Advertisement
Quick Links
Keep this Guide!
AeroGarden Farm Planting Guide
Quick Planting Guide
Simple Steps to Get Your AeroGarden Farm Up and Growing
Welcome to the world of indoor gardening!
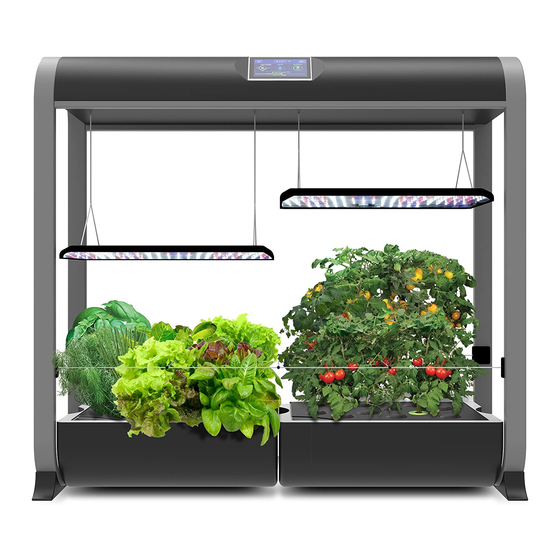
AeroGarden Farm Model number: 100024 - BLK / WHT
AeroGarden Farm Plus Model number: 100025 - BLK / WHT
Farm Plus
&
Electrical Rating: 120V~60Hz, 1.1A
Electrical Rating: 120V~60Hz, 1.1A
Farm
1
Advertisement

Related Manuals for AeroGarden Farm Plus


Summary of Contents for AeroGarden Farm Plus
- Page 1 Welcome to the world of indoor gardening! Keep this Guide! AeroGarden Farm Model number: 100024 - BLK / WHT Electrical Rating: 120V~60Hz, 1.1A AeroGarden Farm Plus Model number: 100025 - BLK / WHT Electrical Rating: 120V~60Hz, 1.1A AeroGarden Farm Planting Guide...
- Page 2 Do not use attachments not recommended by manufacturer. 16. Do not use AeroGarden for other than intended purpose. 5. Never operate AeroGarden if it has a damaged cord or plug, if it is not 17. This product is intended for household and residential use only. This product working properly, if it has been dropped and damaged, or if it has been is not approved for commercial applications.
- Page 3 Welcome! Your AeroGarden Farm operates as two independent 12-pod gardens. Plant one garden, Left or Right side, and then select the opposite to plant the other side. Each side is controlled independently. Once you have selected your Left or Right side garden from the Home Screen,...
- Page 4 Quick Plant is the fastest and easiest path to staring a new garden. The pre-set Quick Plant option provides optimal growth based on the plant type you select. Follow the easy instructions on-screen. More detail is provided on the following pages. AeroGarden.com...
- Page 5 • Do not overfeed! More isn’t better. Too much nutrient can harm your plants. Nutrient Feeding Tip: Always top off water level when adding Liquid Nutrients. For best results, top off the water level in your garden regularly. Read and follow Seed Pod Kit Instructions booklet carefully! AeroGarden Farm Planting Guide...
- Page 6 • Place a Grow Dome over each Seed Pod. • Grow Domes rest on Seed Pods and may not ‘snap’ into place. Also, it is not necessary for Grow Domes to cover Plant Spacers in your AeroGarden. Removing • Leave Grow Domes on the Seed Pods until plants...
-
Page 7: Control Panel
Control Panel Touch Screen The AeroGarden Farm’s touch screen control panel makes it easy for anyone to grow indoors. Beginners get step-by- step instructions on the planting process and tips to improve gardening skills. It also allows advanced users to customize... - Page 8 LEFT The Wi-Fi icon allows you to access the Wi-Fi The Left & Right arrows allow you to access setting of your AeroGarden Farm, as well the Home screen of each side of your RIGHT as connect your AeroGarden Farm to your AeroGarden Farm.
- Page 9 Use this for the fastest and easiest path to planting a new garden. Wi-Fi – Connect your AeroGarden Farm to your preferred network and control your garden remotely on any device using the AeroGarden App.
- Page 10 Trellis cords. Short Trellis cords can be frames of your Aerogrow form. Cords trellis cords at any desired intervals. positioned to allow plant support on half should be attached to the inside of each the garden and easy light movement on frame. the other half. AeroGarden.com...
- Page 11 12 pods to compensate for the large plant size. Place Seed Pods in each back/side opening and in the center front opening. Put Plant Spacers in the remaining openings. AeroGarden Farm Planting Guide...
- Page 12 Also, a full, bushy garden looks much better than one giant, spindly plant surrounded by straggly, light starved neighbors. Pruning also releases a wonderful scent. So prune! Diagram B AeroGarden.com...
- Page 13 Follow instructions for feeding amounts printed on the nutrient water regularly. packaging. Plants grown in the AeroGarden Farm are designed to thrive Add nutrients directly into the Bowl through the Water Port. with most municipal tap water. Nutrient requirements may change as plants grow. See nutrient Use of well water is not recommend, as most well water contains packaging for details.
- Page 14 Use our “Be the Bee Pollinator” to spread the pollen. “Be the Bee Select the side you want to empty by selecting Left or Right Pollinators” are available at AeroGarden.com LEFT RIGHT Strawberries can benefit from more aggressive pollination.
- Page 15 User Maintenance: Any servicing is to be performed by an authorized service representative. Use original packaging for storage when the appliance is not used. Disconnect power before servicing or replacing lights. Use only AeroGarden LED Light Hood replacement. DO NOT SUBMERGE HOUSEHOLD USE ONLY Do not immerse cord in water or other liquid, and unplug cord from outlet when not in use.
- Page 16 WHAT IS COVERED – This warranty covers any defects in materials or workmanship, with the exceptions stated below. HOW LONG COVERAGE LASTS – This warranty runs for one (1) year on this AeroGarden and LED Grow Lights, from the date of original purchase, for the original purchaser/user.
Need help?
Do you have a question about the Farm Plus and is the answer not in the manual?
Questions and answers