
Subscribe to Our Youtube Channel
Related Manuals for DMTech Dti-100


Summary of Contents for DMTech Dti-100
- Page 1 Wooden Speaker Model No: Dti-100 INSTRUCTION MANUAL (iPod/iPhone is not included) READ THIS INSTRUCTION MANUAL BEFORE OPERATING THE APPLIANCE. AND SAVE IT FOR FUTURE REFERENCE.
- Page 2 TABLE OF CONTENTS TABLE OF CONTENTS WARNING AND CAUTION ITOWER WOODEN SPEAKER INSTRUCTION IPOD/IPHONE AUX IN SPECIFICATION - 1 -...
- Page 3 WARNINGS AND PRECAUTIONS • CAUTION: TO PREVENT ELECTRIC SHOCK, MATCH WIDE BLADE Main plug is used as disconnect device and it should remain OF PLUG TO WIDE SLOT, FULLY INSERT. readily operable during intended use. • WARNING: To prevent fire or shock hazards, do not expose this unit to rain or moisture.
- Page 4 Additional Warnings The apparatus shall not be exposed to dripping or splashing and that no objects filled with liquids, such as vases, shall be placed on apparatus. Main plug is used as disconnect device and it should remain readily operable during intended use.
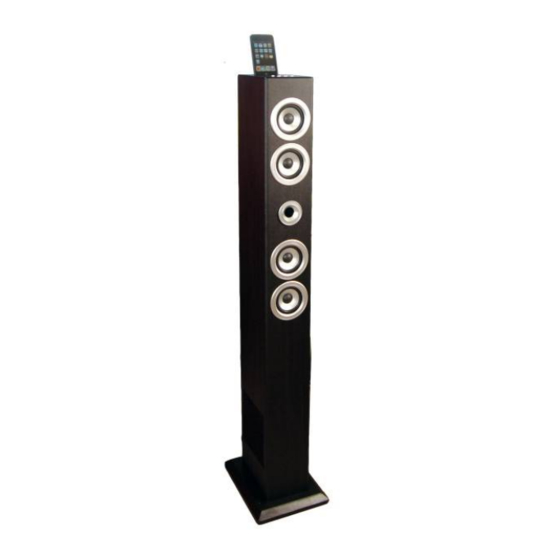
- Page 5 iTower Wooden Speaker Features 4x full range speakers and 1 x built-in Work with iPhone subwoofer Made for iPod Video output Supporting universal docking bracket. Aux-In (Line in 3.5mm type) Jack for other Recharge Circuit for iPod or iPhone Audio Player on the top Controls connected iPod or iPhone players Auxiliary in Jack from the back (RCA) Treble and Bass control...
-
Page 6: Top Panel
INTRODUCTION TOP PANEL 1. iPhone /iPod DOCK 2. Aux in 1 Jack 4. LED for Standby 3. LED for Aux 1 5. LED for Aux 2 6. LED for iPhone/iPod 7. Power 8. Function Press to turn the tower on and off Press to Switch between iPod or iPhone mode, Aux 1 mode, Aux 2 mode 9. -
Page 7: Back Panel
BACK PANEL 1. Video output 2. Aux in 2 ( Auxiliary input RCA type) L 3. Aux in 2 ( Auxiliary input RCA type) R 4. Main Power Swich - 6 -... -
Page 8: Remote Control
Remote Control 1. STANDBY 10. BASS + Press to turn the tower off or on. Press to adjust the level of Bass output from the tower 2. IPOD 11. ENTER Press to play docked iPhone or iPod. Press to confirm the menu of iPod/iPhone 3. - Page 9 SETUP 1. Take out the tower body and tower base carefully from the box. 2. Take out the accessories of 3pcs screws with ring handle and 3pcs metal gasket. 3. Fit the base with the body with the 2 holes. 4.
- Page 10 Remote 1. Slide out the battery holder from the remote control case. (Push tab "A" towards the middle first, see diagram). 2. Place one 3V CR2025 battery into the battery holder, observing the polar marking. If the battery is placed incorrectly, the remote control will not work. Dispose of the old battery properly.
- Page 11 IPHONE/IPOD Docking an iPhone/iPod Press the Power to turn the unit on. Press the function to switch to iPone/iPod mode (iPod button on the remote) Connect the iPhone or iPod to the connector inside the dock for iPhone/iPod.. When the unit is plugged in, using AC power, the docked iPhone/iPod will charge.
- Page 12 AUX IN AUX-IN 1 (Line in Type) Requires an 3.5mm cable (not included) Aux in Connect an 3.5mm cable to Aux-in 1 jack. Connect the other end of 3.5mm cable to an MP3 player or other audio source. Press the power button to turn the unit on.. Press the function button to switch to Aux-in 1 mode.
- Page 13 SPECIFICATIONS Power Supply AC-230V /50Hz 4x3” speakers Speaker Units: 1x5“ speaker Power output 2x10W+1x25W NOTE: As a result of continual improvements, the design and specifications of the product within may differ slightly from the unit illustrated on the packaging. This symbol on the product or in the instructions means that your electrical and electronic equipment should be disposed at the end of its life separately from your household waste.
Need help?
Do you have a question about the Dti-100 and is the answer not in the manual?
Questions and answers