Table of Contents
Advertisement
Advertisement
Table of Contents

Related Manuals for Zte N818S


Summary of Contents for Zte N818S
- Page 1 N818S User Manual...
-
Page 3: Table Of Contents
Table of Contents In-call Options ....... 28 For Your Safety ......4 Set Up Speed Dialing ....28 General Safety......... 4 Call History ........29 FCC RF Exposure Information (SAR)4 Call Settings........29 FCC Regulations ......5 Contacts ........32 Hearing Aid Compatibility (HAC) regulations for Mobile Phones .. - Page 4 Camera and Video ....58 Notifications Settings ..... 78 Take Pictures ......... 58 Manage Notifications Settings for An Record Videos ....... 59 Application ........78 Camera and Camcorder Settings ... 59 Sound Settings ......78 View Pictures and Videos Using Gallery Apps Settings ........
- Page 5 Trademarks About This Manual ZTE and the ZTE logos are trademarks of the ZTE Corporation. Thank you for choosing this ZTE mobile device. In order to keep your device in its best Google and Android are trademarks of condition, please read this manual and keep it Google, Inc.
-
Page 6: For Your Safety
For Your Safety Avoid contact with liquids. Keep your phone dry. General Safety Turn off when asked to in hospitals and medical facilities. Don’t make or receive handheld calls while driving. Never text while driving. Don’t take your phone apart. Don’t use at gas stations. -
Page 7: Fcc Regulations
Class B digital www.fcc.gov/oet/ea/fccid after searching on device, pursuant to Part 15 of the FCC Rules. FCC ID: SRQ-N818S. These limits are designed to provide For this device, the highest reported SAR reasonable protection against harmful value for usage against the head is 0.97 W/kg,... -
Page 8: Hearing Aid Compatibility (Hac) Regulations For Mobile Phones
guarantee that interference will not occur in a Hearing Aid Compatibility particular installation. If this equipment does cause harmful interference to radio or (HAC) regulations for television reception, which can be determined Mobile Phones by turning the equipment off and on, the user is encouraged to try to correct the In 2003, the FCC adopted rules to make interference by one or more of the following... -
Page 9: Distraction
phone with your hearing device is the best Hearing Aid Compatibility, please go to way to evaluate it for your personal needs. http://www.fcc.gov/cgb/dro. This phone has been tested and rated for use Distraction with hearing aids for some of the wireless technologies that it uses. - Page 10 clean and dust-free place. microwave ovens, or hot cooking utensils. Otherwise, your phone may be damaged. Keep the screen and camera lens clean. Unclean screen or camera lens may slow Please check local regulations for down the phone's reaction to your disposal of electronic products.
-
Page 11: Electrical Safety
Normal Use Position Templates and Predictive Text. Take many breaks to stretch and relax. When placing or receiving a phone call, hold your phone to your ear, with the bottom Emergency Calls towards your mouth. This phone, like any wireless phone, operates Air Bags using radio signals, which cannot guarantee connection in all conditions. -
Page 12: Ctia Requirements
Connection to a Car Do not short circuit a battery or allow metallic conductive objects to contact Seek professional advice when connecting a battery terminals. phone interface to the vehicle electrical Replace the battery only with another system. battery that has been qualified with the system per this standard, IEEE-Std-1725. -
Page 13: Radio Frequency Interference
Medical Devices Radio Frequency Please consult your doctor and the device Interference manufacturer to determine if operation of your phone may interfere with the operation of your General Statement on medical device. Interference Hospitals Care must be taken when using the phone in Turn off your wireless device when requested close proximity to personal medical devices, to do so in hospitals, clinics or health care... -
Page 14: Explosive Environments
Explosive Environments Gas Stations and Explosive Atmospheres In locations with potentially explosive atmospheres, obey all posted signs to turn off wireless devices such as your phone or other radio equipment. Areas with potentially explosive atmospheres include fueling areas, below decks on boats, fuel or chemical transfer or storage facilities, and areas where the air contains chemicals or particles, such as grain, dust, or metal... -
Page 15: Getting Started
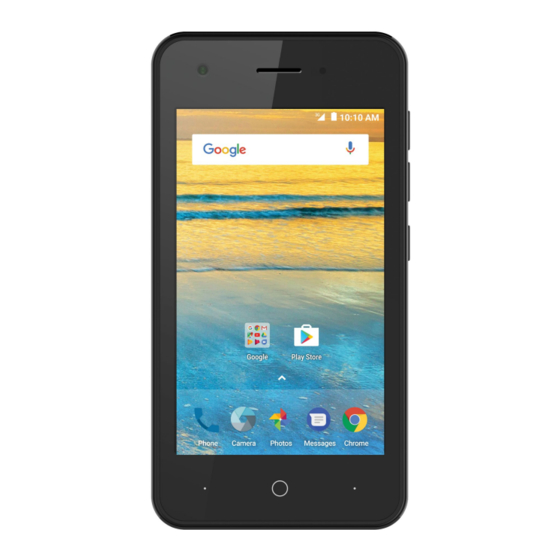
Back Key lets you return to the previous Getting Started screen, or close a dialog box, options menu, the notifications panel, or onscreen keyboard. Your Phone at a Glance Home Key returns you to the home The following illustrations and descriptions screen. -
Page 16: Set Up Your Phone
CAUTION: Inserting an accessory into the incorrect jack may damage the phone. Set Up Your Phone You must first install and charge the battery to begin setting up your phone. Install the Battery 1. Hold the phone face down. 3. Replace the back cover, making sure all tabs are secured and there are no gaps around the cover. - Page 17 2. Plug the AC adapter into an electrical outlet. Fully charging a battery may take up to three hours. NOTE: Your phone’s battery should have enough charge for the phone to turn on and find a signal, run the setup application, set up voicemail, and make a call.
-
Page 18: Activate Your Service
See Wi-Fi on page 49. The phone will power off. Welcome to your N818S – Restore data from another device or set up the 2. After the phone turns back on, follow the phone as new. -
Page 19: Set Up Voicemail
personalize certain apps. Set Up Voicemail Protect your phone – Set a screen You should set up your voicemail and lock to prevent others from using this personal greeting as soon as your phone is phone without your permission, or activated. -
Page 20: Phone Basics
You will still be able to receive messages and Phone Basics calls while the phone’s screen is off. Your phone is packed with features that NOTE: simplify your life and expand your ability to For information on how to adjust the time stay connected to the people and information before the screen turns off, see Sleep Setting that are important to you. - Page 21 Touch and Hold To open the available options for an item Flick (for example, a message or link in a web Flicking the screen is similar to swiping, page), touch and hold the item. except that you need to swipe your finger in light, quick strokes.
-
Page 22: Your Home Screen
Rotate For most screens, you can automatically change the screen orientation from portrait to landscape by turning the phone sideways. When entering text, you can turn the phone sideways to bring up a bigger keyboard. NOTE: From the home screen, touch >... - Page 23 Widgets. There are up to eight extended screens - or - available in addition to the main home screen. Touch on a home screen. You can create, delete, or set the home 2. Touch and hold a widget or an application screens.
-
Page 24: Status Bar
Status Bar Adjust Widget Size The status bar at the top of the home screen 1. Touch and hold the widget on the home provides phone and service status screen and then release it. An outline information on the right side and notification should appear around the widget. -
Page 25: Enter Text
Notification Icons NOTE: Icons Notifications Along with the preloaded keyboards, you can download additional keyboard options from New text and MMS message Google Play Store. See Find and Install an New email App on page 42. New Gmail Goard Keyboard The Gboard Keyboard provides a layout Upcoming event similar to a desktop computer keyboard. - Page 26 As you enter a word, candidates appear Google Voice Typing above the keyboard. Touch to select the Google voice typing uses Google voice correct one; touch and hold to see more recognition to convert speech to text. possible options. To use Google voice typing: ...
- Page 27 In the Keyboard and input methods section, you can configure onscreen virtual keyboards and physical keyboard assistance. To replace text with the clipboard text, select the text you want to replace. Then touch PASTE. To insert text from the clipboard, move the cursor to the insertion point and then touch and hold the tab below the cursor.
-
Page 28: Phone Calls
2. Touch RECENTS to display the call Phone Calls history. 3. Touch the phone icon next to a Make Phone Calls number or contact to place a call. For additional options, touch the name or There are several convenient ways to place number. -
Page 29: Receive Phone Calls
Call a Number in a Text Message While viewing a text message, you can place a call to number that is in the body of the message. 1. From the home screen, touch 2. Touch the conversation and then the phone number in the message. -
Page 30: Retrieve Your Voicemail
Touch Contacts to open the Contacts app Retrieve Your Voicemail and view your contacts list. When you receive a new voicemail, the phone Touch Dialpad to display the onscreen displays in the status bar. dialpad. You can use it during a call to enter additional numbers, such as an 1. -
Page 31: Call History
in the Call settings Touch Display options Call History menu. Touch Sort by or Name format to set the View Call History order of the contacts and the format of the contact names. 1. From the home screen, touch display the Phone app. Sounds and Vibration Settings 2. - Page 32 To activate Plus Code Dialing: Quick Responses 1. In the Call settings menu, touch Call The Quick responses option in the Call settings > Additional settings > Plus settings menu allows you to edit the text code dialing setting. response that you can quickly send to the 2.
- Page 33 TTY Mode Hearing Aids A TTY (teletypewriter, also known as a TDD Your phone supports HAC (Hearing Aid or Text Telephone) is a telecommunications Compatibility) function. When you turn on the device that allows people who are deaf, hard hearing aid compatibility and use a hearing of hearing, or who have speech or language aid device with a telecoil in it to answer the disabilities, to communicate by telephone.
-
Page 34: Contacts
FAVORITES: This tab contains the favorite Contacts contacts that you manually add and the contacts you frequently contacted. The Contacts application lets you store and manage contacts from a variety of sources, Add a Contact including contacts you enter and save directly in your phone as well as contacts 1. -
Page 35: Edit A Contact
Import Contacts NOTE: You can save a phone number to Contacts 1. From the home screen, touch > directly from the phone dialpad. Enter the Contacts phone number with the dialpad and touch Add to a contact, and then follow the 2. -
Page 36: Work With Contact Groups
3. Touch the group name to edit it and touch Work with Contact Groups You can organize contacts into groups and NOTE: send messages to all group members. You cannot rename the Emergency Contacts Set Up a New Group (ICE) group. 1. -
Page 37: Accounts And Messaging
instructions to sign in to your Google Account. Accounts and 1. From the home screen, touch > Messaging Settings > Accounts > Add account > Google. With wireless service and your phone’s 2. Enter your Google Account username, messaging capabilities, you have the and then touch NEXT. -
Page 38: Email
If you have custom settings you need Send a Gmail Message to configure, touch MANUAL SETUP 1. From the home screen, touch > and enter your settings. These may Gmail . If prompted, touch TAKE ME include mail type, user name, TO GMAIL. -
Page 39: Delete An Account
3. Fill in one or more recipients in the “To” Email Account Settings field. If you want to send a CC or a BCC of 1. From the home screen, touch > the email to other recipients, touch Email 4. Enter the subject and compose your message content. -
Page 40: Text And Multimedia Messaging
NOTE: Text and Multimedia If you add two or more recipients, the Messaging message may be sent as a group MMS where everyone can reply and see each With Text Messaging (SMS), you can send other's messages. and receive instant text messages between 4. - Page 41 4. Touch the “Type an SMS message” or To resume composing the message: “Type an MMS message” box and then 1. From the home screen, touch start composing your message. 2. On the Messages screen, the draft 5. Touch messages are marked with “Draft” under 6.
- Page 42 touch the attachment icon in the message. If NOTE: you are concerned about the size of your data To view the details of a particular message, in downloads, check the multimedia message the message thread, touch and hold the size before you download it. message to open the options menu, and then Reply to a Message touch...
- Page 43 Auto-download MMS: Turn on Text and MMS Options this option to automatically retrieve all your multimedia From the home screen, touch > > messages completely. When Settings. The messages settings menu lets turned on, the multimedia you control options for your text and MMS message header plus the messages, such as default SMS app, message body and attachments...
-
Page 44: Apps And Entertainment
usually be found on their website. If you aren’t Apps and Entertainment comfortable with the third-party application’s policies, don’t use the application. All your phone’s features are accessible through the Apps list. Find and Install an App NOTE: When you install apps from Google Play app Available applications and services are and use them on your phone, they may subject to change at any time. - Page 45 On your computer, go to google.com/wallet 5. Touch INSTALL (for free applications) or to create a Google Wallet account. the price (for paid applications). The first time you use your phone to buy NOTE: an item from Google Play, you’re You need a Google Wallet account to prompted to enter your billing information purchase items on Google Play.
-
Page 46: Google Maps
View Maps of Specified Places Uninstall an App 1. From the home screen, touch > You can uninstall any app that you have downloaded and installed from Google Play. Maps 1. From the home screen, touch Play Store 2. Touch the search box at the top. 3. -
Page 47: Music
NOTE: Check Detailed Operation for Maps: If an audio file is being played, its name From the Maps app, touch > Help. and player controls are displayed at the bottom of the screen. Touch the area to Music open the playback screen. The following options of the music player are Your phone lets you discover, download, and available:... - Page 48 3. Touch a playlist to open its content. 8. Touch to add the current song to the Favorite playlist. 4. Touch > Add Songs and select the 9. Touch to see more options. music you want to add before touch 10.
- Page 49 Google Play Music App The Google Play Music app lets you browse, shop, and play back songs purchased from Google Play as well as songs you have loaded from your own music library. The music you choose is automatically stored in your Google Play Music library and instantly ready to play via streaming or download.
- Page 50 Create a New Playlist Music playlists help you organize your music files. 1. From the home screen, touch > Play Music 2. Touch > Music Library to view all the music files. 3. Touch next to a song and select Add to playlist >...
-
Page 51: Web And Data
3. Touch a Wi-Fi network to connect. If you Web and Data selected an open network, you will be automatically connected to the network. If Your phone’s data capabilities let you you selected a network that is secured wirelessly access the Internet or your with a password, enter the password and corporate network through a variety of then touch CONNECT. - Page 52 Check the Wireless Network NOTE: Status If the wireless network you want to connect to is not in the list of detected networks, touch Check the status of your current wireless add network at the bottom of the screen. network, including speed and signal strength, Enter the wireless network settings and touch through the Wi-Fi settings menu.
-
Page 53: Browser
the PIN number, your phone automatically Go Back finds the access point and configures the To go back one page, touch the Back Key on connection. your phone. Repeat this process to keep going back through your web page history of Browser recently visited pages. - Page 54 browser settings. : Touch to go forward to the next page. Help & feedback: View online help and send comments and suggestions. : Touch to bookmark the current web page. Go to a Specific Website : Touch to download the web page. Follow the instructions to go to a particular website by entering a URL (website address).
-
Page 55: 3G Data Services
is submitted to identify your network. Your Create Bookmarks user name is automatically programmed into Make browsing easier by setting up and using your phone. You don't have to enter it. custom bookmarks. Update Your User Name From any open web page, touch >... -
Page 56: Virtual Private Networks (Vpn)
installed are displayed. Virtual Private Networks 3. If prompted, enter the certificate password (VPN) and touch OK. 4. Enter a name for the certificate and touch From your phone, you can add, set up, and manage virtual private networks (VPNs), which allow you to connect and access NOTE: resources inside a secured local network,... -
Page 57: Hotspot
services via Wi-Fi with other Wi-Fi enabled Connect to or Disconnect from devices. a VPN NOTE: Once you have set up a VPN connection, Use of the Hotspot feature may require an connecting and disconnecting from the VPN additional subscription. is easy. -
Page 58: Usb Tethering
Show Password: Check or uncheck to password (as configured when setting up display or hide the password. the Hotspot feature). Broadcast network name(SSID): If your target device supports Wi-Fi Broadcast or hide your network SSID. If Protected Setup, touch the WPS icon on the device, and then touch WPS the broadcast is disabled, other users need to get your network SSID to find... -
Page 59: Bluetooth Tethering
Bluetooth Tethering If your computer or other device can obtain an Internet connection via Bluetooth, you can configure your phone to share its mobile data services with your computer or other device. 1. Pair your phone with your computer via Bluetooth. -
Page 60: Camera And Video
4. View pictures and videos you have taken. Camera and Video 5. Capture a picture. You can use the camera or camcorder to take 6. Switch among manual mode, auto mode, and share pictures and videos. Your phone or fun mode. comes with two camera Lens that let you 7. -
Page 61: Record Videos
During recording, you can pinch or spread Touch > OK to delete the current on the screen or press the Volume Key to picture or video. zoom in or out. You can also touch take a picture. Touch to edit the current picture. -
Page 62: View Pictures And Videos Using Gallery
Storage location: Change the as filter, cropping and more. You can also storage location for captured photos easily assign a picture as your contact picture and videos. or wallpaper and share pictures with your friends. Restore defaults: Restore default View Pictures and Videos camera settings. -
Page 63: Work With Pictures
Use pinch and spread to zoom in or out. Touch to display them again. “Spread” the screen using your thumb and Touch to save the current video forefinger to zoom in when viewing a picture. “Pinch” the screen to zoom out. frame as a picture. -
Page 64: Share Pictures And Videos
4. Touch an edit option at the bottom and Share Pictures and Videos edit the picture. Slide left or right on the bottom of the screen to find all options. The Gallery application lets you send pictures and videos using email or multimedia messages. -
Page 65: Tools And Google Calendar
4. Select goal theme, how often, for how Tools and Google long, best time. 5. If prompted, touch CONNECT to connect Calendar with your favorite fitness apps via Google Fit, or touch NO THANKS. Google Calendar 6. Touch Use Google Calendar to create and manage Add a Reminder to the Calendar Goals, reminders, and events. - Page 66 5. Set the time, location, notification, who’s Erase Calendar Schedules invited, and more. 1. From the home screen, touch > 6. Touch SAVE. Calendar Calendar Scheduled Alerts 2. Open the calendar schedule details. When your phone is turned on and you have ...
-
Page 67: Clock
World Time Clock You can check local time for cities around the Your phone has a clock app that lets you set world. alarms, view time in time zones around the 1. From the home screen, touch > world, use a stopwatch, and set a timer. Clock Alarm 2. -
Page 68: Calculator
Calculator NOTE: You can touch the name to edit the file Your phone's convenient built-in calculator name and touch OK to save the lets you perform basic and advanced recording. mathematical equations and calculate tips. 1. From the home screen, touch >... -
Page 69: File Manager
2. Enter the terms you want to search for in the File Manager search box and touch the search key on the keyboard, or touch a search suggestion File Manager allows you to view and manage that appears below the search box. files stored on your phone's internal storage and your microSDHC card. - Page 70 Turn Bluetooth On or Off Touch > Refresh to search for other visible in-range Bluetooth Use the settings menu to enable or disable devices. your phone’s Bluetooth capabilities. Touch > Rename this device to 1. From the home screen, touch >...
-
Page 71: Microsdhc Card
5. When you see the name of your headset 2. In the Paired devices section, touch the displayed in the Available devices icon beside the Bluetooth device you section, touch the name. Your phone then want to forget. automatically tries to pair with the headset. - Page 72 View microSDHC Card Memory CAUTION! As part of the internal storage, The Storage settings menu gives you access the microSDHC may have data on it that is to your microSDHC card memory information. necessary for some apps to function normally. ...
-
Page 73: Transfer Files Between Your Phone And A Computer
The microSDHC is formatted and Unmount the SD Card as mounted to the phone as portable storage. Internal Storage 5. Touch DONE. While the microSDHC is used as internal storage, you can still unmount the card while Transfer Files Between Your the phone is on. - Page 74 Charge only: Charge your phone via 6. Select a folder (for example, Music for the USB cable. songs and albums) and copy files to it from your computer. Install driver: Install the driver needed for connecting your phone to 7.
-
Page 75: Settings
For more information about Wi-Fi features Settings and settings, see Wi-Fi on page 49. The following topics provide an overview of Bluetooth Settings items you can change using your phone’s Settings menus. The settings menu is Your phone’s Bluetooth capabilities let you grouped into the following categories, all of use wireless headsets, send and receive which are available through the main settings... -
Page 76: Hotspot Settings
Set Roaming Settings Hotspot Settings 1. From the home screen, touch > Hotspot allows you to turn your phone into a Wi-Fi hotspot. When this feature is turned on, Settings > Mobile networks > you can share your phone’s mobile data Roaming. -
Page 77: Airplane Mode
In addition, you can data warning and Restrict Data Access: From the Data usage window, touch Data saver and data limit. slide the switch to turn this feature on. Check Wi-Fi Data Usage: From the Data Data saver can prevent some apps usage window, touch Wi-Fi data usage. -
Page 78: Usb Tethering Setting
USB Tethering Setting Network Settings Reset USB tethering allows you to share your Use the Network settings reset menu to reset phone’s mobile data connection with a all network settings, such as Wi-Fi, cellular computer via a USB cable. For details on USB data, Bluetooth. - Page 79 Wallpaper" in Customize the Home Screen on Settings > Display > Font size. page 21. 2. Touch the slider to select an option. To access Wallpaper settings from the Settings menu: Auto-rotate Screen Touch > Settings > Display > This setting allows the screen to rotate the Wallpaper from the home screen.
-
Page 80: Notifications Settings
Screen saver: Manage the Manage Notifications screensaver of colors or photos. Settings for An Application Ambient display: Wake the screen when new notifications arrive. 1. From the home screen, touch > Display size: Make items on the screen, including fonts, icons and Settings >... - Page 81 media, Ringtone & notifications, and feature turned on and off automatically Alarms. during specific periods. 3. If you select Scheduled, touch Days, Notification Mode Start time, and End time to specify the periods during which Do not disturb is on. Configure your phone’s notification mode To set exceptions for Do not disturb mode: settings.
-
Page 82: Apps Settings
Dial pad tones: Play tones when Emergency Broadcasts using the dial pad. Settings Screen lock sounds: Play sound The options in the Emergency broadcasts in when locking or unlocking the screen. sound settings let you to configure the ... -
Page 83: Storage Settings
Device Storage app permissions. Notifications: Manage the app The internal storage menu lets you view your notifications in the notification panel phone's internal storage capability and and the lock screen. You can set the available space. priority, sensitivity, and more. To view the internal storage space: Open by default: Check the app’s supported links and set whether to... -
Page 84: Battery Settings
Battery Settings 1. From the home screen, touch > Settings > Call settings. Monitor your phone’s battery usage through this settings menu. View which functions are 2. Touch an item to manage your call consuming your battery’s charge and at what settings. -
Page 85: Security Settings
High accuracy: Get accurate location If you touch Pattern, you're guided to using GPS, Wi-Fi, and mobile create a pattern you must draw to networks. unlock the screen. Battery saving: Use only Wi-Fi and If you touch PIN or Password, you're mobile networks to get your prompted to set a numeric PIN or a approximate location. - Page 86 Screen pinning: Keep a screen of To change the screen lock or disable it: your choice in view, so that others 1. From the home screen, touch > cannot switch to other apps and access your personal information. Settings >...
- Page 87 Before turning on encryption, prepare as 6. When encryption is completed, you're follows: prompted to enter your PIN or password. Set a PIN or password as screen lock. Make Passwords Visible Charge the battery. Select whether or not phone and application ...
-
Page 88: Accounts Settings
Set Up a New Account NOTE: To protect your phone and personal data, Add an Internet or corporate account on your please download apps from trusted sources, phone. such as the Google Play Store app. 1. From the home screen, touch >... -
Page 89: Google Settings
is off and red if the phone encounters 1. From the home screen, touch > some problem during synchronization. Settings > Accounts. When automatic sync is on, touch an 2. Touch an account type such as Exchange, account and check the items in the Google, and more. - Page 90 Select Language 3. Touch at the top right of the screen to enter a word or phrase, as well as a The language menu lets you select an shortcut to easily use that word or phrase. onscreen language. 4. Touch the Back key to save it. 1.
-
Page 91: Navigation Key Setting
Text-to-speech output. Navigation Key Setting 2. Touch an option to configure it. The Navigation key setting menu allows you Preferred engine: Select the speech to exchange the positions of the Back key synthesis engine you want to use or and the Recent Apps key. -
Page 92: Date & Time Settings
Automatic restore: Restore for the touch & hold hand gesture, and previously backed up settings and text-to-speech output. data when you reinstall an app. From the home screen, touch > To reset your phone: Settings > Accessibility and select 1. -
Page 93: Printing
Key to end phone calls without turning remind you of notifications. the screen off. Color inversion: Set whether to Auto-rotate screen: Change the display screen content with its colors orientation of some onscreen content inverted. based on the position of the phone. ... -
Page 94: System Updates
to the Internet and register it to your Google 1. From the home screen, touch > Account directly without using a computer. Settings > System updates. 2. Select an option and follow the prompts to Use Cloud Print on Your Phone complete the updates. -
Page 95: Index
Index Accessibility, 90 Erase events, 64 Accounts, 35 Event alerts, 64 Airplane Mode, 75 Call History, 29 Answer a Call, 27 Make call from, 26 Applications, 42 Options, 29 Apps, 42 View, 29 Find and install, 42 Camera, 58 Request refunds, 43 Open, 58 Settings, 80 Review screen, 58... - Page 96 Editing Text, 24 Google Wallet, 43 Email Headset Account settings, 37 Connect, 68 Add account, 36 Headset Jack, 13 Add Exchange ActiveSync account, 36 Home Screen, 20 Compose and send, 36 Add items, 21 Delete account, 37 Adjust widget, 22 Send Gmail, 36 Customize, 21 View and reply, 37...
- Page 97 Notification Icons, 23 Screen lock, 83 Notifications, 23 Settings, 73 Phone Setup Screens, 16 Dialer, 26 Silent Mode, 79 Phone Calls, 26 Slide, 19 Emergency numbers, 27 Speed Dialing, 28 From text messages, 27 Spread, 19 Make calls, 26 Status Bar, 22 Receive, 27 Status Icons, 22 Using Call History, 26...
- Page 98 Keyboard, 23 Setup, 17 Navigation, 18 Volume Turn off, 18 Button, 13 Turn on, 18 Volume Settings, 78 TTY Mode, 31 VPN, 54 Turn Device Off, 18 Add connection, 54 Turn Device On, 18 Connect or disconnect, 55 Typing, 23 Prepare for connection, 54 USB Tethering, 56, 76 Secure credential storage, 54...
Need help?
Do you have a question about the N818S and is the answer not in the manual?
Questions and answers