Table of Contents
Advertisement
Quick Links
Advertisement
Table of Contents

Subscribe to Our Youtube Channel
Related Manuals for OHAUS Skipper 5000


Summary of Contents for OHAUS Skipper 5000
- Page 1 Skipper 5000 User Guide...
-
Page 3: Table Of Contents
Table of Contents Your new retail scale Most important functions .................. Safety instructions.................... Further documents ................... Maintenance ....................Intended use ....................Conventions and symbols used in this user manual ..........Device overview ....................1.7.1 Display .................... 1.7.2 Keyboard ..................1.7.3 Function keys ................... - Page 4 3.12 Granting a discount ..................23 3.12.1 Granting a discount on a single item ........... 23 3.12.2 Granting a discount on the total sum........... 23 3.12.3 Granting a pre-defined discount ............24 3.13 Payment......................24 3.13.1 Working with return ................24 3.13.2 Working without return...............
-
Page 5: Your New Retail Scale
1.3 Further documents For further documents regarding your new retail scale (e.g. Manuals, Data Sheet) please refer to the following website: http://www.ohaus.com/skipper5000 1.4 Maintenance Only authorized personnel is allowed to open and repair the scale. Please contact your local •... -
Page 6: Conventions And Symbols Used In This User Manual
1.6 Conventions and symbols used in this user manual Symbol Description Safety sign that warns the user of situations resulting in death, serious injury or material damage, in case of non-compliance with the indicated safety advices. General information that makes working with the device easier. Configuration requirements and tips. -
Page 7: Device Overview
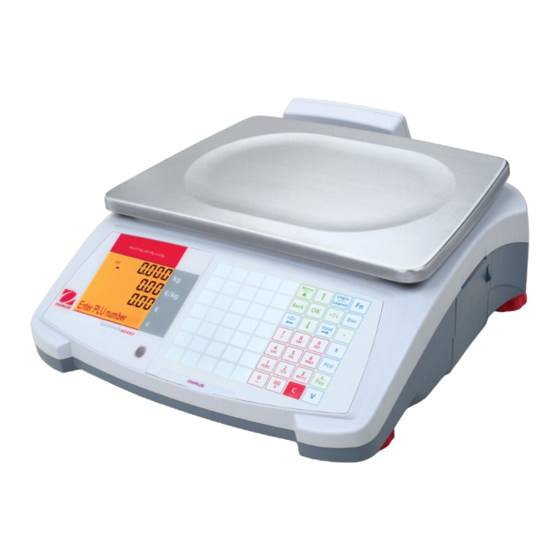
1.7 Device overview 1.7.1 Display The display is laid out as follows, seen both from the customer and the vendor point of view: Metrological information Max 6/15kg Min 40g e=2/5g Weight display Unit price $/kg Price Field for instructions or status messages In addition to the weight and price, the following status messages and indicators can be displayed: –>0<–... -
Page 8: Keyboard
1.7.2 Keyboard The keyboard is divided into three sections: Login Menu Logout Back Disc Void PQRS WXYZ Number keys Preset keys Function keys In addition to their main function, some function keys have one or more auxiliary functions. 1.7.3 Function keys Name Function Menu key... -
Page 9: Connections
Discount key Enter the discount in percent or absolute value Disc Minus key Access negative price entry Quantity key Enter quantity PLU key Switch between entering the price by PLU number and directly entering the unit price Star key Subtotal items or close payment Vendor key Confirm item entry, call up ticket or close payment Clear key... -
Page 10: Setup And Device Settings
2 Setup and device settings 2.1 Contents Check that the delivery is complete: Scale • Stainless steel weighing pan • Power cable • Ticket roll • Manual • 2.2 Setting up the scale 2.2.1 Requirements for scale's location The right location is critical to weighing accuracy. Conditions for an ideal location: No shocks and vibrations •... -
Page 11: Mounting The Tower
2.2.3 Mounting the tower 1 Remove the 3 screws (1) on the bottom of the scale to remove the cover plate. 2 Disconnect the cables and pull the cable out of the scale. 3 Remove the 2 screws (2) under the display and take off the display. 4 Remove screw (3) and take off the adapter. -
Page 12: Inserting Paper
2.3 Inserting paper 2.3.1 Paper format Ticket rolls must have the following dimensions: max. 57 mm max. 63 mm 10.5 - 14 mm The paper used must not be thicker than 0.12 mm. • The paper weight should not be less than 48 g/m , the paper weight recommended is 55 g/m •... -
Page 13: Inserting The Battery
2.4 Inserting the battery The scale can be battery-operated. WARNING Damage to the battery The battery can be damaged if it is installed incorrectly. Pay attention to the correct battery polarity. The positive pole (+) and negative pole (–) must not be short circuited. Only use original manufacturer batteries. -
Page 14: Turning On
2.6 Turning on − Turn the scale on using the switch at the right bottom of the scale. ð The GEO value and the software version are displayed. ð The scale is ready when the weight display appears. The display may turn off automatically after 10 minutes if this is configured in the energy saving settings. -
Page 15: Disposal
Batteries contain heavy metals and therefore cannot be disposed of in the normal refuse. − Observe local regulations on the disposal of materials that are hazardous to the environment. For disposal instructions in Europe, refer to http://www.ohaus.com/weee Skippper 5000 Setup and device settings 13... -
Page 16: Fast And Easy Operation
3 Fast and easy operation The applications described in this chapter refer to working with one vendor. 3.1 Log in / log out The scale allows to have different Vendor keys for different vendors. Each active vendor has to be assigned to a particular Vendor key. -
Page 17: Working With Plus
3.3 Working with PLUs You can save your item data in the scale's PLU memory and easily call it up later. PLUs are created in sub-menu F111. 3.3.1 Calling up a PLU 1 If Direct Price is displayed, press the PLU key. ð... -
Page 18: Using Quantity Plus And Multiplication
3.3.3 Using quantity PLUs and multiplication With the multiplication function, you can enter several items for a PLU. 1 If Direct Price is displayed, press the PLU key. ð Enter PLU number is displayed. 0 … 9 2 Enter the PLU number of the item. ð... -
Page 19: Taring
3.4 Taring 3.4.1 Taring a container This function depends on the metrological limitation of the scale. If you fill containers with your products or customers bring their own container, the tare function makes sure that only the contents are weighed and paid. 1 Place the empty container on the scale. -
Page 20: Customer Tare / Basket Function
3.4.3 Customer tare / Basket function A maximum of 999 basket weighs can be saved. If you have reached basket number 999, the scale automatically creates and prints a basket report. The basket number is then reset to 1. Your customers pick fruit themselves, e.g., strawberries, and bring their own baskets. With the "Customer tare"... -
Page 21: Weighing With 100 G Price Unit
3.6 Weighing with 100 g price unit For many products, customers are used to a price per 100 g. If the PLU is defined with unit kg, the following settings must be made for weighing with 100 g price unit: "100 g"... -
Page 22: Working With Several Scales (Floating Vendor)
3.7.2 Working with several scales (floating vendor) With floating vendors, each vendor can work with any scale in a network of scales. To do so, the following settings must be made: Define up to 16 vendors in sub-menu F121. • Select "Vendor Mode = Floating Vendor"... -
Page 23: Refunding
3.9 Refunding Your customer has paid for an item, but would like to return it. To partially or completely refund the sales price, the following settings must be made: Refund enabled in sub-menu F212. • A key defined as [Refund] in sub-menu F232. •... -
Page 24: Changing Prices
3.11 Changing prices 3.11.1 Overwriting a price temporarily To be able to change a PLU price, the following settings must be made: "Overwrite Price" enabled or set to "Up to PLU" in sub-menu F215. • If the price overwrite is "Up to PLU", the functionality must be enabled for each PLU individually in •... -
Page 25: Granting A Discount
3.12 Granting a discount 3.12.1 Granting a discount on a single item To grant a discount, the following setting must be made: "Discount on Unit Price" or "Discount on Total Price" enabled in sub-menu F217. • When choosing "Discount on Unit Price", the reduction is applied to price per weight/unit. When choosing "Discount on Total Price", the reduction is applied to the calculated item price. -
Page 26: Granting A Pre-Defined Discount
3.12.3 Granting a pre-defined discount To grant a pre-defined discount, the following settings must be made: Discounts defined in sub-menu F131. • One of the following settings enabled in sub-menu F217. • – "Discount on Unit Price" – "Discount on Total Price" –... -
Page 27: Working Without Return
3.13.2 Working without return For direct ticket print, without entering the payment screen when working with a single vendor, enable "Direct Printout" in sub-menu F245. 1 Book the customer's items and confirm each item with the Vendor key. 2 Total items with the Star key. 3 Press the Vendor key. -
Page 28: Cash In / Cash Out
3.14 Cash in / cash out The scale offers the possibility to log cash in / cash out operations without a transaction. To do so, the following settings must be made: Keys defined as [Cash In] and/or [Cash Out] in sub-menu F232. •... -
Page 29: Backup / Restore Data Via Usb Device
3.16 Backup / restore data via USB device 3.16.1 Recommended USB devices For saving or loading data to or from a USB device we recommend the following: Brand Capacity Memory format USB interface Recognition time 8 GB FAT32 USB 2.0 <... -
Page 30: Menu
4 Menu 4.1 Menu operation 4.1.1 Entering the menu Default password: 2666666 1 Press the Menu key. Menu 2 Enter the password. 0 … 9 Password 3 Confirm the entry with the OK key. 4.1.2 Key functions in the menu The following keys can be used in the menu: Name Function... -
Page 31: Ending The Menu
4.1.4 Ending the menu − Press and hold the Menu key until the weight display appears Menu again. … 0.000 kg ð The scale is now in the normal operating mode. – or – Back Back … 0.000 kg − Press the Back key repeatedly until the normal operating mode is displayed. -
Page 32: Menu Description
4.2 Menu description 4.2.1 Overview In the menu, you can set up the scale to handle your special sales and back office tasks. Specific functions and groups are only accessible if you have a license. Ask your sales representative for this. The menu features are organized in the following menu tree: Menu group Menu... - Page 33 Menu group Menu Sub-menus F3 Reports F31 Basic Reports F311 Sales Report F312 PLU Report F313 VAT Report F314 Vendor Report F316 Group Report F32 Advanced F321 Cash Report Reports F322 Customer Tare Report F33 Combination Report F34 Delete Report Delete Sales Report F35 Sales Journal Skippper 5000...
-
Page 34: Data Menu
4.2.2 Data menu In the Data menu group you are able to enter the following data: Item Data • Data Warehouse • Price Management • Payment • Display Description Possible values F11 Item Data Create New? F111 PLU Database/ Edit PLUs Existing items Edit The available PLU items depend on the... - Page 35 Display Description Possible values F116 Barcode Define barcode Create New? Existing barcode presets Barcode ID Enter barcode ID 1 … 99 Barcode Name Enter barcode name Max. 32 characters Barcode Type Select barcode type EAN8 # EAN13 # ITF25 # Code128 # UPC-A # QRCode Barcode Format...
- Page 36 Display Description Possible values F126 Description text by Enter texts, organized by the text type Type Header Text Enter header texts Create New? # Existing items Enter ID of the header text 1 … 99'999'999 Text Enter header text Max. 64 characters Footer Text Enter footer text Refer to Header Text...
-
Page 37: Configuration Menu
4.2.3 Configuration menu In the Configuration menu group you are able to enter the following data: Operation Center: configure operation (registration, tare, price, discount, VAT, ...) • General Settings: configure PLU, key mapping, vendors, ... • Printing: configure printing • Connectivity: configure connectivity •... - Page 38 Display Description Possible values F23 General Settings F231 PLU Editing Fields Configure PLU data Article Number Switching Article Number on/off On/Off Article Name Switching Article Name on/off On/Off Number of Unit Select number of unit prices 1 None Prices 2 (1 unit price) Group Switching Group on/off On/Off...
- Page 39 Display Description Possible values F24 Printing F245 Ticket Configu- Define ticket printing ration Direct Printout Enable/disable direct printout Enable/disable Copy Tickets Select the method of ticket copy printing Auto print # On demand # No Talon Select the method of talon printing Auto print # On demand # No...
- Page 40 Display Description Possible values F257 Data Server Data server setting Data Server Type None # Retrieve Auto # Retrieve from IP # Server IP Address Enter ID Port Enter port number Display Description Possible values F27 Control Panel F271 Display Set up display Contrast Enter the value of contrast...
- Page 41 Display Description Possible values F275 Language Set display language Display Language Select the display language 1 English 2 French (Français) 3 German (Deutsch) Print language Select the printout language 1 English 2 French (Français) 3 German (Deutsch) Display Description Possible values F28 System F282 Reset...
-
Page 42: Reports Menu
4.2.4 Reports menu In the Reports menu group you are able to create the following reports: Basic Reports: Sales Report, PLU Report, Vendor Report, ... • Advanced Reports: Cash Report, Customer Tare Report, ... • Combination Reports • Delete Report •... - Page 43 Display Description Possible values Sales Journal Sales Journal Enable/disable sales journal Enable/disable status Report Format Select format of the sales journal 1 Detailed 2 Simple Skippper 5000 Menu 41...
-
Page 44: Configuration Tips
4.3 Configuration tips 4.3.1 Tips for setting up and configuring PLUs Step 1: Configuring content of a PLU In the factory setting, an item (PLU) offers the following data fields. In sub-menu 231, the data fields can be modified. Article Number •... -
Page 45: Example For Creating A Plu
4.3.2 Example for creating a PLU For operating the menu, refer to [Entering the menu } Page 28]. 1 Enter the menu and navigate to sub-menu F111 F 111 PLU Database/ Edit. 2 Press the OK key. Create New? 3 Use the arrow keys to select Create New? and confirm with the OK key. -
Page 46: Setting Up A Barcode
4.3.3 Setting up a barcode The barcode must first be defined in sub-menu F116. Configuring a barcode 1 Enter the menu and navigate to sub-menu F116 Barcode. F116 2 Press the OK key. 3 Use the arrow keys to select "Create New ?" and confirm with the OK key. - Page 47 Content Placeholder Length Scale ID Vendor ID Current date 2 (YY), 4 (YYMM), 6 (YYMMDD) Current time 2 (HH), 4 (HHMM), 6 (HHMMSS) Counts of transaction Total Price Ticket ID Barcode Check digit Examples: Barcode type Configuration Barcode EAN 8 with Ticket ID NNNNNNNC Barcode EAN 8 with Item Number AAAAAAAC...
-
Page 48: Setting Up The Keyboard
4.3.4 Setting up the keyboard The keypad offers keys for custom assignment either as PLU preset keys or as function keys. Login Menu Logout Back Disc Void PQRS WXYZ Setting up PLU preset keys You can save the most important PLUs to the keys in the keypad. The scale offers two layers of preset keys. - Page 49 Setting up function keys You can assign the most frequently used functions to the keys on the keyboard. 1 Enter the menu and navigate to sub-menu F232 F232 Keymapping. 14 Fix Key 2 Select a function. 3 Press the desired preset key until a beep is heard. 4 For a preset key on the second level, press the desired preset key 1 L3 C4 until a second beep is heard.
-
Page 50: Setting Up A Floating Vendor Scale Network With Data Synchronization
4.3.5 Setting up a floating vendor scale network with data synchronization You can set up different network types depending on your needs, e.g., with or without data synchro- nization. This example shows you how to set up a floating vendor scale network with data synchronization. For this option, you will define one scale as "Data Server / Master"... - Page 51 Configuring the "Client" scale You need to configure each client scale individually. 1 Enter the menu and navigate to sub-menu F251 Network. F251 2 Ensure that "IP Mode" is set to "Automatic". ð This configuration ensures that your scales are in a network IP Mode: Automatic and can communicate with each other.
-
Page 52: Reports
4.3.6 Reports 4.3.6.1 Setting up basic reports Basic reports are based on 4 counters which are summing up the quantity for different information: • "Sales Report", "PLU Report", "VAT Report", "Vendor Report", "Category Report", "Group Report". All reports can be available for 4 time periods: "Today", "Yesterday", "Day Before Yesterday" and •... -
Page 53: Setting Up Combination Reports
4.3.6.2 Setting up combination reports Combination reports allow you to print several reports at once. You can define the content of the combination report in sub-menu F33. 1 Enter the menu and navigate to sub-menu F33 Combination Report. 2 Use the arrow keys to navigate to the required report type. Sales Report 3 Select / deselect a report type and confirm with the OK key. -
Page 54: What To Do, If
5 What to do, if ...? In case of an operating error, the error message will be displayed for approx. 1 second in the bottom line of the display. Error messages can be cleared with the Clear key. No. Message Description / Remedy Operation denied Defined preconditions for operation are not met... - Page 55 No. Message Description / Remedy 28 Void denied Void operation could not be processed by credit card reader • − Try it again 29 All keys blocked All defined Vendor keys currently used by other vendors • 30 Password not −...
- Page 56 No. Message Description / Remedy 60 Enter refund mode − Switch to refund mode to perform a refund 61 100 g not Unit price cannot be divided by 10, e.g., 2.95 • supported − For the 100 g function only use unit prices which can be divided by 10, e.g,.
-
Page 57: Technical Data And Accessories 55
This product conforms to the EMC directive 2014/30/EC, the Low Voltage Directive 2014/35/EC and the Non-automatic Weighing Instruments Directive 2014/31/EC. The complete Declaration of Conformity is available online at http://www.ohaus.com/ce 6.3 Options/Accessories The following options/accessories are available to enhance the performance of your scale: Tower to position the customer display at eye level •... - Page 58 Technical data and accessories Skippper 5000...
- Page 60 OHAUS Corporation 7 Campus Drive, Suite 310 Parsippany, NJ 07054 USA OHAUS Europe GmbH Im Langacher 44 8606 Greifensee Switzerland With offices worldwide www.ohaus.com 30217561 Subject to technical changes. © Ohaus Corporation, all rights reserved 12/2016 30217561C en...
Need help?
Do you have a question about the Skipper 5000 and is the answer not in the manual?
Questions and answers