Advertisement
Table of Contents
- 1 Table of Contents
- 2 Welcome & Safety Precautions
- 3 Li-Po Battery Care Instructions
- 4 Drone Battery Charging
- 5 Box Contents & Drone Overview
- 6 Transmitter Overview
- 7 Transmitter Set up and Preflight Checklist
- 8 Parts Installation
- 9 Preflight Operations
- 10 Calibration & Functions
- 11 Basic Flight Controls
- 12 Trim Adjustments
- 13 App Instructions
- 14 Troubleshooting Guide
- Download this manual
Advertisement
Table of Contents

Related Manuals for Force U45W Blue Jay


Summary of Contents for Force U45W Blue Jay
- Page 1 INSTRUCTION MANUAL FOR MORE INFORMATION Visit us online at force1rc.com or our YouTube channel at youtube.com/usatoyz for product information, replacement parts and flight tutorials.
- Page 3 ATTENTION: PLEASE WATCH THIS FLIGHT INSTRUCTION VIDEO BEFORE FLYING YOUR DRONE. https://youtu.be/tk3qzsUwoWs...
-
Page 4: Table Of Contents
FORCE1 RC CONTENTS Welcome & Safety Precautions ···································· 5 Li-Po Battery Care Instructions ····································· 6 Drone Battery Charging ··············································· 7 Box Contents & Drone Overview ································· 8 Transmitter Overview ···················································· 9 Transmitter Set Up and Preflight Checklist ················· 10 Parts Installation ························································· 11 Preflight Operations ···················································... -
Page 5: Welcome & Safety Precautions
U45W Blue Jay User Manual WELCOME! Welcome to the Force1 Team, and thank you for your Force1 drone purchase. Please read this manual carefully before drone operation. (1) This drone is not a toy! It’s a pro-level drone suitable for experienced RC drone users aged 14 years and older. -
Page 6: Li-Po Battery Care Instructions
FORCE1 RC LI-PO BATTERY CARE INSTRUCTIONS Avoid Overheating Your batteries will sometimes be warm/hot to the touch after use. This is normal, but beware that battery components will fail if not allowed to cool down between uses. Also, do not leave batteries exposed to direct sunlight. -
Page 7: Drone Battery Charging
U45W Blue Jay User Manual DRONE BATTERY CHARGING 1. First, attach your USB cable to the drone battery, then connect it to your preferred charging source. 2. When the battery is charging, a red indicator light on the USB appears. When the battery is fully charged, a green indicator light appears. -
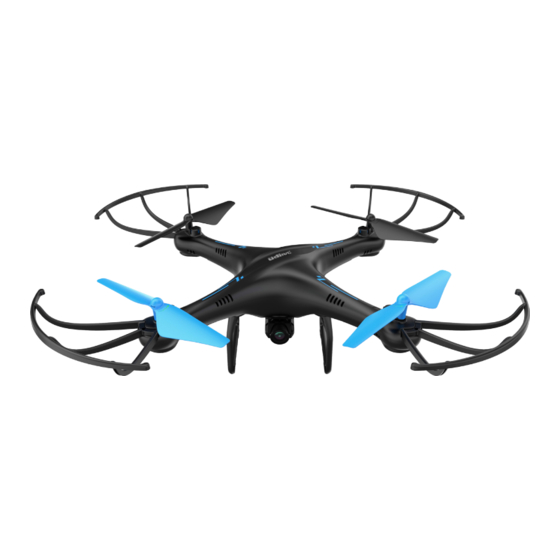
Page 8: Box Contents & Drone Overview
FORCE1 RC BOX CONTENTS DRONE TRANSMITTER 3.7V 500MAH LI-PO BATTERIES (3) PROPELLERS (4) 4GB SANDISK MICRO SD CARD USB BATTERY CHARGER SCREWDRIVER PROPELLER GUARDS (4) + SD CARD READER DRONE OVERVIEW FRONT A PROPELLER B PROPELLER CLOCKWISE COUNTERCLOCKWISE LEFT RIGHT B PROPELLER A PROPELLER COUNTERCLOCKWISE... -
Page 9: Transmitter Overview
U45W Blue Jay User Manual TRANSMITTER OVERVIEW LENS HOOD MOBILE PHONE HOLDER POWER INDICATOR LIGHT FORWARD/BACKWARD TRIMMER POWER SWITCH THROTTLE/RUDDER STICK DIRECTION CONTROL STICK LEFT/RIGHT FLYING TRIMMER LEFT/ RIGHT RUDDER TRIMMER HEADLESS MODE LIFT/ LAND/EMERGENCY STOP HIGH/LOW SPEED MODE FLIP BUTTON... -
Page 10: Transmitter Set Up And Preflight Checklist
FORCE1 RC TRANSMITTER BATTERY INSTALLATION Open the battery cover and insert 4 AA batteries as shown in Figure 1 (not included). CAUTION: • The transmitter needs 4 AA batteries to work • Insert batteries in correct polarity (+) and (-) •... -
Page 11: Parts Installation
U45W Blue Jay User Manual PARTS INSTALLATION PROPELLER INSTALLATION 1. Remove the old propeller by removing the screw using a counterclockwise rotation (Fig 18). 2. Attach the new propeller with the screw and tighten using a clockwise rotation. FIGURE 18 PROPELLER GUARD INSTALLATION 1. -
Page 12: Preflight Operations
FORCE1 RC PREFLIGHT OPERATIONS FREQUENCY PAIRING 1. Turn on the transmitter switch (Fig. 5) and the power indicator light flashes rapidly. Push the left stick all the way down to the lowest position and then release. It will return to the middle position automatically (Fig. -
Page 13: Calibration & Functions
U45W Blue Jay User Manual CALIBRATION INSTRUCTION Always calibrate your drone with your transmitter before flying, and recalibrate after takeoff if you experience difficult operation. 1. Turn off the drone and transmitter. 2. Turn on the transmitter; push the left stick all the way up, then all the way down (Fig. 9, 10). The transmitter is now paired. - Page 14 FORCE1 RC FUNCTIONS LANDING METHODS 1. Method 1 (Landing): When flying, pull the left stick all the way down to the lowest position and hold it until the motors stop and the drone will slowly land. 2. Method 2 (1-Key Landing): When flying, press the Lift/Land/Emergency Shutdown button and the drone will land on the ground automatically (Fig.
- Page 15 U45W Blue Jay User Manual FUNCTIONS HEADLESS MODE Drones have a front and back indicated by LED lights or colored propellers. Before takeoff, position the head of the drone away from you. When in Headless Mode, push the right stick in any direction and the drone will fly accordingly.
-
Page 16: Basic Flight Controls
FORCE1 RC BASIC FLIGHT CONTROLS HOVER UP AND DOWN Push the THROTTLE/RUDDER STICK up to fly the drone up, and pull the THROTTLE/RUDDER STICK down to fly the drone down. FLY FORWARD OR BACKWARD Push the DIRECTION CONTROL STICK up to fly the drone forward, and pull the DIRECTION CONTROL STICK down to fly the drone backward. -
Page 17: Trim Adjustments
U45W Blue Jay User Manual TRIM ADJUSTMENTS FORWARD/BACKWARD TRIM Adjust the FORWARD/BACKWARD TRIMMER backwards if the drone drifts forward when taking off, and adjust the FORWARD/BACKWARD TRIMMER forwards if drone drifts backwards LEFT/RIGHT TRIM Adjust the LEFT/RIGHT FLYING TRIMMER to the... -
Page 18: App Instructions
FORCE1 RC APP INSTRUCTIONS 1. DOWNLOAD AND INSTALL THE “FLYINGSEE” APP This app is compatible with mobile phones running iOS or Android. To download the app: 1. Scan the QR code on the product box to download the App. 2. iOS system: search Flyingsee in APP Store. 3. - Page 19 U45W Blue Jay User Manual 3. KNOW YOUR APP ICONS 1. HOME PAGE ICONS Explore UDIRC Drone Help Learn Drone Operation Media Remote Control Interface 2. REMOTE CONTROL INTERFACE Home Page Icon: Click on the icon to go back to the home page.
- Page 20 FORCE1 RC Virtual Control Stick: The virtual control stick is hidden by default. Click on the icon to turn on the virtual control stick. Gyroscope Mode (aka Gravity Induction Mode): Use the orientation of your mobile phone to control your drone. The throttle remains in place. The drone will change the flying direction according to the incline direction of the phone.
- Page 21 U45W Blue Jay User Manual High/Low Speed Mode: Your drone starts in Low. Click on “H” to enter High- Speed Mode. 360° Flips: Click this icon to do 360° flips. 1-Key Lift: Click this icon to take off automatically hover at an altitude of 3.9 ft.
- Page 22 FORCE1 RC 5. APP FLYING CONTROL CONTINUED... FLY UP AND DOWN Move the left “stick” up to fly the drone up, and move it down to fly the drone down. The drone will stay flying at the altitude you choose. ROTATE LEFT OR RIGHT Move the left “stick”...
- Page 23 U45W Blue Jay User Manual 6. APP TRIMMING ADJUSTMENTS FORWARD/BACKWARD TRIM Click the “-” of the Forward Backward Trimmer to adjust the drone till balance if the drone tilts forward. Click the “+” to adjust the drone till balance if the drone tilts backward.
- Page 24 FORCE1 RC 7. MEDIA To view the photos and videos. To view the aerial photography saved in the memory card. Internal Memory MAIN MENU MEDIA INTERFACE NOTE: You’ll need to authorize the app to read your phone’s media data. If you don’t, you may be unable to view aerial photography.
-
Page 25: Troubleshooting Guide
U45W Blue Jay User Manual TROUBLESHOOTING GUIDE Problem Problem Cause Solution 1. Low battery. 1. Replace the transmitter battery. The transmitter 2. Batteries are inserted improperly. 2. Reinsert the batteries. indicator light is off. 3. Poor contact. 3. Clean the battery housing/contacts. - Page 27 FCC INFORMATION This equipment has been tested and found to comply with the limits for a Class B digital device, pursuant to part 15 of the FCC Rules. These limits are designed to provide residential protection against harmful interference in a residential installation. This equipment generates, uses and can radiate radio frequency energy and, if not Installed and used in accordance with the instructions, may cause harmful interference to radio communications.
Need help?
Do you have a question about the U45W Blue Jay and is the answer not in the manual?
Questions and answers