Table of Contents
Advertisement
Advertisement
Table of Contents

Related Manuals for Nakamichi SHOCKWAFE ELITE


Summary of Contents for Nakamichi SHOCKWAFE ELITE
- Page 1 ELITE...
-
Page 3: Table Of Contents
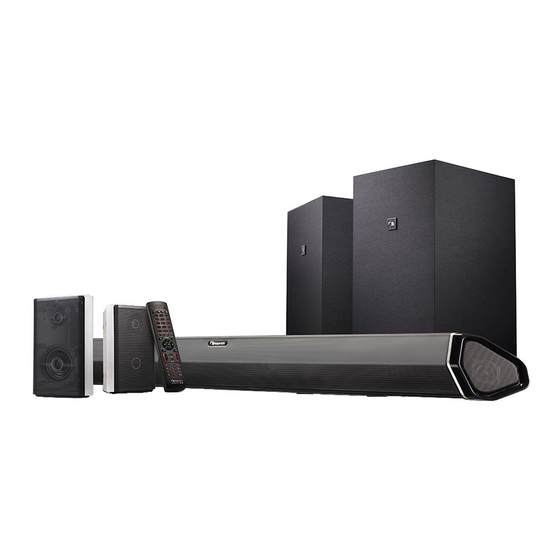
TABLE OF CONTENTS Package Contents .......................4 Control and Connections .....................5 Setting up the SHOCKWAFE Elite System ................8 Setting your TV......................... 13 Connecting your TV ......................14 Advance Setup: Non-HDMI ..................... 16 Advance Setup: HDMI ...................... 17 One Device Setup ....................18 Two Device Setup.................... - Page 4 CENTR TREB SYNC AUTO S L/R SB L/R S L/R SB L/R SHOCKWAFE ELITE Dual Wireless Sound bar Subwoofer 2 x Subwoofer Power cables 2 x Satellite Speaker Audio Cables Digital Optical cable 1 x Soundbar Power cables (Length 16.4 ft. each) (Length: 5 ft.)
- Page 5 HDMI IN [2] HDMI OUT [1] Analog Audio In USB IN (WMA & MP3 music (compatible with (ARC TO TV) playback and Firmware update) (Stereo 3.5mm) HDCP 2.2, 4K HDR pass thru) OPTICAL COAXIAL Digital Optical Digital Coaxial HDMI IN [3] HDMI IN [4] Audio in Audio in...
- Page 6 Press to turn Sound Bar On or Standby.
- Page 7 Back of LEFT Subwoofer Back of RIGHT Subwoofer USB IN USB IN LED indicator Power Switch Power Switch LED indicator (For Firmware update only) (For Firmware update only) Pairing Button Pairing Button RIGHT Back Satellite Speaker Port LEFT Back Satellite Speaker Port Power Port Power Port (Connects to Satellite Speaker)
-
Page 8: Setting Up The Shockwafe Elite System
SETTING UP THE SHOCKWAFE ELITE SYSTEM... - Page 9 Back of Sound Bar Plug the Power adapter to the sound bar and into an electrical outlet.
- Page 10 Connect the LEFT Back satellite speakers to the LEFT subwoofer using the included satellite speaker audio cables. Connect the RIGHT Back satellite speakers to the RIGHT subwoofer using the included satellite speaker audio cables. LEFT RIGHT...
- Page 11 LEFT & RIGHT Subwoofer...
- Page 12 Insert the batteries included in the accessories box and gently push Remove the battery cover by the battery cover back into place. pulling it out from the remote. Turn your Soundbar on by pressing the Power button. Use respective input keys to select an Power audio input source to be played.
- Page 15 Connect one end of the HDMI cable to the HDMI (ARC) port at the back of your TV. Connect the other end to the TV HDMI [1] (ARC) port on your Nakamichi sound bar.
- Page 17 HDMI cables transmit both audio and video. To view video from these devices, turn the Soundbar on, then set the Soundbar input to HDMI IN [2], HDMI IN [3] or HDMI IN [4]. Set your TV input to the HDMI ARC port to which the Soundbar is connected.
- Page 18 HDMI OUT [1] (ARC TO TV) If the device is not equipped with a HDMI port, use an Optical or Coaxial output.
- Page 19 HDMI OUT [1] (ARC TO TV) If the device is not equipped with a HDMI port, use an Optical or Coaxial output.
- Page 20 HDMI OUT [1] (ARC TO TV) If the device is not equipped with a HDMI port, use an Optical or Coaxial output.
- Page 21 HDMI OUT [1] (ARC TO TV) AUDIO AUDIO If the device is not equipped with a HDMI port, use an Optical or Coaxial output.
- Page 23 Return Power Press to return to the previous selection in Setup and Press to turn on/off the Soundbar. Menu function. Mute BLUETOOTH / USB MODE ONLY Info Press to mute/unmute the Soundbar. Press to display the information display on the front Play/ Pause HDMI HDMI...
- Page 24 Press respective buttons to select an audio input source. Each input source (function) will be displayed on the Soundbar’s front LED display. Input source (function): BLUETOOTH / USB MODE ONLY HDMI HDMI HDMI HDMI OPTICAL COAXIAL SYSTEM MEMORY NIGHT MOVIE ENTER MUSIC TAINMENT...
-
Page 25: Accessing Setup On Your Remote
ACCESSING SETUP ON YOUR REMOTE To use SETUP function, please switch to HDMI ARC input. Setting the SETUP selection: 1. Press the SETUP ( ) button. 2. Press the SETUP ( ) button to The selection changes as follows each time the access to different setup selection: BLUETOOTH / USB MODE ONLY SETUP (... -
Page 26: Accessing Menu On Your Remote
ACCESSING MENU ON YOUR REMOTE To use MENU function, please switch to USB input. Setting the MENU selection:: 1. Press the MENU ( ) button to select 2. Soundbar performing task. BLUETOOTH / USB MODE ONLY HDMI HDMI HDMI HDMI OPTICAL COAXIAL SYSTEM MEMORY... -
Page 27: Accessing Info On Your Remote
ACCESSING INFO ON YOUR REMOTE Switching information displayed on the front panel LED display. Information regarding the Firmware version, Decoder format, EQs mode, Volume, Bass, Center, Treble, Surround and Surround back is displayed. BLUETOOTH / USB MODE ONLY HDMI HDMI HDMI 1. -
Page 28: Accessing Eqs On Your Remote
PURE DIRECT NATIVE playback in normal 2.0/ 5.1 /7.1 channel audio. Disable DTS Neural:X upmixing. Direct decoder format to native DSP OFF NATIVE 2.0/ 5.1/ 7.1 channel audio. Audio playback without using any pre-defined Nakamichi EQ DSP OFF DSP OFF settings. -
Page 29: Saving Audio Setting To System Memory
SAVING AUDIO SETTING TO SYSTEM MEMORY Two sets of audio settings can be saved on the Soundbar’s memory, enabling quick loading of settings optimized for user preference. LED Display on Sound bar: BLUETOOTH / USB MODE ONLY Function Button 5 LED DIGITS on Sound Bar HDMI HDMI HDMI... -
Page 30: Accessing Room Size On Your Remote
ACCESSING ROOM SIZE ON YOUR REMOTE Three presets of volume settings for Small, Medium and Large rooms is saved to this unit’s memory, enabling quick loading of settings optimized for different room sizes Medium Room Size Small Large (Average) Square feet Room dimension: 14 x 14 18 x 18... -
Page 31: Using Bluetooth Mode
USING BLUETOOTH MODE BLUETOOTH PAIRING Your Sound Bar supports music streaming from smartphones, To pair the Soundbar with a Bluetooth device: tablets, and computers with Bluetooth capability. Device compatibility 1. Press the Bluetooth ( ) button on the remote control. The will vary, see your device’s documentation for more information. -
Page 32: Re-Linking The Subwoofer With The Soundbar
RE-LINKING THE SUBWOOFER WITH THE SOUNDBAR The subwoofer has already been paired with the Sound Bar by NAKAMICHI. However, they may need to be re-linked if there is no sound coming from the subwoofer. Turn off your TV speakers when programming your sound bar. - Page 33 Insert the two mounting screws into the wall-mount screw holes, and then tighten them.
-
Page 35: Wall Mounting The Satellite Speakers
WALL - MOUNTING THE SATELLITE SPEAKERS To wall-mount the satellite speakers: Attach the mounting screws to the back of the satellite speaker. Align and mount the satellite speaker with the wall mount barcket. Mounting Screws... -
Page 36: Firmware Upgrade
FIRMWARE UPGRADE New firmware that provides additional features or product improvements will be release as needed. Firmware updates can be downloaded at www.nakamichi-usa.com/fw Do not perform this procedure unless firmware update is necessary. Make sure you read the information supplied with the updates before updating the firmware. - Page 37 UPGRADE PROCESS SOUNDBAR FIRMWARE UPGRADE SUBWOOFER FIRMWARE UPGRADE Firmware upgrade process may take up to 5 to 10 minutes. Firmware upgrade process may take up to 5 to 10 minutes. Update progress is displayed on the front panel display when After inserting the USB stick to the subwoofer’s USB port, the firmware is upgrading.
-
Page 38: Help & Troubleshooting
I hear sound See Page 22 for optimal source device settings. cutting out. Go to www. nakamichi-usa.com/audio-setting for the most updated list. Contact: support@nakamichi-usa.com (we guarantee a response within 24 hours.) The remote Replace the remote batteries with new ones. -
Page 39: Customer Support
In the event of a defect, these are your exclusive remedies. Labor: For a period of one (1) year from the original date of purchase of the product (“Labor Warranty”), Nakamichi will, at its option, repair or replace with new or refurbished product, product determined to be defective. -
Page 40: Glossary
GLOSSARY DTS:X DTS:X is the next generation object-based, multi-dimensional audio technology from DTS. Unbound from channels, DTS:X conveys the fluid movement of sound to create This section explains the technical terms used in this user manual. an incredibly rich, realistic and immersive soundscape - in front of, behind, beside and above the audience - more accurately than ever before. - Page 41 GLOSSARY HDCP This Soundbar is compatible with the follow resolutions: HDCP (High-bandwidth Digital Content Protection) is a digital copy protection form 720p/60 Hz, 50 Hz that prevents copying of digital contents as it travels across connections (such as 480i/60 Hz 1080i/60 Hz, 50 Hz HDMI).
-
Page 42: Specification
SPECIFICATIONS SOUNDBAR DRIVERS CONNECTIVITY Left & Right HDMI Out (ARC to TV) x 1 [HDCP 2.2] 2 x 2.5” Full Range Drivers HDMI Input x 3 (4K HDR Pass Thru) [HDCP 2.2] Center OPTICAL Input x 1 2 x 2.5” Full Range Drivers COAXIAL Input x 1 Surround Left &... -
Page 43: Legal & Compliance
It is the responsibilities of the user to registered trademarks owned by Bluetooth correct such interference. SIG, Inc. and any use of such marks by Nakamichi LLC is under license.Other trademarks and trade names are those of For DTS patents, see http://patents.dts.com. RF Exposure Information their respective owners.
Need help?
Do you have a question about the SHOCKWAFE ELITE and is the answer not in the manual?
Questions and answers