
Related Manuals for Nakamichi Shockwafe Pro 7.1


Summary of Contents for Nakamichi Shockwafe Pro 7.1
- Page 1 USER GUIDE Our one-stop support solution: www.nakamichi-usa.com/faq Phone Support: (415) 805 6913 (Weekdays 10am - 7pm PST; Weekends 10am - 5pm PST)
-
Page 3: Table Of Contents
TABLE OF CONTENTS Package Contents .......................4 Control and Connections .....................5 Setting up the SHOCKWAFE PRO 7.1 System ..............8 Setting your TV......................... 13 Connecting theTV ......................14 Advance Setup: Non-HDMI ..................... 16 Advance Setup: HDMI ...................... 17 One Device Setup ....................18 Two Device Setup.................... -
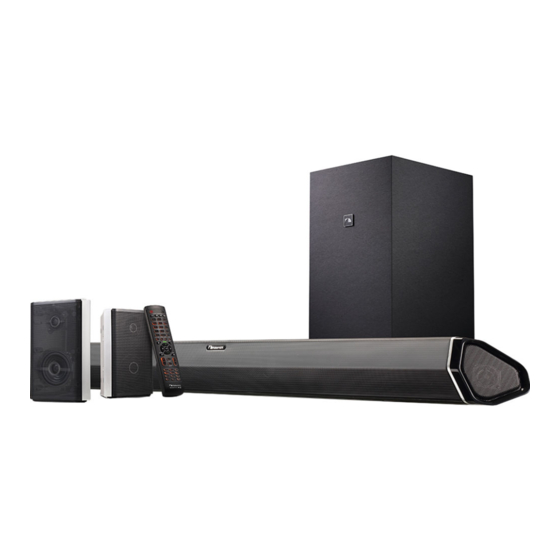
Page 4: Package Contents
TREB SYNC S L/R SB L/R AUTO S L/R SB L/R 1 x SHOCKWAFE PRO 7.1 1 x Wireless Subwoofer 1 x Remote Control Soundbar with Batteries 1 x Subwoofer Power Cable 2 x Satellite Speaker Audio Cables Digital Optical cable 1 x Soundbar Power Cable (Length 32.8 ft. -
Page 5: Control And Connections
DC IN Power Supply PRO 7.1 Ch HDMI IN [2] HDMI OUT [1] Analog Audio Input (Compatible with USB Music Playback (ARC TO TV) (Stereo 3.5mm) HDCP 2.2, 4K (WAV & MP3) and Firmware HDR Pass-thru) Upgrade COAXIAL Digital Coaxial OPTICAL HDMI IN [3] HDMI IN [4]... - Page 6 Tilt the remote downwards by 15-25 degrees for best response (as if you are aiming the remote slightly towards the ground). Press to play NAKAMICHI audio test tone on each channel. Press to turn ON Soundbar or go to STANDBY mode.
- Page 7 Back of Subwoofer Back of Satellite Speakers LEFT RIGHT Connect to Connect to RIGHT BACK LEFT BACK Satellite Speaker Satellite Speaker Satellite Speaker Port Satellite Speaker Port (Connects to Subwoofer) (Connects to Subwoofer) RED LED Indicator (Firmware upgrade indicator) Pairing USB IN LED indicator Power Switch...
-
Page 8: Setting Up The Shockwafe Pro 7.1 System
1 SETTING UP THE SHOCKWAFE PRO SYSTEM Diagram on the right is the recommended speaker placement with optimal distance. Actual distance can vary based on actual room layout. Min. Min. 9 ft (2.5m) Min. Distance 6.5 ft (2m) 6.5 ft (2m) Option B Option B - 150... - Page 9 Back of Soundbar Plug the power adapter to the sound bar and into an electrical outlet.
- Page 10 Connect the Surround LEFT and RIGHT BACK satellite speakers to the subwoofer using the included satellite speaker audio cables. LEFT RIGHT...
- Page 11 Blinking Blue Light: subwoofer is in pairing mode. Blue Light Stays On: subwoofer successfully paired. Note: If the Blue LED light stays blinking, press and hold pairing button until Blue LED light start blinking fast to establish wireless connection to the subwoofer.
- Page 12 Insert the included batteries in the accessories and gently push the Remove the battery cover by battery cover back into place. pulling it out from the remote. Turn your soundbar on by pressing the Power button. Use respective input keys to select an Power audio input source to be played.
-
Page 13: Setting Your Tv
ARC port using a high speed HDMI 2.0 cable. (whichever is available) From the SYSTEM menu, enable CEC and ARC (SAC) functions. From the CEC menu, select Device Discovery to register the soundbar with the TV. *More set-up on HDMI-CEC, visit: www.nakamichi-usa.com/cec... -
Page 14: Connecting Thetv
Options for connecting your TV: HDMI (See Next Page), OPTICAL , COAXIAL Note: Be sure to connect to an audio output port on TV, not an audio input port. Not all TVs have the audio outputs shown above. To connect the soundbar directly to your other devices (Blu-ray player, game system, etc.) see your device’s user manual. - Page 15 Connect one end of the HDMI cable to the HDMI (ARC) port at the back of your TV. Connect the other end to the HDMI OUT [1] (ARC TO TV) port on your Nakamichi soundbar. (HDMI cable send video output and receive Audio input from TV)
-
Page 16: Advance Setup: Non-Hdmi
Tablet/MP3 Player/Computer... -
Page 17: Advance Setup: Hdmi
HDMI cables transmit both audio and video. To view video from these devices, turn the Soundbar on, then set the Soundbar input to HDMI IN [2], HDMI IN [3] or HDMI IN [4]. Set your TV input to the HDMI ARC port to which the Soundbar is connected. -
Page 18: One Device Setup
ARC) HDMI OUT [1] (ARC TO TV) If your TV is previously connected to a sound system or soundbar, disconnect the TV AC Power cord from the wall for one minute. Plug the TV power back in and then connect the HDMI ARC to the Soundbar to ensure proper HDMI handshake. If the device is not equipped with a HDMI port, use an Optical or Coaxial output. -
Page 19: Two Device Setup
HDMI IN (Preferably ARC) HDMI OUT [1] (ARC TO TV) If the device is not equipped with a HDMI port, use an Optical or Coaxial output. -
Page 20: Three Device Setup
HDMI IN (Preferably ARC) HDMI OUT [1] (ARC TO TV) If the device is not equipped with a HDMI port, use an Optical or Coaxial output. -
Page 21: Four Device Setup (4K Tv)
(4K TV): HDMI IN (ARC) VIDEO and AUDIO *HDMI IN HDMI OUT [1] (ARC TO TV) If the device is not equipped with a HDMI port, use an Optical or Coaxial output. *Switch the soundbar’s source to ARC for playing device 4’s audio (via TV’s ARC connection) -
Page 22: Four Device Setup (1080P And Below)
(1080p and below TV): HDMI IN (PreferablyARC) HDMI OUT [1] (ARC TO TV) AUDIO AUDIO If the device is not equipped with a HDMI port, use an Optical or Coaxial output. -
Page 23: Audio Settings For Streaming Devices
Press Option button on controller > Settings > audio format > Recommended Setup: Connect the device directly to TV via HDMI select Bitstream (Direct) port and send out audio to soundbar via ARC nakamichi-usa.com/best-sound Setting Audio Format: XBOX ONE X ®... -
Page 24: Using The Remote
Navigation Buttons Power +/- buttons: DTS:X Dialog control to adjust dialog level Turn ON/OFF the soundbar (DTS:X encoded material only) Mute / , ENTER buttons: Change the settings in SETUP Mute/unmute the soundbar BLUETOOTH / USB MODE ONLY and MENU functions Play/ Pause Return Play/pause audio playback (Bluetooth/USB mode only) -
Page 25: Accessing Source On Your Remote
Press source buttons to select an audio input source. Each input source will be displayed on the soundbar’s front LED display. Input source: BLUETOOTH / USB MODE ONLY HDMI HDMI HDMI HDMI OPTICAL COAXIAL Input Source SYSTEM MEMORY NIGHT ENTER MOVIE MUSIC TAINMENT... -
Page 26: Accessing Setup On Your Remote
ACCESSING SETUP ON YOUR REMOTE To use SETUP function, switch to HDMI ARC input. SETUP function applies to all input sources. Navigating the SETUP function: BLUETOOTH / USB MODE ONLY 1. Press the SETUP ( ) button to cycle through 4. -
Page 27: Accessing Menu On Your Remote
ACCESSING MENU ON YOUR REMOTE To use MENU function, please switch to USB input. Navigating the MENU selection: 1. Press the MENU ( ) button cycle through 2. Available actions: different function (FWUPG -> SUB PAIR) a. Press ENTER to select desired function. BLUETOOTH / USB MODE ONLY b. -
Page 28: Accessing Info On Your Remote
ACCESSING INFO ON YOUR REMOTE Press INFO button to view system settings on the soundbar’s front LED display 1. Navigating the INFO list: Press INFO button each time to change the information displayed on front LED display BLUETOOTH / USB MODE ONLY HDMI HDMI HDMI... -
Page 29: Accessing Audio Settings On Your Remote
CLEAR VOICE CLEAR VOICE Enhances clarity of dialog playback. Audio playback without using any pre-defined Nakamichi EQ settings. DSP OFF DSP OFF NIGHT MODE Night mode feature normalizes the overall volume loudness to avoid sudden change in loudness. This feature is available with DTS:X and DOLBY contents via HDMI, HDMI ARC, Optical and Coaxial inputs. -
Page 30: Saving Audio Setting To System Memory
SAVING AUDIO SETTING TO SYSTEM MEMORY Two sets of audio settings can be saved on the soundbar’s memory, for quick access to preferred audio settings for user preference. LED Display on soundbar: BLUETOOTH / USB MODE ONLY Function Button 5 LED DIGITS on soundbar HDMI HDMI HDMI... -
Page 31: Accessing Room Size On Your Remote
ACCESSING ROOM SIZE ON YOUR REMOTE Three preset room configurations for Small, Medium and Large rooms are saved to this unit’s memory, enabling quick loading of settings optimized for different room sizes. Medium Room Size Small Large (Average) Square feet 484 or more Room dimension: 14 x 14... -
Page 32: Using Bluetooth Mode
USING BLUETOOTH MODE BLUETOOTH PAIRING Stream music wirelessly from your mobile device via Bluetooth To pair the soundbar with a Bluetooth device: (BT) with aptX. BT audio transmission is often compressed 1. Set your Bluetooth device into Bluetooth pairing mode (discoverable) using bit-rate reduction. -
Page 33: Re-Linking The Subwoofer With The Soundbar
RE-LINKING THE SUBWOOFER WITH THE SOUNDBAR The subwoofer has already been paired with the soundbar by NAKAMICHI. However, they may need to be re-linked if there is no sound coming out from the subwoofer. Turn off your TV speakers when programming your soundbar. -
Page 34: Wall-Mounting The Soundbar
Insert the two mounting screws into the wall-mount screw holes, and then tighten them. -
Page 36: Wall Mounting The Satellite Speakers
WALL - MOUNTING THE SATELLITE SPEAKERS To wall-mount the satellite speakers: Attach the mounting screws to the back of the satellite speaker. Align and mount the satellite speaker with the wall mount bracket. Be sure your screws are attached to wood studs or drywall anchors (for drywall) or concrete anchors (for brick/concrete walls). -
Page 38: Help & Troubleshooting
If using Bluetooth, ensure that the volume on your source device is turned up and that the device is not muted. I hear sound See Page 23 for optimal source device settings. cutting out. Go to www.nakamichi-usa.com/audio-settings for the complete, updated list. Contact: support@nakamichi-usa.com The remote Replace the remote batteries with new ones. -
Page 39: Warranty Information & Customer Support
Labor: For a period of one (1) year from the original date of purchase of the product (“Labor Warranty”), Nakamichi will, at its option, repair or replace with new or refurbished product, product determined to be defective. If Nakamichi elects to replace the product after this Labor Warranty has expired but while the Parts Warranty below is still in effect, it will do so for the applicable labor charge. -
Page 40: Glossary
GLOSSARY DTS:X DTS:X is the next generation object-based, multi-dimensional audio technology from DTS. Unbound from channels, DTS:X conveys the fluid movement of sound to create This section explains the technical terms used in this user manual. an incredibly rich, realistic and immersive soundscape - in front of, behind, beside and above the audience - more accurately than ever before. - Page 41 GLOSSARY HDCP What is aptX™? Qualcomm® aptX™ audio technology enhances the wireless sound HDCP (High-bandwidth Digital Content Protection) is a digital copy protection form that quality of many of the world’s finest smartphones, speakers, prevents copying of digital contents as it travels across connections (such as HDMI). headphones and tablets.
-
Page 42: Specification
SPECIFICATIONS SOUNDBAR DRIVERS REMOTE CONTROL 4 x 2.5" Full Range Drivers 52 Keypads, Backlit LED 6 EQ Modes – Movie, Music, Sports, News, 2 x 1" High Frequency Tweeter Game, Clear Voice. Center 2 x 2.5" Full Range Drivers CONNECTIVITY SATELLITE DRIVERS HDMI Out (ARC to TV) x 1 [HDCP 2.2] 1 x 3"... -
Page 43: Legal & Compliance
It is the responsibilities of the user to registered trademarks owned by Bluetooth correct such interference. SIG, Inc. and any use of such marks by Nakamichi LLC is under license.Other trademarks and trade names are those of RF Exposure Information For DTS patents, see http://patents.dts.com. - Page 44 Our one-stop support solution: www.nakamichi-usa.com/faq Phone Support: (415) 805 6913 (Weekdays 10am - 7pm PST; Weekends 10am - 5pm PST) lea et-pro71-user manual-revB...
Need help?
Do you have a question about the Shockwafe Pro 7.1 and is the answer not in the manual?
Questions and answers