Table of Contents
Advertisement
Advertisement
Table of Contents

Related Manuals for Nakamichi SHOCKWAFE PRO 7.1


Summary of Contents for Nakamichi SHOCKWAFE PRO 7.1
- Page 1 USER MANUAL ONE-STOP SUPPORT SOLUTION STOP SPEAK www.nakamichi-usa.com/faq CUSTOMER CARE support@nakamichi-usa.com please do not to our shockwafe (415) 805 6913 return this unit ninjas in usa today (Weekdays 10am - 6:45pm PST; Saturday, Holidays 10am - 4:45pm PST)
-
Page 3: Table Of Contents
TABLE OF CONTENTS Package Contents ......................4 Controls and Connections....................5 Setting up Your Home Theater 1. Speaker Placements ....................8 2. Connecting Surround Speakers to Subwoofers ............10 3. Turning On Your Soundbar System ................11 4. Connecting Your TV....................12 5. Listening to Your Soundbar ..................14 6. -
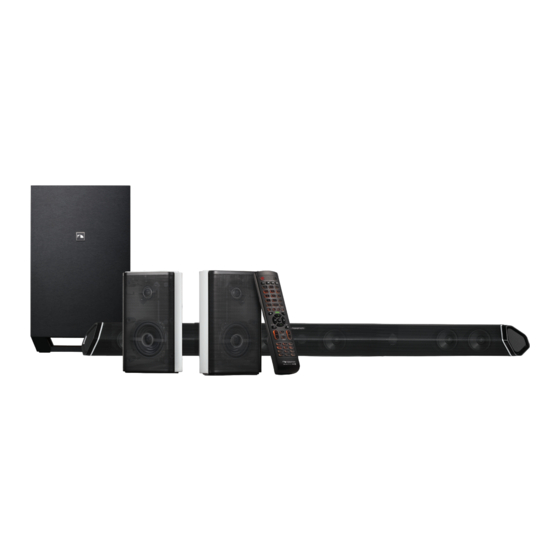
Page 4: Package Contents
PACKAGE CONTENTS 1 x Soundbar 1 x Wireless 2 x Surround Speakers Subwoofer 1 x Subwoofer Power Cables 2 x Surround Speaker Audio Cables 1 x Digital Optical Cable (Length: 32.8 ft.) (Length: 5 ft.) 1 x Soundbar Power Cable (Length: 5 ft.) (Length: 5 ft.) 3.5mm Audio Cable... -
Page 5: Controls And Connections
VOLUME - / + POWER Decrease or Increase volume Power ON soundbar or go to STANDBY mode LED PANEL DEMO Display soundbar information Play NAKAMICHI audio test tone on each channel HELLO SOUNDBAR FRONT PRO 7.1 SOUNDBAR BACK DC IN Power Supply... - Page 6 REMOTE CONTROL Remove the battery cover by pulling it down from the remote Insert the included batteries and gently push the battery cover back into place REMOTE ANGLE Tilt the remote downwards by 15-25 degrees for best response (as if you are aiming the remote slightly towards the ground) Once HDMI-CEC is set up, use your TV/content device’s remote control to power ON your...
- Page 7 Back of Subwoofer Back of Satellite Speakers LEFT RIGHT Connect to Connect to RIGHT BACK LEFT BACK Satellite Speaker Satellite Speaker Satellite Speaker Port Satellite Speaker Port (Connects to Subwoofer) (Connects to Subwoofer) RED LED Indicator (Firmware upgrade indicator) Pairing USB IN LED indicator Power Switch...
-
Page 8: Setting Up Your Home Theater
SETTING UP YOUR HOME THEATER For recommended speaker stands, scan QR code or visit: bit.ly/71-speaker-stands SPEAKER PLACEMENTS OPTION A (Best): 3.2 ft min 3.2 ft min clearance clearance 7.1CH SURROUND Recommended speaker placement with optimal distance. Actual distance can vary based on actual room layout. 9 ft min clearance 3.2 ft... - Page 9 For recommended speaker stands, scan QR code or visit: bit.ly/71-speaker-stands OPTION B: ALL ELEVATION Lay the surround speakers down (drivers tilted upward 3.2 ft min 3.2 ft min in 2 modes, see illustration on the right) to enhance the clearance clearance vertical effects to bounce off the ceiling of your room.
-
Page 10: Connecting Surround Speakers To Subwoofers
CONNECTING SURROUND SPEAKERS TO SUBWOOFERS Connect the Surround LEFT and RIGHT BACK satellite speakers to the subwoofer using the included satellite speaker audio cables. LEFT RIGHT... -
Page 11: Turning On Your Soundbar System
TURNING ON YOUR SOUNDBAR SYSTEM SOUNDBAR Blinking Blue Light: SUBWOOFER Subwoofer is in pairing mode. Blue Light Stays On: Subwoofer successfully paired. AC IN PAIRING POWER Note: Once soundbar is powered off, the blue LED lights on the subwoofer will continue blinking for 10 minutes before going into standby mode. -
Page 12: Connecting Your Tv
Connect one end of the HDMI cable to the HDMI (ARC) port at the back of your TV. Connect the other end to the HDMI OUT [1] (ARC TO TV) port to your Nakamichi soundbar. DID YOU KNOW? HDMI Audio Return Channel (ARC) - Page 13 Note: Be sure to connect to a TV’s audio output port, not an audio input port. Not all TVs have the audio outputs shown above. To connect the soundbar directly to your other devices (Blu-ray player, game system, etc.). See page 20 CONNECTING YOUR CONTENT DEVICES Cable appearance may di er from the ones supplied.
-
Page 14: Listening To Your Soundbar
Always use your TV’s / content device’s remote control to power OFF the system. MENU Access to rmware upgrade and wireless subwoofers pairing. (Button only works when soundbar is in USB For more about HDMI-ARC/CEC, visit: nakamichi-usa.com/what-is-hdmi-cec/ mode only, see page 27 ACCESSING MENU FUNCTIONS ON YOUR REMOTE) SYSTEM MEMORY NIGHT... -
Page 15: Setting Up Your Tv
Hitachi (HDMI-CEC). Naming may di er based on TV brand. See your TV’s user manual for more information. Visit nakamichi-usa.com/best-sound for expanded list of TVs’ audio settings instructions. Visit bit.ly/hdmi-cec-settings or scan QR Code for HDMI-CEC setup instructions by device If your devices are not listed on our website, please check with the device manufacturer’s manual... -
Page 16: Connecting Your Content Devices
Perfect Device Matching Tool “ ” Use our to create a custom setup guide based on your TV and CONNECTING YOUR CONTENT DEVICES devices. Scan QR code or visit bit.ly/device-matching-tool HDMI CONNECTION SETUP HDMI cables transmit both audio and video content. To view video from these devices, turn the soundbar on, then set the soundbar input to HDMI IN [2], HDMI IN [3] or HDMI IN [4]. - Page 17 Perfect Device Matching Tool “ ” CONNECTING YOUR CONTENT DEVICES (cont.) Use our to create a custom setup guide based on your TV and NON-HDMI CONNECTION SETUP devices. Scan QR code or visit bit.ly/device-matching-tool Network Media Player Game Console Tablet/MP3 Player/Computer Dolby Atmos and DTS:X audio are not supported on Optical, Coaxial and Aux connections...
- Page 18 Perfect Device Matching Tool CONNECTING YOUR CONTENT DEVICES “ ” Use our to create a custom setup guide based on your TV and ADVANCED SETUP - FOUR-DEVICE SETUP FOR HDTV devices. Scan QR code or visit bit.ly/device-matching-tool HDMI IN (ARC) HDMI IN* VIDEO &...
- Page 19 Perfect Device Matching Tool “ ” Use our CONNECTING YOUR CONTENT DEVICES (cont.) to create a custom setup guide based on your TV and devices. Scan QR code or visit bit.ly/device-matching-tool ADVANCED SETUP - FOUR-DEVICE SETUP FOR TV WITHOUT HDMI ARC *HDMI IN HDMI IN Switch the soundbar’s source to OPTICAL or COAXIAL...
- Page 20 CONNECTING YOUR CONTENT DEVICES CONNECTIONS CENTRAL - RECOMMENDED CONNECTION BASED ON DEVICES If you are using Optical connection option, connect all your content devices to TV. Perfect Device Matching Tool “ ” Use our Satellites to create a custom setup guide based on your TV and devices.
-
Page 21: Setting Up Your Content Devices
For full list of devices with our recommended audio settings, visit NVIDIA SHIELD ® nakamichi-usa.com/best-sound or scan QR code on the right. Setting Audio Format: 1. Nvidia Shield Audio Settings: Settings > Display & Sound > Other > Advanced Settings >... -
Page 22: Remote Control Overview
REMOTE CONTROL OVERVIEW MUTE Mute/unmute the soundbar For expanded remote control guide, scan QR code or visit: NEXT bit.ly/71-shockwafe-remote Skip to the next track (Bluetooth/USB mode only) PREVIOUS Return to the previous track (Bluetooth/USB mode only) POWER* NIGHT Turn ON/OFF the soundbar Normalize volume for night time listening PLAY/PAUSE (Dolby/DTS:X audio only, see page 24 for details) -
Page 23: Selecting Different Input Sources On Your Remote
SELECTING DIFFERENT INPUT SOURCES ON YOUR REMOTE Press source buttons to select an audio input source. Each input source will be displayed on the soundbar’s front LED display. For expanded remote control guide, scan QR code or visit: bit.ly/71-shockwafe-remote BLUETOOTH / USB MODE ONLY HDMI HDMI HDMI... -
Page 24: Accessing Audio Presets On Your Remote
DSP OFF DSP OFF DSP OFF Audio playback without using any pre-defined Nakamichi EQ settings. NIGHT MODE Night mode feature normalizes the overall volume to avoid sudden changes in loudness. This feature is available with DTS:X and DOLBY contents on HDMI, HDMI ARC, Optical and Coaxial inputs. -
Page 25: Accessing Advanced System Settings On Your Remote
ACCESSING ADVANCED SYSTEM SETTINGS ON YOUR REMOTE (ONLY ACCESSIBLE ON HDMI ARC/2/3/4 MODE) Function OPTIONS SELECTION To use SETUP function, switch to HDMI ARC/2/3/4 input. DTS:X & DOLBY SETUP function applies to all input sources. Dynamic Range (Default OFF) 100% Compression (DRC)* BLUETOOTH / USB MODE ONLY 1. -
Page 26: Accessing Channel Mapping/Upmixing On Your Remote
ACCESSING CHANNEL MAPPING/UPMIXING ON YOUR REMOTE MOVIE MUSIC CLEAR VOICE STEREO DIRECT DSP OFF CHANNEL MAPPING Channel mapping/upmixing is essential because most content is not recorded in 9.2 channels. The SETUP MENU soundbar utilizes different channel mapping methods to optimize your listening experience. Dolby & DTS encode their own content with their respective proprietary upmixers to optimize surround performance. -
Page 27: Accessing Menu Functions On Your Remote
For expanded remote control guide, ACCESSING MENU FUNCTIONS ON YOUR REMOTE scan QR code or visit: bit.ly/71-shockwafe-remote (ONLY ACCESSIBLE ON USB MODE) To use MENU function, please switch to USB input. Navigating the MENU SELECTION: BLUETOOTH / USB MODE ONLY 1. -
Page 28: Accessing Sse Mode On Your Remote
ACCESSING SSE MODE ON YOUR REMOTE SPATIAL SURROUND ELEVATION (SSE) WHAT IS SSE PROCESSING? MODE SYSTEM MEMORY NIGHT Shockwafe Pro 7.1 SSE is embedded with 3 proprietary advanced processing engines MOVIE MUSIC that unlock 7.1.4ch all-around surround CLEAR VOICE STEREO... -
Page 29: Accessing Info On Your Remote
ACCESSING INFO ON YOUR REMOTE Press INFO button to view system settings on the soundbar’s front LED display FIRMWARE VERSION AUDIO FORMAT BLUETOOTH / USB MODE ONLY (FWXX, XX=FIRMWARE VERSION) (DOLBY ATMOS TRUEHD, DOLBY ATMOS D PLUS, DOLBY TRUEHD, DOLBY ATMOS MAT**, DOLBY D PLUS, DOLBY DIGITAL, DTS X, DTS-HD MA, DTS HD, DTS DIGITAL, LPCM 7.1, LPCM 5.1, PCM 2.0) DEDICATED FREQUENCY (DF ON, DF OFF) -
Page 30: Accessing Room Size On Your Remote
ENTER ACCESSING ROOM SIZE ON YOUR REMOTE RETURN INFO For instant surround optimization to Small, Medium Room Size Small Large (Average) Medium and Large rooms, there are 3 pre- tuned acoustic configurations. Square feet 484 or more SIZE ROOM BASS Room dimension: 14 x 14 18 x 18... -
Page 31: Saving Audio Settings To System Memory
SAVING AUDIO SETTINGS TO SYSTEM MEMORY Two sets of audio settings can be saved onto the soundbar's memory, allowing quick access to your audio preferences. BLUETOOTH / USB MODE ONLY FUNCTION BUTTON 5 LED DIGITS ON SOUNDBAR Customized Memory 1 Long press to SAVE1 Once saved, show M1SET SYSTEM MEMORY... -
Page 32: Wireless Bluetooth Audio Streaming
WIRELESS BLUETOOTH AUDIO STREAMING BLUETOOTH 4.1 WITH APTX BLUETOOTH PAIRING Stream music wirelessly from your mobile device via Bluetooth To pair the soundbar with a Bluetooth device: (BT) with aptX. BT audio transmission is often compressed 1. Set your Bluetooth device into Bluetooth pairing mode (discoverable) using bit-rate reduction. -
Page 33: Re-Linking The Subwoofers With The Soundbar
RE-LINKING THE SUBWOOFERS WITH THE SOUNDBAR During production, NAKAMICHI has already paired the subwoofer with the soundbar. However, they may need to be re-linked if there is no sound coming out from the subwoofer. Turn off your TV speakers when programming your soundbar. -
Page 34: Wall-Mounting Your Soundbar System
WALL-MOUNTING YOUR SOUNDBAR SYSTEM SOUNDBAR Insert the 2 mounting screws into the wall-mount screw holes, and then tighten them. Place the included wall-mounting template against the wall under your TV. Mark the 4 bracket holes using a pencil. Be sure your screws are attached to wood studs, drywall anchors (for drywall), or concrete anchors (for brick/concrete walls). - Page 35 WALL-MOUNTING YOUR SOUNDBAR SYSTEM (cont.) SURROUND SPEAKERS To wall-mount the surround speakers: Attach the mounting screws to the back of the surround speaker. Align and mount the surround speaker with the wall mount bracket. Mounting Screws Be sure your screws are attached to wood studs or drywall anchors (for drywall) or concrete anchors (for brick/concrete walls).
-
Page 36: Firmware Upgrade
FIRMWARE UPGRADE... -
Page 37: Help & Troubleshooting
3. The Soundbar or the Subwoofer Does Not Power On 3. Unplug all devices from the AC outlets Please contact support@nakamichi-usa.com so we can 4. Wait for 5 minutes before plugging the TV, soundbar and work on a replacement (within 30 days of purchase). The source devices back to the AC outlets system comes with a 1 year parts and labor warranty. -
Page 38: Specifications
SPECIFICATIONS SOUNDBAR PERFORMANCE 6 x 2.5" Full Range Driver Channels: 7.1 2 x 1" High Frequency Tweeter Sound Pressure Level SPL: 105 dB Total Power: 600W Power Output: SURROUND BACK LEFT & RIGHT 330W (Soundbar) 1 x 3" Full Range Driver (Each side) 90W (Surround Back Left &... -
Page 39: Warranty Information & Customer Support
Labor: For a period of one (1) year from the original date of purchase of the product (“Labor Warranty”), Nakamichi will, at its option, repair or replace with new or refurbished product, product determined to be defective. If Nakamichi elects to replace the product after this Labor Warranty has expired but while the Parts Warranty below is still in effect, it will do so for the applicable labor charge. -
Page 40: Glossary
Spatial Surround Elevation (SSE) Processing Technology channels of 96 kHz/24-bit audio (up to six channels of 192 kHz/24-bit audio) simultaneously. Nakamichi's proprietary processing technology: A set of processing algorithms that takes surround sound performance to a whole new level. For more info, visit nakamichi-usa.com/shockwafe-sse DTS-HD High Resolution Audio DTS-HD High Resolution Audio is a compressed digital audio format that supports 7.1-channel and up... - Page 41 GLOSSARY HDMI HDCP HDMI (High-Definition Multimedia Interface) is the world-wide standard interface for digital HDCP (High-bandwidth Digital Content Protection) is a digital copy audio/video signal transmission. This interface transmits both digital audio and digital video protection form that prevents copying of digital contents as it travels signals using a single cable without any loss.
-
Page 42: Legal & Compliance
Laboratories. Dolby, Dolby Atmos, SIG, Inc. and any use of such marks by Dolby Surround, Dolby Vision Compatible Nakamichi LLC is under license. Other RF Exposure Information and the double-D symbol are trademarks trademarks and trade names are those of This device meets the government’s requirements for exposure to radio waves. - Page 44 ONE-STOP SUPPORT SOLUTION STOP SPEAK www.nakamichi-usa.com/faq CUSTOMER CARE support@nakamichi-usa.com please do not to our shockwafe (415) 805 6913 return this unit ninjas in USA today (Weekdays 10am - 6:45pm PST; Saturday, Holidays 10am - 4:45pm PST) user manual_revB...
Need help?
Do you have a question about the SHOCKWAFE PRO 7.1 and is the answer not in the manual?
Questions and answers