Table of Contents
Advertisement
Advertisement
Table of Contents

Subscribe to Our Youtube Channel
Related Manuals for Blue Coat SG200 200 A


Summary of Contents for Blue Coat SG200 200 A
- Page 1 Blue Coat ® Systems SG200 Series Installation Guide Version: SGOS 4.2.x and 5.1.x...
-
Page 2: Contact Information
Blue Coat Systems, Inc. All right, title and interest in and to the Software and documentation are and shall remain the exclusive property of Blue Coat Systems, Inc. -
Page 3: Table Of Contents
Contents Contact Information Chapter 1: The SG200 Series Unpacking the SG200............................5 The SG200 Appliance............................6 Installing the SG200 ............................8 Powering on the SG200............................ 10 Chapter 2: First-Time Configuration Overview ................................11 Section A: Configuring the SG200 with a Web Browser Connecting the SG200 to a PC ........................ - Page 4 Volume 7: VPM and Advanced Policy Appendix B: Regulatory Statements Class A Digital Warning ..........................55 EC Community EMC Warning ........................55 Canadian EC EMC Warning........................... 55 Australia/New Zealand EMC Warning ....................... 55 Taiwan BSMI Notification ..........................56 Japan VCCI EMC Notification ........................56 China CCC Notification ..........................
-
Page 5: Chapter 1: The Sg200 Series
If you log on to the SG200 using an Internet browser (see Section E: “Logging on to the SG200 on page 37), you can access the Blue Coat ProxySG Configuration and Management Guide Suite by clicking the button Help on any screen in the Management Console, the SG200 user interface. -
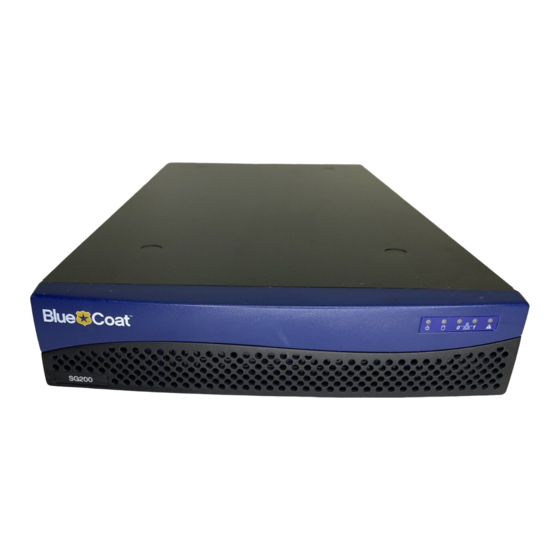
Page 6: The Sg200 Appliance
• Flashing Green to Amber: Indicates a critical system warning—the SG200 requires immediate attention. See “The System LED Indicates Unhealthy Status” on page 43 for information about locating the source of an unhealthy System LED reading. Blue Coat SG200 Series... - Page 7 The Back of the SG200 Reset button Serial Ethernet Ethernet Power Supply Port Port 0 Port 1 Adapter Port Figure 1-2: Components on the Back of the SG200 Power Supply Adapter Port Connects to the power supply adapter. Connecting a power cable to the power supply adapter and to an electrical outlet powers on the SG200.
-
Page 8: Installing The Sg200
Mount the SG200 on the wall-mount bracket by inserting the notches on the SG200 into the hooks on the bracket and pushing down slightly to lock the appliance into place. 3 Locate the two notches 4 Insert the two notches into the wall hooks Figure 1-4: Secure the Wall-Mount Bracket to the Wall Blue Coat SG200 Series... - Page 9 Mounting the SG200 in an Equipment Rack To mount the SG200 horizontally into an equipment rack, use the rack-mounting brackets and screws; you also need a Phillips screwdriver. Use a Phillips screwdriver to attach the brackets to the SG200; use three screws on each side, as shown in Figure 1-5.
-
Page 10: Powering On The Sg200
If the Power LED is solid green after booting up, an initial configuration has already been performed. If you did not perform an initial configuration, restore the appliance to its factory defaults to restart the initial configuration (see “Resetting the SG200 to Its Factory Defaults” on page 46). Blue Coat SG200 Series... -
Page 11: Chapter 2: First-Time Configuration
Section E: “Logging on to the SG200 on page 37 and refer to the Blue Coat ProxySG Configuration and Management Guide Suite for information on how to fully configure the software. Download this manual from the Blue Coat Web site at: www.bluecoat.com. -
Page 12: Section A: Configuring The Sg200 With A Web Browser
Keep the other end of the cable connected to your network. Connect the crossover Ethernet cable by plugging one end into the PC’s Ethernet port and the other end into the empty Ethernet port on the SG200. Figure 2-1: Connect the Cables Blue Coat SG200 Series... - Page 13 Verify that the network link is established by checking the network connection LEDs at the back of the SG200. If the network connection is functioning, the left-hand LED on each connection glows green. 4 Verify that these LEDs are green Figure 2-2: Verify the Network Connection If the network connection LEDs are not green, check the following: •...
-
Page 14: 200 A And 200 B-Initial Configuration With A Web Browser
• Your proxy must not already be configured. To Configure the SG200 200 A and 200 B Using a Web Browser: Note: The following procedure is for 200 A and 200 B Appliances running SGOS 4.x or later. Complete the procedure described in “Connecting the SG200 to a PC”... - Page 15 Enter the network parameters for your appliance. Figure 2-3: Initial Configuration Page—Network Parameters Enter the Console Account username and password and the Enable (privileged mode) password. Do not select unless the password is already in a valid hashed format. Password is in hashed format Note: If you want to have the password hashed for you, use the remote initial configuration method (see Section D:Configuring the SG200 from a Remote Location on page 32).
- Page 16 For more information about this option, refer to Volume 7: The Visual Policy Manager and Advanced Policy Tasks of the Blue Coat ProxySG Configuration and Management Guide Suite. Figure 2-5: Initial Configuration Page—Default Policy for Proxied Services (Optional) Secure the serial port: select and enter the password.
- Page 17 When you have set the basic networking parameters and connected the SG200 to the network, you are ready to fully configure the appliance. For a list of all CLI commands, refer to the Blue Coat ProxySG Command Line Reference. For information about configuring and administering the SG200 (including information about setting policies that will explicitly grant or deny proxied transactions), refer to the Blue Coat ProxySG Configuration and Management Guide Suite.
-
Page 18: 200 C-Initial Configuration Using The Setup Wizard
Important: If you do not see the warning dialog or if you cannot connect to the Setup Wizard, reset the SG200 to its factory defaults. See Chapter 3:Troubleshooting. When the appliance connects, the Setup Wizard displays, as shown in the following figure. Blue Coat SG200 Series... - Page 19 Enter information on each screen, as prompted. Each page is described; some pages include mouse-over help. If you entered network settings from the serial console, they are already filled in. To complete the Setup Wizard you must: Enter the console access information. Enter the CLI Enable password.
-
Page 20: Section B: Placing The Sg200 Into The Network
LAN and a router or firewall connected to the WAN. If you do not know how to place the SG200 into your own network, consult with your IT administrator. For less common network configurations, such as using WCCP or a Layer 4 switch, refer to the Blue Coat ProxySG Configuration and Management Guide Suite. To Place the SG200 into the Network: Connect the SG200 to the WAN—connect one end of an Ethernet cable (straight or crossover... -
Page 21: Section C: Initial Configuration Using A Direct Serial Port Connection
Section C: Initial Configuration Using a Direct Serial Port Connection This section describes how to configure the SG200 using a direct serial port connection. Before configuring the SG200 using the serial port connection, you must place the SG200 into the network as described in Section B: “Placing the SG200 into the Network on page 20 The serial port connection setup differs by model:... - Page 22 Note: If you have removed the pass-through card, you are asked if you want to configure a software bridge. If you enter YES, you must configure at least one bridge port and associate a network interface with it. Blue Coat SG200 Series...
- Page 23 Welcome to the ProxySG Appliance Setup Console --------------------- (page 1 of 5) -------------------- Press <ESC> at any time to return to the main menu DIRECTIONS: This setup console is used to assign IP addresses to the ProxySG Appliance. After assigning the IP addresses you can connect to the command line interface or Web interface to perform additional management tasks.
- Page 24 If you continue and enable the secure serial port it will not be possible to enter the setup console without the setup password. If the setup password is lost, assistance from Blue Coat Systems will be required and all system configuration may be lost. It is recommended that this password be stored in a physically secure location.
- Page 25 Management Console (under Authentication). You can add or remove IP addresses or you can enable or disable workstation restrictions. Refer to Volume 5: Securing the ProxySG of the Blue Coat ProxySG Configuration and Management Guide Suite for details. On page 4, press <Enter> or type if you do not want to enter a forwarding host at this time, or type to enter a forwarding host.
- Page 26 When you have set the basic networking parameters and connected the SG200 to the network, you are ready to fully configure the appliance. For a list of all CLI commands, refer to the Blue Coat ProxySG Command Line Reference. For information about configuring and administering the SG200 (including information about setting policies that will explicitly grant or deny proxied transactions), refer to the Blue Coat ProxySG Configuration and Management Guide Suite.
-
Page 27: 200 C-Configuring The Sg200 Using A Direct Serial Port Connection
200 C—Configuring the SG200 Using a Direct Serial Port Connection If your SG200 is a 200 C, use the following procedure to configure it with a direct serial port connection. Use a standalone serial terminal or a PC and the SG200 command-line interface (CLI) to perform a first-time configuration of the following basic network information: •... - Page 28 IP gateway: 10.25.36.1 DNS server: 101.52.23.101 Would you like to change any of them? Y/N [No] N Figure 2-16: Initial Setup—Page One On page 2, you are asked if you want to finish configuration using the Setup Wizard. Blue Coat SG200 Series...
- Page 29 --------------------- (page 2 of 5) -------------------- A comprehensive Setup Wizard is available if you use your Web browser. You can either use the Web Setup Wizard or you can continue the initial configuration using this serial console. Note that this serial console initial configuration method contains a subset of the configuration options available in the Web Setup Wizard.
- Page 30 If you continue and enable the secure serial port it will not be possible to enter the setup console without the setup password. If the setup password is lost, assistance from Blue Coat Systems will be required and all system configuration may be lost. It is recommended that this password be stored in a physically secure location.
- Page 31 When you have set the basic networking parameters and connected the SG200 to the network, you are ready to fully configure the appliance. For a list of all CLI commands, refer to the Blue Coat ProxySG Command Line Reference. For information about configuring and administering the SG200 (including information about setting policies that will explicitly grant or deny proxied transactions), refer to the Blue Coat ProxySG Configuration and Management Guide Suite.
-
Page 32: Section D: Configuring The Sg200 From A Remote Location
To Enter Configuration Parameters from a Remote Location: Enter the following URL into your browser: http://download.bluecoat.com/initial-remote/initial-remote.html The SG200 Initial Configuration Setup for Remote Appliances window opens. Enter the network parameters for the remote appliance. Figure 2-22: Remote Initial Configuration Page—Network Parameters Blue Coat SG200 Series... - Page 33 Enter the Console Account username and password; enter the Enable (privileged mode) password. • If you enter the passwords in plain text, click for each password. hash the password • If you enter the passwords in hashed format, select for each password. password is in hashed format A hashed password must be in the BSD MD5 password format.
- Page 34 For more information about this option, refer to Volume 7: The Visual Policy Manager and Advanced Policy Tasks of the Blue Coat ProxySG Configuration and Management Guide Suite. Figure 2-24: Remote Initial Configuration Page—Default Policy for Proxied Services (Optional) Secure the serial port: select and enter the password.
- Page 35 Note: Do not select the Secure the Front Panel Display option; the SG200 Series Appliance does not have a front panel display. Click Generate URLs • If a dialog appears with the message , click and correct the errors in the Initial Errors Found Configuration page.
- Page 36 When you have set the basic networking parameters and connected the SG200 to the network, you are ready to fully configure the appliance. For a list of all CLI commands, refer to the Blue Coat ProxySG Command Line Reference. For information about configuring and administering the SG200 (including information about setting policies that will explicitly grant or deny proxied transactions), refer to the Blue Coat ProxySG Configuration and Management Guide Suite.
-
Page 37: Section E: Logging On To The Sg200
Section E: Logging on to the SG200 After you have performed the initial configuration and connected the SG200 to the network, you must log on to the SG200 to fully configure the appliance. There are two ways to do this: •... - Page 38 Click on any screen Help to display information for that screen. The online help contains the complete text of the Blue Coat ProxySG Configuration and Management Guide Suite. Once you are in the online help, use the...
- Page 39 End with CTRL-Z. SGOS#(config) Refer to the Blue Coat ProxySG Configuration and Management Guide Suite or the Blue Coat ProxySG Command Line Reference for information about using the CLI to configure the SG200. To Log on to the SG200 CLI Using an SSH Client: Note: You must already have an SSH Client installed before proceeding with the following steps.
- Page 40 Blue Coat SG200 Series...
-
Page 41: Chapter 3: Troubleshooting
Chapter 3: Troubleshooting This chapter describes how to isolate and solve common problems during the installation of the SG200. A Network Link is Not Established At the back of the appliance, each of the two network connections has two LEDs—the LED on the right flashes amber to indicate network activity and the LED on the left glows green to indicate a functional network connection. -
Page 42: The Initial Configuration Page Is Not Accessible
If the SG200 does not power on, check that the power supply adapter is fully inserted into the back of the SG200 and that the power cable is fully inserted into the power supply adapter and a working electrical outlet. Blue Coat SG200 Series... -
Page 43: Cannot Access The Serial Console
Cannot Access the Serial Console If you have connected a serial cable to the SG200 but you cannot open the serial console, do the following: • Check cable connections. • Check configuration information at the terminal emulator for the correct settings (see “200 A and 200 B—Configuring the SG200 Using a Direct Serial Port Connection”... - Page 44 “5.1.1.x—To Identify a System Problem or Failure through the CLI:” on page 45. Log on to the SG200 CLI (see “Logging on to the SG200 CLI” on page 38 for information). From any CLI mode, enter the following command: sgos# show environmental Blue Coat SG200 Series...
- Page 45 The environmental statistics display. These include the range for upper and lower critical readings for each environmental statistic followed by the current reading and threshold status. SGOS#(config) show environmental Environmental Sensor Information Baseboard Temperature # 1 : Temperature Reading: 31.7 C Current Threshold Status : NOMINAL -- OK % UPPER CRITICAL : 75.0...
-
Page 46: A Security Warning Appears For The Initial Configuration Web Page
Use a pen to push in the reset button—hold it in until the appliance powers off (about five seconds). The appliance performs a soft restart. The power LED turns amber during the restart. Wait until the reset is complete (about one minute) before trying to complete the initial configuration. Blue Coat SG200 Series... -
Page 47: Creating A Static Route To The Sg200
The SG200 Series Appliance comes with a pass-through card—a 10/100 dual port Ethernet adapter designed by Blue Coat to provide an efficient fault-tolerant bridging solution. If this card is installed on a SG200, SGOS detects the card upon system bootup and automatically creates a bridge—the two Ethernet ports on the appliance serve as the bridge ports. - Page 48 You might need to push the SG200 chassis away from you at the same time. Lift the cover up and off. Loosen the cover screws and use them to remove the cover Figure 3-9: Remove the Rack-Mounting Brackets and the Cover Blue Coat SG200 Series...
- Page 49 Locate the pass-through card and remove the pass-through-card screw: if you are facing the front of the SG200, the pass-through card is located near the back of the SG200 on the left. Remove this screw from the pass-through card Front of the SG200 Figure 3-10: Remove the Pass-Through Card Screw Remove the pass-through card (grasp it on two sides and lift up until it disconnects).
- Page 50 One of the proxies must be designated with a higher priority (a master proxy). Refer to Volume 2: Getting Started in the Blue Coat ProxySG Configuration and Management Guide Suite for information. Blue Coat SG200 Series...
-
Page 51: The Sg200'S Certificate Is No Longer Valid After The Ip Address Changes
You must create a new certificate and then edit the HTTPS-Console service to use it. For information about creating a new certificate and editing the HTTPS-Console service, refer to Volume 5: Securing the ProxySG of the Blue Coat ProxySG Configuration and Management Guide Suite. - Page 52 Blue Coat SG200 Series...
-
Page 53: Appendix A: Specifications
Appendix A: Specifications Environmental and Electrical Important: Any modifications to the unit, unless expressly approved by Blue Coat, can void the user’s authority to operate the equipment. Enclosure (Einschließung) 19 inch rack-mountable with optional brackets, desktop, wall mount Height (Höhe) 43.7 mm (1.72 in);... - Page 54 Blue Coat SG200 Series...
-
Page 55: Appendix B: Regulatory Statements
Appendix B: Regulatory Statements Any modification to this product, unless expressly approved by Blue Coat Systems, Inc., could void the user’s authority to operate the equipment. Class A Digital Warning This equipment has been tested and found to comply with the limits for a Class A digital device, pursuant to Part 15 of the FCC rules. -
Page 56: Taiwan Bsmi Notification
Entsorgung gebrauchter Batterien nach Angaben des Herstellers. PRECAUCIÓN: Peligro de explosión si la batería es colocada incorrectamente. Substituya solo con el modelo original o la recomendación del fabricante. Disponga de las baterías usadas según las instrucciones del fabricante. Blue Coat SG200 Series... - Page 57 Connection to ports not defined for normal operation, according to this manual, might result in excessive radiated emissions. The user is then responsible for all corrective action in the event of any problem. Appendix B: Regulatory Statements...
-
Page 58: Declaration Of Conformity
Declaration of Conformity Blue Coat SG200 Series... - Page 59 Index front-panel LEDs adapter port LEDs description of 6 description of 6 initial configuration, see first-time configuration certificate installing the SG200 invalid if SG200 moves or changes IP address 51 mounting on a wall 8 mounting on an equipment-rack 9 logging on to using a direct serial connection 26 placing on a shelf or tabletop 8 logging on to using an SSH client 39...
- Page 60 43 terminal emulator direct serial connection parameters 21 unhealthy status identifying the problem 43 – username configuring remotely 33 configuring using a serial terminal or PC 24 configuring using a Web browser 15 Blue Coat SG200 Series...
Need help?
Do you have a question about the SG200 200 A and is the answer not in the manual?
Questions and answers