EVVA AirKey System Manual
Hide thumbs
Also See for AirKey:
- System manual (217 pages) ,
- System manual (217 pages) ,
- System manual (238 pages)
Table of Contents
Advertisement
Quick Links
Advertisement
Table of Contents

Related Manuals for EVVA AirKey


Summary of Contents for EVVA AirKey
-
Page 2: Table Of Contents
Installing coding stations: See Section 4.6 ..........16 Emergency power device ................16 Commissioning ....................17 Glossary ....................17 Installing the AirKey app ................18 Registering to the AirKey online administration ..........18 Login ......................21 Interactive help ..................22 Installing coding stations ................22 Add credit ....................25 Creating persons ..................26 4.8.1... - Page 3 4.11.2 AirKey wall readers ................38 4.12 Adding Locking components ..............39 4.12.1 Adding Locking components using the smartphone .........39 4.12.2 Adding Locking components using coding stations ........43 4.13 Adding cards, key tags and combi keys using a smartphone .......46 4.14 Assigning persons to media ..............47 4.15...
- Page 4 Locking component protocol .............. 101 5.7.2 Media protocol ................. 103 5.7.3 System event log ................105 Support logins ..................106 5.8.1 Creating support logins ..............106 5.8.2 Blocking support logins ..............107 Help ..................... 109 AirKey app ....................110 Bluetooth components ................110...
- Page 5 Entering PIN codes ................. 113 Encoding media ..................113 Authorisation protocol ................114 AirKey app settings ................115 6.9.1 AirKey app settings on Android smartphones ........115 6.9.2 AirKey app settings on iPhones ............115 6.9.3 Adjusting the hands-free range ............116 6.9.4...
- Page 6 Locking component has trouble identifying or is unable to detect media ..176 14.3 Media no longer identified ..............176 14.4 Unable to unscrew the thumb turn of an AirKey cylinder ......177 14.5 Locking component indicates "Hardware error" ........177 14.5.1...
- Page 7 14.5.2 AirKey wall readers ................178 14.6 The electronic thumb turn is hard to operate .......... 178 15 Important information ................... 179 15.1 System ....................179 16 Konformitätserklärung .................. 180 17 Declaration of Conformity ................182 18 List of figures ....................184 19 Glossary ......................
-
Page 8: Introduction, Overview
General legal notes EVVA concludes the contract on the use of AirKey and Xesar exclusively on the > basis of its General Terms of Business (EVVA-GTB) as well as its General Licensing Conditions (EVVA-ALB) with regards to the software for the product. -
Page 9: Evva Support
EVVA access control systems and can fall back on qualified specialist expertise in this area. Use the EVVA online form for certain types of support requests. We currently provide the online form for the following situations: You have exceeded the maximum attempts to enter credit codes. -
Page 10: System Architecture
System architecture The following figure provides an overview of AirKey locking components and their communication methods. This is followed by descriptions of the individual components. Figure 1: System architecture All transferred data is secured as end-to-end data according to the most recent encryption standards, encrypted from EVVA servers to locking components. -
Page 11: Locking Components
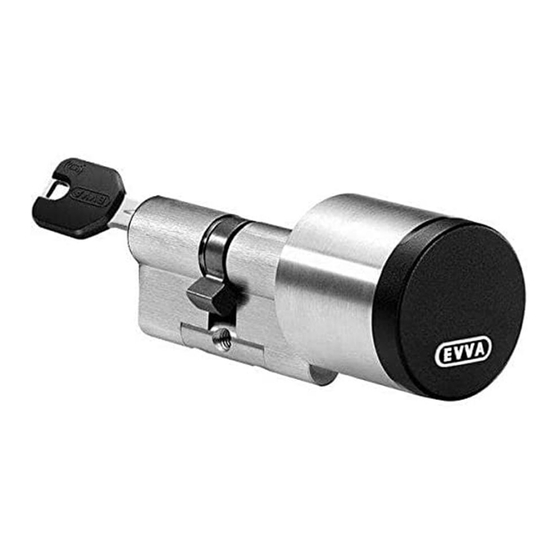
AirKey cylinders are battery-operated locking components. They are certified for indoor and outdoor use. Depending on the specific requirements, AirKey cylinders may also be suitable for use in areas that are critical to security. AirKey cylinders boast mechanical protection from vandalism and manipulation. AirKey cylinders are suitable for installation... -
Page 12: Airkey Wall Readers
AirKey wall readers are connected to the AirKey control unit using CAT5 cables (max. 100 m, loop max. = 2 Ohm) to supply them with power. The AirKey control unit is supplied with power by the mains adapter and in the event of a power cut it features a data buffer for a maximum of 72h, providing the AirKey control unit had previously been in operation for a minimum of six hours. -
Page 13: Airkey App
AirKey wall reader and control unit combinations can be used to operate electronic locking elements, such as motorised cylinders, sliding and swinging doors, etc. Please check carefully to make sure the AirKey product you selected is suitable for your intended application/assembly situation. We have made the required data sheet or... -
Page 14: Airkey Media
Access to the location is necessary because Android 6+ demands the activation of location services to be able to scan for Bluetooth components! If you would like to use Bluetooth functions in the AirKey app, you must activate the location services as well as authorise the app to access this data in the device settings. -
Page 15: Evva Keycredits
The matching KeyCredit package for every application is available from specialist EVVA retailers, tailored to the size and dynamic characteristics of your Access control system. Please refer to the AirKey product catalogue for more detailed information on the available packages. -
Page 16: Installing Coding Stations: See Section 4.6
All Locking components feature an interface at the front of the Locking component, below the EVVA logo. Slightly press towards the inside on the left-hand side of the logo (near the "E") and fold out on the right-hand side (near the "A") to access it. The installed interface is intended for emergency power supply only and it is not required as part of normal operation. -
Page 17: Commissioning
Owner of the AirKey system with a unique customer number. Administrator User role within the AirKey system authorised to carry out all administrative activities within the AirKey online administration. It is possible to create several administrators for one client. A minimum of one administrator must be defined for each Access control system. -
Page 18: Installing The Airkey App
Follow the AirKey app installation instructions on your smartphone. > Registering to the AirKey online administration Register with EVVA using a valid email address to be able to use the AirKey online administration. Open the following page in your browser: https://airkey.evva.com... - Page 19 The Access control system automatically generates one user ID and one registration link and sends it to the email address you stated as part of a registration email. Open your email client. It will contain an email from EVVA AirKey with the subject >...
- Page 20 Enter your date of birth. It is used as a security question to confirm your identity > if you have forgotten your password. We recommend you make your AirKey password as long as possible and do not disclose it. Figure 7: Specifying an AirKey password to complete registration...
-
Page 21: Login
You have now completed the registration process and your access control system has been activated successfully. You can now log on at any time on the AirKey online administration login page. All you need is the user ID from the registration email and the previously defined AirKey password. -
Page 22: Interactive Help
You can browse forwards and backwards within the interactive help file. Figure 10: Interactive help – topping up credit You can also close the interactive help file and get to know the AirKey online administration using the system manual. - Page 23 Figure 12: Installing and starting AirKey coding stations After having clicked the link you have 60 seconds to open the AirKey.jnlp file (see continue step). If the system times out, you must repeat the installation from this step. Alternatively you can also save the Airkey.jnlp...
- Page 24 The local coding station application is automatically quit upon shutting down the computer. Create an application shortcut to automatically start the application upon booting the PC using Java™ Control Panel (Configure Java, application: AirKey Card Reader Proxy; type: Application) and save it in the Auto start folder.
-
Page 25: Add Credit
Figure 17: Configuring the local coding station application List of corresponding menu items: Open EVVA AirKey: AirKey online administration login page link > Activate sound: A beep is output following component updates using a coding >... -
Page 26: Creating Persons
Figure 19: Add credit Enter the code you uncovered by scratching the KeyCredit-Card in the "Add > credit" application window. Figure 20: Entering credit codes Click Add credit. > If you entered the code correctly, the system confirms your input and adds the credit. Figure 21: Add credit Creating persons Each person designated to be granted authorisation to the Access control system must be... - Page 27 Alternatively, go to the Home screen and select the Persons -> Create person > tile. You can also select Media & persons -> Create person in the left-hand > navigation bar Or select the "Send a Key" button and click Create new. This function allows >...
-
Page 28: Importing Personal Data
Figure 24: Importing person lists The parameters of the personal data table are identical to the Creating persons section in the AirKey online administration i.e., column A is the first name , column B is the last name, column C is the identifier , etc. The CSV file is imported into the AirKey online... - Page 29 Figure 25: Importing persons – persons list Figure 26: Importing persons – fields on the persons list CSV file properties with personal data for import: The first row is always ignored. For this reason, we recommend you enter the field >...
- Page 30 > the first name + last name + password (fields 1-3) combination already exists in the AirKey online administration, even if the remaining fields (fields 4-13) are different. These persons are not imported. Persons are interpreted as duplicates within the CSV file if the combination of first >...
- Page 31 > rows. Click Close. > Figure 29: Importing persons – result The AirKey online administration automatically forwards you to the overview list of > persons. Assign the desired access authorisations to the corresponding persons individually > using the familiar process described in Assigning media to persons.
-
Page 32: Creating Smartphones
identical access authorisations can be quickly and easily duplicated. Please refer Duplicating media for more information. Creating smartphones You must create or add smartphones to your Access control system before you can manage them as part of your Access control system. On the Home screen, in the grey bar of the Media and persons section, click >... - Page 33 An error message will appear if the telephone number is invalid or the telephone number has already been created. Now you are in the details section of this smartphones. Click Create registration code if you have not yet created a registration code. ...
-
Page 34: Registering Smartphones
PIN code lock: Shows the status of whether PIN code protection is on or off in > the AirKey app of this particular smartphone. If it is active and the person has forgotten their PIN code, you can reset it here. - Page 35 In this event, please contact the Access control system administrator from whom you received the registration code. If users delete the AirKey app or app data, there is the option to once again assign authorisations that had already been granted to the smartphone without using additional credits.
-
Page 36: Send A Key" Function
Enter the registration code in the AirKey app and the smartphone is registered to > the Access control system. If your smartphone had previously been registered to an Access control system and it had not been correctly removed from this system when the... - Page 37 Click Continue once you have completed all mandatory fields. A text message is immediately sent to the corresponding user containing a link to the AirKey app to register for an Access control system. Figure 39: "Send a Key" – creating persons...
-
Page 38: Installing Locking Components
Access control system to prevent locking users in or out. 4.11.2 AirKey wall readers Please note the assembly manual enclosed in the packaging to assemble the AirKey wall reader. Our homepage additionally provides a drilling template or the assembly video at http://video.evva.com/tutorials/airkey/eawlru/eawlru-1/en/... -
Page 39: Adding Locking Components
Smartphones with installed AirKey app and enabled maintenance > authorisation can unlock Locking components in factory state Unlocking attempts are not recorded in factory state. > Locking authorisations have only been assigned after having added > the Locking component to a Access control system. - Page 40 Figure 43: AirKey app – connecting to components (using NFC for Android smartphones/using Bluetooth for Android smartphones/using Bluetooth for iPhones) Figure 44: AirKey app – connecting to components Hold the smartphone to the Locking component in factory state or select the >...
- Page 41 > component if the smartphone with active maintenance mode is registered in several Access control systems. Figure 47: AirKey app – adding Locking components Android/iPhone Tap Add. > Now once again hold the smartphone to the Locking component to complete the >...
- Page 42 AirKey online administration. Figure 48: AirKey app – Locking component added The Locking component appears in the Locking components overview list in the AirKey online administration. If the GPS coordinates were determined when the Locking ...
-
Page 43: Adding Locking Components Using Coding Stations
4.12.2 Adding Locking components using coding stations Proceed as follows to add Locking components using coding stations: On the Home screen, select the Cylinders or Wall readers tile. > Click the Add Locking component button . > Alternatively, select Access control system-> Add locking components in the >... - Page 44 Figure 52: Adding Locking components – assigning names Follow the on-screen instructions and place the Locking component on the coding > station. Figure 53: Adding Locking components A confirmation prompt appears and the Locking component is added to the Access >...
- Page 45 Figure 55: Locking component details The Locking component is now no longer in factory state. Media in factory state or smartphones with maintenance authorisation are consequently no longer authorised to unlock the Locking component. Add a medium or smartphone to the Access control system and assign valid authorisations to said Locking components to continue to be able to unlock them.
-
Page 46: Adding Cards, Key Tags And Combi Keys Using A Smartphone
Bluetooth with an Android smartphone or an iPhone. Tap the Connect to component icon. > Figure 57: AirKey app – connecting to components Hold the smartphone to the medium in factory state. > A connection to the medium will be established. -
Page 47: Assigning Persons To Media
4.14 Assigning persons to media As part of the continue step, you must assign the medium to a person within the AirKey online administration to be able to assign authorisations. This is the only way to link persons to access events. - Page 48 Select the medium that has not been assigned to a person yet in the media list. > Continue to the No person button click the icon > Figure 61: Assigning persons Select the person from the persons list you would like to assign this medium to. >...
-
Page 49: Assigning Authorisations
Alternatively, you can also assign media to persons using the medium. Please refer to the Assigning media to persons section for more detailed information. 4.15 Assigning authorisations Please note that you can only assign authorisations once a medium has been assigned to a person. Select Media &... -
Page 50: Permanent Access
4.15.1 Permanent access Permanent access indicates access is granted at any time. Specify a start and end date to restrict the authorisation. Figure 65: Assigning permanent access authorisations Specify the period of permanent access. > You can choose between unrestricted, permanent access or permanent access with a specified start and end date. - Page 51 Figure 67: Assigning periodic access The system shows a weekly calendar allowing you to define up to four periods for each day of the week. Specify the period of periodic access. > Figure 68: Assigning periodic access Directly highlight the period in the calendar or click Add periodic access. >...
-
Page 52: Temporary Access
Figure 69: Adding periodic access Enter the desired period and click Save. > Also click Save in the "New authorisation – Periodic access" window. > 4.15.3 Temporary access Assign single access authorisations, if access must be restricted to a certain day and a certain period. -
Page 53: Individual Access
4.15.4 Individual access Assign individual access authorisations if you require a combination of permanent access, single access and periodic access. Figure 72: Assigning individual access The "New authorisation – Individual access" dialogue window shows any individual > access authorisations you have already assigned. Click an entry in a row to change the authorisation. -
Page 54: Creating Authorisations
Permanent access and periodic access periods must not overlap. > It is possible to define a maximum of one individual access period per > day. If individual access and periodic access periods overlap, both access > types are valid. You can configure a maximum of eight individual authorisations. >... - Page 55 This section described how to commission the Access control system and set it up correctly. The processes described herein illustrate the first steps and enable management of your Access control system. Please refer to the following sections for a more detailed description of individual AirKey online administration functions and the AirKey app.
-
Page 56: Airkey Online Administration
> The AirKey online administration login page opens. Enter the user ID you received in the "EVVA AirKey registration" email. > Enter your personal AirKey password and confirm with Login. > Once you have logged on, the system opens the Home screen. It provides an overview of your AirKey access control system. - Page 57 "Forgot your passoword?" dialogue window and click Reset password. Figure 80: Forgot your password? You will receive an automated email from EVVA AirKey with the following subject line: "EVVA AirKey online administration – password reset". Open the email from EVVA AirKey.
-
Page 58: Airkey Logout
Despite having integrated an automatic logout feature after 30 minutes we highly recommend administrators always log out after having completed any due tasks in the AirKey online administration using the Log off button. Administrators Administrators have comprehensive rights to manage the entire access control system. -
Page 59: Creating Administrators
Please refer to the Administrators main menu for the administrator management functions. Figure 84: Administrators main menu 5.3.1 Creating administrators Administrators can exclusively be created by other administrators. In the main menu select Administrators -> Create administrator. > Complete the fields in the form. Fields highlighted by * are mandatory fields. >... -
Page 60: Editing Administrators
The system reports "Administrator saved successfully" once you have created an administrator. Now the administrator you created receives an email from EVVA AirKey with an activation link. The data is deleted and the activation link is rendered invalid if it is not activated within 48 hours. -
Page 61: Deleting Administrators
main menu select Administrators -> Administrators. > The system shows a list of all valid administrators. Search for administrators, sort columns and restrict the number of entries shown per page in the list on screen as well as export the list to a CSV file. Click the administrator whose details you would like to change. -
Page 62: Access Control System Settings
AirKey online administration. Access control system settings Configure basic settings in the AirKey online administration settings. These have been described in the following sections. On the Home screen, click the Settings tile. -
Page 63: Default Values (For All Recently Added Locking Components)
Even if hands-free mode with Bluetooth is activated, you still have to turn the AirKey cylinder manually and unlock or lock the door. For details, refer to Operating locking components. - Page 64 Figure 92: Default values for new Locking components Simply click the drop-down menu and select the correct time zone from the list if you would like to change the time zone for the entire Access control system. On the Home screen, click the Cylinders or Wall readers tile, select the desired Locking component and browse to the Settings tab if you would like to change the time zone of one Locking component.
- Page 65 Locking component locks or unlocks automatically. For instance, specify that office mode automatically ends each night at 5 pm in an office building. For AirKey cylinders this not only means the door has been locked, but also that the cylinder has been disengaged.
-
Page 66: Public Holidays
Define up to 80 public holidays per year in the Public holidays tab (current year and two following years). In AirKey the term "Public holiday" can be interpreted as a general bank holiday or a period of several days, such as company holidays or school holidays (may reoccur). - Page 67 Effects of the public holiday calendar: 1. Periodic access authorisations are not valid on public holidays. 2. Automatic office mode is not taken into account on public holidays. Click the Activate button on the right-hand side to globally enable the public holiday calendar.
-
Page 68: Access Control System
Click the Add public holiday link to add a further public holiday on this day. You can enter several public holidays on one calendar day. Click the pen icon to edit the public holiday. Click the bin to delete the public holiday. Figure 101: Editing public holidays Figure 102: Deleting public holidays As soon as you have entered deadlines, (company) holidays or public holidays in the... -
Page 69: Locking Component Overview
Figure 104: Access control system 5.5.1 Locking component overview For an overview of all Locking components within your Access control system from the Home screen click the Cylinders or Wall readers tile or go to Access control system-> Locking components in the main menu. The Home screen shows how many cylinders or wall readers have been integrated into your Access control system at a glance. -
Page 70: Adding Locking Components: See Section4.12
Export the Locking component list to a CSV file for further processing . > AirKey allows an authorisation of Locking components for external Access control systems. The list differentiates between your own and external Locking components. Please refer to the... - Page 71 Go to the Areas section to edit assigned areas for selected Locking components. > Figure 107: Areas You can optionally also authorise Locking components for other Access control systems. You can manage the corresponding authorisations in the "Authorisations" section. Please refer to the Working with several Access control systems section for more detailed...
-
Page 72: Removing Locking Components
You can specify manual office mode for each Locking component. Select an > Locking component and you will have the option to specify automatic office mode. Please also refer to Default values (for all recently added Locking components). You can adapt personal event log entries for each Locking component. The default >... -
Page 73: Areas
Figure 112: Removing Locking components Click Remove Locking component to confirm the security prompt. > Figure 113: Security prompt A confirmation prompt and a maintenance task appear, indicating the Locking > component must be removed from the Access control system. The process has only been completed once the Locking component has been updated using a smartphone with maintenance authorisation or an optionally available coding station. -
Page 74: Creating Areas
Click the corresponding column heading to determine it as the sorting criterion. > Export the area list to a CSV file for further processing . > Figure 114: Access control system-> Areas Select the desired area from the list to view the details of the selected area. >... - Page 75 Select the area from the list to which you would like to add Locking components. > The details of the selected area appear. Area status indicates whether or not > all Locking components within the area are up to date. The Assigned Locking component list lists all Locking components assigned to the area.
-
Page 76: Cancelling Locking Component Assignments To An Area
Alternatively, you can also directly edit the area assignments of Locking components in the Locking component details. Please refer to the Editing Locking components section for more detailed information. 5.5.8 Cancelling Locking component assignments to an area Proceed as follows to cancel assignments of one or more Locking components to an area: On the Home screen select the Areas tile or click Access control system ->... -
Page 77: Deleting Area
station. You have completed assigning Locking components to areas after having updated. After having updated, persons with media featuring authorisations for this area will be unable to unlock the Locking component for which you cancelled the assignment. Alternatively, you can also directly edit the area assignments of Locking components in the Locking component details. -
Page 78: Authorisation Overview
For this reason, initially cancel all Locking component assignments to the area and subsequently repeat the illustrated process. Please refer to the Cancelling Locking component assignments to an area section for more detailed information on assigning Locking components to areas 5.5.10 Authorisation overview The authorisation overview shows all authorisations of media for each individual Locking component. -
Page 79: Maintenance Tasks
Click a person's name to directly view this person’s authorisation for the medium. Figure 124: Editing media 5.5.11 Maintenance tasks Certain functions influence the Locking component configuration. Such changes to the configuration are known as maintenance tasks. Consequently, maintenance task relate to Locking components where the status is not up to date. - Page 80 Figure 125: Maintenance tasks Prioritisation of the maintenance tasks is saved per AriKey system/client and also applies smartphone with installed AirKey activated maintenance authorisation. Click Prioritisation of maintenance tasks. > Customers have different demands – depending on the applications, drag and >...
-
Page 81: Media & Persons
Media & persons The Media & persons main menu is intended to manage all persons, media and authorisations within the Access control system. Figure 127: Media & persons 5.6.1 Overview of persons On the Home screen, select the Persons tile or click Media & persons-> Persons in the main menu for a list of all created persons including the number of media they own as well as their media states. -
Page 82: Deleting Persons
Click the name of the person on the person list for which you would like to change > details. Change the corresponding data. > Click Save. > 5.6.4 Deleting persons You can delete persons if you would like to remove them from your Access control system. -
Page 83: Assigning Media To Persons
5.6.5 Assigning media to persons Assign the medium to a person to be able to assign authorisations. This is the only way to link persons to access events. On the Home screen, select the Persons tile. > Alternatively select Media & persons -> Persons in the main menu. >... -
Page 84: Overview Of Media
The details are shown after having selected the medium. If required, click Back and select a different medium. Click Assign medium to complete the process. > Figure 133: Assigning media to persons Alternatively, you can also assign media to persons using the medium. Please refer to the Assigning persons to media section for more detailed... -
Page 85: Creating Media
5.6.7 Creating media You must create a medium in your Access control system before you can manage it as part of your Access control system. On the Home screen, in the grey bar of the Media and persons section, click >... -
Page 86: Editing Media
We strongly recommend to create a sufficient number of preconfigured media (cards, key tags or combi keys) featuring permanent authorisations without an expiry date (emergency media) and keep these safe to be able to operate the Access control system regardless of the AirKey online administration. Please refer to Authorisations for more detailed information on assigning authorisations. -
Page 87: Assigning Persons To Media: See Section 4.14
5.6.11 Assigning persons to media: See Section 4.14 5.6.12 Authorisations Authorisations control access of persons to Locking components. Media must have already been assigned to persons to be able to create authorisations for media. Please refer to Assigning media to persons for more information on how to assign media to persons. -
Page 88: Assigning Authorisations: See Section 4.15
See Section Fehler! Verweisquelle konnte nicht gefunden werden. 5.6.15 Changing authorisations You can change authorisations in the AirKey online administration at any time. On the Home screen, select the Smartphones or Cards tile. > Alternatively select Media & persons -> Media in the main menu. -
Page 89: Deleting Authorisations
Click Change access . > Figure 141: Changing access Enter the corresponding values for the respective access type. > Click Save. > You must have credit on your KeyCredit account to change authorisations. Click 1 Changed authorisation can be created. Please refer to the Creating >... - Page 90 Figure 143: Deleting authorisations Click Delete authorisation. > Click Delete authorisation to confirm the security prompt. > Figure 144: Deleting authorisations Pull to refresh and update the medium on smartphones or, if you are using cards, > key tags or combi keys, with coding stations and complete the process. KeyCredits will not be deducted from your account for deletions.
-
Page 91: Deactivating Media
5.6.17 Deactivating media Use the "Deactivate medium" function if there is a security risk and you intend to render all of the medium's authorisations invalid, e.g. if a medium has been lost or damaged. On the Home screen, select the Smartphones or Cards >... -
Page 92: Removing Deactivated Media
Deactivations apply to your Access control system only. If a smartphone has been registered in several Access control systems, the smartphone's status remains up to date in the other Access control systems and the medium is not deactivated. If one person has registered one smartphone in several Access control systems, contact all administrators of the affected Access control systems to completely deactivate the smartphone. -
Page 93: Reactivating Media
A message appears notifying of successful deletion and the medium is then no > longer shown in the Access control system. This process is irrevocable. Media removed using this process are no longer listed in the Access control system and they can consequently no longer be used. -
Page 94: Duplicating Media
Click Reactivate medium and confirm both security prompts (depending on > whether or not you would like to restore authorisations). Figure 152: Reactivating media — including restoring authorisations A confirmation prompt completes successful deactivation. Maintenance tasks are once again created for these Locking components, providing there are blacklist entries on the Locking component for this particular reactivated medium. -
Page 95: Emptying Media
One KeyCredit will be deducted from your account for this process. Consequently, you require credit. If your AirKey online administration involves a high number of persons (see Importing personal data) with identical authorisations, you can quickly assign a high number of media featuring the same authorisations to the corresponding persons using the "Duplicate medium"... -
Page 96: Cancelling Assignments
Alternatively select Media & persons -> Media in the main menu. > Click the medium you would like to clear in the overview list. > Click More… -> Empty. > Click Empty medium to complete the process. > Figure 155: Emptying media Figure 156: Emptying media –... - Page 97 Click the name of the person on the person list for which you would like to cancel > assignments to media. All media assigned to a person are shown on the left, below the name. Select the medium for which you would like to cancel assignments. Figure 157: Assigned media Click More…...
- Page 98 Delete any authorisations on the medium first. You can also use the Empty medium for the Cancel assignment function to clear all function authorisations of the medium. If there are authorisations on the medium and you run the Cancel assignment function, the system shows an alternative dialogue.
-
Page 99: Removing Media
The system shows a list of all created persons. Select the desired person and click Continue to confirm. Figure 162: Changing persons Click Change person to confirm the security prompt and successfully complete the process. Figure 163: Changing persons A message indicating the process was successful appears upon completing the process successfully. -
Page 100: Protocols
Locking component, but it had been assigned other authorisations within the system) in addition to completed access events and technical events. Any events transferred to the AirKey online administration remain saved there for an unrestricted period of time. We recommend you reload the event logs regularly to be able to have the most recent event log entries available. -
Page 101: Locking Component Protocol
We explicitly point out that this Access control system may be subject to mandatory reporting/approval processes depending on the applicable, legal stipulations, particular data protection legislation. As a consequence, EVVA Sicherheitstechnologie GmbH shall not assume any liability for or guarantee operation in compliance with valid, legal stipulations. - Page 102 > event log to a CSV file. You can then process this export regardless of the AirKey online administration. All required information, such as date and time, door designation (additional...
-
Page 103: Media Protocol
Regularly update Locking components to ensure all event log entries have been transferred from Locking components to the online administration. The recommended update intervals depend on the frequency the Locking components used. Observe Values limits Locking components. Events where access is denied are saved only if the medium is authorised for the Locking component, but the authorisation was not valid at the time of the access event (e.g. - Page 104 Enter a minimum of three characters in the search field for a targeted search. > Set filters, such as "Not authorised" . This will list entries where access was > denied. Sort the list by date and time . >...
-
Page 105: System Event Log
A prompt appears asking you whether to delete merely this specific event log > entry or all of this person's entries. Select the desired option. Enter the reason for deleting the event log entry. > Tick I would like to irrevocably delete the log entry. >... -
Page 106: Support Logins
Support logins Creating support logins allows you to create temporary administrators in the event that you need support for AirKey. Users can view all Access control system data with support logins. Persons with support logins are granted administrator authorisations during the validity period. -
Page 107: Blocking Support Logins
Figure 172: Support login lists Click Create support login. > Complete the form. > Fields highlighted by * are mandatory fields. Logins can be assigned for periods between 1 and a maximum of 24 hours. Click Save. > The system generates the support login, user name and password. Figure 173: Creating support logins You will no longer be able to view the password after having closed the dialogue window. - Page 108 Proceed as follows to cancel support logins prematurely: In the main menu select Administrators ->Support logins. > The support logins list shows whether there are currently valid support logins and their validity period. Figure 174: Support logins overview Select the recipient of the support login for whom you would like to cancel the >...
-
Page 109: Help
Help The Help section in the main menu provides additional descriptions. These are also available on the EVVA AirKey product website at http://www.evva.at/products/electronic- locking-systems-access-control/airkey/system-overview/en/. Please contact your specialist EVVA retailer if you require any additional assistance. -
Page 110: Airkey App
AirKey app This section provides an overview of the functions within the AirKey app available on your smartphone. You must comply with the following requirements to use your smartphone for AirKey: The smartphone meets the system requirements. > The AirKey app has been installed successfully on your smartphone. - Page 111 Figure 177: AirKey app — authorisation overview Select one of the authorisations to view the details of the corresponding > authorisation. This section shows the location data (GPS coordinates or address) as a link. Tap the link to be automatically forwarded to the map provider you set on your smartphone by default.
-
Page 112: Maintenance Tasks: See Section 6.12
The Locking component provides visual and audible feedback. > A confirmation appears . > Figure 181: Office mode confirmation message Activating office mode in AirKey components and media increases components' power consumption. Exclusively activate office mode in AirKey components and media that actually use this function. -
Page 113: Entering Pin Codes
Entering PIN codes You can temporarily save an active PIN code for a certain time within the AirKey app by using the Enter PIN function. Open the menu in the AirKey app and select Enter PIN. > Enter the correct PIN code and select Unlock. -
Page 114: Authorisation Protocol
Access control system administrators for your smartphone. This event log is maintained at all times, regardless of the various settings in the AirKey online administration and AirKey app. Figure 185: Authorisation protocol... -
Page 115: Airkey App Settings
6.9.1 AirKey app settings on Android smartphones The Settings menu item in the AirKey app shows basic information about your Android smartphone. For instance, this section shows whether or not NFC or Bluetooth have been activated. Tap one of the two entries to open the device settings of your smartphones. In the continue step, specify whether you would like to activate Bluetooth for AirKey. -
Page 116: Adjusting The Hands-Free Range
Locking components) here. The standard range is approximately 50 - 70 cm, however it depends on the smartphone. Cylinder range Initially touch cylinders to wake them up. The AirKey app then shows all active > AirKey cylinders with Bluetooth that are currently in range. -
Page 117: Unlocking From Notifications
Tick the "Hands-free mode" function to activate it. However, it is necessary to activate the hands-free function for the entire Access control system in the AirKey online administration. Please refer to General for more information. -
Page 118: Security Functions
It may have already been assigned as part of Access control system registration. EVVA recommends assigning a PIN code. Make sure your PIN code is as long as possible and you do not disclose the PIN code. -
Page 119: Changing Pin Codes
Open the menu in the AirKey app and select Settings-> Security functions. > Activate the "AirKey encryption" option. > Define a PIN code, re-enter it and select Confirm. > Figure 191: AirKey app – activating PIN codes Re-enter the PIN code and select Confirm to complete the process. -
Page 120: Deactivating Pin Codes
Enter the current PIN code and select Confirm. > Figure 193: AirKey app – deactivating encryption Proceed as follows in the AirKey online administration to deactivate the PIN code if you do not know it: Log in to your Access control system as an administrator. -
Page 121: Notifications
Activate this setting to receive corresponding push notifications to the lock or start screen of your smartphone as soon as your smartphone is within range of Bluetooth Locking components. Use these notifications to unlock the corresponding door without having to manually open the AirKey app (details in the Unlocking from notifications section). - Page 122 AirKey online administration. Figure 198: Notifications for changes to authorisations If the AirKey app is not open, you will receive a corresponding push notification on the lock or start screen of your smartphone.
-
Page 123: Adding Access Control Systems
6.9.8 Info Within the AirKey app there is the option to view the currently installed AirKey app version, the smartphone registration details, the media ID of the smartphone and the EVVA General Licensing Conditions. -
Page 124: Connecting To Components
The smartphone updates automatically as soon as you start the AirKey app or it updates once a day if you have already started the AirKey app. During the update the bottom section of the AirKey app shows status information regarding the update. -
Page 125: Special "Maintenance Mode" Authorisation
Figure 201: AirKey app – connecting to components; Android NFC/Android Bluetooth/iPhone Follow the on-screen instructions and hold the NFC smartphone to the medium or > Locking component/bring the Bluetooth smartphone into range of the medium or Locking component. Figure 202: Updating data Data updated. - Page 126 The Maintenance tasks menu item is additionally enabled in the AirKey app. Figure 204: "Maintenance tasks" menu item in the main menu Select it to view a list of maintenance tasks for Locking components within your >...
- Page 127 Figure 205: Maintenance tasks As the maintenance engineer you are responsible for regularly checking maintenance tasks to be able to quickly update any Locking components where updates are required. If you come within range of a Bluetooth Locking component (cylinder wall reader ) with a smartphone featuring maintenance authorisation, the icon of this Locking component is highlighted in yellow (e.g.
-
Page 128: Adding Locking Components
6.14 Removing Locking components The Locking component or media (except for smartphones) must have been removed from the AirKey online administration (see Removing Locking components Removing media) and the smartphone must be in Maintenance mode for you to be able to remove Locking components. - Page 129 Locking component to which you would like to establish a connection and then select Connect . Figure 207: AirKey app – connecting to components; Android NFC/Android Bluetooth/iPhone Follow the on-screen instructions and hold the NFC smartphone to the medium or >...
- Page 130 Figure 209: Removing Locking components After having successfully updated, the Locking components and media are once again in factory state. If you would like to remove access media from the Access control system using an iPhone, this process is identical to that described in Encoding media in terms of adding. Select the Bluetooth Locking components you would like to update from the list of >...
-
Page 131: Protocol Data In The Airkey App
Android smartphone with NFC functionality. 6.15 Protocol data in the AirKey app You can enable the authorisation to show event log data on smartphones via the AirKey online administration. Event log data can be viewed regardless of whether or not... - Page 132 Activate or deactivate the display of event log data within the AirKey online administration in the smartphone details section. Please refer to Editing media for more detailed information on editing media.
-
Page 133: Excursus: Hands-Free At A Glance
For this purpose, go to the Home page and select the Settings tile to subsequently activate Hands-free mode in the "General" tab. Figure 214: Online administration settings Activate Hands-free mode in the main menu of the AirKey-App in the Settings > menu. - Page 134 > In the cylinder sub-menu, the AirKey-App lists all active Bluetooth cylinders in range that have been woken up by having touched them. Select the relevant cylinder and move away from it as far as required to activate the automatic smartphone identification.
-
Page 135: Operating Locking Components
You are unable to unlock Locking components using NFC when the screen lock is active or during an active call. However, the AirKey app does not necessarily have to be running or active in the foreground to be able to... - Page 136 Hold the medium to the Locking component. The data transfer distances depend > on the medium type and usually amount to a few millimetres. Pay attention to the visual signals on the Locking component. Do not remove the > medium before the Locking component emits a green signal (A blue light merely indicates communication between medium and Locking component).
-
Page 137: Access Control System Operation And Maintenance
Access control system to exchange data between AirKey online administration and Locking components. You can update with smartphones or optionally available coding stations. Updates with the smartphone merely require the installed AirKey app and registration in any Access control system. The following tasks are completed upon updating Locking components: ... - Page 138 Proceed as follows to update Locking components using coding stations: Log in to your Access control system and ensure the coding station is connected > and has been selected in the AirKey online administration. Place the Locking component on the coding station. >...
-
Page 139: Updating Smartphones: See Section 6.9
See Section 6.10 Updating media You can update any AirKey medium, regardless of its association to an Access control system. You can update with Android smartphones or optionally available coding stations. Updates with the smartphone merely require the installed AirKey app and registration in an Access control system. - Page 140 A corresponding message will appear once the process has been completed. When using smartphones to update combi keys directly hold the side of the combi key featuring the RFID icon to the smartphone's NFC antenna aerial. Figure 224: AirKey app updating a medium...
- Page 141 Access control system. Figure 226: Updating your own or external media using coding stations Regularly update your AirKey media. This is the only way to ensure your Access control system remains secure and up to date. Regularly update media to ensure all event log entries have been transferred from media to the online administration.
-
Page 142: Updating Locking Component Firmware
Establishing a connection using Bluetooth (for iPhones): Swipe the component > designation of the the Locking component to which you would like to establish a connection and then select Connect . Figure 227: AirKey app – connecting to components; Android NFC/Android Bluetooth/iPhone Follow the instructions. >... - Page 143 The Locking component is updated and component details are shown. The > component details indicate the component firmware is not up to date. Figure 229: AirKey app – component details Click the Update firmware option on this screen. ...
- Page 144 Do not remove the smartphone from the components you would like to update during transfers. A message indicating the first update step was successful appears once the process is complete. Figure 231: AirKey app – update step successful Remove the smartphone from the Locking component until the Locking >...
- Page 145 Figure 232: AirKey app – successful update Click Close to confirm the confirmation prompt and complete firmware updates. > As a result, the Locking component status is adapted within the entire system. The maintenance task is no longer shown and the correct firmware version is indicated in the Locking component details.
- Page 146 Figure 234: Coding station – AirKey cylinder firmware updates Firmware updates may take several minutes, depending on the Internet connection. Do not remove the Locking component from the coding station during this period. A confirmation prompt completes the first step of the firmware update.
-
Page 147: Updating The Keyring Version Of Media
Within the Access control system the data area on media (e.g. cards, key tags and combi keys) where all data relevant to AirKey has been saved is known as the key ring. If new key ring versions become available for media, this information is shown in the media details of the particular medium, in the maintenance tasks, on the Home screen and upon updating Locking components. - Page 148 > to component icon . Establishing a connection using Bluetooth (for Android smartphones and > iPhones): Select the Encode media menu item from the AirKey app main menu – refer to Encoding media. Figure 238: AirKey app – connecting to components Hold the NFC smartphone to the medium.
- Page 149 Figure 240: AirKey app – updating key rings Key ring updates may take several minutes, depending on the Internet connection. Permanently hold the smartphone to the medium during this time. Do not remove the smartphone from the medium you would like to update during data transfers.
- Page 150 Figure 242: Coding station – a keyring update is available A corresponding link is shown if a firmware update is available for the Locking component. Click Execute keyring update to start the update. > Figure 243: Coding station — keyring update Key ring version updates may take several minutes, depending on the Internet connection.
-
Page 151: Updating Smartphones' App Versions
You can continue to use the AirKey app as usual once you have completed the app version update. You require a Google Play store account or Apple ID to download apps from the Google Play store or Apple App Store. -
Page 152: Replacing Batteries And Using The Emergency Power Device
Replace batteries when the door is open and secured so it does not accidentally slam shut. Please note the AirKey cylinder time remains active for a maximum of one minute after having removed the batteries. We highly recommend replacing the seals of the AirKey cylinder upon replacing batteries to continue to guarantee the unit is correctly protected from humidity. - Page 153 In a last step, update the cylinder using your smartphone or coding station to > transfer the most recent event log entries to the AirKey online administration. Check the cylinder operates correctly by attempting to unlock it before you once >...
-
Page 154: Repair Options
Repair options Locking components' repair options enable reactions to Locking component faults. There is the option to issue replacement Locking components within the Access control system or remove a faulty Locking component from the Access control system. 8.8.1 Issuing and installing replacement Locking components Issuing and subsequently installing replacement Locking components to replace existing, faulty Locking components with Locking components in factory state. - Page 155 The Repair options dialogue window opens. The Disassemble and install the replacement component and Replace > cylinder (thumb turn and electronics module together) radio buttons have been made available by default. Alternatively select the Replace thumb turn only radio button. >...
- Page 156 As a result, you have completed the preparations to issue and install a replacement Locking component within the AirKey online administration. Issue and install the replacement Locking component using a smartphone with maintenance authorisation or the optionally available coding station to complete the entire process.
-
Page 157: Removing Locking Components Without Replacements And Highlighting Them As "Faulty
Issuing and installing replacement Locking components with the coding station. Position a replacement Locking component in factory state on the > coding station. Select Issue replacement cylinder in the bottom right of the > dialogue window and click the Locking component you would like to replace. - Page 158 On the Home screen, select the Cylinders or Wall readers tile. > Alternatively, select Access control system-> Locking components in the > main menu. Click the Locking component you would like to edit in the overview. > In the Settings tab, select the Protocols and maintenance section and click >...
- Page 159 Figure 253: Component status and maintenance task As a result, any preparations for removing faulty Locking components without replacements have been completed within the AirKey online administration. Complete the overall process of removing the component using your smartphone with maintenance...
-
Page 160: Removing Faulty Locking Components Using Smartphones
8.8.3 Removing faulty Locking components using smartphones If it is no longer possible to update faulty Locking components, you can use your smartphone to remove the faulty Locking component without replacements. This requires a registered smartphone with active maintenance mode for this Access control system. Establishing a connection using NFC (for Android smartphones): Tap the Connect >... -
Page 161: Removing Faulty Locking Components Using The Airkey Online Administration
If it is no longer possible to update the Locking component as a result of a fault, you must complete removal without replacements in the AirKey online administration. On the Home screen, select the Cylinders or Wall readers tile – depending on >... -
Page 162: Revoking Maintenance Tasks For Repair Options
If you would like to remove an operational Locking component from your Access control system, proceed as described in Removing Locking components. 8.8.5 Revoking maintenance tasks for repair options If you accidentally created maintenance tasks for replacement Locking components or removals without replacements, such maintenance tasks can be deleted retrospectively. -
Page 163: Emergency Media
Emergency media Emergency media are media without expiry dates and permanent authorisations to all Locking components within an Access control system. Emergency media are used in emergencies (e.g. by the fire service) and must be kept safe. Emergency media can unlock Locking components regardless of the time. -
Page 164: Working With Several Access Control Systems
10 Working with several Access control systems The following section describes how to work with several Access control systems. 10.1 Sharing Locking components with other Access control systems You can share an Locking component added to your Access control system with another access control system. -
Page 165: Adding Locking Components From Other Access Control Systems
The share code remains valid for 48 hours. You can generate multiple share codes for an Locking component. They are shown in the share list of the Locking component. The system creates an entry in the share list of the Locking component. It shows the share code and its validity. - Page 166 Click Continue. > Figure 262: Adding shared Locking components Enter the share code from the other Access control system to add the Locking > component. Figure 263: Adding shared Locking components An error message appears if the share code is incorrect. Once you have entered a correct share code, you can change the following settings: Alternative door designation...
- Page 167 Figure 264: Adding shared Locking components The system creates a maintenance task. > Update Locking component using smartphone with maintenance > authorisation or an optionally available coding station. This deletes the maintenance task from the list and the share is up to date. >...
-
Page 168: Assigning Authorisations For Shared Locking Components
10.3 Assigning authorisations shared Locking components Within each Access control system to which the authorised Locking component was added, the process to assign authorisations differs marginally to that for owners of the Locking components. Proceed as follows if you have added a shared Locking component to your Access control system. -
Page 169: Viewing Authorisations For Shared Locking Components
Create the authorisation to save it and have one KeyCredit deducted from your > account. Please refer to the Creating authorisations section for more detailed information on creating authorisations. In this process, the KeyCredit is deducted from your Access control system's credit, not the credit of the other Access control system. -
Page 170: Using Smartphones In Several Systems
Figure 267: "Shares" section – deleting shares Click Delete share to confirm the security prompt. > Figure 268: Deleting shares As a result the Locking component is removed from the other client's Access control system. The system creates a maintenance task. Update the Locking component for which you have revoked the share using a >... - Page 171 Open the main menu of the AirKey app and select Settings-> Add Access control > system . Figure 269: Adding Access control systems Enter the registration code you received from the Access control system > administrator and select Register. If a PIN code has been defined for your smartphone, you must enter it and if a >...
-
Page 172: Locking Components Signals
"Battery empty" following first warning signals room temperature and when Signal (Shown in the AirKey h----h----h-- ----- using cards, key tags online administration - --h---- or combi keys). Locking The signal is output component overview regularly upon as "Battery empty".) - Page 173 ----- Duration: until ... Signal AirKey medium (100 None communication reader process period, complete. ms pulse) AirKey cylinder wake- Bluetooth ----... Signal availability (e.g. as a (1,5 None result having periods) touched it) Signal Start of office mode mmm---hhh ---...
-
Page 174: Values And Limits Of Airkey
12 Values and limits of AirKey This section describes the maximum number of configurations per medium and Locking component. 12.1 AirKey online administration The number of maximum Locking components, areas, persons and media is unlimited. 12.2 Locking components The last 1,000 event log entries are saved without updates. -
Page 175: When Are Keycredits Deducted
13 When are KeyCredits deducted? KeyCredits are required to operate Access control systems, for instance to assign or change access authorisations. KeyCredits are exclusively deducted in the event of quantity credit. If there is an available time-based credit, the system uses this time-based credit and the quantity credit remains unchanged. -
Page 176: Troubleshooting
14 Troubleshooting AirKey is a high-quality, comprehensively tested, electronic access control system. However, should you encounter an error or problems, this section will provide support to rectify the fault. 14.1 No communication possible within the system Proceed as follows if you are unable to register the smartphone or cannot update Locking... -
Page 177: Unable To Unscrew The Thumb Turn Of An Airkey Cylinder
Unable to unscrew the thumb turn of an AirKey cylinder Proceed as follows if you are no longer able to unscrew the thumb turn of an AirKey cylinder: Ensure you use the assembly tool for the AirKey cylinder when removing the >... -
Page 178: Airkey Cylinders
Ensure the thumb turn and electronics module have engaged correctly. > 14.5.2 AirKey wall readers Ensure the reader unit and the control unit of the AirKey wall reader have been > connected correctly. If applicable, check the cabling and the plug connections. -
Page 179: Important Information
Please contact your mobile network operator if you encounter any issues when using the mobile data network in connection with AirKey. Grant authorisations with validity periods that are as short as possible to maintain a high level of system security and keep the blacklist to a minimum if media is lost. -
Page 180: Konformitätserklärung
16 Konformitätserklärung... -
Page 182: Declaration Of Conformity
17 Declaration of Conformity... -
Page 184: List Of Figures
Figure 34: Editing media – settings --------------------------------------------------------- 34 Figure 35: AirKey app – adding Access control systems ----------------------------------- 35 Figure 36: AirKey app – defining a PIN code upon registration ---------------------------- 35 Figure 37: Send a key: ---------------------------------------------------------------------- 36 Figure 38: "Send a Key" – search field ------------------------------------------------------ 36 Figure 39: "Send a Key"... - Page 185 Figure 45: AirKey app — connecting -------------------------------------------------------- 40 Figure 46: Adding components ------------------------------------------------------------- 41 Figure 47: AirKey app – adding Locking components Android/iPhone --------------------- 41 Figure 48: AirKey app – Locking component added ---------------------------------------- 42 Figure 49: GPS coordinates in the Locking component details ----------------------------- 42...
- Page 186 Figure 91: Access control system settings -------------------------------------------------- 62 Figure 92: Default values for new Locking components ------------------------------------ 64 Figure 93: Default values – areas ----------------------------------------------------------- 64 Figure 94: Default values – access ---------------------------------------------------------- 65 Figure 95: Automatic office mode ----------------------------------------------------------- 65 Figure 96: Defining logging / event logs ---------------------------------------------------- 66 Figure 97: Save changed specification values? --------------------------------------------- 66 Figure 98: Public holiday calendar (calendar view) ----------------------------------------- 67...
- Page 187 Figure 180: Event log data for authorisations -------------------------------------------- 112 Figure 181: Office mode confirmation message ------------------------------------------ 112 Figure 182: AirKey app – entering PIN codes --------------------------------------------- 113 Figure 183: Encoding media – Bluetooth selection list – Locking components ---------- 113...
- Page 188 Figure 192: AirKey app – changing PIN codes -------------------------------------------- 119 Figure 193: AirKey app – deactivating encryption ---------------------------------------- 120 Figure 194: AirKey online administration – deactivating PIN codes --------------------- 120 Figure 195: AirKey online administration – resetting PIN codes ------------------------- 121...
- Page 189 Figure 232: AirKey app – successful update ---------------------------------------------- 145 Figure 233: Coding station – confirmation upon updating Locking components ------- 145 Figure 234: Coding station – AirKey cylinder firmware updates ------------------------- 146 Figure 235: Coding station — update step successful ------------------------------------ 146 Figure 236: Coding station —...
-
Page 190: Glossary
(without individual power supply), such as cards, key tags and combi keys which are grouped as "Cards". Locking AirKey cylinders and wall readers that open and close doors within components an Access control system. Maintenance... -
Page 191: Legal Notice
All trademarks and industrial property rights reserved. We reserve the rights to make adaptations and update the document without prior notification. Legal notice Publisher EVVA Sicherheitstechnologie GmbH Content management EVVA Sicherheitstechnologie GmbH Technical contents Florian Diener, Sabine Ribits, Hanspeter Seiss, Johannes Ullmann...
Need help?
Do you have a question about the AirKey and is the answer not in the manual?
Questions and answers