Table of Contents
Advertisement
Technical
Information
TI 11B08A01-01E
Contents
Introduction ...................................................................................................2
u
Notice .............................................................................................................3
u
1.
Overview ..................................................................................................... 25
1.1
Wiring And Piping Diagram ............................................................................... 26
1.2
External Dimensions ......................................................................................... 27
1.3
Auxiliary Hardware ............................................................................................ 40
1.4
Gases Required For Operation .......................................................................... 40
1.5
Conformance Standards ................................................................................... 42
1.6
Data Plate ............................................................................................................ 43
2.
Installation, Piping, And Wiring ................................................................ 53
2.1
Installation .......................................................................................................... 53
2.1.1
2.1.2
2.2
Piping .................................................................................................................. 60
2.2.1
2.2.2
2.3
Wiring .................................................................................................................. 65
2.3.1
2.3.2
2.3.3
2.3.4
2.3.5
Revision Information ........................................................................................... 93
Process Gas Chromatograph
GC8000
Installation Manual
Installing The Analyzer ......................................................................... 53
Installing Auxiliary Hardware ............................................................... 57
Types Of Piping And Installation .......................................................... 60
Connecting Piping ............................................................................... 62
Types Of Wiring And Locations ............................................................ 66
Recommended Cables ....................................................................... 67
Preparing Wiring Depending on Specifications .................................. 69
Connecting Power Cable And Grounding ........................................... 77
Connecting Signal Cables .................................................................. 80
Yokogawa Electric Corporation
2-9-32, Nakacho, Musashino-shi, Tokyo, 180-8750 Japan
Tel.: 81-422-52-5617 Fax.: 81-422-52-6792
TI 11B08A01-01E
©Copyright Oct. 2011(YK)
11th Edition Sep. 2017(YK)
Advertisement
Table of Contents

Related Manuals for YOKOGAWA GC8000


Summary of Contents for YOKOGAWA GC8000
- Page 1 2.3.4 Connecting Power Cable and Grounding ........... 77 2.3.5 Connecting Signal Cables ..............80 Revision Information ................... 93 Yokogawa Electric Corporation TI 11B08A01-01E 2-9-32, Nakacho, Musashino-shi, Tokyo, 180-8750 Japan ©Copyright Oct. 2011(YK) Tel.: 81-422-52-5617 Fax.: 81-422-52-6792 11th Edition Sep. 2017(YK)
- Page 2 Introduction This manual describes the installation of the GC8000 Process Gas Chromatograph. Please read the following documents before installing and using the GC8000 system. Documents Related to the GC8000 Process Gas Chromatograph User’s manuals The product comes with the following user’s manuals.
-
Page 3: U Notice
Notice This Manual provides technical information for installing a GC8000 at site. When installing or checking the installation of the GC8000, read the precautions carefully. Regarding This Manual • This Manual should be passed on to the end user. • Read this manual carefully and fully understand how to operate this product before you start operation. - Page 4 • Yokogawa Electric Corporation does not make any warranties regarding the product except for those mentioned in the WARRANTY that is provided separately. • Yokogawa Electric Corporation assumes no liability to any party for any loss or damage, direct or indirect, caused by the use or any unpredictable defect of the product.
- Page 5 Se si desidera ricevere i manuali operativi di prodotti Ex in lingua locale, mettersi in contatto con l’ufficio Alle Betriebsanleitungen für ATEX Ex bezogene Yokogawa più vicino o con un rappresentante. Produkte stehen in den Sprachen Englisch, Deutsch und Französisch zur Verfügung. Sollten Sie die Betriebsanleitungen für Ex-Produkte in Ihrer Landessprache benötigen, setzen Sie sich...
- Page 6 TI 11B08A01-01E Sep. 07, 2017-00...
- Page 7 Labeling Labels are attached to the product for safety. Read each description. Label D is applicable only to TIIS explosion protection. Label G is for ATEX, IECEx and NEPSI. [Left side] [Front] [Right side] [Back] (ATEX, IECEx, NEPSI) (TIIS) TI 11B08A01-01E Sep. 07, 2017-00...
- Page 8 TIIS NEPSI XXXXXXXXX FM-X FM-Y XXXXXXXXX XXXXXXXXX ATEX IECEx XXXXXXXXX XXXXXXXXX CSA-X CSA-Y XXXXXXXXX XXXXXXXXX TI 11B08A01-01E Sep. 07, 2017-00...
- Page 9 Handle it carefully to prevent it from falling. • Up to two protection system may be included, each of which weighs approximately 7 kg, are installed on top of the GC8000. Therefore, the center of gravity is higher than the center of the analyzer body.
- Page 10 IMPORTANT • Read the attached instruction manual before operating the GC8000. • The instruments must be installed and operated according to the installation manual, instruction manual, approval drawings, and operation data. l How to dispose the batteries: This is an explanation about the EU Battery Directive. This directive is only valid in the EU.
-
Page 11: Maintenance And Repair
• When storing or carrying cards, enclose them in a conductive bag or antistatic bag. (Cards as shipped by Yokogawa are enclosed in a conductive bag or antistatic bag labeled with cautions against electrostatic problems.) • When servicing cards, wear a wrist strap grounded via a 1 MΩ resistance. Connect the wrist... - Page 12 CAUTIONS WHEN USING EXPLOSION-PROTECTED INSTRUMENTS The GC8000 is designed to protect against explosion. When the analyzer is used in a hazardous area, observe the following precautions. Since the applicable standard differs depending on the specifications of the analyzer to be used, check the specifications of your analyzer. Type of explosion protection To assure explosion protection, the GC8000 has a pressurized and flameproof enclosure, meeting the following standards (flameproof enclosure is not provided in FM-Y, CSA-Y): <GC8000-F (FM-X), GC8000-G (FM-Y)>...
- Page 13 T1: -10 to +40°C T2: -10 to +40°C T3: -10 to +45°C T4: -10 to +50°C - Only personnel authorized by Yokogawa Electric Corporation can repair the equipment. <GC8000-E (IECEx)> IECEx certified: IECEx DEK 11.0083X * Ex db pxb II B +H T1 Gb (programmed-temperature oven 320°C max., isothermal oven 225°C max., liquid-sample valve 250°C max.) Ex db pxb II B + H T2 Gb (programmed-temperature oven 225°C max., isothermal oven...
- Page 14 - Only personnel authorized by Yokogawa Electric Corporation can repair the equipment. <GC8000-P (NEPSI)> NEPSI certified: GYJ13.1125X Ex d px II B +H T1 Gb (programmed-temperature oven 320°C max., isothermal oven 225°C max., liquid-sample valve 250°C max.) Ex d px II B + H T2 Gb (programmed-temperature oven 225°C max., isothermal oven 225°C max., liquid-sample valve 225°C max.) Ex d px II B + H T3 Gb (programmed-temperature oven 145°C max., isothermal oven...
- Page 15 Ex pd II B +H T2 (programmed-temperature oven 225°C max., isothermal oven 225°C max., liquid-sample valve 225°C max.) Ex pd II B +H T3 (programmed-temperature oven 145°C max., isothermal oven 145°C max., liquid-sample valve 145°C max.) Ex pd II B +H T4 (programmed-temperature oven 95°C max., isothermal oven 95°C max., liquid-sample valve 95°C max.) Analyzer component names Cable entry...
- Page 16 Electronics section The electronics section of the control unit, and the oven unit (large isothermal oven, standard isothermal oven, programmed temperature oven) is a pressurized enclosure. Use a hex wrench (an accessory) to open/close the cover of the electronic chamber. Precautions for protection system (The analyzer with FM-Y, CSA-Y does not have the protection system.) WARNING...
- Page 17 Protection gas (instrumental air) pipe This is the pipe for supplying air to the analyzer for purging pressurized enclosures. An air pressure of 350 to 900 kPa (500 to 900 kPa for FPD) is required. Use general instrument air as the source and connect the piping to the analyzer PURGE AIR port. A pressure regulator should be installed in-between. Installation site and environment The analyzer specifications allow it to be used in hazardous areas as defined by DIV1, GPS B, C & D, T1, T2, T3, T4 (FM, CSA) or Zone 1 IIB + H2T1, T2, T3, T4 (ATEX, IECEx, NEPSI, TIIS).
- Page 18 CAUTION • The unused electrical connection ports should be closed with an appropriate flameproof- certified plug. • Analyzers have pressurized enclosures. The cable end should be sealed in order to maintain pressure to the pressurized enclosure. Otherwise, power is not supplied to the electronics section. <ATEX, IECEx, NEPSI> WARNING • All wiring shall comply with Local Electric Codes and Requirements. • In a hazardous area, use appropriate flameproof-certified parts for connecting cables. • All externally powered input signals into the pressurized enclosure shall be isolated by external relays controlled by the Ex px protection system(Ex px safety device).
-
Page 19: Maintenance And Inspection
The parts to be checked are described in “6. Maintenance” in the User’s Manual (IM 11B08A01-01E). If any of the following damage occurs, contact a Yokogawa sales representative or the Yokogawa sales division. • The screws securing the Protection System (explosionproof construction) are damaged • The exterior of the enclosures is damaged... - Page 20 Middle isothermal oven or programmed temperature oven: Alarm for low internal pressure No. 113 “OVEN2 PRESS DOWN” Bottom isothermal oven: Alarm for low internal pressure No. 114 “OVEN3 PRESS DOWN” Alarms are displayed on the “ASET” PC software for the specification without the operation panel on GC8000. Override switch LABEL Protection system Light sensor...
- Page 21 Operation WARNING • Do not open the doors and the covers. Refer servicing to propery trained personnel. High voltage and high temperature are presented on the inside parts. If contacted, produce electric shock and burns. • Before opening the doors and the covers, turn off the power under the permission of the administrator and wait for at least 25 minutes with the Protective gas (instrumental air) supplied.
- Page 22 (2) The detector is turned off. In case of FID, FID with methanizer and FPD, the detector should be “Frame out” with stopping the supply of make-up gas, combustion gas and combustion air. Then, wait for over 4 hours. (3) Each heater of the isothermal oven (or programmed temperature oven), LSV and FPD is turned off.
-
Page 23: Safety Instructions
When the internal pressure in the oven returns to normal, the procedure starts automatically from item (7) in <Power on>. Safety Instructions This content described as follows is only for ATEX, IECEx and NEPSI. ● Specification of safety system Protection system Oven safety unit Power supply Install in accordance with the specification of GC8000 Ambient condition Threshold Pressure 392 Pa value Flow rate of protection 35 L/min... - Page 24 In order to maintain the safety function, proof test at least once while test period below is necessary. Contact your nearest Yokogawa representative. If proof test is not performed for longer than test interval, GC8000 cannot be used as explosion proof equipment.
-
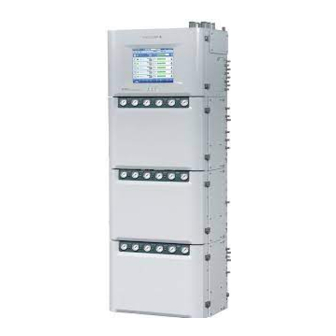
Page 25: Overview
This document is an excerpted version of the GC8000 User’s Manual for the customer’s convenience. See also Operation Data for installation work and operation. Five types of GC8000 are available (Type 1 to 5). And each type has a wall-mounting version and a self-standing version. Protection... -
Page 26: Wiring And Piping Diagram
With Vent stack *1: The specification determines the number of Explosion proof enclosures. No enclosures is needed for FM-Y, CSA-Y type. *2: If an analyzer base sampling unit is provided, most applications require no external sampling equipment. In addition, optimum sampling systems are prepared depending on various conditions. (For details, consult Yokogawa. Optimal sampling systems will be offered.) *3: For air purge piping, use stainless steel pipe of 1/2 inch or more. *4: Power and contact output for system alarm 1 or annunciator are connected to control unit in case of FM-Y, CSA-Y type. *5: Dehumidifier can be optionally provided by Yokogawa. Other wiring cables, piping and installation materials should be supplied by the user. -
Page 27: External Dimensions
1. Overview External Dimensions Type 1 (Wall-mounting) Unit: mm Protection system *1 Wiring connection *2 Connection to electronics section *2 Vent for protective gas (instrumental air) Grounding wiring Air outlet for stream switching valve (100 Ω or less) 6 mm or 1/4” tube Control unit Protective gas (instrumental air) inlet Rc1/4 or 1/4NPT... - Page 28 (as accessories) Connection 3/4NPT (for Ethernet cable) *4: The empty compartment (base) placed For TIIS (wiring connection: 3/4NPT) by Yokogawa to create a Self-standing Connector (as accessories) GC8000-A, does not impair the Cable gland (as accessories) compliance of the GC8000-A.
- Page 29 1. Overview Type 2 (Wall-mounting) Unit: mm Protection system A *1 Protection system B *1 Wiring connection *2 Connection to electronics section *2 (only 100 V) Vent for protective gas (instrumental air) Grounding wiring Air outlet for stream switching valve (100 Ω...
- Page 30 (as accessories) Connection 3/4NPT (for Ethernet cable) *4: The empty compartment (base) placed For TIIS (wiring connection: 3/4NPT) by Yokogawa to create a Self-standing Connector (as accessories) GC8000-A, does not impair the Cable gland (as accessories) compliance of the GC8000-A.
- Page 31 1. Overview Type 3 (Wall-mounting) Unit: mm Protection system A *1 Protection system B *1 Wiring connection *2 Connection to electronics section *2 Vent for protective gas (instrumental air) Grounding wiring Air outlet for stream switching valve (100 Ω or less) 6 mm or 1/4”...
- Page 32 1. Overview Type 3 (Self-standing) Unit: mm Protection system A *1 Protection system B *1 Wiring connection *2 Connection to electronics section *2 Vent for protective gas (instrumental air) Grounding wiring Air outlet for stream switching valve (100 Ω or less) 6 mm or 1/4”...
- Page 33 1. Overview Type 4 (Wall-mounting) Unit: mm Protection system A *1 Protection system B *1 Wiring connection *2 Connection to electronics section *2 Vent for protective gas (instrumental air) Grounding wiring Air outlet for stream switching valve (100 Ω or less) 6 mm or 1/4”...
- Page 34 (as accessories) Connection 3/4NPT (for Ethernet cable) *4: The empty compartment (base) placed For TIIS (wiring connection: 3/4NPT) by Yokogawa to create a Self-standing Connector (as accessories) GC8000-A, does not impair the Cable gland (as accessories) compliance of the GC8000-A.
- Page 35 1. Overview Type 5 (Wall-mounting) Unit: mm Protection system A *1 Protection system B *1 Wiring connection *2 Connection to electronics section *2 Vent for protective gas (instrumental air) Grounding wiring Air outlet for stream switching valve (100 Ω or less) 6 mm or 1/4”...
- Page 36 1. Overview Type 5 (Self-standing) Unit: mm Protection system A *1 Protection system B *1 Wiring connection *2 Connection to electronics section *2 Vent for protective gas (instrumental air) Grounding wiring Air outlet for stream switching valve *1 (100 Ω or less) 6 mm or 1/4”...
- Page 37 1. Overview Piping connection of control unit, isothermal oven, large isothermal oven, and programmed temperature oven Unit :mm Vent for protective gas (instrumental air) Control unit Air outlet for stream switching valve 6mm or 1/4” tube Protective gas (instrumental air) inlet Rc1/4 or 1/4NPT Inlet/outlet for sample gas, carrier gases, etc.
- Page 38 1. Overview Communication converter/Signal interrupter (disconnecter) Rack-mounted type • Converter for RS-422/RS-232C: K9806AS* • Signal interrupter for Ethernet twisted pair cable: K9806AA • Signal interrupter for RS-422 output, analog input: K9806AE Unit: mm 2-holes for M4 screw The number and the location of the terminals depend on its part number. Weight: approx. 500 g • Signal interrupter for contact output (AC): K9806AN* • Signal interrupter for contact output (DC): K9806AJ* Unit: mm 2-holes for M4 screw The number and the location of...
- Page 39 1. Overview Desk-top type • Converter for RS-422/RS-232C: K9806AT • Signal interrupter for Ethernet twisted pair cable: K9806AB Unit: mm The number and the location of the terminals depend on its part number. Weight: approx. 500 g Note: Desk-top type should be installed horizontally. TI 11B08A01-01E Sep. 07, 2017-00...
-
Page 40: Auxiliary Hardware
1. Overview Auxiliary Hardware (1) Cylinders (carrier gas, standard gases, etc.) These cylinders are filled with a carrier gas or standard gas. The maximum filling pressure is limited to 15 MPa considering the strength of the cylinders. (2) Regulator for cylinder This valve reduces a cylinder pressure to a safe degree to facilitate handling. The valve is directly mounted to the cylinder. (3) Stop valve This valve shuts down the lines for the sample gas, instrument gas, and so on. - Page 41 1. Overview (2) Carrier gas Prepare a gas cylinder for the carrier gas. Keep spare cylinders at hand, too. If two different carrier gases are used, two gas cylinders are needed. The gas must satisfy the following conditions. (Gas with higher purity may be required depending on the specifications. See the delivery specifications for details.) Purity: Measuring range from 0 to 50 ppm or more: 99.99% minimum Moisture: 10 ppm or less;...
-
Page 42: Conformance Standards
GC8000-C CSA C22.2 No. 61010-1-04 GC8000-D *1: Analyzer base sampling unit (GCSMP) or base placed under GC8000-A is not covered by the EU-DoC nor the EC Type-examination Certificate. The empty compartment (base) placed by Yokogawa to create a Self- standing GC8000-A, does not impair the compliance of the GC8000-A. *2: The design is based on the safety and EMC standard, though the mark of CE is not indicated. *3: The design is based on the safety and EMC standard, though the mark of CE, KC and RCM are not indicated. CAUTION This instrument is a Class A product, and is designed for use in an industrial environment. Please use this instrument in an industrial environment only. -
Page 43: Data Plate
1. Overview Data Plate FM-X XXXXXXXXX FM-Y XXXXXXXXX TI 11B08A01-01E Sep. 07, 2017-00... - Page 44 1. Overview Text Remarks (a) -F, -G FM-X, FM-Y (b) Model and suffix codes With additional code (c) 100, 110, 115, 120, 200, 220, 230, 240 Depends on power specifications (-A to -H) (d) Maximum rated power (e) Latest style number (f) Instrument number (g) Year of production In A.D. year (h) KGC number (i) (T)1 to (T)4 Depends on temperature class specifications...
- Page 45 1. Overview CSA-Y XXXXXXXXX Text Remarks (a) -C, -D CSA-X, CSA-Y (b) Model and suffix codes With additional code (c) 100, 110, 115, 120, 200, 220, 230, 240 Depends on power specifications (-A to -H) (d) Maximum rated power (e) Latest style number (f) Instrument number (g) Year of production In A.D.
- Page 46 1. Overview ATEX In case of Type 1 XXXXXXXXX In case of Type 2 In case of Type 3 In case of Type 4 In case of Type 5 TI 11B08A01-01E Sep. 07, 2017-00...
- Page 47 1. Overview *1: Approx. 110,000 cm with EPC *2: Approx. 129,000 cm with EPC *3: Approx. 142,000 cm with EPC *4: Approx. 120,500 cm with EPC *5: Approx. 135,000 cm with EPC Text Remarks (a) -A ATEX (b) Model and suffix codes With additional code (c) 100, 110, 115, 120, 200, 220, 230, 240 Depends on power specifications (-A to -H) (d) Maximum rated power (e) 40, 45, 50...
- Page 48 1. Overview IECEx In case of Type 1 XXXXXXXXX In case of Type 2 In case of Type 3 In case of Type 4 In case of Type 5 TI 11B08A01-01E Sep. 07, 2017-00...
- Page 49 1. Overview *1: Approx. 110,000 cm with EPC *2: Approx. 129,000 cm with EPC *3: Approx. 142,000 cm with EPC *4: Approx. 120,500 cm with EPC *5: Approx. 135,000 cm with EPC Text Remarks (a) -E IECEx (b) Model and suffix codes With additional code (c) 100, 110, 115, 120, 200, 220, 230, 240 Depends on power specifications (-A to -H) (d) Maximum rated power (e) 40, 45, 50...
- Page 50 1. Overview NEPSI In case of Type 1 XXXXXXXXX In case of Type 2 In case of Type 3 In case of Type 4 In case of Type 5 TI 11B08A01-01E Sep. 07, 2017-00...
- Page 51 1. Overview *1: Approx. 110,000 cm with EPC *2: Approx. 129,000 cm with EPC *3: Approx. 142,000 cm with EPC *4: Approx. 120,500 cm with EPC *5: Approx. 135,000 cm with EPC Text Remarks (a) -P NEPSI (b) Model and suffix codes With additional code (c) 100, 110, 115, 120, 200, 220, 230, 240 Depends on power specifications (-A to -H) (d) Maximum rated power (e) 40, 45, 50...
- Page 52 1. Overview TIIS In case of Type 1 In case of Type 3 In case of Type 2 In case of Type 4 *1: Approx. 110,000 cm with EPC *2: Approx. 129,000 cm with EPC *3: Approx. 142,000 cm with EPC *4: Approx.
-
Page 53: Installation, Piping, And Wiring
2. Installation, Piping, and Wiring Installation, Piping, and Wiring If the process gas chromatograph is installed in a hazardous area, do the wiring according to the applicable explosionproof requirements. Installation Refer to “1.1 Wiring and Piping Diagram.” 2.1.1 Installing the Analyzer Two types of analyzer are available: self-standing and wall-mounted. Install the chromatograph according to the procedure for each type. - Page 54 • The GC8000 weighs about 100 to 220 kg. Unpack it near the installation site. Use a transportation machine to move it. Handle it carefully to prevent it from falling. • Up to two protection system may be included, each of which weighs approximately 7 kg. They are installed on top of GC8000. Therefore, the center of gravity is higher than the center of the analyzer body. TI 11B08A01-01E...
- Page 55 However, don’t use those screws applied to the brackets to mount the equipment to a wall. They are not designed for wall mounting. Self-standing type: T he fixture brackets for crating are exclusively for the purpose of shipping. Be sure to detach the brackets away from GC8000 after an installation of the equipment is completed. Don’t use the brackets to mount the equipment to a wall. They are not designed for wall mounting. (4) Checking equipment Check that the equipment has not been damaged during transportation. Contact Yokogawa if any damage is found. Keep the packing such as crates.
- Page 56 2. Installation, Piping, and Wiring Accessories Check the accessories listed in Table 2.1 and Table 2.2. Table 2.1 Accessory kit Accessory kit part number (K9800**) Remark EA EB EC ED HE HF HG HH EG EH EJ EK EE EF HA HB TIIS FM-X, FM-Y, ATEX, IECEx, CSA-X...
-
Page 57: Installing Auxiliary Hardware
2. Installation, Piping, and Wiring Figure 2.2 Accessory kit Note: The picture is for illustrative purposes only. It is not be an exact representation of each part in the dimension ratio to the actual one or the number of pieces contained in a kit. Table 2.2 Item Parts number... - Page 58 2. Installation, Piping, and Wiring (2) Other items (a) Dehumidifier Provide a dehumidifier between the carrier gas cylinders and the analyzer (as near the analyzer as possible). (b) Sample-gas pressure regulator Provide sample-gas pressure regulators between the sampling point and the analyzer or the external sampling system (as near the sampling point as possible). (c) Vent stack, Drain tank Without Vent Stack Provide a header with a diameter of about 5 cm near the analyzer to connect the venting...
- Page 59 2. Installation, Piping, and Wiring SGP, STPG SPG, STPG Vent stack Vent header (Both ends are Rc1/2 or 1/2NPT) 15A SPG, STPG ID:10mm Drain or more Drain tank Water seal Using a drain Using a water tank seal pot With Vent stack Figure 2.4 Example of vent stack installation Note 1: The drain tank is used only for FID/FPD.
-
Page 60: Piping
2. Installation, Piping, and Wiring Piping IMPORTANT • Do not remove the blind plugs at the analyzer piping connections until starting piping work to prevent deterioration of the columns. On the condition that carrier gas is not supplied even after the blind plugs are taken out or while the analyzer is out of operation, the column has the risk of deterioration. In these condition, fix the the blind plugs at each vent with carrier gas enclosed. - Page 61 2. Installation, Piping, and Wiring (5) Condensate drain (CONDENSATE OUT) (6) Steam (STEAM IN) (7) Steam drain (STEAM OUT) Vent for protective gas (instrumental air) (open to the atmosphere) Air outlet for stream swiching valve (A) 6mm or 1/4” tube AIR OUT 1 AIR OUT 2 AIR OUT 3...
-
Page 62: Connecting Piping
2. Installation, Piping, and Wiring FID/FPD vent (J)(K) 1/4” tube FID 2 FID 1 FPD 1 Vent (L)(M) 1/8” tube TCD1 TCD1 TCD2 VENT1 REF.1 REF.1 REF.2 VENT2 TCD2 VENT1 VENT1 VENT3 REF.2 VENT2 VENT2 VENT4 VENT1 VENT3 VENT3 VENT5 VENT2 VENT4 VENT4... - Page 63 When two different carrier gases are used, provide separate pipes for each gas to lead them into the analyzer. The following is recommended. By arranging the two gas cylinders in this way, there is no contamination of air. To GC8000 (Spare) Figure 2.10 Confirm that the insides of the pipes and pipe fittings are not contaminated.
- Page 64 2. Installation, Piping, and Wiring If the carrier gas contains moisture with a dew point of –60°C or above, it is recommended that a desiccant, such as a molecular sieve, be used to remove moisture to prevent deterioration of the columns.
-
Page 65: Wiring
2. Installation, Piping, and Wiring (g) Steam pipe This is necessary for heating the sample with steam. Connect the piping between a steam supply that can provide the required pressure (see Operation Data) and the analyzer STEAM IN port. (h) Venting pipes These are used for backflush venting, foreflush venting, detector venting, etc. With a vent header, the piping is provided. Without a vent stack, install piping to the vent stack. Use large pipes for venting to minimize pressure losses. -
Page 66: Types Of Wiring And Locations
• Lay the signal wiring and electrical wiring in separate conduit pipes or ducts. • Use independent grounding with a grounding resistance of 100 ohms or less. 2.3.1 Types of Wiring and Locations The following types of wiring are required for the GC8000. The wiring required varies with the specifications. (A) Electric circuit and heater power (B) Heater power... -
Page 67: Recommended Cables
2. Installation, Piping, and Wiring 2.3.2 Recommended Cables CAUTION (C) to (L) cables: Use heat-resistant cables with maximum allowable temperature of 80°C or higher. (M) and (N) cables: Required maximum allowable temperature of the cables depends on the temperature class of the instrument and the actual ambient temperature. Use cables with maximum allowable temperature shown in the table below. Maximum allowable Temperature Class T1, T2... - Page 68 2. Installation, Piping, and Wiring Table 2.4 Wiring Cable Cable Wiring Cable Condition Terminal Cable Connections Inlet O.D. Shield (for TIIS) Protection system A: (A) Electric circuit and 3.5 to 5.5 mm max. screw required heater power crimp-on Protection system B: 1.25 to 5.5 mm max.
-
Page 69: Preparing Wiring Depending On Specifications
AI 1.5-10BK Contact Phoenix Contact Ltd. for details. 2.3.3 Preparing Wiring Depending on Specifications Perform wiring carefully because the connection of wiring varies depending on the GC8000 explosionproof specifications. IMPORTANT Cables should be arranged in an orderly manner in the protection system. Otherwise, they may damage the parts (e.g. relay). - Page 70 2. Installation, Piping, and Wiring Connection port of the protection system *3 3/4NPT(F) Connection port of the electronics section *1 9/16 inch Plug *2 3/4NPT Connector Gasket Plate NONHAZARDOUS NONHAZARDOUS LOCATION LOCATION EQUIPMENT EQUIPMENT Detail of A NON-HAZARDOUS LOCATIONS HAZARDOUS LOCATIONS *1: Any of the six connection ports of the electronics section can be equally used.
- Page 71 2. Installation, Piping, and Wiring CAUTION • The unused electrical connection ports should be closed with an appropriate flameproof- certified plug. • Analyzers have pressurized enclosures. The cable end should be sealed in order to apply pressure to the pressurized enclosure. Otherwise, power does not supplied to the electronics section. In the CSA-Y, all wiring must be connected to the electronics section since the protection system is not provided.
- Page 72 2. Installation, Piping, and Wiring ATEX, IECEx, NEPSI WARNING • All wiring shall comply with Local Electric Codes and Requirements. • In a hazardous area, use appropriate flameproof-certified parts for connecting cables. • All externally powered input signals into the pressurized enclosure shall be isolated by external relays controlled by the Ex px protection system(Ex px safety device). CAUTION • The unused electrical connection ports should be closed with an appropriate flameproof- certified plug. • The blind plug shall not be used with an adapter. • Analyzers have pressurized enclosures. The cable end should be sealed in order to apply pressure to the pressurized enclosure. Otherwise, power does not supplied to the electronics section.
- Page 73 2. Installation, Piping, and Wiring Connection port for the protection system Remove the attached plug and perform wiring. For the 3/4NPT or G3/4 connection port, use the connectors in the accessory kit. Connection port for the electronics section Six connection ports are provided in the electronics section. Use convenient ones. Remove the attached plug of the connector and perform wiring.
- Page 74 2. Installation, Piping, and Wiring CAUTION The minimum packing (for ø8.0 to ø9.0) is attached to the cable packing adapters at shipment. Change it to an appropriate packing for the cable O.D. (See Table 2.6.) Hex key wrench Hex.socket set screw Hex.socket set screw Flameproof packing adapter Lock nut...
- Page 75 2. Installation, Piping, and Wiring CAUTION The minimum packing (for ø9.0 to ø10.0) is attached to the cable packing adapters at shipment. Change it to an appropriate packing for the cable O.D. (See Table 2.7.) Hex.socket set screw Hex key wrench Cable packing adapter Hex.socket set screw Gasket...
- Page 76 2. Installation, Piping, and Wiring Insulated wires * Unit: mm O-ring Close-up plug Hex. key wrench * Sealing compound * (width across flats: 10 mm) Sealing dam * Body O-ring Gasket Close-up plug Case of electronics section (Pressurized enclosure) Body Nipple (connection threads) Thread type and size: G3/4...
-
Page 77: Connecting Power Cable And Grounding
2. Installation, Piping, and Wiring 2.3.4 Connecting Power Cable and Grounding CAUTION • Wire the power supply cable keeping the distance of 1 cm or more from other signal wires. • The power supply cable shall comply with UL or CSA. • Do wiring after securing protective grounding. - Page 78 2. Installation, Piping, and Wiring Power supply for heater Power supply for electric circuit and heater Contact output for system alarm 1 Contact output for annunciator Top view of the protection system without the cover Protection-film cover for wiring ELECTRIC ANNUNCIATOR HEATER HEATER...
- Page 79 2. Installation, Piping, and Wiring Power supply line of the electronics section (A) (B) without the protection system Power supply for electric circuit and heater Type 1, Type 2 (200 V), Type 5 (200 V) ELECTRIC HEATER CIRCUIT ELECTRIC HEATER CIRCUIT Type 2 (100 V), Type 3, Type 4, Type 5 (100 V) Power supply for electric circuit...
-
Page 80: Connecting Signal Cables
• In order to prevent the earthing conductor from loosening, the conductor must be secured to the terminal, tightening the screw with torque of approx. 1.2 N•m. • Care must be taken not to twist the conductor. Screw Ground Figure 2.23 Earth terminal for the GC8000 2.3.5 Connecting Signal Cables CAUTION (C) to (L) cables: Use heat-resistant cables with maximum allowable temperature of 80°C or higher. - Page 81 2. Installation, Piping, and Wiring NOTE • For analog input, use twisted pair cables with a common shield (a twist pitch of 50 mm or less), to avoid induction noise. Use twisted pair cables for digital signals as well. • Stranded cables are superior to single-conductor cables in the following respects: • Stranded cables are more flexible and easy to lay in a curved pit or cramped space.
- Page 82 2. Installation, Piping, and Wiring Contact output for system alarm 1 (C) and contact output for annunciator (D) The wiring locations differ depending on whether the protection system is provided or not. Wiring to protection system A Perform wiring to the terminals shown in Figure 2.21. The MKKDSN series terminals from Phoenix Contact Ltd.
- Page 83 2. Installation, Piping, and Wiring Ethernet (twisted pair) (M) (L) CAUTION (M) cable: Required maximum allowable temperature of the cables depends on the temperature class of the instrument and the actual ambient temperature. Use cables with maximum allowable temperature shown in the table below. Maximum allowable Temperature Class T1, T2 temperature of cable Up to 30°C Up to 35°C Up to 40°C 60°C 31 to 36°C...
- Page 84 2. Installation, Piping, and Wiring n Ethernet (optical fiber) (N) CAUTION (N) cable: Required maximum allowable temperature of the cables depends on the temperature class of the instrument and the actual ambient temperature. Use cables with maximum allowable temperature shown in the table below. Maximum allowable Temperature Class T1, T2 temperature of cable Up to 30°C Up to 35°C Up to 40°C 60°C 31 to 36°C 36 to 40°C...
- Page 85 2. Installation, Piping, and Wiring Wiring to slots 1 to 5 Perform wiring to slots 1 to 5 for each card. CAUTION After the card is removed, return it to its original position. There is a label on the card. Earth bar Figure 2.27 FKC series terminals from Phoenix Contact Ltd.
- Page 86 Please refer to the following for flow control setting. RS control: None, DR check: YES (Recommended), CD check: None If the instrument to be connected accepts NULL modem-type connection, wiring (b) is also applicable. Example: Regular personal computers, “FA-M3” (Yokogawa PLC). Communication Instrument to...
- Page 87 2. Installation, Piping, and Wiring l Analog output (system isolation) (Code: 1) and analog output (channel isolation) (Code: 2) (J) *1: The ground wire is connected to the earth bar. Figure 2.30 Wiring for an analog output card The analog output card is labeled “AO”. l Analog input (voltage) (Code: 3) and analog input (current) (Code: 4) (E) (L) *1 *2 Signal interrupter K9806AE V1 + 24V DC V1 -...
- Page 88 2. Installation, Piping, and Wiring The shield is grounded at the earth bar in Figure 2.24. Remove the cover on the upper right of the electronics section and perform wiring. l Contact output (AC) (Code: 8) (G) (L) Signal interrupter K9806AN V1 + 24V DC V1 - 11 NO NO 31 12 COM...
- Page 89 2. Installation, Piping, and Wiring l Contact output (DC) (Code: 7) (G) (L) Signal interrupter K9806AJ V1 + 24V DC V1 - 11 NC NC 31 12 COM COM 32 13 NO NO 33 14 NC NC 34 15 COM COM 35 16 NO NO 36 21 NC NC 41 22 COM...
- Page 90 2. Installation, Piping, and Wiring l Contact input (Code: A) (F) *1: The ground wire is connected to the earth bar. Figure 2.34 Wiring for a contact input card The contact input card is labeled “DI”. TI 11B08A01-01E Sep. 07, 2017-00...
- Page 91 2. Installation, Piping, and Wiring l Contact input/output (AC) (Code: 6) (F) (G) (L) Signal interrupter K9806AN V1 + 24V DC V1 - 11 NO NO 31 12 COM COM 32 13 NO NO 33 14 COM COM 34 15 NO NO 35 16 COM COM 36 *1: This is not used for FM-Y, CSA-Y.
- Page 92 2. Installation, Piping, and Wiring l Contact input/output (DC) (Code: 5) (F) (G) (L) Signal interrupter K9806AJ V1 + 24V DC V1 - 11 NC NC 31 12 COM COM 32 13 NO NO 33 14 NC NC 34 15 COM COM 35 16 NO NO 36 21 NC NC 41 22 COM...
-
Page 93: Revision Information
Revision Information Title : Process Gas Chromatograph GC8000 Installation Manual Manual number : TI 11B08A01-01E Sep. 2017/11th Edition Revised regulation on (60079-2 Ed.6) (Pages 8, 12, 13, 21, 23, 42 to 51). Corrections (Pages 10, 11, 52, 56, 72, 78) Jun. 2017/10th Edition...
Need help?
Do you have a question about the GC8000 and is the answer not in the manual?
Questions and answers