Table of Contents
Advertisement
Advertisement
Table of Contents

Subscribe to Our Youtube Channel
Related Manuals for Valeo spheros thermo 230


Summary of Contents for Valeo spheros thermo 230
- Page 1 HEATING SYSTEMS Thermo 230 Thermo 300 Thermo 350 with control unit 1572 model .30 and up Thermo 230 Thermo 300 Thermo 350 with control unit 1572D model .30 and up Thermo 231 Thermo 301 model .01 and up Thermo Rail Workshop Manual Rev.
-
Page 2: Table Of Contents
Thermo 230 / 231 / 300 / 301 / 350 1 Table of Contents Table of contents Introduction Content and purpose ............101 Effectivity of the workshop manual . -
Page 3: Igniter Box, Replacement
Thermo 230 / 231 / 300 / 301 / 350 1 Table of Contents Functional Checkouts General ..............601 Adjustments . - Page 4 Thermo 230 / 231 / 300 / 301 / 350 1 Table of Contents 9.2.7 High Pressure Nozzle, Replacement ........908 9.2.8 Igniter Box, Replacement .
-
Page 5: Thermo
Thermo 230 / 231 / 300 / 301 / 350 1 Introduction Introduction Symbols Symbol tightening torque value: Content and purpose Identifies in graphics parts (eg nuts, bolts) that are to be mounted with a specific tigh- This workshop manual is used during maintenance and tening torque. -
Page 6: Thermo
Thermo 230 / 231 / 300 / 301 / 350 1 Introduction Suggestions for improvement and change Please direct any complaints, improvement or modifica- tion suggestions regarding this manual to: service@spheros.de... -
Page 7: Thermo
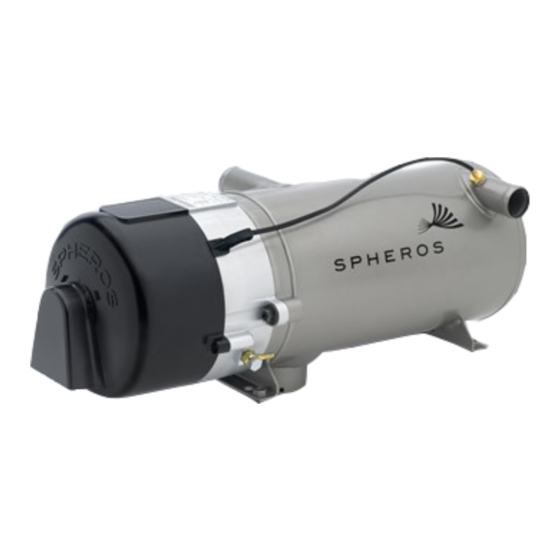
Thermo 230 / 231 / 300 / 301 / 350 2 General Description General Description The water heaters Spheros Thermo 230, 231, 300, 301 The heaters Thermo 230, 231, 300, 301 and 350 basically and 350 are used in combination with the vehicle’s own... -
Page 8: Thermo
Thermo 230 / 231 / 300 / 301 / 350 2 General Description Combustion Air Fan Nozzle block Solenoid valve pre-heater (optional) The combustion air fan supplies the air required for combustion from the combustion air inlet to the combus- tion chamber. -
Page 9: Flame Sensor, Replacement
Thermo 230 / 231 / 300 / 301 / 350 2 General Description 2.2.1 Nozzle block preheater At extremely low temperatures malfunctions may occur without a nozzle block preheater. At a temperature of < 0°C a thermostat activates the heater cartridge in the nozzle block. The heating period depends on the heat reflected within the combustion chamber. -
Page 10: Fuel Pump
Thermo 230 / 231 / 300 / 301 / 350 2 General Description 2.10 Overheat Thermostat for burner (Thermo 231 and 301 only) The overheat thermostat is screwed onto the disk and electrically connected to the solenoid valve of the fuel pump. - Page 11 Thermo 230 / 231 / 300 / 301 / 350 2 General Description 2.11.2 Aquavent 6000C (U4855) and Aquavent 6000SC (U4856) circulating pumps The Aquavent 6000C (U4855) andAquavent 6000SC Aquavent 5000 (U4856) circulating pumps are equipped with a brushless (U4814) motor.
- Page 12 Thermo 230 / 231 / 300 / 301 / 350 2 General Description 2.12 Fuel Filter At compact devices of the series 230/300/350.126 and .190 Rail an optional heatable fuel filter is provided, as an additional option also for .124 and .155 Rail. If the electrical filter heating is hooked-up, the temperature switch turns the integrated filter heating at ≤...
-
Page 13: Nozzle Block Preheater
Thermo 230 / 231 / 300 / 301 / 350 3 Functional Description Functional Description Activation and deactivation is by means of a • switch • timer • air conditioning dependent on the type of installation. For monitoring operation at least an operating indicator light is provided. -
Page 14: Heat Exchanger
Thermo 230 / 231 / 300 / 301 / 350 3 Functional Description Switching thresholds for Thermo xxx Raill 230.040 230.056 300.124 xxx.126 300.155 350.190 Version Thermo xxx* 350.056 350.155 „VOSSLOH „VOSSLOH “ “ 973 13A 90 162 37x 90 210 12B Scope of delivery thru 90 162 36A... -
Page 15: Flame Sensor
Thermo 230 / 231 / 300 / 301 / 350 3 Functional Description Heaters with control unit 1572D only The lower temperature threshold for reactivation of the Gradient evaluation burner after control idle period is raised above that for In case of low coolant flow or poor coolant circuit venting normal operation and is automatically shifted up or down the temperature quickly increases in heating operation. -
Page 16: Temperature Sensor
Thermo 230 / 231 / 300 / 301 / 350 3 Functional Description Operating indicator light Heater cartridge Circulation pump Igniter box Combustion air fan Solenoid valve Flame sensor Switch on Start Combustion operation Temperature sensor – upper switching threshold Flame sensor –... - Page 17 Thermo 230 / 231 / 300 / 301 / 350 3 Functional Description Operating indicator light Circulation pump Igniter box Combustion air fan Solenoid valve Flame sensor Switch on Start Flame-up, combustion operation Temperature sensor – upper switching threshold Flame sensor – dark Control idle Temperature sensor –...
- Page 18 Thermo 230 / 231 / 300 / 301 / 350 3 Functional Description Error Code Output (heaters with Malfunctions during run-down: Detection of a flame after more than 30 seconds after control unit 1572D) start of run-down with the circulation pump and combustion air fan only maintaining operation for the follo- When equipped with a standard timer an error code wing 90 seconds.
-
Page 19: Technical Data
Thermo 230 / 231 / 300 / 301 / 350 4 Technical Data Technical Data Where no threshold values are specified technical data ATTENTION: are understood to include standard tolerances for heater While using the fuels, their operating limits must be units of ±... -
Page 20: Fuel Filter
Thermo 230 / 231 / 300 / 301 / 350 4 Technical Data Heater Thermo 230 Thermo 231 Thermo 300 Thermo 301 Thermo 350 Type Thermo 230 Thermo 231 Thermo 300 Thermo 301 Thermo 350 Mark of conformity up to 4/03 ~ S230 ~ S327 ~ S229... - Page 21 Thermo 230 / 231 / 300 / 301 / 350 5 Troubleshooting Troubleshooting ATTENTION: Troubleshooting is normally limited to the isolation of defective components. General The following possible causes for trouble have not been taken into consideration and must always be ex- This section describes troubleshooting procedures for the cluded as a possible cause for malfunction: heaters Thermo 230, 231, 300, 301 and 350.
- Page 22 Thermo 230 / 231 / 300 / 301 / 350 5 Troubleshooting Error symptom Possible cause Heater stops as the connected heat exchangers Flow rate too small, because provides insufficient heat. • Air in the heater, heat exchangers or in system sections.
- Page 23 Thermo 230 / 231 / 300 / 301 / 350 5 Troubleshooting Error symptom Possible cause Error in the combustion value cannot be adjusted to nominal value. • Air bubbles in fuel supply line (leaking fuel supply line). Irregular combustion. •...
-
Page 24: Switch On
Thermo 230 / 231 / 300 / 301 / 350 5 Troubleshooting 5.3.2 Fault Symptoms to a malfunction, the heater enters an error lockout and stops any further attempts to start. This error lockout is superior to the normal error lockout condition. 5.3.2.1 Fault Symptom "No Start"... - Page 25 Thermo 230 / 231 / 300 / 301 / 350 5 Troubleshooting 5.3.2.2 Fault Symptom "Flame-out" stops any further attempts to start. This error lockout is superior to the normal error lockout condition. NOTE: The error lockout reset is achieved by switching the heater Heaters with control unit 1572D: on and disconnection of the heater power supply during If the heater performs 5 subsequent attempts to start due...
- Page 26 Thermo 230 / 231 / 300 / 301 / 350 5 Troubleshooting 5.3.2.4 Fault Symptom "Foreign Light Detection during Run-up or Run-down" Has the heater been in long time operation shortly Flame sensor defective, replace. Control unit before? defective, replace. Allow heater to cool down and restart (approx.
- Page 27 Thermo 230 / 231 / 300 / 301 / 350 5 Troubleshooting 5.3.2.7 Fault Symptom "Solenoid Valve Defective" Is the solenoid valve supplied Make electrical connections. with electrical power? Safety thermostat in the burner defec- Has the safety thermostat responded? tive, replace.
- Page 28 Thermo 230 / 231 / 300 / 301 / 350 5 Troubleshooting 5.3.2.8 Fault Symptom "Temperature Limiter Defective" Is electrical power supply Make electrical connections. to components o.k.? Control unit defective, replace. Has temperature limiter responded (reset limiter)? Determine why temperature limiter has responded, e.g.: •...
- Page 29 Thermo 230 / 231 / 300 / 301 / 350 6 Functional Checkouts Functional Checkouts Setting procedure – measure control unit power supply voltage – operate heater for approximately 5 min. General – measure CO contents and soot level and compare with relevant diagram –...
- Page 30 Thermo 230 / 231 / 300 / 301 / 350 6 Functional Checkouts Components Testing 6.3.3 Igniter Electrodes Check NOTE: 6.3.1 Temperature Sensor Resistance Check The insulator of the igniter electrodes must show no damage. Igniter electrodes with a gap out of tolerance or When checking the temperature sensor with a digital not working properly must be replaced.
- Page 31 Thermo 230 / 231 / 300 / 301 / 350 6 Functional Checkouts 6.3.5 Fuel Pump Check pressure despite readjustment not be achieved or occur leaks, the fuel pump must be replaced. – switch off heater. 6.3.5.1 Fuel Pump Check on Heaters with Control Unit –...
- Page 32 Thermo 230 / 231 / 300 / 301 / 350 6 Functional Checkouts 6.3.7 Solenoid Valve Check – screw on the test gauge with bleeding feature. – Follow the instructions in the menu component test of the PC heater diagnosis. NOTE: –...
- Page 33 Thermo 230 / 231 / 300 / 301 / 350 7 Circuit Diagrams Circuit Diagrams General The circuit diagrams (Fig. 701 and 702) show possible heater circuits for Thermo 230, 300 and 350 with control unit 1572 and with – switch –...
- Page 34 Thermo 230 / 231 / 300 / 301 / 350 7 Circuit Diagrams rt/ws F1/B3 ϑ B1 Y1 ϑ Wire colors blue brown Diagnostic connector yellow green Wire gauges gray orange < 7,5 m 7,5 - 15 m 0,75 mm 1,5 mm 1,0 mm 1,5 mm...
- Page 35 Thermo 230 / 231 / 300 / 301 / 350 7 Circuit Diagrams 75(15) 75(15) rt/ws F1/B3 ϑ B1 Y1 ϑ Wire colors blue brown yellow Diagnostic connector green Wire gauges to vehicle terminal +75 if available, otherwise terminal 15 gray orange <...
- Page 36 Thermo 230 / 231 / 300 / 301 / 350 7 Circuit Diagrams Wire colors blue Diagnostic connector brown yellow Pin assignment: Pin assignment 4wire lead 7wire lead green 0,75 gr 0,75 rt Wire gauges 0,75 or 0,75 or gray 0,75 gn 0,75 bl orange...
- Page 37 Thermo 230 / 231 / 300 / 301 / 350 7 Circuit Diagrams Diagnostic connector Timer P: Wire colors with plus to connection 10 = continuous operating during immediate heating blue terminal 10 not connected = duration of heating programmable (10 min to 120 min); brown yellow Pin assignment:...
- Page 38 Thermo 230 / 231 / 300 / 301 / 350 7 Circuit Diagrams UPFA Signal UP rt/ws B3/B5 ϑ ϑ B1 Y1 Wire colors blue brown yellow Diagnostic connector green Wire gauges gray orange < 7,5 m 7,5 - 15 m 0,75 mm 1,5 mm 1,0 mm...
- Page 39 Thermo 230 / 231 / 300 / 301 / 350 7 Circuit Diagrams rt/ws F1/B3 ϑ ϑ B1 Y1 Fuses acc. to SAE J 1284 Wire colors DW230 DW300 DW350 blue 25A / 16A 25A / 16A 25A / 16A brown 25A / 16A 25A / 16A...
- Page 40 Thermo 230 / 231 / 300 / 301 / 350 7 Circuit Diagrams rt/ws F1/B3 ϑ ϑ B1 Y1 Fuses acc. to SAE J 1284 Wire colors DW230 DW300 DW350 blue 25A / 16A 25A / 16A 25A / 16A brown 25A / 16A 25A / 16A...
- Page 41 Thermo 230 / 231 / 300 / 301 / 350 7 Circuit Diagrams rt/ws B3/B5 ϑ ϑ B1 Y1 Wire colors blue brown yellow Diagnostic connector green Wire gauges gray orange < 7,5 m 7,5 - 15 m 0,75 mm 1,5 mm 1,0 mm 1,5 mm...
- Page 42 Thermo 230 / 231 / 300 / 301 / 350 7 Circuit Diagrams rt/ws X4/X5 B3/B6 ϑ ϑ ϑ ϑ B1 Y1 Wire colors blue brown yellow Diagnostic connector green Wire gauges gray orange < 7,5 m 7,5 - 15 m 0,75 mm 1,5 mm 1,0 mm...
- Page 43 Thermo 230 / 231 / 300 / 301 / 350 7 Circuit Diagrams Diagnostic connector Wire colors Timer P: blue with plus to connection 10 = continuous operating during immediate heating brown terminal 10 not connected = duration of heating programmable (10 min to 120 min); yellow green Pin assignment:...
- Page 44 Thermo 230 / 231 / 300 / 301 / 350 8 Servicing Servicing 8.5.1 Inspection and Attachment of the Exhaust Muffler (only heaters from year of production 1996 and up to production General date 1996, calendar week 36; 3G..) This section describes the servicing procedures allowed NOTE: on the heater when installed.
- Page 45 Thermo 230 / 231 / 300 / 301 / 350 8 Servicing Inspection and Attachment 3. If no muffler is found in exhaust end pipe check if muffler is upstream in exhaust pipe. If muffler is NOTE: dislocated in the exhaust pipe, arrest muffler as The exhaust muffler must always be secured with a sheet described in NOTE.
- Page 46 Thermo 230 / 231 / 300 / 301 / 350 8 Servicing 8.5.2 Burner Head Opening and Closing In order to obtain a convenient burner head opening angle it is required to disconnect the electrical connection(s) to the temperature limiter and temperature sensor. High voltage! Opening Warning!
- Page 47 Thermo 230 / 231 / 300 / 301 / 350 8 Servicing Visual Inspections and Regulations 8.6.2 Connection to Vehicle Fuel System for Installation Fuel is tapped from the fuel reservoir of the vehicle or from a separate fuel tank. 8.6.1 Connection to Vehicle Cooling System The installation of the heater should be in a location as low 8.6.2.1 Fuel Lines...
- Page 48 Thermo 230 / 231 / 300 / 301 / 350 8 Servicing Water heating circuit – Sidewall radiators and roof duct heating Supply Return 1 Sidewall radiator with fan 2 Heat exchanger, entrance 3 Heater unit 4 Circulation pump 5 Heat exchanger, roof 6 Vehicle engine 7 Cockpit heating 8 Control element...
-
Page 49: Technical Data
Thermo 230 / 231 / 300 / 301 / 350 8 Servicing 8.6.3 Combustion Air Supply When installing a shut-off device in the return line a clearly visible information label must be provided. ATTENTION: Warning! Operation with the return line shut off causes damage Danger to life and health! to the fuel pump. - Page 50 Thermo 230 / 231 / 300 / 301 / 350 8 Servicing 8.6.4 Exhaust Line 4. Loosen fuel supply and return line connections, disconnect and fit dummy plugs. Close water cocks as applicable. 5. Loosen hose clamps on coolant hoses, disconnect hoses and fit dummy plugs.
-
Page 51: Troubleshooting
Thermo 230 / 231 / 300 / 301 / 350 8 Servicing 8.7.4 Burner, Replacement First Operation NOTE: After heater installation the coolant circuit and the fuel The replacement procedure for the burner is identical with supply system must be thoroughly bled observing the the heater installed or removed. - Page 52 Thermo 230 / 231 / 300 / 301 / 350 8 Servicing 8.8.2 Fuel Supply System, Bleeding The whole fuel supply system including the fuel filter must completely filled with fuel before initial start-up. NOTE: Never use the fuel pump to fill / bleed the fuel system! ATTENTION: In the event no fuel comes to the fuel pump during initial start-up, there is a risk that the fuel pump will be...
-
Page 53: General
Thermo 230 / 231 / 300 / 301 / 350 9 Repair Repair General This section describes the repairs that may be performed on the heaters Thermo 230, 300 and 350 when removed. Any further disassembly will void the warranty. For re-assembly only components of the proper spare part kits are to be used. -
Page 54: General
Thermo 230 / 231 / 300 / 301 / 350 9 Repair 9.1.1 Work on Components after Disassembly 9.1.2 Incorporation of Modifications ATTENTION: NOTE: Continuous enhancement of heater design is for optimi- All gaskets located between disassembled com- zing performance and avoiding failures and malfunctions. ponents must always be replaced and discarded. -
Page 55: General
Thermo 230 / 231 / 300 / 301 / 350 9 Repair 9.1.2.1 Installation of Control Unit 1572D as Procedure Substitute for Control Unit 1572 ATTENTION: General Control unit 1572D may only be used in combination with the igniter box delivered (green connector Due to the progress in the development of processors cover). - Page 56 Thermo 230 / 231 / 300 / 301 / 350 9 Repair Disassembly and Assembly 2. Unscrew temperature sensor (2, Fig. 901) and remove. 9.2.1 Temperature Limiter, Replacement 9.2.2.2 Installation 9.2.1.1 Removal 1. Manually screw temperature sensor (2, Fig. 901) into coolant outlet (4).
- Page 57 Thermo 230 / 231 / 300 / 301 / 350 9 Repair 1 Temperature limiter 2 Temperature sensor Rubber cap 3 Connector Temperature 4 Coolant outlet limiter 5 Cotter pin 6 Nut (2) 7 Hinge bolt (2) Retaining clip 8 Burner 20 +5 Nm 7.5 +1 Nm NOTE...
- Page 58 Thermo 230 / 231 / 300 / 301 / 350 9 Repair 9.2.4 Combustion Air Fan, Replacement 9.2.4.2 Installation NOTE: NOTE: Fan motor (7, Fig. 902) to be aligned with control unit For replacement of the combustion air fan the burner may (recess in mounting flange) and with clutch (by rotating be left installed.
- Page 59 Thermo 230 / 231 / 300 / 301 / 350 9 Repair 5 +1 Nm 1 Splash protection cover 2 Cap 3 Screw (2) 4 Fan wheel 2 Nm 5 Slide lock 6 Screw (3) 7 Fan motor 8 Clutch 9 Electrical connector Fig.
- Page 60 Thermo 230 / 231 / 300 / 301 / 350 9 Repair 9.2.5 Control Unit, Replacement 9.2.6.2 Installation 1. Install solenoid valve (7, Fig. 904) on fuel pump (10) NOTE: if required. For replacement of the control unit the burner head 2.
- Page 61 Thermo 230 / 231 / 300 / 301 / 350 9 Repair Overheat thermostat only Thermo 231 / 301 Control unit 1572D 20 Nm 5 +1 Nm 5 +1 Nm Control unit 1572 5 +1 Nm 15 Flame sensor 1 Igniter box 16 Screw 2 Screw (2) 17 Burner housing...
- Page 62 Thermo 230 / 231 / 300 / 301 / 350 9 Repair 9.2.9 Flame Sensor, Replacement 9.2.8.1 Removal 1. Remove burner if required (refer to 9.2.3.1). 9.2.9.1 Removal 2. Using screw driver lever off igniter electrodes (Fig. 904) from igniter box and remove. 1.
- Page 63 Thermo 230 / 231 / 300 / 301 / 350 9 Repair Overheat thermostat only Thermo 231 / 301 Control unit 1572D 20 Nm 5 +1 Nm 5 +1 Nm Control unit 1572 5 +1 Nm 15 Flame sensor 1 Igniter box 16 Screw 2 Screw (2) 17 Burner housing...
- Page 64 Thermo 230 / 231 / 300 / 301 / 350 9 Repair 9.2.10 Heat Exchanger, Replacement 3. Install temperature limiter (refer to 9.2.1.2). 4. Install temperature sensor (refer to 9.2.2.2). 9.2.10.1 Removal 1. Remove temperature limiter (refer to 9.2.1.1). 9.2.11 Combustion Chamber, Replacement 2.
- Page 65 Thermo 230 / 231 / 300 / 301 / 350 9 Repair 9.2.11.2 Installation ATTENTION: When replacing the combustion chamber, ensure that the new combustion chamber corresponds to the heating capacity class of your heating appliance. 1. Slide combustion chamber (1, Fig.
-
Page 66: 10 Packaging, Storage And Shipping
Thermo 230 / 231 / 300 / 301 / 350 10 Packaging, Storage and Shipping Packaging, Storage and Shipping 10.1 General The heater or its components shipped to Webasto Thermosysteme GmbH for testing or repair must be cleaned and packaged so that they are protected against damage during handling, shipping and storage. -
Page 67: Maintenance
Änderungen vorbehalten. Für Übersetzungen ist die deutsche Fassung rechtlich bindend. Die aktuelle Fassung dieses Dokumentes steht unter www.valeo-thermalbus.com zum Download bereit. / Subject to modification. For translations the german version is binding. Latest version of this document is provided for download on www.valeo-thermalbus.com. -
Page 68: Exhaust Line
FAME is used! is shortened Technical Information Biodiesel / FAME d) Replace fuel screen with gasket in the pump. www.valeo- thermalbus.com 4. Burner head a) Inspect combustion air intake opening for clear passage. Replace damaged b) Inspect hood for damage. - Page 69 Maintenance plan for heaters of type Thermo, Thermo E, Thermo S and Thermo plus in buses und railway vehicles 7. Functional check a) If available, open shut-off valve of the fuel return line and water line. b) Check fault memory, clear it as needed using the diagnostic tool (STT).
- Page 70 memos...
- Page 71 Valeo Thermal Commercial Vehicles Germany GmbH Postfach 1371 - 82198 Gilching - Germany - Tel. +49 (0)8105 7721-0 - Fax +49 (0)8105 7721-889 www.valeo-thermalbus.com - service-valeobus@valeo.com...
Need help?
Do you have a question about the spheros thermo 230 and is the answer not in the manual?
Questions and answers