Table of Contents
Advertisement
Quick Links
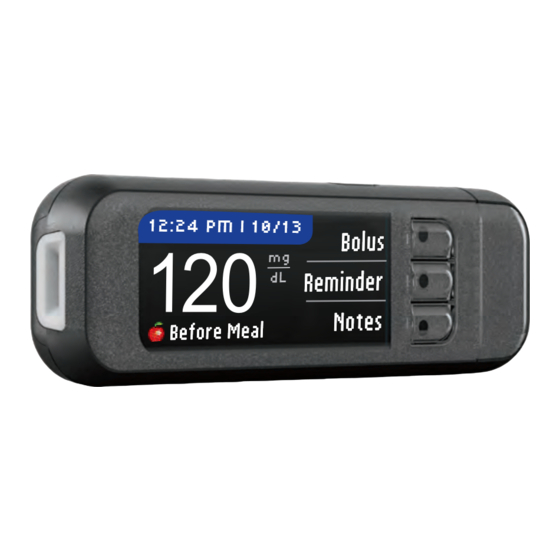
Wireless Blood Glucose
Monitoring System
C
N
®
ONTOUR
EXT
system (BGMS) approved as part of the MiniMed
and MiniMed
670G systems. The meter is designed to be
®
used exclusively for Continuous Glucose Monitoring (CGM)
calibration and insulin administration decisions as part of the
MiniMed 630G and MiniMed 670G systems.
The C
N
ONTOUR
has been demonstrated to close the gap between laboratory
accuracy and real world test results.
that differences in BGMS accuracy could result in clinically
important differences in insulin dosing.
85587269_CntrNextLINK_2_4_UG_EN_FpBp_v5.indd ofc1
®
LINK 2.4 is the only blood glucose monitoring
LINK 2.4 BGMS is highly accurate and
EXT
USER GUIDE
630G
®
Clinical studies show
11
12, 13
Uses only C
ONTOUR
Blood Glucose Test Strips
BG
120
Active Insulin
N
®
EXT
12:24
PM
mg/dL
0.0 u
11/21/16 2:40 PM
Advertisement
Table of Contents

Related Manuals for CONTOUR NEXT LINK 2.4


Summary of Contents for CONTOUR NEXT LINK 2.4
- Page 1 Uses only C ® ONTOUR Blood Glucose Test Strips Wireless Blood Glucose Monitoring System 12:24 LINK 2.4 is the only blood glucose monitoring ® ONTOUR system (BGMS) approved as part of the MiniMed 630G ® and MiniMed 670G systems. The meter is designed to be ®...
- Page 2 • If your blood sugar reading is over 250 mg/dL, wash and dry your hands well and repeat the test • The C • The C LINK 2.4 meter has been preset and locked to display results in mg/dL (milligrams LINK 2.4 meter has been preset and locked to display results in mg/dL (milligrams ONTOUR ONTOUR call your health care professional as soon as possible.
-
Page 3: Table Of Contents
Preparing the Lancing Device ..................13 Preparing the Lancing Device ..................13 argeable battery. You must charge Your C LINK 2.4 meter has a rechargeable battery. You must charge ONTOUR Getting the Blood Drop — Fingertip Testing ..............15 Getting the Blood Drop — Fingertip Testing ..............15... -
Page 4: Usb Cap
LINK 2.4 Wireless Blood Glucose ONTOUR ONTOUR ® ® Monitoring System Monitoring System Your C Your C LINK 2.4 wireless blood glucose monitoring system works with LINK 2.4 wireless blood glucose monitoring system works with ONTOUR ONTOUR ® ® test strips. test strips. ONTOUR... -
Page 5: Initial Setup
Setup Setup s can be connected to your MiniMed insulin to 6 C LINK 2.4 meters can be connected to your MiniMed insulin ONTOUR 4 meter and MiniMed insulin pump must be pump. Your C LINK 2.4 meter and MiniMed insulin pump must be ONTOUR The Main Menu has four choices: Bolus, Logbook, Trends and Setup. - Page 6 Set Language for illustration purposes only. These meter screen images are for illustration purposes only. 8. Press the Down arrow button 8. Press the Down arrow button Menu Menu to scroll to Utilities. to scroll to Utilities. LANGUAGE Insulin Settings Insulin Settings Press Select button Press Select button...
- Page 7 When the pump links to the meter, the SN on the meter screen will change to a different When the pump links to the meter, the SN on the meter screen will change to a different serial number. This number is the pump SN. serial number.
- Page 8 Meter Send Options High and Low Alerts High and Low Alerts onnected, you set your Send Options. This controls 18. After the meter and pump are connected, you set your Send Options. This controls The High and Low Alert feature tells you when your test result is above or below the settings The High and Low Alert feature tells you when your test result is above or below the settings cose readings to your MiniMed insulin pump.
-
Page 9: Preparing The Lancing Device
Log OFF, you have a single Target range. With AutoLog your blood sugar results. With AutoLog OFF, you have a single Target range. With AutoLog Read your C Read your C LINK 2.4 user guide, your MiniMed insulin pump LINK 2.4 user guide, your MiniMed insulin pump ® ®... -
Page 10: Getting The Blood Drop - Fingertip Testing
2. Hold the test strip with the gray square end facing up. 2. Hold the test strip with the gray square end facing up. 3. Insert the gray square end into the test strip port until 3. Insert the gray square end into the test strip port until 3. -
Page 11: Test Results
Apply More Blood Testing With AutoLog On Testing With AutoLog On STRIP UNDERFILLED the first blood drop is not enough, the meter will beep If the first blood drop is not enough, the meter will beep AUTOLOG AUTOLOG After you apply blood to the test strip, use the M to select After you apply blood to the test strip, use the M to select wice and display “STRIP UNDERFILLED”... -
Page 12: Alternative Site Testing (Ast) - Palm
IMPORTANT: For Alternative Site Testing, use the clear endcap on your lancing device. Your be used for fingertip or palm testing. See the lancing LINK 2.4 meter can be used for fingertip or palm testing. See the lancing ® ONTOUR 5. - Page 13 If you have the AutoLog feature turned ON, the AUTOLOG 9. If you have the AutoLog feature turned ON, the WARNING: Potential Biohazard WARNING: Potential Biohazard AutoLog screen appears. Select AutoLog screen appears. Select Fasting Fasting, Before Fasting, Before • Always dispose of test strip and lancet as medical waste or as advised by your •...
-
Page 14: Control Solution Testing
ONTOUR ® ® ® ® LINK 2.4 blood glucose monitoring system. Using anything other than LINK 2.4 blood glucose monitoring system. Using anything other than ONTOUR ONTOUR A screen with large orange numbers alerts you that • A screen with large orange numbers alerts you that control solution can cause inaccurate results. -
Page 15: Autolog (Marking Your Results)
15 times before every use. Your C Your C ® ® LINK 2.4 meter includes many testing features. LINK 2.4 meter includes many testing features. ONTOUR ONTOUR move the bottle cap and use a tissue to wipe away any 6. Remove the bottle cap and use a tissue to wipe away any... -
Page 16: Notes
If Block Mode is ON at the pump, you are asked if you want to proceed with the bolus. ou are asked if you want to proceed with the bolus. Manual Bolus was sent. Manual Bolus was sent. ing that restricts access to critical pump settings. Block Mode is a MiniMed pump setting that restricts access to critical pump settings. - Page 17 Test Reminders Changing a Reminder Time Changing a Reminder Time set after testing OR from the Setup Menu (see page 43). A reminder for your next test can be set after testing OR from the Setup Menu (see page 43). 1.
- Page 18 Using the Main Menu Using the Main Menu Notes lt that may help explain results. Your notes will be saved You may add notes to your test result that may help explain results. Your notes will be saved The Main Menu has 4 choices: Bolus, Logbook, Trends and Setup. To select one, press the The Main Menu has 4 choices: Bolus, Logbook, Trends and Setup.
-
Page 19: Setup
maries) Trends (Averages and Summaries) 14 DAY RESULTS 14 DAY RESULTS erages and your results as they compare to your The Trends feature displays your averages and your results as they compare to your AVERAGE AVERAGE 6. Press the M button to go to the 14 Day Results screen. 6. - Page 20 PUMP OPTIONS 4. The Connect to Pump screens appear next. Press Yes The Connect to Pump screens appear next. Press Yes No MiniMed Pump Connect Device Connect Device 9. Place the meter and pump next to each other. Select Auto 9.
- Page 21 k that the SN (serial number) on the pump screen 12. Check that the SN (serial number) on the pump screen es the meter SN on the meter screen. matches the meter SN on the meter screen. Confirm Device SN match, scroll to Confirm on the pump.
- Page 22 Manual Connect Connecting to the Pump Using Manual Connect r pump side by side before you begin. You need to NOTE: Place your meter and your pump side by side before you begin. You need to 7. Press the Down arrow button 7.
- Page 23 If you have just connected to a pump for the first time, you will be returned to If you have just connected to a pump for the first time, you will be returned to Initial Setup, Meter Send Options, Step 18 (page 10). Initial Setup, Meter Send Options, Step 18 (page 10).
-
Page 24: Test Reminders
Changing the Send Option Viewing or Disconnecting Your Pump Connection Viewing or Disconnecting Your Pump Connection Your meter must be connected to your MiniMed insulin pump to view pump connection or Your meter must be connected to your MiniMed insulin pump to view pump connection or cted to your MiniMed insulin pump to set or NOTE: The meter must be connected to your MiniMed insulin pump to set or disconnect from pump. -
Page 25: Date And Time
To accept the preset time shown, select Start. To 4. To accept the preset time shown, select Start. To Date and Time Date and Time REMINDER Start COUNTDOWN change the time, select Change, and you can change change the time, select Change, and you can change Setting the Date (When Not Connected to a Pump) Setting the Date (When Not Connected to a Pump) Change... - Page 26 SETUP Sound Sound Press the M button to highlight Time. Press OK Date 3. Press the M button to highlight Time. Press OK Turning the Sound On/Off Turning the Sound On/Off to select. Time: 11:30 to select. Sound is ON when you receive your meter. Some error messages and the Reminder bell will Sound is ON when you receive your meter.
- Page 27 Blood Sugar Targets Blood Sugar Targets AUTOLOG Press Turn On to activate AutoLog. AutoLog is Off. 4. Press Turn On to activate AutoLog. Targets are your personal ranges for your blood sugar results. With AutoLog OFF, you have Targets are your personal ranges for your blood sugar results. With AutoLog OFF, you have Accept a single Target range.
- Page 28 Your meter has been preset to 14 day averages, but you can change this in Setup. in Setup. ® LINK 2.4 meter comes preset with the following When AutoLog is ON, your C ® LINK 2.4 meter comes preset with the following...
-
Page 29: Transferring Data To Carelink
Press the � button to highlight Language. Press OK 3. Press the � button to highlight Language. Press OK IMPORTANT: The C IMPORTANT: The C LINK 2.4 meter has only been tested for use with LINK 2.4 meter has only been tested for use with ONTOUR ONTOUR Language to select. -
Page 30: Battery Status
Battery Status Rapid Charge Rapid Charge Battery Status Displays If the battery is low when you plug in your meter, it will Rapid Charge for about 1 minute. If the battery is low when you plug in your meter, it will Rapid Charge for about 1 minute. You can run a blood sugar test as soon as Rapid Charge is complete and you have You can run a blood sugar test as soon as Rapid Charge is complete and you have a battery symbol... -
Page 31: Technical Information
Ketones (Ketoacidosis): (Hyperglycemia): (Hypoglycemia): (Hyperglycemia): The C The C LINK 2.4 blood glucose monitoring system was tested in a user LINK 2.4 blood glucose monitoring system was tested in a user ONTOUR ONTOUR ® ® performance study by 218 people with diabetes using capillary blood samples and... - Page 32 Figure 1 — 100% of results are within Zone A of the Consensus Error Grid for LINK 2.4. ONTOUR A repeatability study was conducted with the C A repeatability study was conducted with the C LINK 2.4 blood glucose LINK 2.4 blood glucose ® ® ONTOUR...
- Page 33 The C ® LINK 2.4 blood glucose test is based on measurement of electrical ONTOUR Customer Service. Please see back cover for contact information. We have trained specialists Customer Service. Please see back cover for contact information. We have trained specialists glucose with the reagents on the electrode of the strip.
-
Page 34: Caring For Your Meter
41ºF – 86ºF Strip Storage Temperature Range: 41ºF – 86ºF Your C Your C LINK 2.4 meter should be cleaned and disinfected once a week. LINK 2.4 meter should be cleaned and disinfected once a week. ONTOUR ONTOUR ®... - Page 35 Cleaning Your Meter Disinfecting Your Lancing Device Disinfecting Your Lancing Device Supplies Needed for Cleaning: Supplies Needed for Disinfecting: Supplies Needed for Disinfecting: ning 0.55% sodium hypochlorite (bleach) • Clorox Germicidal Wipes containing 0.55% sodium hypochlorite (bleach) • Clorox • Clorox Germicidal Wipes containing 0.55% sodium hypochlorite (bleach) Germicidal Wipes containing 0.55% sodium hypochlorite (bleach) ®...
- Page 36 5. Ascensia Diabetes Care makes no warranty regarding the performance of the Care. 2014;37(supplement 1);S14. LINK 2.4 meter or test results when used with any control solution other LINK 2.4 meter or test results when used with any control solution other...
-
Page 37: Index
Index Date ..............Accuracy ............. Date ..............Meter Care ............Meter Care ............Strip Port Light ............. Strip Port Light ............. Format (Day.Month.Year) or Format (Day.Month.Year) or Alerts ..............mg/dL (milligrams per deciliter) ......mg/dL (milligrams per deciliter) ......Strips ..............Strips .............. - Page 38 85587269_CntrNextLINK_2_4_UG_EN_FpBp_v5_UnMaskedPlaced.pdf:74 85587269_CntrNextLINK_2_4_UG_EN_FpBp_v4.indd 70 11/18/16 9:03 AM 11/18/16 9:03 AM 85587269_CntrNextLINK_2_4_UG_EN_FpBp_v4.indd 71 85587269_CntrNextLINK_2_4_UG_EN_FpBp_v4.indd 71 11/18/16 9:03 AM 11/18/16 9:03 AM...
-
Page 39: Customer Service
Ascensia Diabetes Care US Inc. 5 Wood Hollow Road Parsippany, NJ 07054 USA Customer Service is available, Monday through Sunday, 8:00 am through 12:00 Midnight, Eastern Time at: 1-800-348-8100 www.diabetes.ascensia.com Ascensia, the Ascensia Diabetes Care logo, Clinilog, Contour, Glucofacts, and the No Coding logo are trademarks and/or registered trademarks of Ascensia Diabetes Care Holdings AG.
Need help?
Do you have a question about the LINK 2.4 and is the answer not in the manual?
Questions and answers