
Related Manuals for Linksys WPSM54G V1.1


Summary of Contents for Linksys WPSM54G V1.1
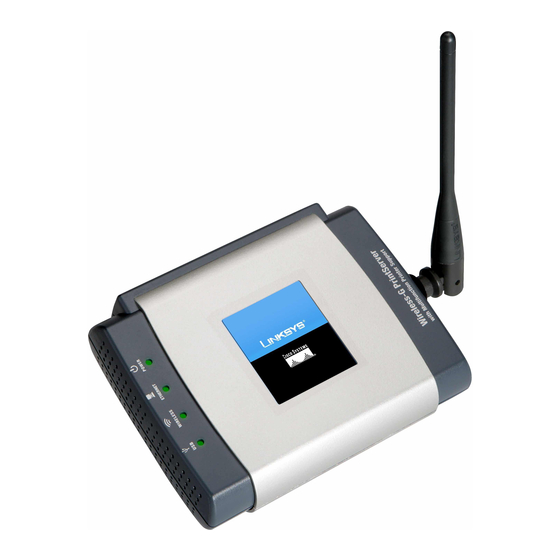
- Page 1 Wireless-G 802.11g PrintServer with User Guide Multifunction Printer Support WIRELESS WPSM54G V1.1 Model No.
- Page 2 Wireless-G PrintServer with Multifunction Printer Support Copyright and Trademarks Specifications are subject to change without notice. Linksys is a registered trademark or trademark of Cisco Systems, Inc. and/or its affiliates in the U.S. and certain other countries. Copyright © 2006 Cisco Systems, Inc. All rights reserved.
-
Page 3: Table Of Contents
Wireless-G PrintServer with Multifunction Printer Support Table of Contents Chapter 1: Introduction Welcome What’s in this Guide? Chapter 2: Getting to Know the PrintServer The Bottom Panel The Front Panel Chapter 3: Connecting the PrintServer Overview Connecting the PrintServer to Your Network Placement Options Chapter 4: Configuring the PrintServer Using the Setup Wizard Installation... - Page 4 Wireless-G PrintServer with Multifunction Printer Support Chapter 7: Bi-Admin Management Overview Bi-Admin Installation Starting the Bi-Admin Management Utility The Bi-Admin Management Utility Chapter 8: Internet Printing Protocol (IPP) Overview Windows IPP Client Setup Appendix A: Troubleshooting Common Problems and Solutions Appendix B: Wireless Security Security Precautions Security Threats Facing Wireless Networks...
- Page 5 Wireless-G PrintServer with Multifunction Printer Support List of Figures Figure 2-1: PrintServer’s Bottom Panel Figure 2-2: PrintServer’s Front Panel Figure 3-1: Connect to the USB Port Figure 3-2: Connect to the Ethernet Port Figure 3-3: Desktop Placement Figure 4-1: Welcome Figure 4-2: Set up PrintServer Figure 4-3: Disconnect the USB Printer cable and power Figure 4-4: Connect the PrintServer to the Printer...
- Page 6 Wireless-G PrintServer with Multifunction Printer Support Figure 5-4: Check Print Driver Figure 5-5: Wireless-G PrintServer Diagnostic - Check Printer Driver Installation Figure 5-6: Printer Driver Not Installed Figure 5-7: Print Test Page Figure 5-8: PrintServer Diagnostic Icon Figure 5-9: PrintServer Info Figure 5-10: Right-click Icon Figure 6-1: Setup Tab Figure 6-2: Protocol Tab - TCP/IP...
- Page 7 Wireless-G PrintServer with Multifunction Printer Support Figure 7-12: Configuration - AppleTalk Figure 7-13: Configuration - NetBEUI Figure 7-14: Configuration - Internet Printing Figure 7-15: Configuration - Port Figure 7-16: Configuration - Wireless Figure 7-17: Configuration - SNMP Figure 7-18: Upgrade Figure 7-19: Detected LAN Cards Figure 7-20: BIN File Information Figure 7-21: Add Cross Segment PrintServer...
-
Page 8: Chapter 1: Introduction
Chapter 1: Introduction Welcome Thank you for choosing the Linksys Wireless-G PrintServer with Multifunction Printer Support. The PrintServer lets you connect a USB printer directly to your network, eliminating the need to dedicate a PC to print sharing chores. Using a PrintServer frees up your “print share PC” so you don’t have to leave it on all the time. It also removes the printing bottleneck, and sets your PC free to do more useful work. -
Page 9: What's In This Guide
Wireless-G PrintServer with Multifunction Printer Support What’s in this Guide? This user guide covers the steps for setting up and using the PrintServer. • Chapter 1: Introduction This chapter describes the PrintServer’s applications and this User Guide. • Chapter 2: Getting to Know the PrintServer This chapter describes the physical features of the PrintServer. - Page 10 • Appendix I: Regulatory Information This appendix supplies the regulatory information regarding the PrintServer. • Appendix J: Contact Information This appendix provides contact information for a variety of Linksys resources, including Technical Support. Chapter 1: Introduction What’s in this Guide?
-
Page 11: Chapter 2: Getting To Know The Printserver
Wireless-G PrintServer with Multifunction Printer Support Chapter 2: Getting to Know the PrintServer The Bottom Panel The PrintServer’s ports and Reset button are located on the bottom panel. Figure 2-1: PrintServer’s Bottom Panel IMPORTANT: Resetting the PrintServer will delete all of your settings and replace them Power The Power port is where you will connect the power adapter. -
Page 12: The Front Panel
Wireless-G PrintServer with Multifunction Printer Support The Front Panel The PrintServer’s LEDs are located on the front panel. Figure 2-2: PrintServer’s Front Panel Green/Orange. The USB LED lights up green when there is a printer connected to the USB port. The LED flashes green when the PrintServer is sending data through the USB port. -
Page 13: Chapter 3: Connecting The Printserver
Wireless-G PrintServer with Multifunction Printer Support Chapter 3: Connecting the PrintServer Overview Before starting the physical installation, note the PrintServer’s default name, which starts with “LK” (for example, LK71107). The default name is shown in the Server field on the PrintServer’s sticker, which is located on the PrintServer’s back panel. -
Page 14: Placement Options
Wireless-G PrintServer with Multifunction Printer Support Placement Options There are different ways to place the PrintServer. The first way is to place the PrintServer horizontally on a surface, so it sits on four small rubber pads. You can also use the included velcro to mount the PrintServer on a wall or underneath a shelf. -
Page 15: Chapter 4: Configuring The Printserver Using The Setup Wizard
Wireless-G PrintServer with Multifunction Printer Support Chapter 4: Configuring the PrintServer Using the Setup Wizard Installation To install the PrintServer, you will use the Setup CD-ROM to run the Setup Wizard. It is highly recommended that you use a computer on the wired network to set up the PrintServer. However, if you only have a wireless network, then you can use a computer on the wireless network to set up the PrintServer. -
Page 16: Figure 4-3: Disconnect The Usb Printer Cable And Power
Wireless-G PrintServer with Multifunction Printer Support 4. You will need to first disconnect the USB Printer cable from the computer and disconnect the power from the printer. Click Next when finished. Figure 4-3: Disconnect the USB Printer cable and power 5. -
Page 17: Figure 4-5: Connect The Printserver
Wireless-G PrintServer with Multifunction Printer Support 6. From the Connecting Your PrintServer screen, you will connect your Ethernet port. The Ethernet connection is for configuration purposes only. Later in this installation, you will need to disconnect the ethernet cable and reconnect your PrintServer, printer, and router. Click Next to continue. -
Page 18: Figure 4-7: Reconnect The Printer
Wireless-G PrintServer with Multifunction Printer Support 8. Reconnect the power adapter to the printer. Plug the power into the wall outlet. Click Next to continue, or click Back to return to the previous screen. Wait a few moments while the system searches for the PrintServer. Figure 4-7: Reconnect the Printer 9. -
Page 19: Figure 4-9: Password
Wireless-G PrintServer with Multifunction Printer Support 10. If you have changed the default password previously, the password dialog opens and you are prompted for your password. Otherwise, the installation will continue. If you have forgotten your password, hold the reset button on the side of the PrintServer for 10 seconds. This will reset the device to factory default. -
Page 20: Figure 4-11: Set Printserver Password
Wireless-G PrintServer with Multifunction Printer Support 12. The Set PrintServer’s Password screen appears. If you want to change your password, enter your current password in the Password field. Enter the new password in the Confirm field. Click Next to continue, or click Back to return to the previous screen. Figure 4-11: Set PrintServer Password 13. -
Page 21: Figure 4-13: Configure Wireless Settings - Ssid
Wireless-G PrintServer with Multifunction Printer Support 14. If you clicked Manual Setup, the Configure Wireless Settings screen appears with the SSID field. Enter your wireless network’s SSID or name. This is the unique name shared by all devices in a wireless network. The SSID is case-sensitive and should have 32 characters or fewer. -
Page 22: Figure 4-15: Wireless Security Settings - Disabled
Wireless-G PrintServer with Multifunction Printer Support 15. If your network uses wireless security, you will prompted to enter the correct information. Figure 4-15: Wireless Security Settings - Disabled If you enter a Passphrase, you will see the automatically generated WEP key on the following screen. Otherwise, enter the WEP key manually in the field provided. -
Page 23: Figure 4-17: Wireless Security - Wpa-Pre-Shared
Wireless-G PrintServer with Multifunction Printer Support WPA-Pre-Shared Key Enter a Pre-Shared Key that is 8-63 characters in length. Click Next to continue, or click Back to return to the previous screen. Figure 4-17: Wireless Security - WPA-Pre-Shared 16. The Confirmation screen will appear. Your old and new settings will be displayed. If you want to save the new settings, click Next. -
Page 24: Figure 4-19: Disconnect Power To The Printserver
Wireless-G PrintServer with Multifunction Printer Support 17. Disconnect the power to the PrintServer. Click Next. Figure 4-19: Disconnect power to the PrintServer 18. Disconnect the Network Cable from the PrintServer and router. Figure 4-20: Disconnect Network Chapter 4: Configuring the PrintServer Using the Setup Wizard Installation... -
Page 25: Figure 4-21: Reconnect The Printserver
Wireless-G PrintServer with Multifunction Printer Support 19. Reconnect the power to the PrintServer and click Next. Wait a few moments while the system checks for the network. Figure 4-21: Reconnect the PrintServer 20. The PrintServer is now connected to your wireless network properly. The order used in reconnecting your PrintServer, router, and printer is very important. -
Page 26: Figure 4-23: Continue To Set Up Computer
Wireless-G PrintServer with Multifunction Printer Support 21. Now you have finished the initial setup.. You will need to install the driver next. Click Set up Computer at the bottom of this, and go to “Chapter 5: Windows Driver Installation” of this user guide. Figure 4-23: Continue to Set up Computer Chapter 4: Configuring the PrintServer Using the Setup Wizard Installation... -
Page 27: Chapter 5: Windows Driver Installation
• an IP address assigned to the PrintServer by you or your network router. By default the PrintServer has DHCP HAVE YOU: already set up your printer? Linksys enabled so the network router will automatically assign an IP address. If you need to manually assign an IP recommends that you set up your printer and address, run the Setup Wizard on the Setup CD-ROM or go to “Chapter 7: Bi-Admin Management.”... -
Page 28: Figure 5-1: Welcome
Wireless-G PrintServer with Multifunction Printer Support 3. When you see the Welcome screen, click Click Here to Start to continue. Click Exit to end the installation. Figure 5-1: Welcome 4. Click Set up Computer. Figure 5-2: Set up Computer Configuration of the PrintServer Driver Chapter 5: Windows Driver Installation Installation... -
Page 29: Configuration Of The Printserver Driver
Wireless-G PrintServer with Multifunction Printer Support Configuration of the PrintServer Driver 1. The Wireless-G PrintServer Driver screen automatically appears. Select the PrintServer you are installing. Then click Next. NOTE: If the PrintServer is not listed, then click Refresh. If the PrintServer cannot be found, then select to temporarily disable the firewall and click Refresh again. -
Page 30: Figure 5-5: Wireless-G Printserver Diagnostic - Check Printer Driver Installation
Wireless-G PrintServer with Multifunction Printer Support 3. The Wireless-G PrintServer Driver screen appears. Review the PrintServer status and then click Next. Figure 5-5: Wireless-G PrintServer Diagnostic - Check Printer Driver Installation 4. The Wireless-G PrintServer Driver screen appears. If you want to print a test page, click Test Print. Then click Finish. -
Page 31: Figure 5-8: Printserver Diagnostic Icon
Wireless-G PrintServer with Multifunction Printer Support 6. The Print Server diagnostic icon will appear in the system tray of your desktop. When you double-click the icon, you will see the PrintServer Info screen. Figure 5-8: PrintServer Diagnostic Icon If you want to run the wizard that configures the printer driver, click the Diagnostics button. To close the PrintServer Info screen, click the Close button. -
Page 32: Chapter 6: Configuring The Printserver Using The Web-Based Utility
Wireless-G PrintServer with Multifunction Printer Support Chapter 6: Configuring the PrintServer Using the Web-based Utility Overview After setting up the PrintServer with the Setup Wizard, the PrintServer will be ready for use. However, if you’d like to change its settings, use the PrintServer’s web-based utility. This chapter will describe each web page of the utility and each page’s key functions. -
Page 33: The Setup Tab
Wireless-G PrintServer with Multifunction Printer Support The Setup Tab The first screen that appears is the Setup tab and allows you to change the PrintServer’s general settings. WPS54G Device Name Enter the PrintServer’s name in the field provided. The name is located on a sticker on the bottom of the PrintServer. -
Page 34: The Protocol Tab - Tcp/Ip
Wireless-G PrintServer with Multifunction Printer Support The Protocol Tab - TCP/IP Click the TCP/IP tab to view or change the TCP/IP values of the PrintServer. IP Address Obtain an IP Address Automatically. If your network router is using DHCP to assign IP addresses, select Obtain an IP Address Automatically. -
Page 35: The Protocol Tab - Appletalk
Wireless-G PrintServer with Multifunction Printer Support The Protocol Tab - AppleTalk AppleTalk is a network communications protocol that allows computers to talk to each other using Ethernet. Typically only Macintoshes use AppleTalk, although other platforms can use it if they have the necessary, third- party software. -
Page 36: The Protocol Tab - Netbeui
Wireless-G PrintServer with Multifunction Printer Support The Protocol Tab - NetBEUI NetBEUI connection settings of the PrintServer are available on this tab. Domain Name Enter the name of the domain that you want the PrintServer associated with in the Domain Name field. If you are unsure of the Domain Name, you can find it out by looking on any computer already on the network. -
Page 37: The Protocol Tab - Snmp
Wireless-G PrintServer with Multifunction Printer Support The Protocol Tab - SNMP Use this screen to view or change the PrintServer’s SNMP (Simple Network Management Protocol) settings. The PrintServer supports SNMP, which allows network administrators to monitor and control the PrintServer through the use of network management platforms, such as HP OpenView. -
Page 38: The Wireless Tab - Basic
Wireless-G PrintServer with Multifunction Printer Support The Wireless Tab - Basic This screen allows you to change the PrintServer’s basic wireless settings. Configuration Regulatory Domain and MAC Address. The PrintServer’s Regulatory Domain and MAC Address are listed and cannot be changed. SSID. -
Page 39: The Wireless Tab - Security
Passphrase. Enter a Passphrase and click the Generate Keys button to automatically generate WEP Keys 1-4. The Passphrase is case-sensitive and should have no more than 16 alphanumeric characters. It must match your wireless network’s passphrase and is compatible with Linksys wireless products only. (Enter the WEP key(s) manually on any non-Linksys wireless products.) Key 1 to Key 4. -
Page 40: The Printer Tab - Internet Printing
Wireless-G PrintServer with Multifunction Printer Support The Printer Tab - Internet Printing Internet Printing allows you to automatically print any e-mails that are sent to a specific e-mail account on your network. This is especially useful for printing information when you are not connected to the network. You can print from any location where you can access e-mail.
Need help?
Do you have a question about the WPSM54G V1.1 and is the answer not in the manual?
Questions and answers