Table of Contents
Advertisement
Advertisement
Table of Contents

Related Manuals for Bioland G-427B


Summary of Contents for Bioland G-427B
- Page 1 Bioland® Blood Glucose Monitor : Model G-427B OWNER'S MANUAL ...
-
Page 2: Important Safety Instructions
Dear Bioland Blood Glucose Monitoring System Owner: Thank you for choosing this system! This manual contains important information you must know about the system. Please read it thoroughly and carefully. The system provides No Code function which means that you don't need to calibrate your ... - Page 3 handicapped persons or invalids. The following basic safety notice should always be taken: 1. Do not place the device in liquid, nor put it where it could fall into liquid. 2. The following basic safety notice should always be taken. 3. Use the device only for the intended use described in this manual. 4.Do not use adjunct which are not supplied by the producer. 5. Do not make the device come into contact with surfaces which are too hot to touch. 6.Do not use the device where aerosol sprays are being used. 7.Do not use the device if it is not working properly, or if it has been damaged. 8.Read all the manual, and practice the test, and then use the product to test your blood glucose. Do all quality control checks as directed and consult with a diabetes expert. KEEP THESE INSTRUCTION IN A SAFE PLACE 2 / 19 ...
-
Page 4: Table Of Contents
Table of Contents BEFORE YOUR BEGIN ......................... 4 INTRODUCTION TO THE SYSTEM ....................... 4 Intended Use .......................... 4 ABOUT ALTERNATIVE SITE TESTING (AST) .................. 5 CONTENTS OF THE KITS ........................ 6 Blood Glucose Meter......................... 7 Meter Screen Display Message .................... 7 Test Strip ............................ 7 SETTING THE METER AND DELETING THE MEMORY ................ 8 THE TWO MEASURING MODES ....................... 1 1 TESTING WITH BLOOD SAMPLE ...................... ... -
Page 5: Before Your Begin
BEFORE YOUR BEGIN Installing the battery 1. Open the battery cover on the back of meter. 2. If replacing the batteries, please remove the used batteries. 3. Insert 2 new (AAA) batteries with correct +/‐ direction. 4. Close the battery cover. Environment Protection – Waste electrical products should not be disposed of with household waste. Please recycle where facilities exist. Check with your local Authority or retailer for recycling advice. ... -
Page 6: About Alternative Site Testing (Ast)
Alternative site testing should be done only during steady – state times (when glucose is not changing rapidly). The “ Bioland ” Test Strips are for use with the Blood Glucose Meter to quantitatively measure glucose in fresh capillary whole blood samples drawn from the fingertips, palm, forearm, upper arm, calf and thigh. The Bioland control solutions is intended for use with the System, to check that the glucose meter and test strips are working properly and that you are doing the test ... -
Page 7: Contents Of The Kits
When to use AST? Food , medication , illness, stress and exercise can affect blood glucose levels. Capillary blood at fingertip reflects these changes faster than capillary blood at other sites. Therefore when testing blood glucose during or immediately after meal, physical exercise, or any other event, take a blood sample from your finger only. You do AST only in the following instances: In a pre‐meal or fasting state (more than 2 hours since the last meal). Two hours or more after taking insulin. Two hours or more after exercising. NOTE: Alternative site testing(AST) should not be used to calibrate continuous glucose monitoring systems (CGMs). Results from alternative site testing should not be used in insulin doses calculations. Do NOT use AST if: You think your blood glucose is low. You are unaware of hypoglycemia. You are testing for hyperglycemia. Your AST results do not match the way you feel. Your routine glucose results are often fluctuating. ... -
Page 8: Blood Glucose Meter
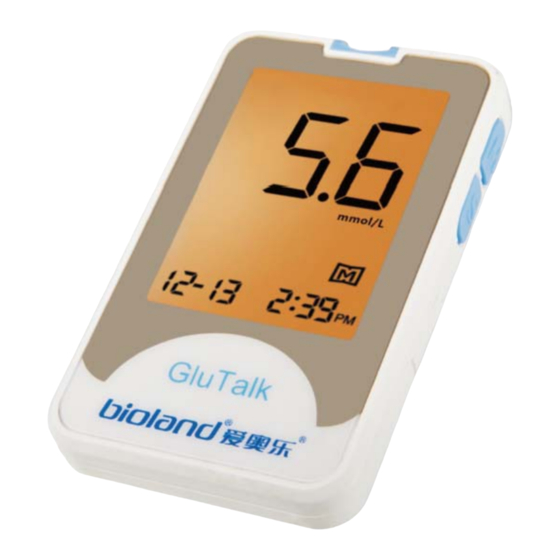
Blood Glucose Meter 1. STRIP PORT: Where you insert the test strip. The meter will turn on automatically 2. DATA PORT:Located at the side is for cable connection 3. STRIP EJECTOR: Slide forward to eject the test strip after test 4. LCD DISPLAY:It guides you through the test using symbols and simple messages 5. "M" BUTTON:It is used to turn on the meter enter the memory mode 6. "S" BUTTON:It is used to set up the meter Meter Screen Display Message BLOOD DROP SYMBOL: Flashes when it is ready to apply the blood sample TEST STRIPS SYMBOL: Appears when the meter is turned on LOW BATTERY SYMBOL: Appears when the battery power is low MEASUREMENT UNIT: Appears with the test result in mg/Ml or mmol/L CTL SYMBOL: Appears when doing a Control test and indicates That the result won/t be Stored in ... -
Page 9: Setting The Meter And Deleting The Memory
2‐Confirmation window This is where you confirm if enough blood has been drawn into the absorbent hole of the strip. 3‐Test strip handle Hold this part to insert the test strip into the slot. 4‐Contact bars Insert this end of the test strip into the meter. Push it in firmly until it will go no further. Attention! Test results might be wrong if the contact Bar is not fully inserted into the test slot. ... - Page 10 2.3 Setting the day With the day flashing, Press “M” until the correct day appears. Press “S”. 2.4 Setting the AM/PM With the AM or PM flashing, Press “M” until the correct one appears. Press “S”. 2.5 Setting the hour With the hour flashing, Press “M” until the correct hour appears. Press S“. 2.6 Setting the minute With the minute flashing, Press “M” until the correct minute appears. Press “S”. 3. Deleting the Memory Press “S” then “dEL” will display with flashing “M”. Press “M” once, to confirm delete, press “M“ button again to delete ALL memory. The meter then displays “OK”, which means that the memory is deleted. If you don’t want to delete the memory, press the S button to skip this step. The meter will automatically turn “OFF”, and the set up will be completed. NOTE: The date, time, unit and memory deletion can ONLY be set in the setting mode. When the meter is in setting mode, if no button is pressed within 3 minutes, the meter will turn off. No set up necessary, meter is pre‐set. Meter is pre‐set for Eastern Standard Time. Please ...
- Page 11 product. Setting the voice volume Voice volume is (number) Setting the year The year is (number) Setting the month The month is (month) Setting the date The date is the (number) Setting the AM/PM AM/PM Setting the hour The hour is (number) Setting the minutes The minutes are (number) Deleting the memory 1. Delete all record mode. Press “M” key to delete all records. 2. Are you sure? Yes, to press “M” key again. 3. All memory record have been deleted. At the end of the meter setting 1. Today’s date is (month) (day), (year) 2. The time is (hour minute)AM/PM 3. Thank you for using this product Using the meter Insert test strip 1. Test strip inserted When the meter is ready to test. 2. Today’s date is (month) (day), (year) 3. The time is (hour minute)AM/PM 4. Please apply blood onto the test strip. After sample is applied onto the test strip Beep When the test is completed (result appears Your blood glucose is (number) milligrams on display) per deciliter When the test result is<20mg/dL Your blood glucose is less than 20 milligrams per deciliter ...
-
Page 12: The Two Measuring Modes
When inserted an used strip Strip has been used When room temperature is outside operating Temperature is out of range range, which is 50℉~104℉(10℃~40℃) When error message appear Unable to measure THE TWO MEASURING MODES The meter provides you with two modes for measuring, General and CTL. The CTL mode should be used when a control solution is being tested. See the table below. Modes Use when General test (not display) Any time of day without regard to time since last meal CTL Testing with the control solution You can switch between each mode by: 1. Start with the meter turned off. Insert a test strip to turn on the meter, the screen will display a flashing blood drop. 2. Press M to select General or CTL mode. TESTING WITH BLOOD SAMPLE CAUTION: To reduce the chances of infection: Choose a clean, dry work surface. Never share a lancing device and lancet with another person. Always use a new and sterile lancet. Lancets are for single use only. Always use a new test strip. Test strip are for single use only. Avoid getting lotion, oils, dirt or debris in or on the lancet and lancing device. ... -
Page 13: Overview Of The Lancing Device
Overview of the Lancing Device A. Device Cap B. Handle C. Needle Cap D. Needle Holder E. Device Body F. Connecting Collar G. Adjustable tip H. Release Button I. Ejection Button J. Device control cap On the lancets and the lancing device. If your lancing device differs from the one shown here, please refer to the manufacturer’s manual to ensure proper usage. NOTE: To reduce the chance of infection: ● Never share a lancet or the lancing device. ● Always use a new, sterile lancet. Lancets are for single use only. ● Avoid ge ng hand lo on, oils, dirt, or debris when handling the lancets. Setting Up the Lancing Device 1. Screw the lancing device cap off. Insert a needle into the lancet holder and push down firmly until it is fully in place. 2. Screw the needle cap and place it in appropriate location to use again after finish blood‐taking. 3. Replace the lancing device cap. Turn the cap until it is snug but not too tight. And then Adjust the adjustable tip to proper level. NOTE: The adjustable tip offers 5 levels of skin penetration. Twist ... -
Page 14: Preparing The Puncture Site
4. Pull the device control cap until it clicks. If not clicks, check the needle is installed appropriately. 5. Aiming at the sterilized part for blood‐taking, press the release key to finish blood‐taking. 6. Screw the device cap. Push the exposed needle into the needle cap, and then push the ejection button to discard the used needle in appropriate container. Cover the device cap at last. Preparing the puncture site Stimulating blood perfusion by rubbing the puncture site prior to blood extraction has a significant influence on the glucose value obtained. Blood from a site that has not been rubbed exhibits a measurably different glucose concentration than blood from the finger. When the puncture site was rubbed prior to blood extraction, the difference was significantly reduced. Please follow the suggestions below before obtaining a drop of blood: Rub the puncture site for about 20 seconds before penetration. Select the puncture site either at the fingertips or another body part (please see section “Alternative Site Testing” (AST) on how to select the appropriate sites). Clean the puncture site using cotton moistened with 70% alcohol and let it air dry. Fingertip testing Hold the lancing device firmly against the side of your finger. Press the release key. You will hear a click, indicating that the puncture is complete. ... - Page 15 Step 2. Remove a test strip from its vial. With clean, dry hands, you may touch the test strip anywhere on its surface. Do not bend, cut or modify the test strips in any way. Remove the test strip from the vial and use it instantly. Step 3. Insert the test strip into the meter's test port and the meter is turned on. The time and date appears on the screen. NOTE: Be sure to use “Bioland” test strips, other test strips may not produce accurate results. Step 4 When the blood drop symbol flashes on the screen, you may select the appropriate measurement mode, for selecting the measurement mode of Control(CTL) or General, please refer to the “THE TWO MEASURING MODES” section. Step 5 Apply your blood to the absorbent hole of the test strip. Step 6 As soon as enough blood has filled the confirmation window of the test strip, you will hear a beep letting you know the test has begun. A countdown of 5 seconds starts. Note: make sure the confirmation window of the Test Strip is completely filled with your blood sample. Step 7 Your blood glucose level, along date and time appears on the display. Blood glucose results are automatically stored in the memory. When bluetooth connected, Bluetooth symbol flashing, and waiting for other device with Bluetooth to scan and connect, ...
-
Page 16: Comparing Meter And Laboratory Results
Step 8 Eject the used test strip and remove the lancet. To eject the test strip, point the strip at a disposal container for sharp objects. The meter will switch itself off automatically after the test strip is ejected. Please wash hands thoroughly with soap and water after handling the meter, lancing device, or test strips. Reference value: Time of day Normal plasma glucose rang for people without Before breakfast (fasting) <100 mg/dL Two hours after meals <140 mg/dL Source: American Diabetes Association. Standards of Medical Care in Diabetes‐2012.Diabetes Care 2012,35(Suppl.1)S11‐S63. Please work with your doctor to determine a target range that works best for you. Comparing Meter and Laboratory Results The meter provides you with whole blood equivalent results. The result you obtain from your meter may differ somewhat from your laboratory result due to normal variation. Meter results can be affected by factors and conditions that do not affect laboratory results in the same way. To make an accurate comparison between meter and laboratory results, follow the guidelines below. Before going to the lab: ■ Do a control solu on test to make sure that the meter is working properly. ■ Fast for at least eight hours and then do comparison tests, if possible. ■ Take your meter with you to the lab. ... -
Page 17: Viewing Results On The Meter
◆ If your blood glucose test results are not consistent with how you feel. ◆ After the test strips are exposed to extreme conditions. ◆ After dropping the meter. The control solution is to check that the meter and the test strips can work together as a system and work correctly. Step 1 Insert the test strip to turn on the meter. Insert the test strip into the meter. Wait for the meter to display the drop symbol. Step 2 You may press “M” button to select CTL mode, for selecting the CTL mode, please refer to the “THE TWO MEASURING MODES” section. Step 3 Apply the control solution Shake the control solution vial thoroughly before use. Squeeze out a drop and wipe it off, then squeeze another drop and place it on the tip of the vial cap. Hold the meter to move the absorbent hole of test strip so it touches the drop. Once the confirmation window fills completely, the meter will begin counting down. To avoid contaminating the control solution, do not directly apply control solution onto a strip. Step 4 The result of the control solutions test appears on the display. The result will not be stored under CTL mode. The result of the control solutions test should be within the range printed on the test strip vial label. If the test results falls outside the specified range printed on test strip vial label, repeat the test. Results falling outside the specified range may be caused by: ■ Error in performing the test ■ Expired or contaminated Control Solu on ■... -
Page 18: Care And Storage For Your System
1.Start with the meter off, press the “M” button to turn on the meter. The “ ” symbol will flash with the time and date displayed on the screen. 2.Press “M” again, the most recent test results with date and time will display. Press “M” once more and the next most recent test results will appear. Each time you press and release “M”, the meter will recall up to your last 500 test results in order. Press the “S” to turn off the meter. When the memory is full, the oldest result is dropped and the newest result is added. Reading the Average of Blood Glucose Results When the meter is off, press and hold the “M” button until the DAY AVG flashing, release button then 7‐day average results appear with “n024” (means 24 records to be averaged) on the screen. Press the “M” button to review the 14‐, 21‐,28‐, 60‐ and 90‐day general averages. Press the “S” button to turn off the meter. Note: The control solution readings are not included in the average of your results. CARE AND STORAGE FOR YOUR SYSTEM ◆ Handle the meter with care. Dropping or throwing the meter may cause damage to the device. ◆ Don't expose the Blood Glucose Monitoring System, Test strip, and Control Solution, to extreme conditions, such as high humidity, heat, freezing cold or dust. The storage conditions for the test strips are 39℉~86℉, Humidity<80%RH. Storage conditions for the meter are ‐40℉~131℉, Humidity<80%RH. ◆ Always wash your hands with soap and water and rinse and dry completely before handling the Blood Glucose Monitoring system and Test strip. ◆... -
Page 19: Meter Specification
The meter for single‐patient use and the lancing devices may be cleaned 5‐6 times per day (Test 5‐6 times every day), so the meter will be cleaned and disinfect about 11000 cycles that include cleanings plus disinfections (1 cycle = 1 cleaning + 1 disinfection) during its 5 years life cycle. 1. Before the test, the user should clean and wash hands. If you are a caregiver, (not the patient), please use disposable gloves. 2. After test, take one wipe to clean the meter’s housing, buttons, lens, mark, usb cover and support block, including its front and back for 10 seconds for cleaning until there is no soil on the surface. Then disinfect the meter’s housing, buttons, lens, mark, usb cover and support block use another wipe for 2 min, keep the surface wet for 2 min. 3. Take off the glove; discard carefully according to your health‐ care provider’s instruction. Note: 1. Each disinfection step requires a pre‐cleaning step. 2. If the meter is being operated by a second person who is providing testing assistance to the user, the meter and lancing device shall be cleaned and disinfected first. 3. The users should wash hands thoroughly with soap and water after handling the meter, lancing device, or test strips. METER SPECIFICATION Model G‐427B (with “ Bioland ” test strip and control solution) Machine size 90mm (L)×54mm (W)×13mm(H) Weight 50g (excluding batteries) Measuring method Amperometric technology using glucose oxidase Measuring range 20 mg/dL ~600 mg/dL Blood Source Fresh capillary whole blood ... -
Page 20: Display Message
※ The Blood Glucose Meter should be used with “ Bioland ” test strip. ※ The system can be used up to an al tude of 10744 feet. ※ The following substances at levels greater than normal or therapeu c levels may cause significant interference (affect the result by greater than 10%) resulting in an inaccurate result: ascorbic acid, uric acid, hemoglobin,acetaminophen, Dopamine, L‐dopa, L‐dopa and Tolbutamide etc. These sub‐ stances do not affect test results in normal concentration but may affect test results in high concentration. Do not use haemolysis sample, icterus sample or high lipemia samples. ※ The following compounds, when determined to in excess of their limitation, may produce inaccurate results: Compound Limitation >2mg/dL Ascorbic acid >10mg/dL Uric acid >5mg/dL Acetaminophen >15mg/dL Bilirubin >0.03mg/dL Dopamine >0.45mg/dL L‐dopa >0.75mg/dL Methyldopa >24mg/dL Tolbutamide >2000mg/dL Triglycerides >250mg/dL... -
Page 21: Problems
Meter is ready to test control Please place a drop of control solution solution under the CTL state. onto the test well of test strip. Battery power is low. Please change the battery. MESSAGE WHAT IT MEANS ACTION Use a used test strip Please use a new strip and re‐test Error massage indicates that Try again with a new test strip you may remove the strip afeter applying blood to the absorbent hole Problem with the meter Re‐test with a new test strip. If the problem is still unsolved, please call the customer care line for help. Environmental temperature is Please test at an environmental lower than 50℉~104℉ temperature within 50℉~104℉ operation range Problems Problems Causes Solutions Display remains 1. Battery may be installed 1.Install the Battery correctly. ... - Page 22 Bioland Technology LTD. No. A6B7 (Block G) ShangRong Industrial Zone No. 5 Baolong Road, Baolong Community Longgang District 518116, Shenzhen, Guangdong PEOPLE’S REPUBLIC OF CHINA Version: V1.0 @ 2016-01 by Bioland Technology LTD. 21 / 19 ...
Need help?
Do you have a question about the G-427B and is the answer not in the manual?
Questions and answers