Table of Contents
Advertisement
Advertisement
Table of Contents

Related Manuals for Hanwha Techwin Wisenet SPD-150


Summary of Contents for Hanwha Techwin Wisenet SPD-150
- Page 1 NETWORK VIDEO DECODER User Manual SPD-150...
- Page 2 Network Video Decoder User Manual Copyright ©2017 Co., Ltd. All rights reserved. Hanwha Techwin Trademark Each of trademarks herein is registered. The name of this product and other trademarks mentioned in this manual are the registered trademark of their respective company. Restriction Copyright of this document is reserved.
- Page 3 overview important Safety inStructionS Standards approvals Read these operating instructions carefully before using the unit. Follow all the safety instructions listed below. Keep these operating instructions handy for future reference. Any changes or modifications in construction of this device which are not expressly approved by the party responsible for Read these instructions.
- Page 4 • Hanwha Techwin retains the copyright on this manual. • This manual cannot be copied without Hanwha Techwin's prior written approval. • We are not liable for any or all losses to the product incurred by your use of non-standard product or violation of instructions mentioned in this manual.
-
Page 5: Table Of Contents
contentS menu Setup System Setup Setting the Device Network Configuration overview Important Safety Instructions Before Start Contents Features appendix Product Specification Part Names and Functions (Front) Product Overview Part Names and Functions (Rear) Default Setting Troubleshooting Open Source License Report on the Product connecting with other device Connecting to an external device Connecting the USB... -
Page 6: Overview
overview featureS package contents Please unwrap the product, and place the product on a flat place or in the place to be installed. This product can play back the video and audio captured by network cameras. Please check the following contents are included in addition to the main unit. •... -
Page 7: Part Names And Functions (Front)
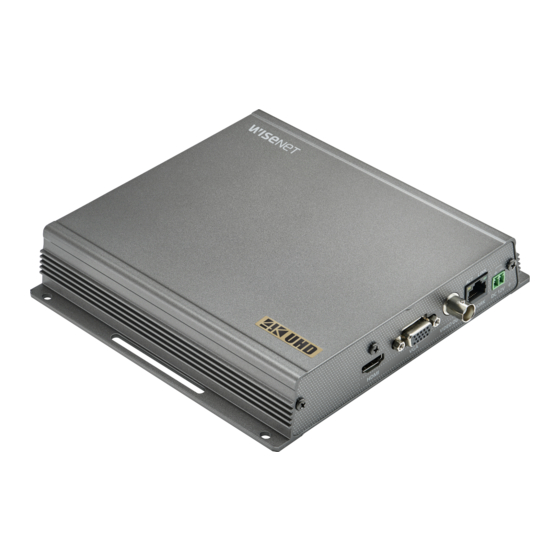
part nameS and functionS (front) part nameS and functionS (rear) LINK POWER CONSOLE RESET AUDIO OUT HDMI VIDEO OUT NETWORK DC12V Part Names Functions HDMI Part Names Functions HDMI connector port. It displays the power ON/OFF status using an LED. VGA Video Signal Output Port. -
Page 8: Connecting With Other Device
connecting with other device connecting to an externaL device connect ethernet Connect the Ethernet cable to connect it to a local network or the internet. It can be connected without a power adapter by supplying power separately from the PoE switch. Network Please see "Product specifications"... -
Page 9: Connecting Ground Wire
connecting ground wire Connect the ground wire to the FG screw at the right side of the power input terminal using a screwdriver. Grounding protects the product from being damaged by lightning. When connecting, be sure to turn off the power to devices. recommended specifications for ground wire • Length: Maximum 3M • Thickness: 18AWG or thicker... -
Page 10: Live
live getting Started 4. After setting the date/time settings in the <date/time> screen, click on the <finish> button to launch the setting completion window. Starting the system 1. Connect the decoder to the power supply. 2. Initialization will proceed in the order of the icons shown. 3. -
Page 11: Live Screen Configuration
Shutting down the System Live Screen configuration icons on the Live Screen 1. In the live screen menu, select <Shutdown>. 2. The “Shutdown” confirmation pop-up window will appear. You can check the status or operation of the Decoder with the icons on the live screen. FULL RAID RAID... - Page 12 live Live Screen menu Split mode menu In Live split mode, right-click to display this context menu as shown. If you right click with your mouse button in live screen mode, it will launch the live screen menu where you can The context sensitive menu in split mode differs, depending on the login/logout status.
-
Page 13: Live Screen Mode
Live Screen mode connection If you select <connection> in the <Status> menu on the live You can play up to 64 live video channels in single, 10-split, or auto sequence mode. screen, you can check the connection state of the camera connected to each channel. -
Page 14: Audio On/Off
CH10 CH11 CH12 CH13 live audio on/off a rename single channel CH19 CH10 CH11 CH12 CH13 Select one channel from the <channel Setup> menu of the live screen, and click <Single channel change> You can turn the sound on/off corresponding to the channel in Live mode. CH10 CH11 CH12... -
Page 15: Set Up Layout
Set up Layout hdmi/vga layout settings Bundle channels based on user needs, to check them immediately when necessary. You can set up the layout of each channel from the live screen. Full Screen Status ► Audio ► Channel Setup ► Single Channel Change Menu Multi Channel Setup... - Page 16 live configure live monitoring Please see each page for details of settings. 1. Camera registration (Page 21) > 2. Designate Live channel name (Page 14) > 3. Layout settings (Page 15) > 4. Layout monitoring (Page 15) 1. Camera registration 3.
-
Page 17: System Setup
menu setup user System environment, device and network can be set up. SyStem Setup You can set permissions of each user over the Decoder's specific function and settings. Setting the administrator You can setup Date/Time/Language, User, System Properties and Log. You can set and change Administrator's ID and password. - Page 18 menu setup user setting if you want to register a user You can create a group or set permissions for each group. You can add a user and edit the registered user information. 1. Click on the [ ] button to launch the user addition popup window. To add a user, click on <ok>.
-
Page 19: System Management
if the user has restricted access System management If a new group is restricted to access the entire menus, the users belonging to the group can access only the You can check the current system version and upgrade to the newest version, or run settings, backup or basic menus and can change only their respective password. - Page 20 menu setup Log information 4. When the recognized device appears, select <upgrade>. If you connect a device in the upgrade menu window, you can press the < > button to search for available software. You can check out the record information related to the system. If there is an upgrade image on the network, the popup window will appear.
-
Page 21: Setting The Device
Setting the device to auto-search for and register a network camera You can set up content related to the camera and monitor. camera to register a camera You can register a network camera for each channel and make connection between. 1. - Page 22 - TCP : The connection type with the network camera will switch to "RTP over TCP". • SAMSUNG : Comply with the internal network protocols adopted by Hanwha Techwin. - UDP : The connection type with the network camera will switch to "RTP over UDP".
- Page 23 channel Setting to edit camera profile When a camera is added for the first time, it is added as the default profile of H.264, H.265 and MJPEG in You can configure the video settings for each channel. order temporarily. If you want to change the profile, you can change it from "Live settings" directly.(Page 23). For the decoder, the profile will differ according to the split screen.
-
Page 24: Network Configuration
menu setup network configuration monitor You can set the information displayed on the monitor as well as the output system. Users can set up the network to connect network cameras. monitor settings interface You can configure the monitor output-related settings including the displayed information, dwell time and output You can set the network connection route and protocol. - Page 25 connecting and Setting the network Networking may differ from the connection method, check your environment before setting the connection mode. when no router is used • Static mode - Internet connection : Static IP, leased line allows connection. - Decoder Network Settings : Set the <network> in <interface> menu of the connected Decoder to <Static>. Consult your network manager for IP, Gateway and Subnet Mask.
-
Page 26: Product Specification
appendix product Specification Item Details Item Details H.265/H.264/MJPEG Codec Embedded Linux 200Mbps Operating System Network Performance 1ch (up-to 4K) 49ch (HDMI: 32ch, VGA: 16ch, CVBS: 1ch) HDMI Max. Channel 1ea (up-to 1080p) Output Max. Decoding 120fps@8MP, up-to 12MP Performance 1ch, 704x480 (30fps), 704x576 (25fps) CVBS Video Clone mode... -
Page 27: Product Overview
product overview defauLt Setting To reset the system, move to "System management > Settings > Load factory default" and press the unit : mm (inches) <initialization> button. This returns the factory default settings. When you initialize with the <Authority Management Settings> included, you are required to reboot the camera and reset the password. -
Page 28: Troubleshooting
appendix trouBLeShooting Problem Action The Live screen is too bright or too dark. y Check the video settings of the registered camera. Problem Action A message of "Need to reset date/time." Is displayed y This message is displayed if there occurs a problem with the time setting of Live video will be slow or cut off. -
Page 29: Open Source License Report On The Product
open Source LicenSe report on the product say, a work containing the Program or a portion of it, either verbatim or The source code for a work means the preferred form of the work for with modifications and/or translated into another language. (Hereinafter, making modifications to it. - Page 30 Software Foundation. If the Program does not specify a version number commands you use may be called something other than `show w' and The precise terms and conditions for copying, distribution and by this License only if the output, given its content, constitutes a covered of this License, you may choose any version ever published by the Free `show c';...
- Page 31 b) Convey the object code in, or embodied in, a physical product Additional permissions that are applicable to the entire Program shall be work. These actions infringe copyright if you do not accept this License. compilations that contain the covered work, unless you entered into that (including a physical distribution medium), accompanied by a written treated as though they were included in this License, to the extent that Therefore, by modifying or propagating a covered work, you indicate...
- Page 32 end of termS and conditionS 0. This License Agreement applies to any software library or other 3. You may opt to apply the terms of the ordinary GNU General Public When we speak of free software, we are referring to freedom of use, not price.
- Page 33 1.11. "Source code" means the preferred form of the Covered Code as long as the modified version is interface-compatible with the consistent application of that system; it is up to the author/donor to version 2.1 of the License, or (at your option) any later version. version that the work was made with.
- Page 34 8.2. If You initiate litigation by asserting a patent infringement claim 12. reSponSiBiLity for cLaimS. Code You distribute. You may not offer or impose any terms on any rights relating to the Covered Code. You may distribute the Executable Source Code version that alters or restricts the applicable version of version of Covered Code or ownership rights under a license of Your (excluding declatory judgment actions) against Initial Developer or a As between Initial Developer and the Contributors, each party is...
- Page 35 6. trademarks. This License does not grant permission to use the trade Copyright (c) 2000-2009, Paul Johnston. THE SOFTWARE IS PROVIDED "AS IS", WITHOUT WARRANTY OF separable from, or merely link (or bind by name) to the interfaces of, the ANY KIND, EXPRESS OR IMPLIED, INCLUDING BUT NOT LIMITED TO Work and Derivative Works thereof.
- Page 36 e. "publisher" means the provider of the website, magazine, 3. This notice may not be removed or altered from any source B. Patent Grant- Subject to the terms of this license, including the and to the disclaimer of warranties. You may not distribute the distribution.
- Page 37 c. No term or provision of this License shall be deemed waived and ansi2knr.c is included in this distribution by permission of L. Peter the right to modify the terms applicable to covered code created under LIABILITY, WHETHER IN CONTRACT, STRICT LIABILITY, OR TORT no breach consented to unless such waiver or consent shall be in Deutsch, sole proprietor of its copyright holder, Aladdin Enterprises of this License.
- Page 38 gLut for win32 License 1. [1]Mark Andrews <marka@syd.dms.csiro.au> Leitch atomic clock 39. [43]Jack Sasportas <jack@innovativeinternet.com> Saved a Lot of 43. mailto:jack@innovativeinternet.com controller space on the stuff in the html/pic/ subdirectory 44. mailto:schnitz@unipress.com The OpenGL Utility Toolkit distribution for Win32 (Windows NT & 2.
- Page 39 Hanwha Techwin cares for the environment at all product manufacturing stages, and is taking measures to provide customers with more environmentally friendly products. The Eco mark represents Hanwha Techwin's devotion to creating environmentally friendly products, and indicates that the product satisfies the EU RoHS Directive.
- Page 40 Head Office 6, Pangyo-ro 319 beon-gil, Bundang-gu, Seongnam-si, Gyeonggi-do, 463-400 Rep. of KOREA Tel : +82.70.7147.8753 Fax : +82.31.8018.3740 www.hanwha-security.com Hanwha Techwin America 500 Frank W. Burr Blvd. Suite 43 Teaneck, NJ 07666 Toll Free +1.877.213.1222 Direct +1.201.325.6920 Fax +1.201.373.0124 www.hanwha-security.com...
Need help?
Do you have a question about the Wisenet SPD-150 and is the answer not in the manual?
Questions and answers