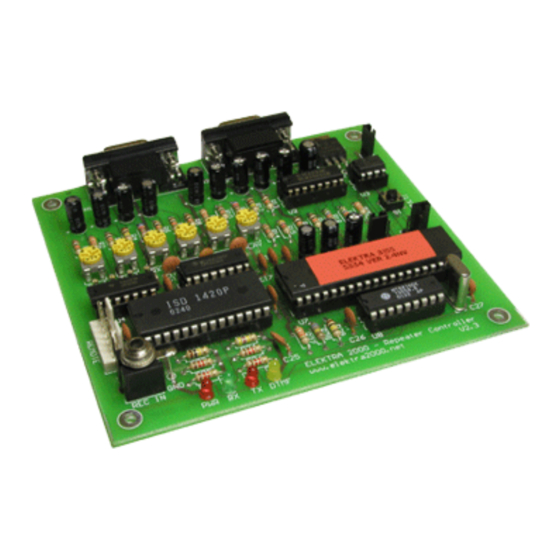
Summary of Contents for Hamtronix Elektra 2000
- Page 1 Hamtronix Repeater Controller Elektra 2000 Instruction Manual Software V2.10 Hardware Revision H...
-
Page 2: Table Of Contents
ELEKTRA 2000 Hamtronix Technical Support ............................02 Precautions ..............................02 Warranty ..............................02 Software Update ............................02 CONNECTORS CN1 - RPT ..............................03 CN2 - LINK ..............................03 CN3 - REMOTE ............................. 03 Connector Pin out ............................03 INSTALATION Determining COR Logic ..........................04 Active High COR ............................ -
Page 3: Technical Support
This board must be interconnected with radio equipment or accessories using connectors. Any sign of direct soldering to the board will void the Warranty. Hamtronix liability is limited to repair or replacement of any defective product, Hamtronix shall not be liable for any damages, whether incidental, consequential or otherwise, because of any defective Hamtronix product. -
Page 4: Connectors
ELEKTRA 2000 Hamtronix CONNECTORS CN1 – Repeater (RPT) Signal Description RX audio (from repeater receiver) Ground TX audio (to repeater transmitter) PTT signal output (to repeater transmitter) COR/COS signal input (from repeater receiver) TONE CTCSS logic input (from repeater receiver or optional CTCSS decoder) -
Page 5: Instalation
ELEKTRA 2000 Hamtronix INSTALATION It’s recommended to enclose the controller board into a shielded box to avoid undesirable radio interference that may cause unstable operation Pin on CN1 Legend Connect to Audio output from repeater receiver (discriminator or speaker) Ground (common for power source/receiver/transmitter) -
Page 6: Wiring And Test
ELEKTRA 2000 Hamtronix TURNING YOUR CONTROLLER ON FOR THE FIRST TIME Place jumper J1 (ON). A melody should be heard if all transmitter connections were made correctly. Key up on repeater input frequency to check if the received signal is being retransmitted. If the receiver connections were made correctly, you should be able to hear the courtesy tone after transmitter drops. -
Page 7: Quick Reference
ELEKTRA 2000 Hamtronix QUICK GUIDE Function Description Option Page Repeater Transmitter Enable [0] OFF, [1] ON Hang Time [0]~[9] X 300ms, 500ms, 1s, 2s, 3s, 5s, 7.5s e 10s Time to Courtesy Tone [0]~[9] X 50ms Duration of Courtesy Tone... -
Page 8: Basic Operation
ELEKTRA 2000 Hamtronix BASIC OPERATION CONTROLLING YOU REPEATER REMOTELY With exception of audio levels, all functions are controlled remotely with your radio DTMF keypad. COMMAND SINTAXES Commands are as following: PPPPFF0# PPPP Where: 4 digits password 2 digits function 1 digit option... -
Page 9: Functions Descripition
This is the master repeater switch. This function must be enabled for normal repeater operation. The Elektra 2000 will continue to respond to DTMF commands even when the repeater's transmitter is disabled. This function will automatically be enabled after a reset or power up. -
Page 10: Roller Beep
CN1-6. The logic must be low (0V) when a CTCSS is present otherwise high (5V). If the Hamtronix TED200 generic decoder is used, you can remotely change CTCSS codes using remote control outputs. TED200 has 8 extra CTCSS tones not available in all amateur radios for a better security in private or commercial repeaters use. -
Page 11: Id Selection
ELEKTRA 2000 Hamtronix 15 – ID SELECTION (Default = 0) Determine which ID will be transmitted. Option 0 and 1 will be transmitted following the time programming on function 14. Option 2 will not play the ID after the time is exceeded until someone keys up the repeater, when the message 1 will be played. -
Page 12: 19 - Voice Id Message Recording
ELEKTRA 2000 Hamtronix 19 – VOICE ID MESSAGE RECORDING The maximum recording time is 20s. If you choose Smart ID (function 15-2), this time will be split in two, resulting in two 10s messages each. After sending the command, release PTT switch and the next key up will be recorded and played back after recording. -
Page 13: Simplex Repeater
ELEKTRA 2000 Hamtronix 25 – SIMPLEX REPEATER (Default = 0) Do not require separate receiver and transmitter. Even an HT can be used for this. When enabled, any incoming signal will be recorded and played back. The duration of each transmission should not exceed 20s or it will be cropped. -
Page 14: 36 - Reset
ELEKTRA 2000 Hamtronix 36 - RESET Restart the microcontroller with user programmed values. A melody is heard to indicate a successful reset. Has the same effect as power up. Ex: 123436# Note: The voice message and CW programming are not affected. -
Page 15: Master Reset And Full Reset (Button)
Note: The voice message and CW programming are not affected. CONTACT AND SERVICE If you need support, service or have any suggestion, contact us: For technical support & suggestions: suporte@hamtronix.com.br For information or to buy our products: sales@hamtronix.com To learn more about our products visit: www.hamtronix.com Repair address Hamtronix... - Page 16 Serial Number Software Version V2.10 Master Reset Hamtronix 55 (19) 3601-8540 www.hamtronix.com 2013 ©...

Need help?
Do you have a question about the Elektra 2000 and is the answer not in the manual?
Questions and answers