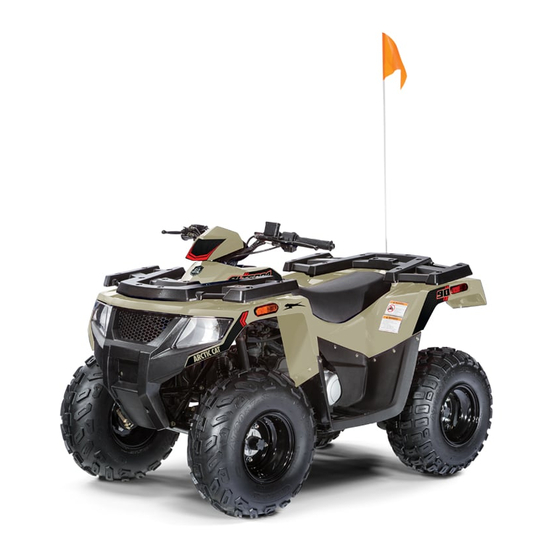
Table of Contents
Advertisement
Quick Links
Remove ATV from crate
Service battery
Install battery
Install/secure handlebar
Inflate tires to proper inflation pressure
Install/secure wheels
Install front fascia
Install kick start lever
Install flag
Check/adjust throttle lever free-play
Check engine oil level
Check transmission lubricant level
Check front and rear wheel brake systems
NOTE: Read these instructions thoroughly before
starting.
Even though the vehicle has been set up (with some
minor exceptions) and inspected at the factory, EVERY
vehicle must be properly inspected and serviced at the
dealership prior to being released to the customer. Expe-
rience has shown that dealerships that properly prepare
each ATV have fewer warranty problems and more satis-
fied customers.
Removing ATV From Crate
1. Set the crate on a flat surface.
2. Remove the top and sides of the crate; then remove
the flag, flag hardware, front fascia, and wheels from
the crate.
NOTE: The ATV is crated with the front fascia
removed and the hardware kit, kick start lever, battery
strap, and handlebar cover mount located beneath
the seat.
3. Remove hardware packages and account for the fol-
lowing items:
1. Handlebar Cover Mount (1)
2. Front Fascia (1)
3. Battery (1)
4. Battery Strap (1)
5. Tool Kit (1)
6. 5 mm Cap Screw w/Washer (10)
7. 5 mm Clip Nut (6)
8. 6 mm Cap Screw w/Washer (4)
9. 6 mm Flange Cap Screw (2)
10. 6 mm x 22 mm Flange Cap Screw (1)
11. Self-Tapping Screw (2)
12. Lug Nut (16)
ARCTIC CAT PRE-DELIVERY
INSTRUCTIONS
(Alterra 90)
CHECKLIST
Adjust parking brake
Check gasoline level
Test ride
Check idle RPM
Verify all decals and hangtags are properly displayed
Clean
Check tool kit contents
Explain break-in procedure to the customer
Explain Operator's Manual and legal obligations to
the customer
Explain Limited Warranty to the customer
Complete ATV Rider Training Certificate and Owner
Registration form with customer and submit to Cat
Tracker within 10 days
4. Lift or hoist the ATV free of the crate base. Place on
a suitable ATV lift or on a support stand.
Servicing Battery
These ATVs are shipped with a sealed battery. The bat-
tery requires an initial charge after activation as well as
periodic maintenance-charging during periods of non-use
or storage.
Always activate and maintain the battery in accordance
with the following instructions to ensure maximum ser-
vice life and performance from the battery.
NOTE: Refer to all warnings and cautions provided
with the battery.
Each sealed battery comes with an electrolyte container
and proper amount for each specific battery type. DO
NOT add additional electrolyte to any sealed battery.
Sealed battery electrolyte has a higher concentration of
sulfuric acid.
1. Carefully remove and save the sealing strip from the
battery electrolyte container. This will be used to seal
the battery later.
2. Remove and discard the foil sealing strip covering
the fill holes from the battery.
3. Place electrolyte container with the foil-sealed top of
the cells facing down into the fill ports of the battery.
4. Hold the container level in the fill ports of the bat-
tery. Push down to break the seals. Air bubbles will
appear as the ports fill. Do not tilt the electrolyte
container. Do not remove the container from the bat-
tery until it is empty.
5. From the following chart (or located on the battery),
determine the correct Amp/Hr rating of the battery.
Effective: November 2015
p/n 2261-084
1
Advertisement
Table of Contents

Summary of Contents for Arctic Cat Alterra 90
- Page 1 Effective: November 2015 p/n 2261-084 ARCTIC CAT PRE-DELIVERY INSTRUCTIONS (Alterra 90) CHECKLIST Remove ATV from crate Adjust parking brake Service battery Check gasoline level Install battery Test ride Install/secure handlebar Check idle RPM ...
- Page 2 Loss of battery charge may be caused by ambient tem- perature, ignition OFF current draw, corroded terminals, self-discharge, frequent start/stops, and other factors. 1. Arctic Cat recommends the use of the Yuasa BTY01 Battery Tester to check Battery State (Charge) and Battery Condition (Health).
- Page 3 2 hours before testing battery volt- cap screws with washers. age and health with the Yuasa BTY01 Battery Tester. NOTE: Arctic Cat recommends the use of the Yuasa BTY01 Battery Tester to check battery Health and Charge state.
- Page 4 Installing/Securing Wheels 5. Install the front headlights using the two existing 5 mm cap screws with washers, two new 5 mm cap Mount the front wheels to the front hubs noting the rota- screws with washers, and two self-tapping screws. tion arrows on the tires.
-
Page 5: Checking Engine Oil Level
Checking Engine Oil Level The recommended oil to use is Arctic Cat ACX All Weather synthetic engine oil, which has been specifically NOTE: When checking oil level, the ATV must be formulated for use in this Arctic Cat engine. -
Page 6: Rear Brake Lever
Rear Brake Lever 1. With the hydraulic brake reservoir in a level position, check the fluid level. It must be visible in the sight glass. KM970A NOTE: Inspect the area around the drain plug for leaks. 2. On the transmission, check the lubricant level using the level plug. -
Page 7: Transporting Atv
CAUTION Do not use white gas. Only Arctic Cat approved gas- oline and/or additives should be used. Test Riding the ATV 1. Check all mechanical functions. - Page 8 ®TM Trademarks of Arctic Cat Inc., Thief River Falls, MN 56701 1115...


Need help?
Do you have a question about the Alterra 90 and is the answer not in the manual?
Questions and answers