
Related Manuals for Interfit S1


Summary of Contents for Interfit S1
- Page 1 The Interfit S1 AC/DC Powered TTL/HSS Flash Instruction Manual www.interfitphotographic.com...
- Page 2 Warranty does not cover consumables, such as the flash tube or the glass dome. If the flash tube or glass dome are damaged upon arrival, you have seven (7) days to report the damage to Interfit. You can reach Interfit Photographic Ltd. for customer service at:...
-
Page 3: Table Of Contents
Table of Contents A look at the S1................... Accessorizing your S1................ Shipping Cover................Bowens® Mount Modifiers............Softboxes..................Umbrellas..................Sync Cable.................. Remote..................Third-Party Remotes..............Using your S1..................Powering Up your S1..............Adjusting the Power..............Using the Modeling Lamp............Setting Channels................ Setting Groups................ -
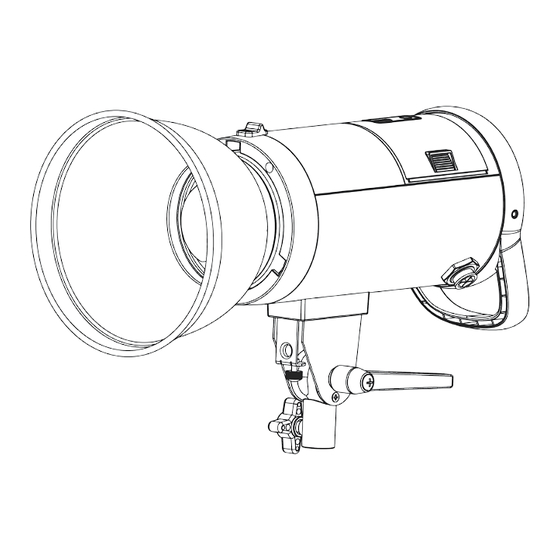
Page 4: A Look At The S1
A Look at the S1 1. Optical Slave Cell 2. LCD Battery Indicator 3. Flash Test Button 4. Cell Button 5. Beep Button 6. Power Dial 7. 3-Way Power Switch 17. Sync Port 8. Group Selection Button 18. AC Power Port 9. -
Page 5: Accessorizing Your S1
Bowens® Mount Modifiers Modifying the light from your S1 is key to creating dynamic images. The S1 can be used with any light modifier with a Bowens® mount. To attach a Bowens® mount modifier to the S1, simply insert the three prongs of the modifier ring into the mount and rotate clockwise until you hear a click. -
Page 6: Umbrellas
They will also not allow you to use HSS or TTL. A sync cable is included with your S1 and can be plugged into the sync port on the rear left side of the flash unit and the corresponding sync port on your camera. -
Page 7: Using Your S1
Turn the power switch on the light to AC. The S1’s AC converter is multi-voltage, meaning it can be used either on 110V/ 60Hz or 220V/50Hz. -
Page 8: Setting Groups
Setting the control group allows you to independently control the power of each light in your setup without affecting your other lights. Your S1 can be set to three different control groups (A, B, C). Press the GROUP button to assign your light to it’s own group. -
Page 9: Mount To Light Stand
10’ away from your subject. A test shot reveals an under-exposed image and you hear a “double-beep” from your S1. The LCD screen on the S1 says it is at full power (10.0). The “double-beep” is notifying you that the S1 is giving you all 500Ws but the camera has determined the image is still under-exposed. -
Page 10: Firmware Updates
Firmware Updates In order to ensure proper communication between the S1, your TTL Remote and your camera, make sure the firmware on both your light and remote are updated to the most recent version. The newest firmware updates are available in the support section of the Interfit website.
Need help?
Do you have a question about the S1 and is the answer not in the manual?
Questions and answers