
Related Manuals for Interfit HONEY BADGER


Summary of Contents for Interfit HONEY BADGER
- Page 1 HONEY BADGER 320Ws Digital Flash Instruction Manual www.interfitphotographic.com...
- Page 2 What’s cool about the Honey Badger? The Honey Badger is the perfect tool for any shoot, and at 320Ws and only 3lbs, it’s a real force to be reckoned with. The aggressive flash recycle time ensures you are ready to strike at the right moment, while the expanded 7-stop power range gives you the versatility and precision you need to attack any shoot.
-
Page 3: Table Of Contents
Protective Cap................Bowens® Mount Modifiers............Softboxes..................Umbrellas................... Sync Cable.................. Remote..................Using the Honey Badger..............Powering Up the Honey Badger..........Adjusting the Power..............Turning off the Flash Function..........Using the Modeling Lamp............Setting Channels................ Setting Groups................Beep Button................Optical Slave Cell............... -
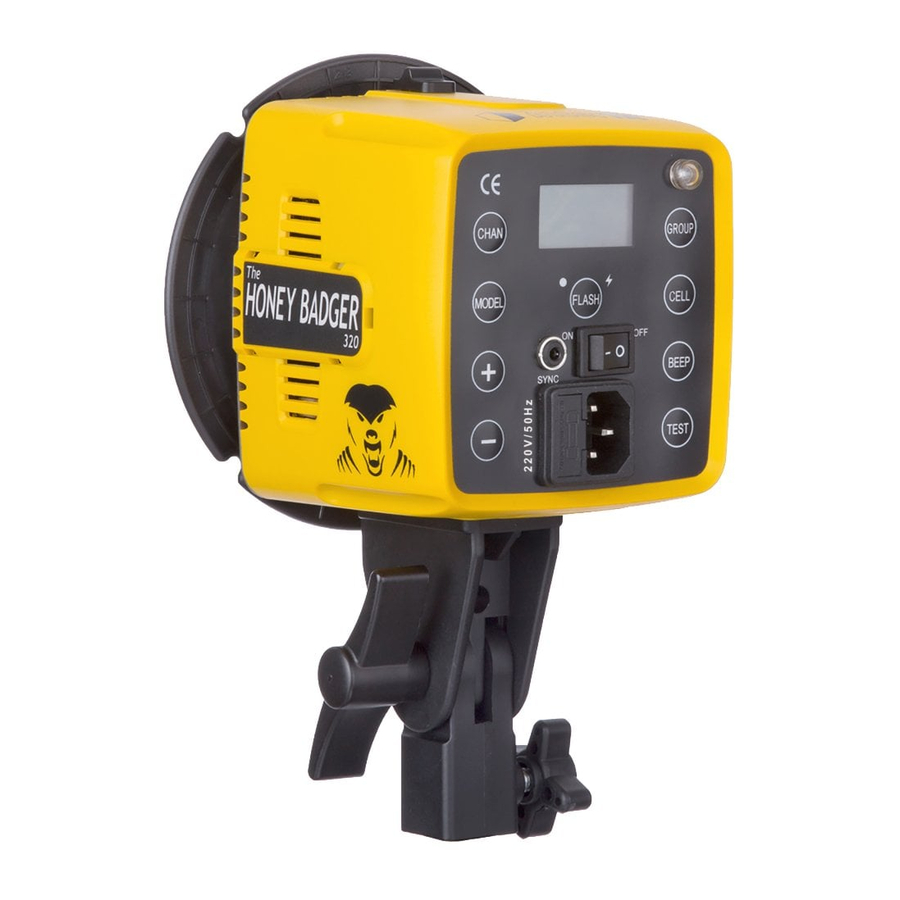
Page 4: Honey Badger Overview
Honey Badger Overview 1. Modifier Quick-Release 13. Flash Power Up/Down 2. Pop-Up Softbox Ring 14. AC Power Port 3. Bowens® S-Type Mount 15. Flash Toggle Button 4. Frosted Glass Dome 16. Optical Slave Cell 5. Flash Tube and LED Lamp 17. -
Page 5: Accessorizing The Honey Badger
Accessorizing the Honey Badger Protective Cap Every Honey Badger flash head includes a protective cap. This cover offers protection to the glass dome, flash tube, and LED modeling lamp during transportation and storage. To remove the protective cap, pull back on the modifier quick release on the top of the flash unit to release the mount lock. -
Page 6: Umbrellas
A sync cable is included with your Honey Badger and can be plugged into the sync port on the back of the flash unit and the corresponding sync port on your camera. To connect the cable to the light, insert the 3.5mm (headphone jack) plug into the sync port on the back of the light, just to the left of the power switch. -
Page 7: Using The Honey Badger
Your Honey Badger is packed with 320Ws of power. This power is adjustable over a 7-stop range and can be adjusted in 1/10th of a stop intervals. Use the + and - buttons on the back of your Honey Badger to adjust the power from 10.0 (full power) to 4.0 (lowest power). -
Page 8: Setting Groups
CELL When using a multiple-light setup with your Honey Badger and a sync cord or a third-party remote, turn on the “CELL” button to activate the optical slave function. This will allow the light to be triggered by the light of your other flashes. -
Page 9: Honey Badger Specifications
Specifications of the Honey Badger Max Watt Seconds 320Ws Power Range 7 Stops Guide Number 148 (100 ISO, 1/125, 1 meter, 7” reflector) Variability 1/10th stop increments Recycle Time 1 second at full power Flash Duration 1/900@ full power Color Temperature...
Need help?
Do you have a question about the HONEY BADGER and is the answer not in the manual?
Questions and answers