Table of Contents
Advertisement
Advertisement
Table of Contents

Subscribe to Our Youtube Channel
Related Manuals for Viavito ROKAI


Summary of Contents for Viavito ROKAI
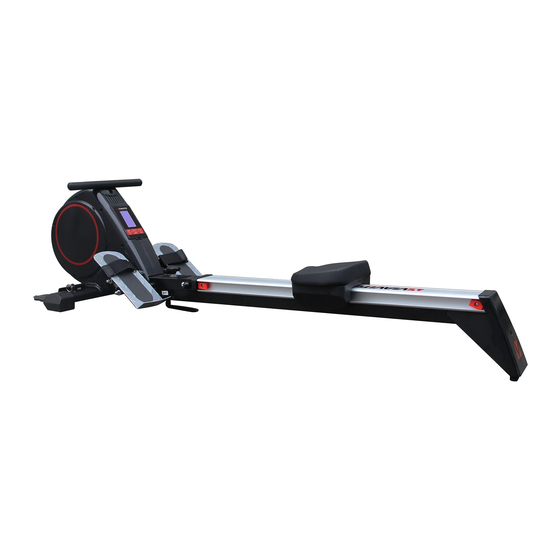
- Page 1 Owner’s Manual. ROKAI Folding Rowing Machine www.viavito.com Manual version 2.1...
-
Page 2: Table Of Contents
Congratulations Manual Contents. on purchasing your Safety Information 03/04 very own ROKAI Machine Assembly 05/17 Folding Rowing Contents Checklist Machine Hardware Pack Assembly Diagram Assembly Instructions 08/15 Folding & Unfolding You have chosen a high-quality, safe and Moving the Machine... -
Page 3: Safety Information
If you experience dizziness, nau- 06 Before beginning training, remove sea, chest pain, or any other all objects within a 2-metre radius abnormal symptoms STOP of the machine. EXERCISING IMMEDIATELY AND CONSULT A PHYSICIAN WITHOUT DELAY. www.viavito.com... - Page 4 Viavito assumes no responsibility for personal injury or property, 20 Examine the machine carefully before and/or damage sustained by or you use it, especially the components through the use of this product.
-
Page 5: Machine Assembly
Machine Assembly. Contents Checklist Make sure you have the following parts: www.viavito.com... -
Page 6: Hardware Pack
111 Bolt φ9.5*128mm (1) 120 Screwdriver (1) 116 Spring washer for 120 Screwdriver (1) 122 Allen Key (1) φ8*φ4*2T (4) (MM) Please also view our Youtube Assembly Guide video, should you require extra assistance in setting up this product: https://youtu.be/WpwqPnV0RW8 www.viavito.com... -
Page 7: Assembly Diagram
Assembly Diagram www.viavito.com... -
Page 8: Assembly Instructions
01 Attach the front stabiliser (67) to the main frame (3) with the wheels pointing forwards. Lock with the Allen bolts (107), and flat washers (108) making sure they are securely tightened. Please also view our Youtube Assembly Guide video, should you require extra assistance in setting up this product: https://youtu.be/WpwqPnV0RW8 www.viavito.com... - Page 9 Step Two. 01 Place the two front footplates (118) on the front stabiliser (67) and lock them in place with the locking pins (113). 118 113 www.viavito.com...
- Page 10 (92) you removed. It may be inset diagram. easier to perform points 5 and 6 with the rail lifted into the vertical position. Allen Key Φ 13x Φ20x2t M6xP1. 25x16L Φ 8x Φ 16xlt 1/2-13 * 100L 1/2-13 www.viavito.com...
- Page 11 Loop the bungee cord (63) around the cord. Failure to do so may result in injury. STEP 1 STEP 3 STEP 2 www.viavito.com...
- Page 12 06 Insert the locking knob (109) with the main frame. Hold the rail securely in washer (110) into the hole on the the upright position. main frame as shown. 03 Place the rail cover (85) onto the aluminium rail. www.viavito.com...
- Page 13 (72) then place the end cover (80) of the rower with the ridged end at the on the rear foot (72). Fix in place using rear. the screw (74). STEP STEP 2 STEP 3 STEP 4 www.viavito.com...
- Page 14 (114) onto each end of the rod (119) 04 Check both straps are secure and that nearest the front of the rower. the pedals are secure and pivot on the bar 03 Slide the pedals (65) onto the front pedal rod (119) and secure them with www.viavito.com...
- Page 15 Unpack the power module (123) and fit the adaptor suitable for your region. Plug the terminal into the DC hole on the main fame as shown, then connect to a suitable mains supply. Please also view our Youtube Assembly Guide video, should you require extra assistance in setting up this product: https://youtu.be/WpwqPnV0RW8 www.viavito.com...
-
Page 16: Folding & Unfolding
Folding & Unfolding Your Rokai is a folding rowing machine. Take care when folding or unfolding it. 01 Loosen the locking knob (109). 03 Fold the rail (71) upward and replace the locking pin (111) to secure it. 02 Remove the locking pin (111). -
Page 17: Moving The Machine
Moving the Machine There are transport wheels on the front stabiliser of your Rokai to help make moving it easier. To move it, simply take hold of the rear foot and tilt the machine forward until it can be pushed easily. -
Page 18: Console Instructions
Console Instructions. Console Image www.viavito.com... - Page 19 Display Functions TRAINING DISPLAY DESCRIPTION VALUES RANGE 0~999 - Displays your strokes per minute. - Displays the time elapsed for your current session. Time/500m 0.0 ~ 99:00min - It will scan in every 6s and display the remaining time to cover 500 metres according to your current speed. - Displays the distance you’ve rowed during your Distance 0~99999m...
-
Page 20: Button Functions
2 short beeps per minute = Target pulse value exceeded 3 short beeps per minute = Target Watt value exceeded 4 short beeps per minute = 0 reached on any function count down (time, distance etc) or system alarm 6 short beeps = Forced system stop www.viavito.com... -
Page 21: Operation
Quick Start The Rokai has a range of different training programs which are explained below, but for quick, simple exercising you can just start rowing to activate your session. To do this, you do not need to select a training program or manually set the time, distance or any other values, just make the sure rower is connected to a power supply and begin rowing. -
Page 22: Training Programs
Training Programs The centre of the console displays the training program you selected. The following programs are available: - Quick start - Manual - Pre-set programs - Heart Rate Control (H.R.C.) - Race - User defined www.viavito.com... - Page 23 - Press START/STOP to end the workout. will flash in turn: All exercise data will remain. • TIME (or DISTANCE) (Time and Distance - Press RESET to return to the workout se- can’t be set at the same time.) lection menu. • CALORIES • PULSE www.viavito.com...
- Page 24 As soon as the TIME value counts down to - Press RESET to return to the workout 0.00 the program will stop and the console selection menu. alarm will sound for 8 seconds. Press any button to stop the alarm. www.viavito.com...
- Page 25 For more in- formation see the target heart rate section on page 30 - Press UP/DOWN to select H.R.C and press MODE to select. Press UP/DOWN to set your AGE (pre-set value 25, Drawing 6). www.viavito.com...
- Page 26 • If there is no pulse signal received while rowing, the resistance will decrease to 1 level immediately. The system will decrease by one level every 15 seconds until reaching Level=1. If no pulse signal is received for 30 seconds the system will stop the program automatically. www.viavito.com...
- Page 27 All workout data will remain. - Press START/STOP to start the race. The console will display USER & PC - Press RESET to return to the workout workout status. The PC column shows selection menu. the computer’s rowing distance. The www.viavito.com...
- Page 28 The max. resistance level is 16. To save your settings, press and hold the MODE button for 2s. - Set the desired TIME of the overall workout using the UP & DOWN buttons and press MODE to confirm (Drawing 15). www.viavito.com...
- Page 29 - Press the RECOVERY button, then the console will count down from 00:60 to 0:00 (Drawing 16). No other functions will be available during the countdown. Once the 60 seconds recovery phase is over, an evaluation of your fitness will be shown (drawing 17). www.viavito.com...
-
Page 30: Conditioning Guidelines
124-156 • Stimulate the mind 122-155 121-153 • Help maintain stable weight 119-151 • Control appetite 118-150 • Boost self-image 117-147 115-146 • Improve muscle tone and strength 114-144 • Improve flexibility • Lower blood pressure • Relieve insomnia www.viavito.com... -
Page 31: Beginners Guide To Exercise
• If you are sore or tired, give yourself the THR for your age. Always be aware of a few extra days to recover. how you feel when you exercise. If you feel dizzy or light-headed, stop immediately and rest. www.viavito.com... -
Page 32: Stretching Guide
• Stretch at least three times a week to elevated temperature, which greatly maintain flexibility. reduces the risk of injury. Stretching develops flexibility and reduces muscles soreness. Stretches should be held for 15 to 30 seconds. www.viavito.com... - Page 33 A proper cool-down slowly lowers your heart rate, allows blood to return to the heart and helps prevent muscle soreness caused by the build-up of lactic acid in the muscles. www.viavito.com...
-
Page 34: Customer Support
• Precise description of the issue or defect. IMPORTANT!! - Please retain your sales receipt, Viavito Customer Care may request proof of purchase to val- idate eligibility for warranty service. Warranty cover starts from the date shown on the proof of purchase. -
Page 35: Manufacturer's Warranty
Manufacturer's Warranty Viavito ltd warrants this product to d) Repairs not provided by Viavito ltd be free of defects of material and e) Accidents, lightning, water, fire, workmanship, under normal use and or any other causes beyond the conditions, for a period of 12 months control of Viavito from the date of the original purchase. -
Page 36: Technical Information
Technical Information. Space Required Site area 1890x576x530mm Training area 1990x716x1030mm Free area 3080x1916x1630mm www.viavito.com... -
Page 37: Exploded Diagram
Exploded Diagram www.viavito.com... -
Page 38: Parts List
Roller Sensor holder Sensor wire Screw M4x10L Hex screw M10xP1.5x50L Flat washer Nylon nut M10 Handlebar End cap Foam grip Elastic cord holder Top cover Foot cover Frame bottom cover Upper cable Bolt 1/2-13*100L Nylon nut 1/2-13 Flat washer www.viavito.com... - Page 39 EVA foam Magnetic brake set Hex screw M6xP1.0*16L Spring washer Flat washer Curve washer Flywheel complete set (49~59) Flywheel Nut M8 Washer C-type Flywheel axle Bearing 6001RS One-way bearing Bearing 61904 Mounting for cord guide Cord guide Screw M8 www.viavito.com...
- Page 40 Roller 42 mm Hex bolt M10x30L Guide bush Guide bush Nut M10 End cover Connector Fixing plate for rear foot Joint plate End cap, rail Rail clad cover Screw M5x10L Stopper Stopper axle Screw M6x10 Screw M8x16 Spring washer www.viavito.com...
- Page 41 M8 nut Screw Screw Washer Locking knob Washer Locking pin Nut cover Pin for front grips Spacer sleeve for pedal Washer Lock washer M8 Nut M8 Front footplates Pedal crank Switching power Rubber sleeve Wireless heartrate receiver Screw M4x8L www.viavito.com...
- Page 42 www.viavito.com...
Need help?
Do you have a question about the ROKAI and is the answer not in the manual?
Questions and answers
after using for a couple of minutes an error E 7 displays on the screen, also the resistance is the same throughtout the work out when rowing