
Related Manuals for Compu-aire SYSTEM 2200 Plus 3L


Summary of Contents for Compu-aire SYSTEM 2200 Plus 3L
- Page 1 SYSTEM 2200+3L PROGRAMMABLE CONTROLLER -USER MANUAL- 8167 Byron Road Whittier, CA 90606 Phone: (562) 945-8971 Fax: (562) 696-0724 SUBJECT TO CHANGE WITHOUT INCURRING OBLIGATION Compu-Aire Rev.03C 02-19-14 Page 1 of 82...
-
Page 2: Table Of Contents
Slave Unit (ID=2)........................21 4.6.3 P-LAN WIRING ........................22 General Options .......................... 23 5.0 TECHNICAL SPECIFICATIONS ....................... 24 Controller and Display ......................... 24 General Characteristics ....................... 24 Mechanical Characteristics ......................25 Electrical Characteristics ......................26 Compu-Aire Rev.03C 02-19-14 Page 2 of 82... - Page 3 8.0 SETUP MENU ............................38 Entering a password ........................38 Setup Menu Tree ........................39 Setpoints ............................. 40 8.3.1 Changing Setpoints ......................40 8.3.2 Changing Alarm Setpoints ....................41 Clock Setup ..........................41 Compu-Aire Rev.03C 02-19-14 Page 3 of 82...
- Page 4 Accessing the operating system by authentication ............55 10.4.8 CGI script ..........................56 10.4.9 SNMP ........................... 56 10.4.10 BACnet..........................56 10.4.11 WARNINGS ........................56 10.5 BANET over MS/TP ........................57 10.5.1 Installation .......................... 57 Compu-Aire Rev.03C 02-19-14 Page 4 of 82...
- Page 5 Digital Inputs and Digital Outputs ..................70 12.1.2 HVAC ........................... 72 12.1.3 Analog Inputs and Analog Outputs ..................75 12.1.4 Changing Passwords ......................77 12.2 Factory Reset ..........................77 13.0 TROUBLESHOOTING GUIDE ........................ 78 Compu-Aire Rev.03C 02-19-14 Page 5 of 82...
- Page 6 Figure 35 - Alarm delays..........................64 Figure 36 -Alarm switch over ........................64 Figure 37 - Network Setup .......................... 67 Figure 38 - Network Assist .......................... 67 Figure 39 - Factory Setting .......................... 69 Compu-Aire Rev.03C 02-19-14 Page 6 of 82...
- Page 7 Figure 52 - Analog input configuration ....................... 75 Figure 53 - Analog output configuration ..................... 76 Figure 54 - Changing default password....................... 77 Figure 55 - Factory reset / Set Unit Mode ....................77 Compu-Aire Rev.03C 02-19-14 Page 7 of 82...
-
Page 8: Introduction
The controller is fully programmed and pre-configured per system configuration. Further tweaking may be required to better fit the application. For remote mounted controllers, make sure the UNIT ID is matching with the Tag ID number. Compu-Aire Rev.03C 02-19-14 Page 8 of 82... -
Page 9: Sequence Of Operations
When more than one unit are connected through p-LAN network for lead/lag operation, the first controller, unit ID# U01 is defined as the “Master” and the rest (U02, U03 ….U16) are define as Compu-Aire Rev.03C 02-19-14 Page 9 of 82... -
Page 10: Air Cooled Dx With Chilled Water Plus
DX cooling based on loss of water flow. When no water flow switch is selected for switch over, the unit will only work on either DX or C.W. cooling mode. Compu-Aire Rev.03C 02-19-14 Page 10 of 82... -
Page 11: Air Side Economizer
3.6 Water Side Economizer Energy miser (EM) Unit Using 2-Way Valves Summary of Equipment Energy miser units are provided with Dual Cooling options. DX cooling using Compressor based system and Economizer cooling using Water Side Economizer Coil. Compu-Aire Rev.03C 02-19-14 Page 11 of 82... - Page 12 In the free cooling energy miser mode the compressors will remain shut off while the fans of the unit shall be on. Humidification and Dehumidification modes shall be operating as needed. Compu-Aire Rev.03C 02-19-14 Page 12 of 82...
-
Page 13: Water Cooled Energy Miser
Continuous water shall be flowing through the chilled water valve and will only supply Note: water to coil when called upon. Cooling-Energy miser Mode The unit can switch over from DX cooling mode to Free cooling Energy miser mode based on the Entering Water temperature. Compu-Aire Rev.03C 02-19-14 Page 13 of 82... -
Page 14: Dry Fluid Cooler With Energymizer
The fluid cooler shall be provided with ambient T-stats to control the water temperature during DX cooling mode. The fluid cooler shall bypass the T-Stat control logic and run all fans continuously during Energy Miser mode. Condenser cooling mode Compu-Aire Rev.03C 02-19-14 Page 14 of 82... - Page 15 The optional Pressure Differential (No Water Flow)Switch shall be provided for field installation. GLYCOL PUMP: A matching centrifugal circulating pump is provided for field mounting and piping. Pump Operation Compu-Aire Rev.03C 02-19-14 Page 15 of 82...
-
Page 16: Special Pump And Dry Fluid Cooler Control Logic
Discharge air temperature sensor to prevent overheating or cooling of the air stream • Outside air temperature sensor for automatic temperature adjustment or economizer action • Free-cooling temperature sensor for water cooled systems • Hot gas bypass either by solenoid or by modulating electronic valve Compu-Aire Rev.03C 02-19-14 Page 16 of 82... -
Page 17: Configuration
The main menu is used to select the three main configuration categories • Screen Settings: Settings relating to the screen • Network Configuration: Settings relating to the RS485 network • General Options: Various settings Compu-Aire Rev.03C 02-19-14 Page 17 of 82... -
Page 18: Screen Settings
“Done: touch the screen to ESC” indicates that the operation has been completed successfully. If the screen displays “Bad: touch to ESC and repeat”, repeat the calibration process. Figure 2 - Screen calibration Compu-Aire Rev.03C 02-19-14 Page 18 of 82... -
Page 19: Network Configuration
Any type of terminal active in the network Current terminal Device not connected If activity is detected on the network, the message “Online” is displayed. Press the Esc button to exit the screen. Compu-Aire Rev.03C 02-19-14 Page 19 of 82... -
Page 20: Assigning Private And Shared Terminals
Important: the pGD terminals cannot be configured as “Sp” (shared printer) as the printer output is not featured. Selecting this mode has no effect on the management of printed messages sent via pLAN. Figure 3–Changing unit ID Compu-Aire Rev.03C 02-19-14 Page 20 of 82... -
Page 21: P-Lan Setup
15. Select Setup for I/O board 16. Follow on screen direction to complete the setting. Note: For unit 3 and up, use SLAVE UNIT setup instructions and increase the Address ID by 1 and terminal ID by 1. Compu-Aire Rev.03C 02-19-14 Page 21 of 82... -
Page 22: P-Lan Wiring
4.6.3 P-LAN WIRING Compu-Aire Rev.03C 02-19-14 Page 22 of 82... -
Page 23: General Options
Press “yes” to confirm the operation or “no” to abort it; • Display Firmware Update: starts the pGD firmware update procedure, as described in the next paragraph. Compu-Aire Rev.03C 02-19-14 Page 23 of 82... -
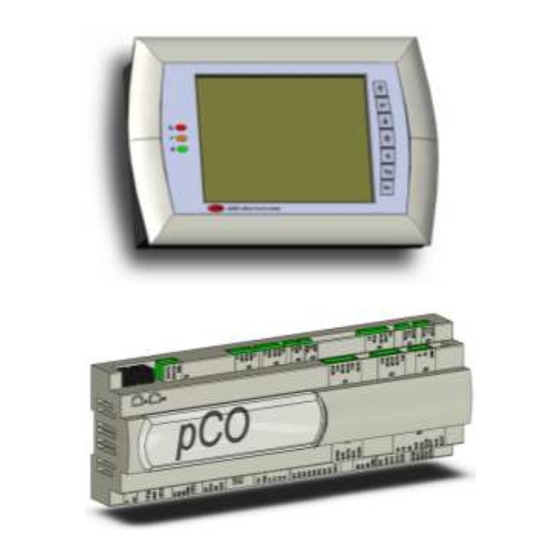
Page 24: Technical Specifications
Other optional cards can be used to connect to a supervisor via standards other than RS485. Finally, the serial field bus interface, using the optional board, ensures connection to the field devices controlled. Compu-Aire Rev.03C 02-19-14 Page 24 of 82... -
Page 25: Mechanical Characteristics
DIN rail according to DIN 43880 and CEI EN 50022 standards Materials: Techno polymers Flame Retardant: V0 (UL94) and 960°C (IEC 695) Ball Pressure Test: 125°C Resistance to creeping ≥250 V current: Color: Grey RAL7035 Compu-Aire Rev.03C 02-19-14 Page 25 of 82... -
Page 26: Electrical Characteristics
WARNING: The 21VDC available at the +Vdc terminal (J2) can be used to power any active probes, the maximum current is 150 mA, thermally protected against short-circuits. To supply the ratiometric 0 to 5 V probes, use the +5VREF (Imax: 60 mA) present at terminal J24. Compu-Aire Rev.03C 02-19-14 Page 26 of 82... -
Page 27: Analog Outputs
The 21VDC present at +Vterm (J24) can be used to power an external terminal with a maximum input of 2 W. Only one terminal can be connected (for example PLD terminal or ARIA terminal) in addition to the one connected to terminal J10. Compu-Aire Rev.03C 02-19-14 Page 27 of 82... -
Page 28: Standard Input / Outputs
5.11 Standard Input / Outputs The following table defines standard I/O ports for the PCO3 controller. Refer to the electrical wiring diagram for actual wiring. Compu-Aire Rev.03C 02-19-14 Page 28 of 82... -
Page 29: Optional Features
“Point-Point” protocol with up to 32 nodes Backlighting Level: Two levels of brightness, “high” and “normal” 5.14 Building Management System BMS Protocol: LONWorks BACnet over TCP/IP BACnet over MS/TP Modbus over RS-485 Compu-Aire Rev.03C 02-19-14 Page 29 of 82... -
Page 30: Controller Interface
Enter Execute current selection Power Turn the unit ON/OFF Alarm View and Reset active alarms Program View Setup Menu Escape Exit and return to previous screen Table 2 - Navigating buttons Navigation Menu Compu-Aire Rev.03C 02-19-14 Page 30 of 82... -
Page 31: Menu Tree
Low Pressure Alarm Log Water in High Pressure Exit Temperature Compressor Discharge Air Short Cycling Temperature Heater over heat High Pressures Sensor Failures Low Pressures Over/Under Pressure Temperatures Transducers Over/Under Humidity Alarm Reset Compu-Aire Rev.03C 02-19-14 Page 31 of 82... -
Page 32: Accessing Submenus
Temperature Cooling Demand Heating Stages Icon Descriptions Cooling Stages Menu Navigation Unit Mode Figure 9 - DX Based System Status EC Fan Speed C.W Valve Position Figure 10 - Chilled Water System Status Compu-Aire Rev.03C 02-19-14 Page 32 of 82... - Page 33 Figure 8. Pressing the (help?) button brings up the help screen as shown in Figure 9. Icon Function Demands Displays Fan, cooling, heating, humidification, dehumidification, excess humidity draining, and humidifier Cooling Displays current active cooling stages Heating Displays current active heating stages Table 4 – Unit general status Compu-Aire Rev.03C 02-19-14 Page 33 of 82...
-
Page 34: Trending
7.5 Trending 7.5.1 Graph Overviews Figure 13- Graphical sensors representation Figure 14 - Graph description Figure 15 - Pressure graph Compu-Aire Rev.03C 02-19-14 Page 34 of 82... -
Page 35: Icon Description And Function
Move the view down View is moved so as to display the first data saved (the oldest data). View is moved so as to display the last data saved (the most recent data). Compu-Aire Rev.03C 02-19-14 Page 35 of 82... - Page 36 When pressed changes the status from Normal to Pressed. Indicate that trend no.1 is available. Enable the display of trend no. 2 Normal=hidden Pressed=visible When pressed, changes the status from Normal to Pressed. Indicate that trend no.2 is available. Compu-Aire Rev.03C 02-19-14 Page 36 of 82...
-
Page 37: Alarms
Press the Reset button on the screen. Note: All active alarms remain active until the root cause of the event is rectified. Compu-Aire Rev.03C 02-19-14 Page 37 of 82... -
Page 38: Setup Menu
Accessibility Setpoint Menu Technician Menu 1798 Factory Setup (Consult factory for more information) Table 5 - Default Passwords Entering a service menu requires a password. Default password is listed in Table 5. Note: Compu-Aire Rev.03C 02-19-14 Page 38 of 82... -
Page 39: Setup Menu Tree
*Modbus -Network -Analog Outputs -Hum High Alarm *BACnet -Manual Control -HVAC -Hum Low Alarm *LONWorks -Password -Temp Water In *Carel -Factory Reset -Temp Discharge Air -Economizer setpoints Figure 20 - Setup Menu Tree Compu-Aire Rev.03C 02-19-14 Page 39 of 82... -
Page 40: Setpoints
Figure 23 - Dew Point Control Figure 24 - Dew Point Setpoints 8.3.1 Changing Setpoints Tap the Temperature/Humidity display Enter a new value from the virtual keyboard Tap on the enter button once done Compu-Aire Rev.03C 02-19-14 Page 40 of 82... -
Page 41: Changing Alarm Setpoints
To active the Night Setback, change its setting to “YES” and follow the on screen directions. Use the arrow keys to navigate through the different screens to program each individual day. Default Setting: Night Setback: NO Compu-Aire Rev.03C 02-19-14 Page 41 of 82... -
Page 42: Run Time Hour Meters
Change the Reset setting from “NO” to “YES” Press Enter from the virtual screen The run time hour is reset immediately Repeat the same process for other components Figure 26 - Component run time meters Compu-Aire Rev.03C 02-19-14 Page 42 of 82... -
Page 43: Building Management System (Bms)
To install the card in the pCO unit follow these instructions: 1. Remove the "serial card" placement cover with a screwdriver. 2. Remove the pre-punctured plastic piece corresponding to the card being installed. Compu-Aire Rev.03C 02-19-14 Page 43 of 82... - Page 44 Before using any electronic component or card, ground yourself (not touching the card does not prevent a spike, as static electricity can produce a 10000V spike discharge which can form an arc of about 1cm) Compu-Aire Rev.03C 02-19-14 Page 44 of 82...
- Page 45 • Absolutely avoid non-antistatic plastic bags, polystyrene or sponge. • Do not pass the card directly to other operators (to prevent from electrostatic induction and discharges). Compu-Aire Rev.03C 02-19-14 Page 45 of 82...
-
Page 46: Pointlist
0 = NO ECONOMIZER 1= AIR 2= WATER 3= CHILLED WATER VALVE (HVAC) 40148 1019 0 = Off 1= Vent 2 = Heat 3 = Cool 4 = Humidify 5 = Dehumidify 6 = Economizer 7 = Defrost Compu-Aire Rev.03C 02-19-14 Page 46 of 82... - Page 47 Dehumidifier Output Reset Alarm Command Unloader 1 Output Unloader 2 Output Bypass 1 Output Bypass 2 Output System Alarm Remote On command via digital input Bypass 3 Output Alarm 2 Condenser Fan Output Compu-Aire Rev.03C 02-19-14 Page 47 of 82...
-
Page 48: Lonworks
2. Terminal block for LonWorks® network (GND, A, B) 3. Service pin 4. Green service LED 5. Red fault LED Figure 29 - LONTalk Card Note: The ground wire (GND) is not requires in some application. Compu-Aire Rev.03C 02-19-14 Page 48 of 82... -
Page 49: Led Color Description
• Absolutely avoid non-antistatic plastic bags, polystyrene or sponges; • Do not pass the electronic components or boards directly to other operators (to prevent electrostatic induction and discharges) Compu-Aire Rev.03C 02-19-14 Page 49 of 82... -
Page 50: Connection To The Pco3 Controller
Figure 24) with the tip of a screwdriver or a similar tool. The service pin must only be activated during the installation of the node. When the pin is activated, the node sends a broadcast message over the LonWorks® network, containing the information required for identification. Compu-Aire Rev.03C 02-19-14 Page 50 of 82... -
Page 51: Wink Event
In this specific case, the service LED on the interface comes on for one second, thus making it possible to check the correct operation of the connection between the interface and LonWorks® network. Compu-Aire Rev.03C 02-19-14 Page 51 of 82... -
Page 52: Bacnet Over Tcp/Ip
In order to access the configuration (see the Configuration section), the pCOWeb can be started using the “factory bootswitch parameters”: IP address= 172.16.0.1 Net mask= 255.255.0.0; “root” user password: froot “httpadmin” user password: fhttpadmin “guest” user password: fguest Compu-Aire Rev.03C 02-19-14 Page 52 of 82... -
Page 53: Restarting The Software
Network without DHCP: when first using the board, it is recommended to connect pCOWeb directly to a computer using a crossed Ethernet cable; then start the board with the “factory bootswitch” parameters (see “Pushbutton”). Compu-Aire Rev.03C 02-19-14 Page 53 of 82... -
Page 54: Figure 30 - Pcoweb
DHCP, ask the network administrator for a valid IP address and Netmask for the local network that the pCO3 will be connected to. Figure 34 - PCOWeb Figure 35 - Window cover Figure 36 - Installing PCOWeb Figure 37 - Installing plastic cover Compu-Aire Rev.03C 02-19-14 Page 54 of 82... -
Page 55: Web Server
“auto-set attributes” function is available in the administrator pages. To activate this function, simply click the “Adjust HTML pages attributes” link; it is recommended to do this whenever modifying one or more HTML pages. Compu-Aire Rev.03C 02-19-14 Page 55 of 82... -
Page 56: Cgi Script
• Always avoid using plastic, polystyrene or non-antistatic materials; • Always avoid passing the board between operators (to avoid the phenomena of electrostatic induction and consequent discharges). Compu-Aire Rev.03C 02-19-14 Page 56 of 82... -
Page 57: Banet Over Ms/Tp
2kV, connector G0 on the PCO3 board must be grounded. The board cannot be installed in direct contact with the metal panel on the electrical panel. Status RS-485 Push Button Table 8- Installation guide Compu-Aire Rev.03C 02-19-14 Page 57 of 82... -
Page 58: Meaning Of The Jumpers
Quick green-OFF-green if communication with the pCO3 is OK (pCO* ON-LINE); • Slow red-OFF-red if communication has not been established with the pCO* (pCO3 OFF- LINE) • Green-red-green if PCOnet detects errors or a temporary lack of response from the pCO3. Compu-Aire Rev.03C 02-19-14 Page 58 of 82... - Page 59 5 seconds and no more than 10 seconds. Approximately 10 seconds after releasing the button, the Status LED will stop flashing, and 15 seconds later PCOnet will be restarted: Status LED quickly flashing red-green-red-green. Compu-Aire Rev.03C 02-19-14 Page 59 of 82...
-
Page 60: Recalling The Factory Configuration ("Factory Bootswitch" Mode)
Note: If the values of the pCOnet parameters are not suitable, communication with BACset may not be possible. To connect to pCOnet, restart pCOnet using “factory bootswitch” mode (see the section on Operation - Pushbutton). Compu-Aire Rev.03C 02-19-14 Page 60 of 82... -
Page 61: Bacnet Parameter Description
This baud rate is not supported by the RS232 serial port on a normal PC. Parameter Factory Device Instance 4194303 77000 Station Address Max Master Max Info Frames Baud Rate 9600, 19200, 38400,76800 Table 9 - BACnet MS/TP parameters Compu-Aire Rev.03C 02-19-14 Page 61 of 82... -
Page 62: Technician Menu
R2 is the second relay which is connected to a normally opened dry contactor. Consult the electrical wiring diagram for more information. Switch over Figure 38 - Alarm configuration Compu-Aire Rev.03C 02-19-14 Page 62 of 82... - Page 63 Note: Not all systems are equipped with a general alarm or global alarm. Setting the SW=ON will shut the current active unit down and switch the operation over to standby unit. The “Switch Over” column setting only available when more than one unit are networked together. Compu-Aire Rev.03C 02-19-14 Page 63 of 82...
-
Page 64: Available Alarms
“ON/OFF” by tapping the screen and toggling via the virtual keyboard. Figure 39 - Alarm delays Figure 40 -Alarm switch over The PCO3 controller implements time out sensor delays to insure smooth operation. Each delay is dictated in second unless otherwise noted. Compu-Aire Rev.03C 02-19-14 Page 64 of 82... - Page 65 RMT/OAH Sensor: • FC/OAT/B10: • Fire Stat: Temp: 125.0°F • Fire Stat Alarm Delay: 0s • Offline Alarm Delay: • Alarm Buzzer: • T/H Alarm Delay: • All Alarm Switchover: • Disc Cool/Heat: 0.2°F Compu-Aire Rev.03C 02-19-14 Page 65 of 82...
-
Page 66: Sensor Offset
Available options are closed and open. Table 14 - Digital Input Setting Setting Description Alarm If: CLOSED: Used for normally open sensor OPEN: Used for normally closed sensor Compu-Aire Rev.03C 02-19-14 Page 66 of 82... -
Page 67: Network Setup
Figure 37. The delay of assistance is set to 600 seconds by default. After 600s, standby units become active and assist only if the active unit is unable to maintain the setpoints Compu-Aire Rev.03C 02-19-14 Page 67 of 82... -
Page 68: Manual Control
Refer to Factory->HVAC setting for detail. Default Setting: AUTO for all components Blower Liquid Solenoids Low pressure bypass Humidifier Heaters Analog outputs Compressors Global alarm Note: All analog outputs must be set to “0” for normal operation. Compu-Aire Rev.03C 02-19-14 Page 68 of 82... -
Page 69: Factory Setting
Fan Min/Max ON Condensate Unloaders Water In Temperature Unit °C/°F Water Flow Bypass Pressure Transducer Compressor Setup Filter Alarm Humidifier Economizer Fan Overload Global Alarm DX Assist Remote ON/OFF Low Pressure Retry Condensate Dead Bands Compu-Aire Rev.03C 02-19-14 Page 69 of 82... -
Page 70: Digital Inputs And Digital Outputs
In general, the controller works with a 24VAC input from the normally opened relay. The internal relay from the controller sends out a 24VAC on the digital output terminals to designated coils in order to energize the high voltage components. Figure 44 - Digital input configuration Compu-Aire Rev.03C 02-19-14 Page 70 of 82... - Page 71 Figure 45 - Digital output configuration Compu-Aire Rev.03C 02-19-14 Page 71 of 82...
-
Page 72: Hvac
Figure 47 Sensor Setup Mode: Continuous, Demand Room T. Type: Proportional, Integral, PID Speed: High, Low Band: Deadband default 5.0 (±2.5°F) Figure 48 Demand Ramps Figure 49 Compressor Option *Do not use. Factory reserved Compu-Aire Rev.03C 02-19-14 Page 72 of 82... - Page 73 Figure 50 Compressor Options Figure 51 Ramping Figure 52 Low pressure setup Figure 53 Humidity Figure 54 Dehumdification Figure 55 Heating Compu-Aire Rev.03C 02-19-14 Page 73 of 82...
- Page 74 Figure 56 BMS Control Figure 57 BMS Offline Control Figure 58 Sensor Failure control Compu-Aire Rev.03C 02-19-14 Page 74 of 82...
-
Page 75: Analog Inputs And Analog Outputs
Analog output terminals are primarily used for economizer systems where modulating output signals are required. Consult the factory for any special equipment use request. Figure 59 - Analog input configuration Compu-Aire Rev.03C 02-19-14 Page 75 of 82... - Page 76 Figure 60 - Analog output configuration Warning: Consult the manufacturer prior making any changes. Compu-Aire Rev.03C 02-19-14 Page 76 of 82...
-
Page 77: Changing Passwords
Do not perform this function. It will wipe out all the default settings and return the controller settings back to its default values. A reconfiguration is required to set it back to its specifications. Figure 62 - Factory reset / Set Unit Mode Compu-Aire Rev.03C 02-19-14 Page 77 of 82... -
Page 78: Troubleshooting Guide
A crossed over cable is required for direct Wrong cable PCOWeb fails connection from PC to controller communication Add-on card not Check for proper matting connectors between installed properly the controller and the add-on card Compu-Aire Rev.03C 02-19-14 Page 78 of 82... - Page 79 Check for low pressure switch. Change low Refrigerant pressure Low Pressure pressure bypass time out and reset the alarm drops below limit after rectifying the problem. Compu-Aire Rev.03C 02-19-14 Page 79 of 82...
- Page 80 Check pump for proper voltage and wiring. Condensate pump Check pump’s floaters for consistency. Check Pump failed failed if water still resides in pump’s reservoir. Reset alarm after rectifying the problems. Compu-Aire Rev.03C 02-19-14 Page 80 of 82...
- Page 81 Compu-Aire Rev.03C 02-19-14 Page 81 of 82...
- Page 82 TECHNICAL SUPPORTS www.compu-aire.com Tel: (562) 945-8971 Fax: (562) 696-0724 UNITED STATES OFFICE Compu-Aire, Inc. 8167 Byron Rd. Whittier, CA 90606 SUBJECT TO CHANGE WITHOUT INCURRING OBLIGATION Compu-Aire Rev.03C 02-19-14 Page 82 of 82...
Need help?
Do you have a question about the SYSTEM 2200 Plus 3L and is the answer not in the manual?
Questions and answers