Table of Contents
Advertisement
Quick Links
Download this manual
See also:
User Manual
Advertisement
Table of Contents

Subscribe to Our Youtube Channel
Related Manuals for Compuprint 10200


Summary of Contents for Compuprint 10200
- Page 1 Rev. 001...
- Page 2 • other standards Compuprint advises the customers not to use products for which the compliance to this safety rules are not warranted. Finally seek your dealer or contact a Compuprint office and be sure that are provided you the original Compuprint consumables.
-
Page 3: Eec Regulations
This equipment has been tested and found to comply with the limits for a Class B digital device, pursuant to Part 15 of the FCC Rules. These limits are designed to provide reasonable protection against harmful interference when the equipment is operated in a commercial environment. -
Page 4: Table Of Contents
Moving within the Printer Setups........38 FCC Notes.............. iii Leaving the Printer Setups ..........39 Canadian D.O.C. Radio Interference Regulation iii Power-On Configuration ............ 40 EEC Regulations ........... iii Entering the Power-On Configuration......40 Table of Contents..........iv Program Setup ..............77 Entering the Program Setup.......... -
Page 5: Getting To Know Your Printer
• 24 Needle Print Head • 136 columns @ 10 cpi • High Speed Draft printing at 1100 cps, Draft printing at 800 cps and LQ printing at 133 cps • IBM Proprinter XL 24, Personal Printer 2391+ and EPSON LQ Series emulations •... -
Page 6: Unpacking Your Printer
Together with the Installation Guide and the CD-ROM with the User Manual, the following items are included in the box: Notify any damage to your supplier. CD-ROM Front2 Tractor Ribbon Cartridge Repacking Strips Power Cable Never remove any printer cover unless it is necessary for the installation of a printer accessory and expressly described in this manual. - Page 7 To unpack the printer proceed as follows: Keep the packing material in a safe place. It must be used if you need to repack the printer for shipment. 1. Bring the printer box near the final printer location. 2. Cut the packing ribbons. 3.
- Page 8 4. Remove the polystyrene panels and the four polystyrene angles out of the packing box. Polystyrene Panels Polystyrene Angles...
- Page 9 5. Slide the packing box off the printer. 6. Remove the plastic bag from the printer. 7. With the help of another person, move the printer to its final position (onto the printer cabinet). The printer may be used also on a table or a stable surface.
-
Page 10: Connecting The Ground Cable
Connect the ground cable of the interface area (on the rear side of the printer) to the printer pedestal. If the printer is installed on a table, it is not necessary to connect the ground cable. -
Page 11: Removal Of The Shipment Locks
Open the printer tractor cover and make sure that you remove the shipment lock from the printer. Keep the packing material in a safe place. It must be used if you need to repack the printer for shipment. -
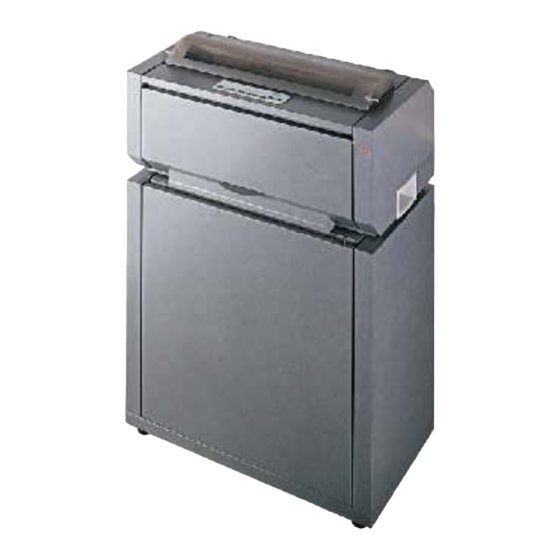
Page 12: Printer Parts
Upper Printer Cover Operator Panel Tractor Area Cover Printer Cabinet Printer Handgrip... -
Page 13: Rear View
Serial Interface Connector Parallel Interface Connector Power Connector Printer Cabinet Paper Output Stacker... -
Page 14: Left Side View
Power Switch Print Head Color Shifter Paper Bail Print Head Gap Adjustment Ribbon Cartridge Supports... -
Page 15: Setting Up Your Printer
Consider the following points when you choose the location for your printer: 80 cm 31.5 in. • The distance between the printer and the host computer must not exceed the length of the interface cable; • The location must sturdy, horizontal and stable;... -
Page 16: Ribbon Cartridge Installation
Make sure that you are using only Compuprint original consumables. 1. Make sure that the printer is turned off. 2. Find the ribbon cartridge among the accessories. Ribbon Guide Color Shifter Holder Tension Knob Cartridge Pin... - Page 17 3. Open the top cover using the handles on the front side of the covers. 4. Turn the printer on. The print carriage prepares for ribbon cartridge installation.
- Page 18 5. Before installing ribbon cartridge turn ribbon- winding knob arrow direction (located cartridge) to take up slack in the ribbon. Ribbon Winding Knob To avoid damage to the ribbon, do not turn the winding knob in the wrong direction. 6. Align the cartridge pins with the locking grooves on the left and right cartridge supports.
- Page 19 7. Slide and insert the ribbon guide between the print head and the ribbon guide mask holding it perpendicular to the print head. Make sure that the ribbon is inserted correctly between the print head and the print head mask. 8.
- Page 20 9. Turn again the ribbon-winding knob in the arrow direction (located on the cartridge) to take up slack in the ribbon. 10. Push the cartridge down gently until it clips into place at both locking points. 11. Turn the ribbon-winding knob again in the direction of the arrow to take up slack in the ribbon. 12.
Need help?
Do you have a question about the 10200 and is the answer not in the manual?
Questions and answers