Table of Contents
Advertisement
Quick Links
Federal Communications Commission (FCC) Statement
You are cautioned that changes or modifications not expressly approved by
the part responsible for compliance could void the user's authority to operate
the equipment
FCC- Class B
This equipment has been tested and found to comply with the limits for a Class
B digital device, pursuant to part 15 of the FCC Rules. These limits are
designed to provide reasonable protection against harmful interference in a
communications. However, there is no guarantee that interference will not
occur in particular installation. If this equipment does cause harmful
interference to radio or television reception, which can be determined by
turning the equipment off and on, the user is encouraged to try to correct the
interference by one or more of the following measures:
-Reorient or relocate the receiving antenna.
-Increase the separation between the equipment and receiver.
-Connect the equipment into an outlet on a circuit different from that to
which the receiver is connected.
-Consult the dealer or an experienced radio/TV technician for help.
All specifications and information are subject to changes without further notices.
User Manual
TViX R-3310
Advertisement
Table of Contents

Related Manuals for Dvico TViX R-3310


Summary of Contents for Dvico TViX R-3310
-
Page 1: User Manual
User Manual TViX R-3310 Federal Communications Commission (FCC) Statement You are cautioned that changes or modifications not expressly approved by the part responsible for compliance could void the user’s authority to operate the equipment FCC- Class B This equipment has been tested and found to comply with the limits for a Class B digital device, pursuant to part 15 of the FCC Rules. -
Page 2: Safety Notice
Safety Notice Magnetic material may erase the data in TViX. Do not disassemble the device. It may Keep any magnetic material away from TViX. cause malfunction or fire Keep TViX away from heat or fire. Do not expose TViX to oil, smoke, Do not block any ventilation openings. -
Page 3: Usage Precautions
Usage Precautions Please read the following usage precautions before using your TViX. Make sure the power is off when you connect the A/V cable between the TViX and the TV. When cleaning the TViX product, pull out the power cord and then wipe it with a soft piece of dry cloth. When connected to the computer through the USB cable the TViX acts as an external USB storage device (In this state, there is no video/audio output displayed on the TV Screen a USB ON icon will be displayed on the center of the TV screen and on the VFD. -
Page 4: Table Of Contents
Table of Contents Safety Notice ............................2 Usage Precautions ..........................3 Introduction....................5 Multimedia Player ........................5 Audio Player .......................... 6 External Storage ........................6 Specifications ........................7 Name of Each Part ..................8 Control Panel ......................... 8 Cable Connection ........................8 Package Contents ......................... -
Page 5: Introduction
1 Introduction Multimedia Player TViX is a standalone, multimedia hard disk player which plays digital videos, digital music, digital still images and DVD files to a TV display and home entertainment system. You can enjoy digital contents in your living room without having to burn discs or having to play it back on a DVD or CD player anymore. -
Page 6: Audio Player
Audio Player TViX can play a variety of audio files such as MP3, Ipod, M4A, Ogg or WMA (Windows Media Audio) through the TV speaker and any other audio systems. You can listen to your favorite music files nonstop, by organizing a custom winamp playlist. -
Page 7: Specifications
Specifications Main Chipset Adapts superb Scorpio RT1282 200Mhz processor 7 Alpha-Numeric Character VFD Display 5 Digit Numeric Display Format : AVI, MPEG1/2/4 (Xvid), .IFO, .ISO, .VOB, .DAT, .TP Video Codec : MPEG 1 / 2 / 4, AVI, XVID Resolutions Up to 1080i (1920x1080i) resolution .MP3, .OGG, .WMA, .AAC, .WAV (PCM) Audio Multimedia digital sound, DTS pass-thru &... -
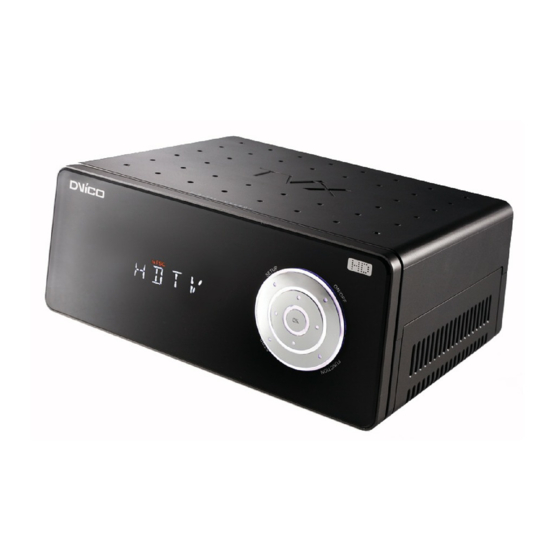
Page 8: Name Of Each Part
2 Name of Each Part Control Panel Basic functions can be done without the remote control. Cable Connection You can connect the TViX to a TV display or audio Amplifier using the A/V cable. There is a detail instruction for tuner box on the quick guide of optional tuner box package. HD Tuner port HDMI OUT USB HOST COMPONENT... -
Page 9: Installation And Connection
3 Installation and Connection Video Connection We support HDMI, Component, S-Video, Composite video output for connecting to the TV and each output needed to be changed on the settings menu depending on the cable used. The highest quality expected by the components used is in the following order: HDMI >... - Page 10 Connection to S-Video Output Connection to Component Output Connect the TViX kit and your TV .using the S-Video Connect the TViX kit and your TV. By using the cable. component cables. Turn on the TViX Kit and the TV. Select video input Turn on the TViX Kit and the TV.
-
Page 11: Audio Connection
Audio Connection Connection to 2 CH Normal TV Connection to 5.1CH Amplifier (Digital) Connect the audio cables from the left (white) and If you have a multi-channel decoder/amplifier with an right (red) of TViX to the appropriate terminal of your optical/coaxial input, you can enjoy 5.1 CH high TV or Hi - Fi system for sound output. -
Page 12: Hdd Installation/Exchange
HDD Installation/Exchange Warning: If you change the HDD of a TViX with another HDD, the warranty will be voided. Assembling the TViX is very easy. Just follow the instructions below: Use a Screwdriver and Tighten the Bolts by attaching the guide board to the Hard disk Open the lid of the TViX by sliding as shown in below pictures. - Page 13 Close the lid of TViX. To change the hard disk, pull the hdd’s guide board while pressing the lock button.
-
Page 14: Tvix Setup Menu
4 TViX Setup Menu Audio/Video Setting This section indicates the Audio/Video settings. You can set password to enter into setup menu. Setup password protection is available. on MISC menu Within SET UP menu. Safety lock feature need to be enabled. This will block children changing setup accidentally. - Page 15 If the ratio of the TV is 4:3, select the 4:3 letter box or 4:3 Pan & Scan. If the ratio is 16:9, select 16:9. * The 4:3 Letter box can show the original ratio of the multimedia file in 16:9. * The 4:3 Pan &...
-
Page 16: Misc Setting
MISC Setting This section indicates the MISC settings. Photo Transport Effect : All Effect Shuffle Photo Display Time : 2 Seconds Date & Time : Manual Menu Language : English Auto Execution : Display OSD : Normal Safety Lock : Subtitle/Outline : White/Black Screen Saver :... -
Page 17: Network Setting
Network Setting This section indicates the Network settings. Wired Lan Setup : DHCP IP (AUTO) TViX Network Information Network Disk1 : Slow(SAMBA) Network Disk2 : Slow(SAMBA) Network Disk3 : Slow(SAMBA) Network Disk4 : Slow(SAMBA) Restart FTP server FTP password : 334455 * LAN setting : Default setting is DHCP. -
Page 18: Hdtv Setting
HDTV Setting This section indicates the DTV settings. DTV Region : Time Zone : Central Time(US& Canada) HDTV Audio Language : English TV Input : Antenna Start Scanning Timeshift Auto start : Timeshift Duration : 30 MIN Quality : Auto Chapter : 15 minutes DTV Region : Select your location. -
Page 19: Easy Usage Of Tvix
5 Easy Usage of TViX Making an HDD Folder As shown in the picture below, one end of the USB cable should be connected to the USB connector of the TViX and the other end to the computer. CAUTION! The USB cable has a different shape on both ends. -
Page 20: Play Video Files
Play Video Files When installation is successfully finished, you will see screen A. You can copy a video file into the VIDEO folder in advance. SETUP, VIDEO, AUDIO, PHOTO icons is shown. Select the Video menu by using the Left/Right arrow button. If you want to change the partition of the HDD, press the Jump/Repeat button. -
Page 21: Play Audio Files
Play Audio Files You can copy an audio file into the AUDIO folder in advance and play music files. If you cannot see screen A, press the MENU button on the remote control. Select the Audio menu on screen A and press the OK button. -
Page 22: Play Image Files
Play Image Files You may copy image files into the PHOTO folder in advance and play the image or photo files. You can press the PHOTO button on the remote control without selecting from the menu screen. Press the PHOTO button. You can see the image files that you just copied. -
Page 23: Using The Remote Control
6 Using the remote control Basic Functions This indicates Remote Buttons. Some buttons is not available without DTV Tuner. POWER On/Off button Mute button Go to DTV Go to Photo Folder Boot as DTV Go to Video Folder Go to Audio Folder Boot as Player 1/2/3/4 : used to change the @ : / _ -... -
Page 24: Descriptions Of Each Buttons
Descriptions of Each Buttons During the playback of multimedia files. Basically you can choose the file you want and press the OK button. For playback of DVD files copied to the HDD, please locate the cursor to VIDEO_TS.IFO file and press OK. You can do a full DVD navigation like you would do with a DVD player. - Page 25 <NOTE> INFO Button : • First Press – Shows information of the contents. • Second Press – Shows the elapsed time (the progress bar is displayed on the upper left hand corner of the screen). • Third Press – Show remaining time. •...
- Page 26 - SLEEP ON will blink for 3 minutes before turning off The present playing time will be displayed with the GOTO function. FF/REW Button • AVI : 2X 4X 32X. • DVD Jukebox : 2X 64X. STEP / SLOW Function With Pause mode - Right button : Slow Motion playback.
-
Page 27: Audio Playback
6.2.2 Audio Playback When you press the AUDIO button on the remote control, Only the contents available on the Audio folder of TVIX will be displayed It applies only to the active partition(first partition) if you have more than one partition. POWER On/Off button Mute button Go to Audio Folder... - Page 28 Shuffle Function (Random Playback) - Press the Shuffle button to play the files of the present directory randomly. - Press the Shuffle button again to disable the shuffle mode. Supports 10 Sec function when playing WMA, WAV… files. 10 sec FF/REW function is available while playing audio files. Supports Lyric Files (.lrc) If the file name of a music file and .lrc file are the same, the lyrics will be displayed automatically.
-
Page 29: Image Playback
6.2.3 Image Playback When you press the PHOTO button on the remote control, only the contents available on the PHOTO folder of TVIX will be displayed. It applies only to the active partition(first partition) if you have more than one partition. Mute button POWER On/Off button Go to Photo Folder... - Page 30 Some non-standard JPEG files may not be displayed If you press the SETUP button, you will see in sequence the Brightness Contrast Saturation menus. In these menus, you can adjust the Contrast, Brightness, Hue and Saturation by pressing the left/right arrow buttons. The currently supported maximum resolution of picture is 3888 x 2592.
-
Page 31: Firmware Upgrade
7 Firmware Upgrade Firmware Version Check. Connect the TViX to your TV and then turn on the TViX Press the SETUP button on the top panel and the setup screen will be displayed. Check the latest firmware version of TViX at www.tvix.co.kr *** You’ll be posted for any firmware updates or news if you fill out the customer registration form at http://www.tvix.co.kr... - Page 32 Erasing the old firmware is in process. New firmware upgrade is in process (takes about 1 minute). When the upgrade is successfully finished, the TViX will reboot automatically. < CAUTIONS: Safe Mode Upgrading > Even if the TViX accidentally turns off during the firmware upgrade, the safe mode will enable the TViX to be re-upgraded.
Need help?
Do you have a question about the TViX R-3310 and is the answer not in the manual?
Questions and answers