Keyline NINJA LASER Quick Start Manual
Hide thumbs
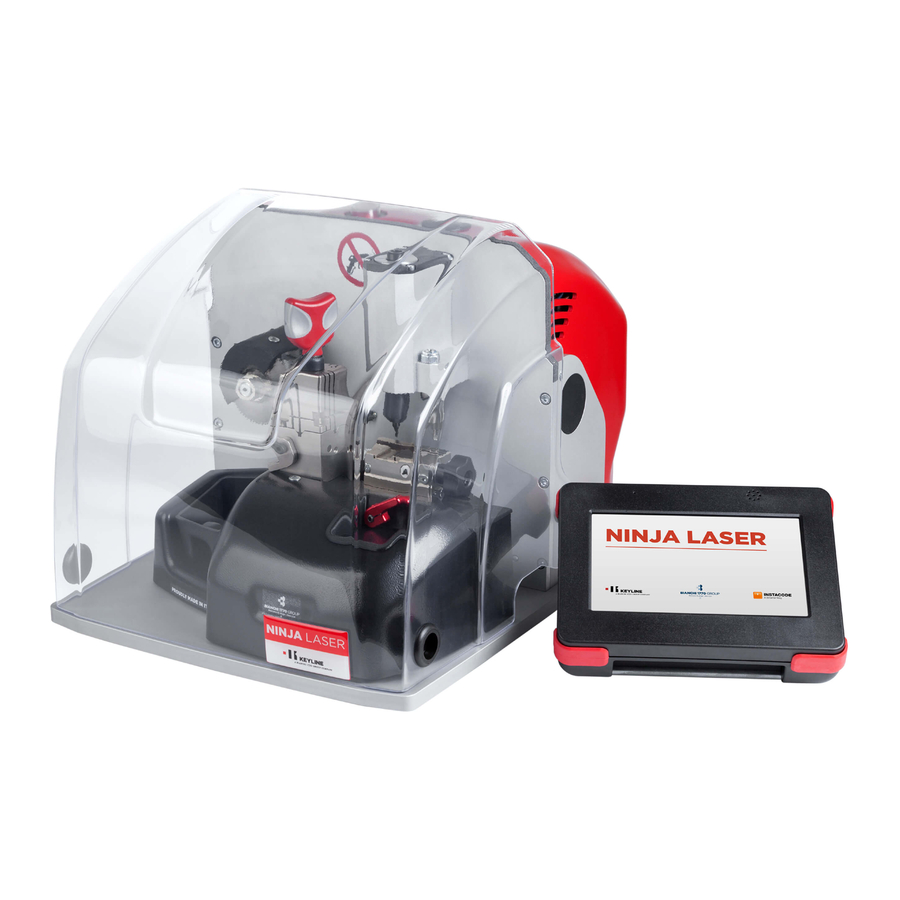
Also See for NINJA LASER:
- Quick start manual (40 pages) ,
- Use and maintenance manual (172 pages) ,
- Use and maintenance manual (64 pages)
Table of Contents
Advertisement
Quick Links
Advertisement
Table of Contents

Related Manuals for Keyline NINJA LASER


Summary of Contents for Keyline NINJA LASER
- Page 2 * IMPORTANT * REGISTERING YOUR MACHINE Thank you for your purchase of the Keyline Ninja Laser. Before continuing with machine setup and use, please complete the following; COMPLETE PRODUCT REGISTRATION FORM Complete enclosed form and fax to 216-803-0202 or e-mail to info@keyline- .
- Page 3 INSTALLING SAFETY SHIELD Your Ninja Laser safety shield is shipped separate from the machine in order to protect the shield in transit. Please follow the instructions for installing the shield upon receipt before initial use. STEP 1: Remove the Ninja Laser...
- Page 4 POWERING MACHINE ON/OFF Cable Connection & Powering Machine ON *MOBILE USERS: YOU MUST USE A PURE SINE WAVE INVERTER WITH 1100 WATTS (or greater) TO POWER THE MACHINE OR MACHINE MOTOR WILL NOT WORK PROPERLY Attach the 9-pin connector cable to the port on the LEFT SIDE of the console AND to the back of the machine.
- Page 5 LOGIN / PASSWORD ENTRY TIP: Use included stylus with touch screen to ensure accurate selections Leave password screen blank, no Select ADMINSTRATOR default password is set, Select NEXT. To create password, see below. PASSWORD CREATION (OPTIONAL) -Skip this section if you do not want a password- From Main Menu, Select SETUP, then USERS and then CHANGE PASSWORD.
- Page 6 This will avoid having to replicate steps. KEY MATERIAL The Ninja Laser defaults to cutting brass keys as the key material type. If you are cutting a different type of metal key, such as steel, nickel silver or aluminum, you can make the selection in the cutting screen.
- Page 7 TIP: DO NOT DECODE PLASTIC KEYS! Only metal keys can be decoded and cut on the Ninja Laser. 1. Select: SETUP Select MAKE, then NEXT Select CARS Select : Cut by Code...
- Page 8 CUT BY DECODE – H.S. , cont. Confirm jaw position, select OK Insert key correctly on jaw, remove tip stop and close shield, select NEXT Confirm tip stop tool removal Decoding in process Depths and key code displayed Decode complete; Select OK Select NEXT, then proceed with cutting the key by code (refer to Page 8 –...
- Page 9 CUT BY CODE – HIGH SECURITY NOTE: Make sure AC Jaw is in cutting position on the jaw carriage as shown in the picture to the right. TIP: Cutting a test key is also recommended on first use to verify correct key cutting procedure.
- Page 10 CUT BY CODE – HIGH SECURITY , cont. Key depths appear, select NEXT Make sure jaw is in cutting position Insert key correctly on jaw, paying Confirm jaw placement, select OK close attention to tip stop position (shown in RED). Tighten down key, then remove tip stop.
- Page 11 CUT BY CODE – HIGH SECURITY , cont. Confirm removal of tip stop tool, Flip key in jaw, removing key select OK shavings with brush, select OK Key cutting begins Cut complete Key cutting complete, select OK. Remove all key shavings from the jaw and select CUT to cut additional keys or HOME to go back to MAIN MENU.
- Page 12 CUT BY DECODE – EDGE CUT NOTE: When using the edge cut jaw side, the AC jaw (right side) must be removed. Select CARS Select MODEL Select MAKE Select DECODE Select YEAR Insert key correctly on jaw, paying close attention to tip stop position (shown in BLUE).
- Page 13 CUT BY DECODE – EDGE CUT , cont. Confirm tip stop removal, select OK Extract left side tracer as shown Confirm AC jaw removal, select OK Decoding in process Depths and key code displayed Decode complete; select OK If proceeding to cutting, retract tracer, then select NEXT to proceed with cutting the key by code (refer to Page 12 –...
- Page 14 CUT BY CODE – EDGE CUT NOTE: When using the edge cut jaw side, the AC jaw (right side) must be removed. Select CARS Select MODEL Select MAKE Select CODES Select YEAR Enter code and select NEXT Key depths display, select NEXT...
- Page 15 CUT BY CODE – EDGE CUT , cont. Select the correct jaw side as displayed on screen. Jaw can be rotated by pulling up on the base of the jaw and rotating to correct side. Inset tip stop and insert key to correct position as noted in BLUE.
- Page 16 CUT BY CODE – EDGE CUT , cont. Cut complete, select OK Once key cutting complete, put additional duplicate key to be cut into jaw and select CUT. If done, select HOME to go to Main Menu.
- Page 17 FAVORITES Selecting Favorites helps bypass Make, Model and Year selections that you most commonly use to get you right to the Code/Decode/Direct screen Go through the menu and select the Make, then the Model, then the Year and Code Series range of the vehicle you want to save a favorite for At Main Menu, select Cars...
- Page 18 CUTTER REPLACEMENT – H.S. 1. Select: SETUP Select UTILITY Select SETUP Select REPLACE CUTTER, make Current cutter installed displays, sure appropriate jaw is installed select YES to continue Jaw carriage moves into position Select OK once complete TO REMOVE CUTTER: 1.
- Page 19 CUTTER REPLACEMENT – H.S. , cont. 1. Select: SETUP Confirm no keys or templates are Confirm cutter removal, select installed on jaw, select OK OK. Jaw will move into position 1. Select: SETUP Confirm no tip stop is installed, Close the shield and select OK. select OK Jaw moves into position TO INSTALL NEW CUTTER:...
- Page 20 CUTTER REPLACEMENT – H.S. , cont. 1. Select: SETUP Select OK to reset cutter counter Close the shield, select OK. Jaw will move into position Utility screen appears, select HOME to go to Main Menu...
- Page 21 TRACER REPLACEMENT IMPORTANT: Please make sure safety shield is closed before starting initial tracer replacement procedure. 1. Select: SETUP Select UTILITY Select SETUP Current tracer installed displays, Select REPLACE TRACER select YES to continue Remove tracer; see instructions on Remove jaw, then select OK page 23...
- Page 22 TRACER REPLACEMENT , cont. TO REMOVE TRACER: 1. Use 2.5mm Allen tool to loosen tracer setscrew ½ a turn 2. Pull out tracer. NOTE: You may use pliers to remove tracer if it is bent or broken. Select OK once tracer is removed TO INSTALL NEW TRACER: 1.
- Page 23 CUTTER REPLACEMENT – EDGE CUT WHAT YOU NEED: New replacement cutter (B5500) 2.5mm allen tool (included in tool kit) Steel bar (included in tool kit) 19mm open end wrench (included in tool kit) REMOVE OLD CUTTER: 1. Use 2.5mm allen tool to remove 3 screws that secure black edge cutter cover. 2.
- Page 24 SOFTWARE UPDATE INSTRUCTIONS SOFTWARE UPDATE VIA USB MEMORY STICK & KEYONLINE WEBSITE WHAT YOU WILL NEED: Console, USB Memory Stick (included with machine), PC with Internet connection NOTE: USB Memory Stick must be blank with no files on it To check your current software version, see ‘Version SW’ below the Main Menu tab...
- Page 25 STEP 1: Prepare USB Memory Stick with Update File At MAIN MENU, select SETUP At SETUP MENU, select UPDATES Then select KEYONLINE VIA PC Select YES to Software Update Insert USB Memory Stick, select OK USB stick inserts on right side of console Console prepares software file Remove USB stick, Select OK...
- Page 26 STEP 2: Install Update File on USB from PC Insert USB stick into USB port on PC then go to http://keyonline.keyline.it On site, double-click CHOOSE FILE Go to Computer, then double- Highlight the ‘.csk’ file listed and click Removable Disk...
- Page 27 STEP 2, cont: Install Update File on USB from PC Package creation completed should appear. You will be prompted with a pop up at the bottom of the screen, click on the drop down arrow to the right of ‘SAVE’ and select ‘SAVE AS’ After selecting ‘SAVE AS’, you will be prompted to select the destination where you want to save the file.
- Page 28 STEP 3: Complete Software Installation on Console Insert USB into console and select OK Update begins Select YES to confirm update Machine will re-boot and power back up as update continues Update continues; progress bar on bottom Update successful; select OK...
- Page 29 "AC" Jaw OPZ09734B 1495551 3mm T-wrench (Long) B3316 1519892 B Jaw OPZ09781B 1495552 D Jaw OPZ09783B 1495553 Console Arm Support OPZ09454B 1519894 N01 Calibration Blanks RIC08842B 1519895 Lexus Adaptor B3379 1495416 Infiniti Adaptor B3352 1166835 ©2017 Keyline USA. All Rights Reserved.
Need help?
Do you have a question about the NINJA LASER and is the answer not in the manual?
Questions and answers