Table of Contents
Advertisement
Quick Links
Advertisement
Table of Contents

Related Manuals for thomann column PT


Summary of Contents for thomann column PT
- Page 1 PT, column HT UHF wireless system user manual...
- Page 2 Musikhaus Thomann Thomann GmbH Hans-Thomann-Strasse 1 96138 Burgebrach Germany Telephone: +49 (0) 9546 9223-0 E-mail: info@thomann.de Internet: www.thomann.de 07.04.2017, ID: 400765, 400768...
-
Page 3: Table Of Contents
Installation and starting up........................ 15 4.1 General Information........................15 4.2 Bodypack receiver..........................17 4.3 Bodypack transmitter and receiver................... 18 4.4 Handheld transmitter........................18 Connections and controls........................19 5.1 Bodypack receiver..........................19 5.2 Bodypack transmitter........................23 5.3 Handheld transmitter........................27 column PT, column HT... - Page 4 Table of contents Operating..............................30 6.1 Bodypack receiver..........................30 6.2 Bodypack transmitter........................43 6.3 Handheld transmitter........................52 Technical specifications........................63 7.1 Bodypack receiver..........................63 7.2 Bodypack transmitter........................64 Plug and connection assignment....................67 Troubleshooting............................69 Protecting the environment......................72 UHF wireless system...
-
Page 5: General Information
If you sell the unit please make sure that the buyer also receives this manual. Our products are subject to a process of continuous development. Thus, they are subject to change. column PT, column HT... -
Page 6: Further Information
General information 1.1 Further information On our website (www.thomann.de) you will find lots of further information and details on the following points: Download This manual is also available as PDF file for you to download. Use the search function in the electronic version to find the topics of Keyword search interest for you quickly. -
Page 7: Notational Conventions
The individual steps of an instruction are numbered consecutively. The result of a step is indented and highlighted by an arrow. Example: Switch on the device. Press [Auto]. ð Automatic operation is started. Switch off the device. column PT, column HT... -
Page 8: Symbols And Signal Words
General information 1.3 Symbols and signal words In this section you will find an overview of the meaning of symbols and signal words that are used in this manual. Signal word Meaning DANGER! This combination of symbol and signal word indicates an immediate dangerous situation that will result in death or serious injury if it is not avoided. -
Page 9: Safety Instructions
This device may be used only by persons with sufficient physical, sensorial, and intellectual abilities and having corresponding knowledge and experience. Other persons may use this device only if they are supervised or instructed by a person who is responsible for their safety. column PT, column HT... - Page 10 Safety instructions Safety DANGER! Danger for children Ensure that plastic bags, packaging, etc. are disposed of properly and are not within reach of babies and young children. Choking hazard! Ensure that children do not detach any small parts (e.g. knobs or the like) from the unit.
- Page 11 NOTICE! Risk of fire due to incorrect polarity Incorrectly inserted batteries may destroy the device or the batteries. Ensure that proper polarity is observed when inserting batteries. column PT, column HT...
- Page 12 Safety instructions NOTICE! Possible damage by leaking batteries Leaking batteries can cause permanent damage to the device. Take batteries out of the device if it is not going to be used for a longer period. UHF wireless system...
-
Page 13: Features
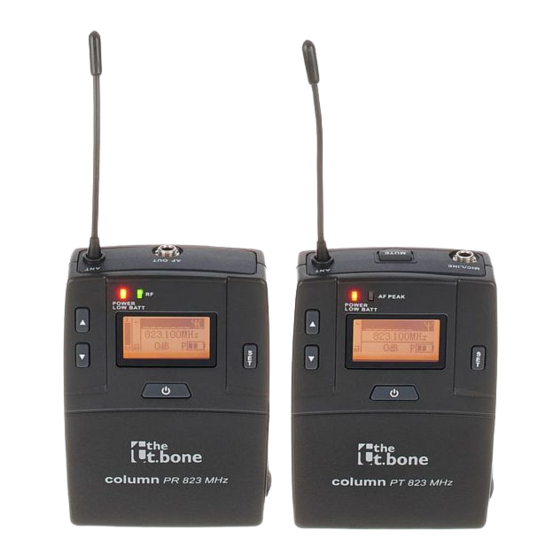
The UHF wireless camera system column HT is comprised of the following components: Bodypack receiver Battery operated handheld transmitter with cardioid characteristic Your UHF wireless camera system column PT is comprised of the following components: Bodypack receiver Battery powered bodypack transmitter... - Page 14 Features Attaches to the camera with a fixed flash shoe adapter Voltage supply: 2 AA cells (LR6, 1.5 V) or corresponding rechargeable batteries UHF wireless system...
-
Page 15: Installation And Starting Up
Create all connections while the device is off. Use the shortest possible high-quality cables for all connections. Take care when running the cables to prevent tripping hazards. column PT, column HT... - Page 16 For more information, please visit: http://www.thomann.de. Make sure that transmitter and receiver are both tuned to the same channel.
-
Page 17: Bodypack Receiver
Use two fingers to evenly lift the retaining clamp and slide the hot shoe adapter under the clamp. Slide the hot shoe adapter all the way up. Release the retaining clamp. The hot shoe adapter is secured by the ends of the retaining clamp. column PT, column HT... -
Page 18: Bodypack Transmitter And Receiver
Installation and starting up To remove, lift the retaining clamp and slide the hot shoe adapter downwards. 4.3 Bodypack transmitter and receiver Inserting batteries Open up the lateral battery compartment. Insert the batteries. Pay attention to the correct location of the poles. The correct arrangement of the batteries is shown on the back of the unit next to the battery compartment. -
Page 19: Connections And Controls
Connections and controls Connections and controls 5.1 Bodypack receiver column PT, column HT... - Page 20 Connections and controls 1 Display 2 Flexible antenna 3 [RF] Indicates that a signal is being received. 4 [POWER / LOW BATT] This LED shows that the device is turned on. Blinks when the remaining capacity of the batteries gets too low. 5 [SET] Opens the menu and selects a menu item.
- Page 21 Connections and controls 12 Infra red sensor. 13 [AF OUT] 3.5 mm TRS phone socket for audio signal output and direct connection to a camera. column PT, column HT...
- Page 22 Connections and controls Display 14 Displays the name of the transmission path, if it has been set. 15 Battery level indicator. Replace the batteries as soon as the symbol flashes. Reduces the voltage of the batteries even further if the transmitter is automatically switched off.
-
Page 23: Bodypack Transmitter
Connections and controls 5.2 Bodypack transmitter column PT, column HT... - Page 24 Connections and controls 31 Display 32 Flexible antenna 33 [AF PEAK] Indicates that an audio signal is present at the input. 34 [POWER / LOW BATT] Lights up when the device is turned on. Blinks when the remaining capacity of the batteries gets too low. 35 [SET] Opens the menu and selects a menu item.
- Page 25 Connections and controls 42 [MUTE] Temporarily mutes or unmutes the transmitter. 43 [MIC/LINE] 3.5 mm TRS phone socket for audio signal input. column PT, column HT...
- Page 26 Connections and controls Display 44 Displays the name of the transmission path, if it has been set. 45 Battery level indicator. Replace the batteries as soon as the symbol flashes. Reduces the voltage of the batteries even further if the transmitter is automatically switched off.
-
Page 27: Handheld Transmitter
Connections and controls 5.3 Handheld transmitter column PT, column HT... - Page 28 Connections and controls 61 Display. 62 Microphone head grill to protect from damage and reduce wind and breathing noise. 63 Main switch Press the switch for several seconds to switch the device on or off. Press the switch once briefly to mute or unmute the microphone.
- Page 29 Shows that the transmitter has been muted. This is the case if the transmitter and receiver are working on different frequencies, if the receiver is not getting a usable signal or if you have muted the transmitter by briefly pressing the main switch. 74 Shows the output power. column PT, column HT...
-
Page 30: Operating
Operating Operating 6.1 Bodypack receiver Switching the device on / off To turn the device on, press the main switch for two seconds. ð The [POWER / LOW BATT] LED lights up. To turn the unit off, press the main switch for several seconds. ð... - Page 31 Press [SET] to confirm the selection. ð The display shows that the receiver is being adjusted to the new frequency. After a few seconds, the display shows the normal sate again. Press the main switch to close the menu. column PT, column HT...
- Page 32 Operating Select channel Press [SET]. ð The main menu opens up. Use the arrow buttons to select the submenu ‘Freq. preset’ . Press [SET] to confirm the selection. ð The ‘CH xxx’ display appears. Use the arrow buttons to select a channel between 1 and 90. The bottom line of the dis‐ play shows the corresponding frequency.
- Page 33 Press [SET] to confirm the entry. ð The display shows that the receiver is being adjusted to the new frequency. After a few seconds, the display shows the normal sate again. Press the main switch to close the menu. column PT, column HT...
- Page 34 Operating Synchronizing transmitter and receiver Ensure that the transmitter is switched on. Press [SET] on the receiver. ð The main menu opens up. Use the arrow buttons to select the submenu ‘Sync’ . Press [SET] to confirm the selection. ð The ‘sync’ display appears. The receiver now synchronizes its settings with the trans‐ mitter.
- Page 35 Use the arrow buttons to select the menu item ‘Squelch’ . Press [SET] to confirm the selection. Use the arrow buttons to choose between ‘High’ , ‘Mid’ and ‘Low’ . Press [SET] to confirm the entry. Press the main switch to close the menu. column PT, column HT...
- Page 36 Operating Turning the pilot tone on / off By transmitting an inaudible pilot tone, the devices involved can automatically detect whether the radio link is working. Press [SET]. ð The main menu opens up. Use the arrow buttons to select the submenu ‘Advanced’ . Press [SET] to confirm the selection.
- Page 37 Press [SET] to confirm the selection. Use the arrow buttons to select the menu item ‘Software Revision’ . Press [SET] to confirm the selection. ð The software version of the device is displayed. Press the main switch to close the menu. column PT, column HT...
- Page 38 Operating Resetting to basic settings Press [SET]. ð The main menu opens up. Use the arrow buttons to select the submenu ‘Advanced’ . Press [SET] to confirm the selection. Use the arrow buttons to select the menu item ‘Reset’ . Press [SET] to confirm the selection.
- Page 39 Use the arrow keys to select a value between 1 and 15. Press [SET] to confirm the selection. ð The display shows ‘Stored’ , the settings are being applied. Press the main switch to close the menu. column PT, column HT...
- Page 40 Operating Labelling the device To clearly identify the device in the display, you can assign a name to it Press [SET]. ð The main menu opens up. Use the arrow buttons to select the submenu ‘Name’ . Press [SET] to confirm the selection. Use the arrow buttons to select a character at the current cursor position.
- Page 41 You can change the output level (volume) with the arrow keys even if the keypad is locked. To unlock the keypad, press [SET] until the message ‘System unlock’ is displayed. ð The keys have their original function again. The symbol is no longer visible. column PT, column HT...
- Page 42 Operating Adjusting the output level (volume) Press [SET]. ð The main menu opens up. Use the arrow buttons to select the submenu ‘Output’ . Press [SET] to confirm the selection. Use the arrow buttons to select a value between 0 dB und –42 dB. Press [SET] to confirm the selection.
-
Page 43: Bodypack Transmitter
Use the arrow buttons to select the menu item ‘Power off’ and confirm with ‘SET’ . ð The display shows the message ‘OFF’ , the [POWER / LOW BATT] LED goes out, the device is switched off. column PT, column HT... - Page 44 Operating Select channel Press [SET]. ð The main menu opens up. Use the arrow buttons to select the submenu ‘Freq. preset’ . Press [SET] to confirm the selection. ð The ‘CH xxx’ display appears. Use the arrow buttons to select a channel between 1 and 90. The bottom line of the dis‐ play shows the corresponding frequency.
- Page 45 Press [SET] to confirm the entry. ð The display shows that the receiver is being adjusted to the new frequency. After a few seconds, the display shows the normal sate again. Press the main switch to close the menu. column PT, column HT...
- Page 46 Operating Turning the pilot tone on / off By transmitting an inaudible pilot tone, the devices involved can automatically detect whether the radio link is working. Press [SET]. ð The main menu opens up. Use the arrow buttons to select the submenu ‘Advanced’ . Press [SET] to confirm the selection.
- Page 47 Press [SET] to confirm the selection. Use the arrow buttons to select the menu item ‘Software Revision’ . Press [SET] to confirm the selection. ð The software version of the device is displayed. Press the main switch to close the menu. column PT, column HT...
- Page 48 Operating Resetting to basic settings Press [SET]. ð The main menu opens up. Use the arrow buttons to select the submenu ‘Advanced’ . Press [SET] to confirm the selection. Use the arrow buttons to select the menu item ‘Reset’ . Press [SET] to confirm the selection.
- Page 49 Use the arrow keys to select a value between 1 and 15. Press [SET] to confirm the selection. ð The display shows ‘Stored’ , the settings are being applied. Press the main switch to close the menu. column PT, column HT...
- Page 50 Operating Labelling the device To clearly identify the device in the display, you can assign a name to it Press [SET]. ð The main menu opens up. Use the arrow buttons to select the submenu ‘Name’ . Press [SET] to confirm the selection. Use the arrow buttons to select a character at the current cursor position.
- Page 51 After a few seconds, the menu is closed. The symbol appears on the display. To unlock the keypad, press [SET] until the message ‘System unlock’ is displayed. ð The keys have their original function again. The symbol is no longer visible. column PT, column HT...
-
Page 52: Handheld Transmitter
Operating Setting the input sensitivity Press [SET]. ð The main menu opens up. Use the arrow buttons to select the submenu ‘Sensitivity’ . Press [SET] to confirm the selection. Use the arrow buttons to select a value between –21 dB and +22 dB. Press [SET] to confirm the entry. - Page 53 ð The ‘Power&lock’ menu opens up. Use [SEL] to select the menu item ‘Power off’ and confirm with ‘SET’ . ð The display shows the message ‘OFF’ , the [POWER / LOW BATT] LED goes out, the device is switched off. column PT, column HT...
- Page 54 Operating Select channel Press [SET]. ð The main menu opens up. Use [SEL] to select the submenu ‘Freq. preset’ . Press [SET] to confirm the selection. ð The ‘CH xxx’ display appears. Use [SEL] to select a channel between 1 and 90. The bottom line of the display shows the corresponding frequency.
- Page 55 Press [SET] to confirm the entry. ð The display shows that the receiver is being adjusted to the new frequency. After a few seconds, the display shows the normal sate again. Press the main switch to close the menu. column PT, column HT...
- Page 56 Operating Turning the pilot tone on / off By transmitting an inaudible pilot tone, the devices involved can automatically detect whether the radio link is working. Press [SET]. ð The main menu opens up. Use [SEL] to select the submenu ‘Advanced’ . Press [SET] to confirm the selection.
- Page 57 Press [SET] to confirm the selection. Use [SEL] to select the menu item ‘Software Revision’ . Press [SET] to confirm the selection. ð The software version of the device is displayed. Press the main switch to close the menu. column PT, column HT...
- Page 58 Operating Resetting to basic settings Press [SET]. ð The main menu opens up. Use [SEL] to select the submenu ‘Advanced’ . Press [SET] to confirm the selection. Use [SEL] to select the menu item ‘Reset’ . Press [SET] to confirm the selection. Use [SEL] to select the option ‘Yes’...
- Page 59 Press [SET] to confirm the selection. Use [SEL] to select a value between 1 and 15. Press [SET] to confirm the selection. ð The display shows ‘Stored’ , the settings are being applied. Press the main switch to close the menu. column PT, column HT...
- Page 60 Operating Labelling the device To clearly identify the device in the display, you can assign a name to it Press [SET]. ð The main menu opens up. Use [SEL] to select the submenu ‘Name’ . Press [SET] to confirm the selection. Use [SEL] to select a character at the current cursor position.
- Page 61 After a few seconds, the menu is closed. The symbol appears on the display. To unlock the keypad, press [SET] until the message ‘System unlock’ is displayed. ð The keys have their original function again. The symbol is no longer visible. column PT, column HT...
- Page 62 Operating Setting the input sensitivity Press [SET]. ð The main menu opens up. Use [SEL] to select the submenu ‘Sensitivity’ . Press [SET] to confirm the selection. Use [SEL] to select a value between –21 dB and +22 dB. Press [SET] to confirm the entry. Press the main switch to close the menu.
-
Page 63: Technical Specifications
Frequency modulation (FM) Sensitivity (RF) <–98 dBm (@ 30 dB) Image frequency rejection >75 dB Pilot tone 32.768 kHz (switchable) NF frequency response 50 Hz…15 kHz (±3 dB) < 0.5 % Signal-to-noise ratio > 105 dB (A) column PT, column HT... -
Page 64: Bodypack Transmitter
Technical specifications Audio output level 0 dBV Output impedance 600 Ω Operating supply voltage 2 AA cells (LR6, 1.5 V) or corresponding rechargeable batteries Dimensions (W × H × D) 66 mm × 90 mm × 26 mm Weight (without batteries) 160 g 7.2 Bodypack transmitter Transmission power... - Page 65 60 Hz…18 kHz (±3 dB) < 0.5 % Signal-to-noise ratio > 102 dB (A) Operating supply voltage 2 AA cells (LR6, 1.5 V) or corresponding rechargeable batteries Operating time > 8 h (with alkaline cells) 1300 mAh) column PT, column HT...
- Page 66 Technical specifications Dimensions (L × D) 250 mm × 53 mm Weight (without batteries) 350 g Frequency band, number of channels, bandwidth, and modulation type correspond to those of the receiver. UHF wireless system...
-
Page 67: Plug And Connection Assignment
In addition to the conduc‐ tors ‘Ground’ and ‘Signal’, in a balanced transmission a second core is added. This also transfers the signal, but phase-shifted by 180°. column PT, column HT... - Page 68 Plug and connection assignment Since the interference affects both cores equally, by subtracting the phase-shifted signals, the interfering signal is completely neutralized. The result is a pure signal without any noise inter‐ ference. Three-pole 1/8" mini phone jack (stereo, unbalanced) Signal (left) Signal (right) Ground, shielding...
-
Page 69: Troubleshooting
Troubleshooting Troubleshooting In the following we list a few common problems that may occur during operation. We give you some suggestions for easy troubleshooting: column PT, column HT... - Page 70 Troubleshooting Symptom Remedy No sound 1. Check the power supply of transmitter and receiver. 2. Make sure that transmitter and receiver are operating in the same frequency range. 3. Are transmitter and receiver set to the same channel? 4. Test the connection between the receiver and the connected camera. Is the connected camera turned on and does the signal level at the output of the receiver match the input requirements of the camera? 5.
- Page 71 Troubleshooting If the procedures recommended above do not succeed, please contact our Service Center. You can find the contact information at www.thomann.de. column PT, column HT...
-
Page 72: Protecting The Environment
Protecting the environment Protecting the environment Disposal of the packaging mate‐ rial For the transport and protective packaging, environmentally friendly materials have been chosen that can be supplied to normal recycling. Ensure that plastic bags, packaging, etc. are properly disposed of. Do not just dispose these materials with your normal household waste, but make sure that they are fed to a recovery. - Page 73 Dispose this device through an approved waste disposal firm or through your local waste facility. When discarding the device, comply with the rules and regulations that apply in your country. If in doubt, consult your local waste disposal facility. column PT, column HT...
- Page 74 Notes UHF wireless system...
- Page 76 Musikhaus Thomann · Hans-Thomann-Straße 1 · 96138 Burgebrach · Germany · www.thomann.de...
Need help?
Do you have a question about the column PT and is the answer not in the manual?
Questions and answers