
Related Manuals for JVC PANDORA KD-X241


Summary of Contents for JVC PANDORA KD-X241
-
Page 1: Instruction Manual
ENGLISH ไทย KD-X241 / KD-X141 DIGITAL MEDIA RECEIVER INSTRUCTION MANUAL ตั ว รั บ สื ่ อ ดิ จ ิ ต อล คู ่ ม ื อ การใช้ ง าน B5A-1355-00 [M]... -
Page 2: Table Of Contents
CONTENTS BEFORE USE BEFORE USE IMPORTANT • To ensure proper use, please read through this manual before using this product. It is especially important that you read and observe BASICS Warning and Caution in this manual. • Please keep the manual in a safe and accessible place for future reference. GETTING STARTED 1 Cancel the demonstration WARNING... -
Page 3: Basics
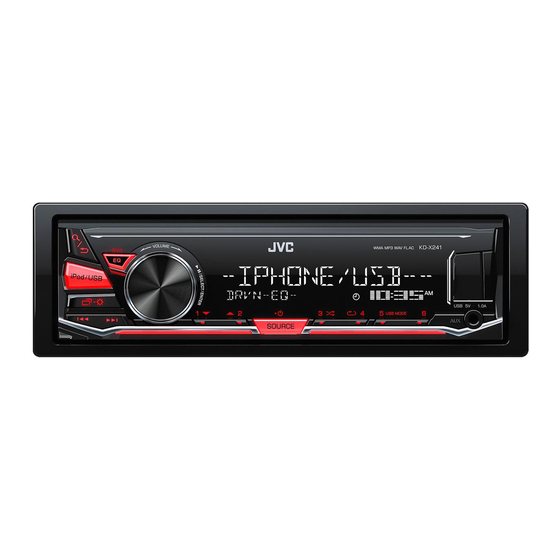
BASICS Faceplate Remote control (RM-RK52) Remote sensor Volume knob Display window (Do not expose to bright sunlight.) Pull out the insulation sheet when using for the first time. Detach button Attach Detach How to reset How to replace the battery Your preset adjustments will be erased except stored radio stations. -
Page 4: Getting Started
Turn the volume knob to select [DATE SET], then press the knob. For details on how to update the firmware, see: Turn the volume knob to make the settings, then press the knob. <http://www.jvc.net/cs/car/>. Day Month Year Press to exit. -
Page 5: Radio
RADIO GETTING STARTED CLOCK TIME SYNC ON: The clock time is automatically set using the Clock Time (CT) data in FM Radio Data System signal. ; OFF: Cancels. CLOCK DISPLAY ON: The clock time is shown on the display even when the unit is turned off. ; OFF: Cancels. “ST”... - Page 6 RADIO Other settings IF BAND AUTO: Increases the tuner selectivity to reduce interference noises from adjacent FM stations. (Stereo effect may be lost.) ; WIDE: Subjects to Press and hold interference noises from adjacent FM stations, but sound quality will not be Turn the volume knob to select an item (see the following table), degraded and the stereo effect will remain.
-
Page 7: Usb/Ipod/Android
Do not leave the cable inside the car when not using. When connecting an Android device, “Press [VIEW] to install JVC MUSIC PLAY APP” is shown. Follow the instructions to install the application. You can also install the latest version of JVC MUSIC PLAY application on your Android device before connecting. - Page 8 Turn the volume knob to select a file, then press the knob. While in ANDROID source, press repeatedly. AUTO MODE: Control Android device from this unit via JVC MUSIC PLAY Quick search (applicable only for USB and ANDROID source) application installed in the Android device.
-
Page 9: Pandora® (For Kd-X241)
Pandora® (for KD-X241) (Applicable for Australia or New Zealand models only) Preparation: Create and store a new station Install the latest version of the Pandora application on your device (iPhone/iPod touch), then create an account and log in to Pandora. Press •... -
Page 10: Iheartradio
(for KD-X241) Preparation: Search for a station Install the latest version of iHeart Link for JVC application on your device (iPhone/ iPod touch), then create an account and log in to iHeartRadio. Press • Select [ON] for [IHEART SRC] in [SOURCE SELECT]. ( 4) Turn the volume knob to select a category, then press the knob. -
Page 11: Aux
AUDIO SETTINGS Use a portable audio player Connect a portable audio player (commercially available). 3.5 mm stereo mini plug with “L” shaped connector (commercially available) Select a preset equalizer Portable audio player Press repeatedly. Auxiliary input jack (or) Press , then turn the volume knob within 5 seconds. Select [ON] for [BUILT-IN AUX] in [SOURCE SELECT]. - Page 12 AUDIO SETTINGS Default: XX SUB.W LEVEL * SPK-OUT * SUB.W 00 to SUB.W +06 (SUB.W +03): Adjusts the output level of the subwoofer connected via EQ SETTING speaker lead. ( 19) PRESET EQ Select a preset equalizer suitable to the music genre. PRE-OUT * SUB.W –08 to SUB.W +08 (SUB.W 00): Adjusts •...
-
Page 13: Display Settings
DISPLAY SETTINGS AUDIO SETTINGS D.T.EXPANDER ON: Creates realistic sound by compensating the high-frequency components (Digital Track and restoring the rise-time of the waveform that are lost in audio data Expander) compression. ; OFF: Cancels. SPK/PRE OUT Depending on the speaker connection method, select the appropriate setting to get the desired output. -
Page 14: References
Some characters or symbols will not be shown correctly (or will be blanked). For: – Latest firmware updates and latest compatible item list – Any other latest information Visit <http://www.jvc.net/cs/car/>. Playable files • For detailed information and notes about the playable audio files, visit <http://www.jvc.net/cs/car/>. - Page 15 REFERENCES Change the display information • The song order displayed on the selection menu of this unit may differ from that of the iPod/ Each time you press , the display information changes. iPhone. • If the information is unavailable or not recorded, “NO TEXT”, “NO NAME”, or other •...
-
Page 16: Troubleshooting
( 15) Source cannot be selected. Check the [SOURCE SELECT] setting. ( 4) Cannot playback at • Make sure JVC MUSIC PLAY APP is installed on the • Radio reception is poor. Connect the antenna firmly. [AUTO MODE]. -
Page 17: Installation/Connection
Make sure you have installed the latest version of the • Keep all cables away from heat dissipate metal parts. iHeart Link for JVC application on your device • After the unit is installed, check whether the brake lamps, blinkers, wipers, etc. on the car are working properly. - Page 18 INSTALLATION/CONNECTION Installing the unit (in-dash mounting) Part list for installation Do the required wiring. (A) Faceplate ( 19) Hook on the top side (B) Trim plate Dashboard of Orientate the trim plate as your car illustrated before fitting. Bend the appropriate tabs to hold the sleeve firmly in place.
-
Page 19: Wiring Connection
INSTALLATION/CONNECTION Wiring connection IMPORTANT We recommend installing the unit with a JVC Amplifier * Rear/Subwoofer ouput commercially available custom wiring harness specific for your car and leave this job to professionals for your Signal cord (not supplied) safety. Consult your car audio dealer. -
Page 20: Specifications
SPECIFICATIONS FM Frequency Range 87.5 MHz — 108.0 MHz (50 kHz step) USB Standard USB 1.1, USB 2.0 (Full speed) Usable Sensitivity (S/N = 26 dB) 8.2 dBf (0.71 μV/75 Ω) Compatible Devices Mass storage class Quieting Sensitivity 17.2 dBf (2.0 μV/75 Ω) File System FAT12/16/32 (DIN S/N = 46 dB) Maximum Supply Current DC 5 V 1 A Frequency Response (±3 dB) 30 Hz —... - Page 21 SPECIFICATIONS Operating Voltage 14.4 V • Microsoft and Windows Media are either registered trademarks or trademarks of Microsoft (10.5 V — 16 V allowable) Corporation in the United States and/or other countries. • “Made for iPod,” and “Made for iPhone” mean that an electronic accessory has been designed to Maximum Current Consumption 10 A connect specifically to iPod, or iPhone, respectively, and has been certified by the developer to...
- Page 22 สารบั ญ ก่ อ นใช้ ง าน ก่ อ นใช้ ง าน ข้ อ มู ล สํ า คั ญ • เพื ่ อ ให้ แ น่ ใ จว่ า ใช้ ง านถู ก ต้ อ ง กรุ ณ าอ่ า นคู ่ ม ื อ นี ้ ก ่ อ นใช้ ผ ลิ ต ภั ณ ฑ์ คุ ณ จํ า เป็ น ต้ อ งอ่ า นและดู ค ํ า เตื อ นและข้ อ ควรระวั ง ในคู ่ ม ื อ นี ้ ข้...
- Page 23 ข้ อ มู ล เบื ้ อ งต้ น แผงหน้ า ปั ด รี โ มทคอนโทรล (RM-RK52) ปุ่ มปรั บ ระดั บ เสี ย ง หน้ า จอแสดงผล รี โ มทเซ็ น เซอร์ (อย่ า วางให้ ถ ู ก แสงแดดจั ด ) ดึ...
- Page 24 หมุ น ปุ่ มเสี ย งเพื ่ อ ทํ า การตั ้ ง ค่ า หลั ง จากนั ้ น กดปุ่ ม สํ า หรั บ รายละเอี ย ดเกี ่ ย วกั บ วิ ธ ี ก ารอั พ เดตเฟิ ร์ ม แวร์ โปรดดู : วั น เดื อ น ปี <http://www.jvc.net/cs/car/> กด เพื ่ อ ออก...
- Page 25 วิ ท ยุ เริ ่ ม ใช้ ง าน CLOCK : เวลาของนาฬิ ก าจะถู ก ตั ้ ง ค่ า โดยใช้ ข ้ อ มู ล เวลานาฬิ ก า (CT) TIME SYNC ในสั ญ ญาณระบบข้ อ มู ล วิ ท ยุ FM ; : ยกเลิ...
- Page 26 วิ ท ยุ การตั ้ ง ค่ า อื ่ น ๆ : เพิ ่ ม ความสามารถในการเลื อ กของจู น เนอร์ เ พื ่ อ ลดเสี ย งรบกวนจากสถานี FM IF BAND AUTO ข้ า งเคี ย ง (อาจไม่ เ ป็ น เสี ย งสเตอริ โ อ) ; : ขึ...
- Page 27 เมื ่ อ เชื ่ อ มต่ อ กั บ อุ ป กรณ์ แ อนดรอยด์ จะปรากฏ “Press [VIEW] to install JVC MUSIC PLAY APP” ปฏิ บ ั ต ิ ต ามคํ า แนะนํ า เพื ่ อ ติ ด ตั ้...
- Page 28 ขณะที ่ อ ยู ่ ใ นแหล่ ง สั ญ ญาณจาก ANDROID กดปุ่ ม ซํ ้ า ควบคุ ม อุ ป กรณ์ Android จากเครื ่ อ งนี ้ ผ ่ า นแอปพลิ เ คชั ่ น JVC MUSIC PLAY ที ่ ต ิ ด ตั ้ ง ใน AUTO MODE การค้...
- Page 29 Pandora ® (สํ า หรั บ ) (ใช้ ไ ด้ ส ํ า หรั บ รุ ่ น ที ่ จ ํ า หน่ า ยในออสเตรเลี ย หรื อ นิ ว ซี แ ลนด์ เ ท่ า นั ้ น ) KD-X241 การเตรี...
- Page 30 ติ ด ตั ้ ง เวอร์ ช ั น ล่ า สุ ด ของแอปพลิ เ คชั น iHeart Link สํ า หรั บ JVC ลงบนอุ ป กรณ์ ข องคุ ณ (iPhone/iPod touch) หลั ง จากนั ้ น สร้ า ง...
- Page 31 การตั ้ ง ค่ า ระบบเสี ย ง ใช้ เ ครื ่ อ งเล่ น เสี ย งแบบพกพา เชื ่ อ มต่ อ เครื ่ อ งเล่ น เสี ย งแบบพกพา (ที ่ ม ี ข ายทั ่ ว ไป) ขั...
- Page 32 การตั ้ ง ค่ า ระบบเสี ย ง ค่ า เริ ่ ม ต้ น : SUB.W LEVEL * SPK-OUT * ถึ ง ): ปรั บ SUB.W 00 SUB.W +06 SUB.W +03 ระดั บ สั ญ ญาณออกของซั บ วู ฟ เฟอร์ ท ี ่ ต ่ อ ผ่ า นสายต่ อ ลํ า โ EQ SETTING พง...
- Page 33 หน้ า จอแสดงผลการตั ้ ง ค่ า การตั ้ ง ค่ า ระบบเสี ย ง : สร้ า งเสี ย งที ่ ส มจริ ง โดยการบี บ อั ด ส่ ว นประกอบความถี ่ ส ู ง และทํ า การกู ้ ค ื น เวลาเพิ ่ ม ขึ ้ น ข D.T.EXPANDER (ตั...
- Page 34 ไฟล์ ท ี ่ ส ามารถเล่ น ได้ • ดู ร ายละเอี ย ดและหมายเลขเกี ่ ย วกั บ ไฟล์ เ สี ย งได้ จ าก <http://www.jvc.net/cs/car/> • ไฟล์ เ สี ย งที เ ล่ น ได้ : MP3 (.mp3), WMA (.wma), WAV (.wav), FLAC (.flac) •...
- Page 35 อ้ า งอิ ง เปลี ่ ย นข้ อ มู ล ที ่ แ สดง • ลํ า ดั บ เพลงที ่ แ สดงบนเมนู ก ารเลื อ กของเครื ่ อ งนี ้ อ าจต่ า งจากลํ า ดั บ เพลงใน iPod/iPhone แต่...
- Page 36 ไม่ ส ามารถเล่ น ได้ ใ น • ให้ แ น่ ใ จว่ า มี JVC MUSIC PLAY APP ติ ด ตั ้ ง บนอุ ป กรณ์ แ อน • รั บ สั ญ ญาณวิ ท ยุ ไ ด้ ไ ม่ ด ี...
- Page 37 • หลั ง จากติ ด ตั ้ ง เครื ่ อ งแล้ ว ให้ ต รวจดู ว ่ า ไฟเบรก ไฟกะพริ บ ที ่ ป ั ด นํ ้ า ฝน ฯลฯ ในรถยนต์ ท ํ า งานอย่ า งเหมาะสม iHeart Link สํ า หรั บ JVC บนอุ ป กรณ์ ข องคุ ณ...
- Page 38 การติ ด ตั ้ ง /เชื ่ อ มต่ อ การติ ด ตั ้ ง เครื ่ อ ง (การยึ ด เข้ า กั บ ช่ อ งหน้ า ปั ด ) รายชื ่ อ ชิ ้ น ส่ ว นสํ า หรั บ การติ ด ตั ้ ง จั...
- Page 39 สั ญ ญาณเสี ย งออกด้ า นหลั ง / อร์ ข อง JVC จํ า หน่ า ยสํ า หรั บ รถยนต์ ข องคุ ณ และให้ ผ ู ้ เ ชี ่ ย วชาญเป็ น ผู ้ ด ํ า เนิ น...
- Page 40 ข้ อ มู ล จํ า เพาะ FM ช่ ว งความถี ่ มาตรฐาน USB USB 1.1, USB 2.0 (ความเร็ ว สู ง ) 87.5 MHz — 108.0 MHz (ขั ้ น ละ 50 kHz) อุ ป กรณ์ ท ี ่ ใ ช้ ด ้ ว ยกั น ได้ ประเภทการจั...
- Page 41 ข้ อ มู ล จํ า เพาะ แรงดั น ใช้ ง าน (อยู ่ ร ะหว่ า ง 10.5 V — 16 V) 14.4 V • Microsoft and Windows Media are either registered trademarks or trademarks of Microsoft Corporation in the United States and/or other countries. ความสิ...
- Page 44 ﺗﻮﺿﻴﺤﺎﺕ 4.41 ﻭﻟﺖ (ﻭﻟﺘﺎژ ﻛﺎﺭ )5.01 ﻭﻟﺖ — 61 ﻭﻟﺖ ﻣﺠﺎﺯ • Microsoft and Windows Media are either registered trademarks or trademarks of Microsoft Corporation in the United States and/or other countries. ﺣﺪﺍﻛﺜﺮ ﻣﻴﺰﺍﻥ ﻣﺼﺮﻑ ﺑﺮﻕ 01 ﺁﻣﭙﺮ • “Made for iPod,” and “Made for iPhone” mean that an electronic accessory has been designed to ﻣﺤﺪﻭﺩﻩ...
- Page 45 ﺗﻮﺿﻴﺤﺎﺕ ﺣﻮﺯﻩ ﻓﺮﻛﺎﻧﺲ ( )ﺳﺮﻋﺖ ﺑﺎﻻUSB 2.0 ،USB 1.1 USB ﺍﺳﺘﺎﻧﺪﺍﺭﺩ 5.78 ﻣﮕﺎ ﻫﺮﺗﺰ — 0.801 ﻣﮕﺎ ﻫﺮﺗﺰ ()ﮔﺎﻡ 05 ﻛﻴﻠﻮﻫﺮﺗﺰی ﻛﻼﺱ ﺫﺧﻴﺮﻩ ﺍﻧﺒﻮﻩ ﺩﺳﺘﮕﺎﻩ ﻫﺎی ﺳﺎﺯﮔﺎﺭ ﺣﺴﺎﺳﻴﺖ ﻗﺎﺑﻞ ﺍﺳﺘﻔﺎﺩﻩ (75 Ω/0.71 μV) 8.2 dBf ﺳﻴﺴﺘﻢ ﻓﺎﻳﻞ 32/16/FAT12 ( = 62 ﺩﺳﯽ ﺑﻞS/N) ﺣﺪﺍﻛﺜﺮ...
- Page 46 ﻣﻬﻢ ﺧﺮﻭﺟﯽ ﻋﻘﺐ/ﺳﺎﺏ ﻭﻭﻓﺮ ﻣﺎ ﭘﻴﺸﻨﻬﺎﺩ ﻣﯽ ﻛﻨﻴﻢ ﺩﺳﺘﮕﺎﻩ ﺭﺍ ﺑﺎ ﻳﮏ ﺩﺳﺘﻪ ﺳﻴﻢ ﺳﻔﺎﺭﺷﯽ JVC ﺁﻣﭙﻠﯽ ﻓﺎﻳﺮ ﻣﺨﺼﻮﺹ ﺧﻮﺩﺭﻭی ﺧﻮﺩ ﻛﻪ ﺩﺭ ﺑﺎﺯﺍﺭ ﻣﻮﺟﻮﺩ ﺍﺳﺖ ﻧﺼﺐ (ﺳﻴﻢ ﺳﻴﮕﻨﺎﻝ )ﻋﺮﺿﻪ ﻧﻤﯽ ﺷﻮﺩ ﻛﻨﻴﺪ ﻭ ﺑﺮﺍی ﺍﻳﻤﻨﯽ ﺧﻮﺩ، ﺍﻳﻦ ﻛﺎﺭ ﺭﺍ ﺑﻪ ﺍﻓﺮﺍﺩ ﺣﺮﻓﻪ ﺍی ﻭﺍﮔﺬﺍﺭ...
- Page 47 ﻧﺼﺐ/ﺍﺗﺼﺎﻝ ﻓﻬﺮﺳﺖ ﻗﻄﻌﺎﺕ ﺑﺮﺍی ﻧﺼﺐ (ﻧﺼﺐ ﺩﺳﺘﮕﺎﻩ )ﻧﺼﺐ ﻛﺮﺩﻥ ﺩﺭ ﺩﺍﺷﺒﻮﺭﺩ ﺳﻴﻢ ﻛﺸﯽ ﻫﺎی ﻣﻮﺭﺩ ﻧﻴﺎﺯ ( ﺻﻔﺤﻪ ﺟﻠﻮﻳﯽA) (19 ) .ﺭﺍ ﺍﻧﺠﺎﻡ ﺑﺪﻫﻴﺪ ﺭﻭی ﺳﻤﺖ ﺭﺍﺳﺖ ﺩﺭ ﺑﺎﻻ ﻗﻼﺏ ﺍﻳﺠﺎﺩ ﻛﻨﻴﺪ ﺑﻪ ﺻﻔﺤﻪ ﺑﺮﺵ ﻫﻤﺎﻧﻄﻮﺭ ﻛﻪ ﺩﺍﺷﺒﻮﺭﺩ ﻣﺎﺷﻴﻦ ( ﻗﺎﺏ ﺩﻭﺭ ﺿﺒﻂB) ﻧﺸﺎﻥ...
- Page 48 .ﺧﺎﻣﻮﺵ ﻣﯽ ﺷﻮﺩ، ﻭﺻﻞ ﻛﻨﻴﺪ “UPDATE APP” ﺭﺍ ﺩﺭ ﺩﺳﺘﮕﺎﻫﺘﺎﻥ ﻧﺼﺐ ﻛﺮﺩﻩ ﺑﺎﺷﻴﺪJVC ﺑﺮﻧﺎﻣﻪ .• ﻛﻠﻴﻪ ﻛﺎﺑﻞ ﻫﺎ ﺭﺍ ﺍﺯ ﻗﻄﻌﺎﺕ ﻓﻠﺰی ﮔﺮﻣﺎﺯﺍ ﺩﻭﺭ ﻛﻨﻴﺪ • ﺑﻌﺪ ﺍﺯ ﻧﺼﺐ ﺩﺳﺘﮕﺎﻩ، ﺑﺮﺭﺳﯽ ﻛﻨﻴﺪ ﻛﻪ ﭼﺮﺍﻏﻬﺎی ﺗﺮﻣﺰ، ﭼﺮﺍﻏﻬﺎی ﺭﺍﻫﻨﻤﺎ، ﺑﺮﻑ ﭘﺎک ﻛﻨﻬﺎ ﻭ ﺳﺎﻳﺮ ﻣﻮﺍﺭﺩ...
- Page 49 .ﺁﻧﺘﻦ ﻫﻮﺍﻳﻰ ﺭﺍ ﺑﻄﻮﺭ ﻣﺤﻜﻢ ﻭﺻﻞ ﻛﻨﻴﺪ • ﺩﺭﻳﺎﻓﺖ ﻣﻮﺝ ﺭﺍﺩﻳﻮﻳﯽ ﭘﺨﺶ ﺩﺭ ﺣﺎﻟﺖ .ﺿﻌﻴﻒ ﺍﺳﺖ ﺭﻭی ﺩﺳﺘﮕﺎﻩJVC MUSIC PLAY APP • ﻣﻄﻤﺌﻦ ﺷﻮﻳﺪ ﻛﻪ ﺑﺮﻧﺎﻣﻪ [ ﺍﻣﻜﺎﻥAUTO MODE] • ﻧﻮﻳﺰ ﺛﺎﺑﺘﻰ ﻫﻨﮕﺎﻡ ﮔﻮﺵ ﺩﺍﺩﻥ (7 ) .ﺍﻧﺪﺭﻭﻳﺪ ﺷﻤﺎ ﻧﺼﺐ ﺷﺪﻩ ﺑﺎﺷﺪ...
- Page 50 ﻣﻨﺎﺑﻊ ﺍﻃﻼﻋﺎﺕ ﺭﻭی ﺻﻔﺤﻪ ﻧﻤﺎﻳﺶ ﺭﺍ ﺗﻐﻴﻴﺮ ﻣﯽ ﺩﻫﺪ • ﻣﻤﻜﻦ ﺍﺳﺖ ﺗﺮﺗﻴﺐ ﺁﻫﻨﮓ ﻫﺎﻳﯽ ﻛﻪ ﺩﺭ ﻣﻨﻮی ﺍﻧﺘﺨﺎﺏ ﺍﻳﻦ ﺩﺳﺘﮕﺎﻩ ﻧﻤﺎﻳﺶ ﺩﺍﺩﻩ ﻣﯽ ﺷﻮﺩ، ﺑﺎ ﺗﺮﺗﻴﺐ ﻣﻮﺟﻮﺩ .ﺭﺍ ﻓﺸﺎﺭ ﺩﻫﻴﺪ، ﺍﻃﻼﻋﺎﺕ ﻣﻮﺭﺩ ﻧﻤﺎﻳﺶ ﺗﻐﻴﻴﺮ ﺧﻮﺍﻫﺪ ﻛﺮﺩ ﻫﺮﺑﺎﺭ ﻛﻪ ﺩﻛﻤﻪ ....
- Page 51 * ﺑﻌﻀﻰ ﺍﺯ ﻛﺎﺭﺍﻛﺘﺮﻫﺎ، ﻳﺎ ﻋﻼﺋﻢ ﺑﻪ ﺩﺭﺳﺘﻰ ﺑﺮ ﺭﻭ ﺻﻔﺤﻪ ﻧﻤﺎﻳﺶ ﺩﺍﺩﻩ ﻧﺨﻮﺍﻫﻨﺪ ﺷﺪ )ﻳﺎ ﺧﺎﻟﻰ ﺧﻮﺍﻫﻨﺪ – ﺳﺎﻳﺮ ﺍﻃﻼﻋﺎﺕ ﺟﺪﻳﺪ .(ﺑﻮﺩ .< ﻣﺮﺍﺟﻌﻪ ﻧﻤﺎﻳﻴﺪhttp://www.jvc.net/cs/car/> ﺑﻪ ﻓﺎﻳﻞ ﻫﺎی ﻗﺎﺑﻞ ﺍﺟﺮﺍ • ﺑﺮﺍی ﺍﻃﻼﻋﺎﺕ ﺩﻗﻴﻖ ﻭ ﺗﻮﺿﻴﺤﺎﺗﯽ ﺩﺭ ﺧﺼﻮﺹ ﻓﺎﻳﻞ ﻫﺎی ﺻﻮﺗﯽ ﻗﺎﺑﻞ ﭘﺨﺶ، ﺑﻪ...
- Page 52 ﺗﻨﻈﻴﻤﺎﺕ ﻧﻤﺎﻳﺶ ﺗﻨﻈﻴﻤﺎﺕ ﺻﺪﺍ : ﺑﺎ ﺟﺒﺮﺍﻥ ﻣﺆﻟﻔﻪ ﻫﺎی ﻓﺮﻛﺎﻧﺲ ﺑﺎﻻ ﻭ ﺑﺎﺯﻳﺎﺑﯽ ﺯﻣﺎﻥ ﺍﻭﺝ ﻓﺮﻡ ﻣﻮﺟﯽ ﺷﻜﻞ ﻛﻪ ﺩﺭ ﻓﺸﺮﺩﻩON D.T.EXPANDER : ﻟﻐﻮ ﻣﻰOFF ﺳﺎﺯی ﺩﺍﺩﻩ ﻫﺎی ﺻﺪﺍ ﺍﺯ ﺑﻴﻦ ﺭﻓﺘﻪ ﺍﻧﺪ، ﺻﺪﺍﻫﺎﻳﯽ ﻭﺍﻗﻌﯽ ﺭﺍ ﺍﻳﺠﺎﺩ ﻣﯽ ﻛﻨﺪ. ؛ )ﮔﺴﺘﺮﺵ...
- Page 53 ﺗﻨﻈﻴﻤﺎﺕ ﺻﺪﺍ XX :ﭘﻴﺶ ﻓﺮﺽ (: ﻣﻴﺰﺍﻥSUB.W +03) SUB.W +06 ﺗﺎSUB.W 00 SPK-OUT * SUB.W LEVEL * ﺧﺮﻭﺟﯽ ﺳﺎﺏ ﻭﻭﻓﺮی ﻛﻪ ﺍﺯ ﻃﺮﻳﻖ ﺳﻴﻢ ﺑﻠﻨﺪﮔﻮ ﻣﺘﺼﻞ EQ SETTING (19 ) .ﺷﺪﻩ ﺍﺳﺖ ﺭﺍ ﺗﻨﻈﻴﻢ ﻣﯽ ﻛﻨﺪ .ﻳﮏ ﺍﻛﻮﻻﻳﺰﺭ ﭘﻴﺶ ﺗﻨﻈﻴﻢ ﻣﺘﻨﺎﺳﺐ ﺑﺎ ژﺍﻧﺮ ﻣﻮﺳﻴﻘﯽ ﺭﺍ ﺍﻧﺘﺨﺎﺏ ﻣﯽ ﻛﻨﺪ PRESET EQ (: ﻣﻴﺰﺍﻥSUB.W 00) SUB.W +08 ...
- Page 54 ﺗﻨﻈﻴﻤﺎﺕ ﺻﺪﺍ ﺍﺳﺘﻔﺎﺩﻩ ﺍﺯ ﻳﮏ ﭘﺨﺶ ﻛﻨﻨﺪﻩ ﺻﻮﺗﯽ ﻗﺎﺑﻞ ﺣﻤﻞ .ﻳﮏ ﭘﺨﺶ ﻛﻨﻨﺪﻩ ﺻﻮﺗﯽ ﻗﺎﺑﻞ ﺣﻤﻞ )ﻛﻪ ﺑﺮﺍی ﺧﺮﻳﺪ ﻣﻮﺟﻮﺩ ﺍﺳﺖ( ﺭﺍ ﻭﺻﻞ ﻛﻨﻴﺪ “ ﻣﺎﻧﻨﺪL” ﻓﻴﺶ ﻣﻴﻨﯽ ﺍﺳﺘﺮﻳﻮ 5.3 ﻣﻴﻠﯽ ﻣﺘﺮی ﺑﺎ ﺭﺍﺑﻂ ()ﺑﺮﺍی ﺧﺮﻳﺪ ﻣﻮﺟﻮﺩ ﺍﺳﺖ ﺍﻧﺘﺨﺎﺏ ﺍﻛﻮﻻﻳﺰﺭ ﺍﺯ ﭘﻴﺶ ﺗﻨﻈﻴﻢ ﺷﺪﻩ .ﺭﺍ...
- Page 55 (KD-X241 )ﺑﺮﺍی :ﺁﻣﺎﺩﻩ ﺳﺎﺯ ﻫﺎ ﺟﺴﺘﺠﻮی ﻳﮏ ﺍﻳﺴﺘﮕﺎﻩ ﺭﺍﺩﻳﻮﻳﯽ ،(iPod touch/iPhone) ﺭﺍ ﺭﻭی ﺩﺳﺘﮕﺎﻩ ﺧﻮﺩ ﻧﺼﺐ ﻛﻨﻴﺪJVC ﻣﺨﺼﻮﺹ ﺑﺮﻧﺎﻣﻪiHeart Link ﺟﺪﻳﺪﺗﺮﻳﻦ ﻧﺴﺨﻪ . ﻭﺍﺭﺩ ﺷﻮﻳﺪiHeartRadio ﺳﭙﺲ ﻳﮏ ﺣﺴﺎﺏ ﻛﺎﺭﺑﺮی ﺍﻳﺠﺎﺩ ﻛﺮﺩﻩ ﻭ ﺑﻪ .ﺭﺍ ﻓﺸﺎﺭ ﺩﻫﻴﺪ (4 ) .[ ﺭﺍ ﺍﻧﺘﺨﺎﺏ ﻛﻨﻴﺪON] [ ﮔﺰﻳﻨﻪSOURCE SELECT] [ ﺩﺭIHEART SRC] • ﺑﺮﺍی...
- Page 56 Pandora® (( )ﻓﻘﻂ ﺑﺮﺍی ﻣﺪﻝ ﻫﺎی ﺍﺳﺘﺮﺍﻟﻴﺎ ﻭ ﻧﻴﻮﺯﻳﻠﻨﺪ ﻗﺎﺑﻞ ﺍﺳﺘﻔﺎﺩﻩ ﺍﺳﺖKD-X241 )ﺑﺮﺍ :ﺁﻣﺎﺩﻩ ﺳﺎﺯ ﻫﺎ ﺍﻳﺠﺎﺩ ﻭ ﺫﺧﻴﺮﻩ ﻳﮏ ﺍﻳﺴﺘﮕﺎﻩ ﺟﺪﻳﺪ ( ﺳﭙﺲiPod touch/iPhone) ﺭﺍ ﺩﺭ ﺩﺳﺘﮕﺎﻩ ﺧﻮﺩ ﻧﺼﺐ ﻛﻨﻴﺪPandora ﺟﺪﻳﺪﺗﺮﻳﻦ ﻧﺴﺨﻪ ﺑﺮﻧﺎﻣﻪ . ﻭﺍﺭﺩ ﺷﻮﻳﺪPandora ﻳﮏ ﺣﺴﺎﺏ ﺭﺍ ﺍﻳﺠﺎﺩ ﻛﺮﺩﻩ ﻭ ﺑﻪ .ﺭﺍ...
- Page 57 .ﺟﻬﺖ ﺍﻧﺘﺨﺎﺏ ﻳﮏ ﻓﺎﻳﻞ، ﺩﻛﻤﻪ ﻭﻟﻮﻡ ﺭﺍ ﺑﭽﺮﺧﺎﻧﻴﺪ، ﺳﭙﺲ ﺩﻛﻤﻪ ﺭﺍ ﻓﺸﺎﺭ ﺩﻫﻴﺪ .ﺭﺍ ﭼﻨﺪﺑﺎﺭ ﻓﺸﺎﺭ ﺩﻫﻴﺪ ،ANDROID ﻫﻨﮕﺎﻡ ﺑﺎﺯ ﺑﻮﺩﻥ ﻣﻨﺒﻊ .JVC MUSIC PLAY ﻛﻨﺘﺮﻝ ﺩﺳﺘﮕﺎﻩ ﺍﻧﺪﺭﻭﻳﺪ ﺍﺯ ﺭﻭی ﺍﻳﻦ ﺩﺳﺘﮕﺎﻩ ﺑﺎ ﺩﺍﺷﺘﻦ ﺑﺮﻧﺎﻣﻪ :AUTO MODE ﺟﺴﺘﺠﻮی ﺳﺮﻳﻊ ( ﺍﺳﺖANDROID ﻭUSB )ﻓﻘﻂ ﻣﺮﺑﻮﻁ ﺑﻪ ﻣﻨﺒﻊ ﻫﺎی...
- Page 58 .* ﻭﻗﺘﯽ ﺍﺯ ﺩﺳﺘﮕﺎﻩ ﺍﺳﺘﻔﺎﺩﻩ ﻧﻤﯽ ﻛﻨﻴﺪ، ﻛﺎﺑﻞ ﺭﺍ ﺩﺍﺧﻞ ﺧﻮﺩﺭﻭ ﺭﻫﺎ ﻧﻜﻨﻴﺪ ،“ ﻧﻤﺎﻳﺶ ﺩﺍﺩﻩ ﻣﯽ ﺷﻮﺩ. ﺑﺮﺍی ﻧﺼﺐ ﺑﺮﻧﺎﻣﻪPress [VIEW] to install JVC MUSIC PLAY APP” * ﻫﻨﮕﺎﻣﯽ ﻛﻪ ﺩﺳﺘﮕﺎﻩ ﺍﻧﺪﺭﻭﻳﺪی ﺭﺍ ﻣﺘﺼﻞ ﻛﻨﻴﺪ، ﭘﻴﺎﻡ ﺭﺍ ﺭﻭی ﺩﺳﺘﮕﺎﻩ ﺍﻧﺪﺭﻭﻳﺪJVC MUSIC PLAY ﺩﺳﺘﻮﺭﺍﻟﻌﻤﻞ ﻫﺎ ﺭﺍ ﺩﻧﺒﺎﻝ ﻛﻨﻴﺪ. ﻫﻤﭽﻨﻴﻦ ﻣﯽ ﺗﻮﺍﻧﻴﺪ ﻗﺒﻞ ﺍﺯ ﻣﺘﺼﻞ ﻛﺮﺩﻥ ﺩﺳﺘﮕﺎﻩ، ﺁﺧﺮﻳﻦ ﻧﺴﺨﻪ ﺑﺮﻧﺎﻣﻪ...
- Page 59 ﺭﺍﺩﻳﻮ ﺳﺎﻳﺮ ﺗﻨﻈﻴﻤﺎﺕ ﻧﺰﺩﻳﮏ، ﺍﻧﺘﺨﺎﺏFM : ﺑﺮﺍی ﻛﻤﮏ ﻛﺮﺩﻥ ﺻﺪﺍﻫﺎی ﺍﺿﺎﻓﯽ ﺍﺯ ﺍﻳﺴﺘﮕﺎﻩ ﻫﺎیAUTO IF BAND : ﺍﻳﻦ ﺍﻣﺮWIDE ﺗﻴﻮﻧﺮ ﺭﺍ ﺍﻓﺰﺍﻳﺶ ﺩﻫﻴﺪ. )ﻣﻤﻜﻦ ﺍﺳﺖ ﺗﺄﺛﻴﺮ ﺍﺳﺘﺮﻳﻮﻳﻰ ﺍﺯ ﺑﻴﻦ ﺑﺮﻭﺩ.( ؛ .ﺭﺍ ﻓﺸﺎﺭ ﺩﺍﺩﻩ ﻭ ﻧﮕﻪ ﺩﺍﺭﻳﺪ ﻧﺰﺩﻳﮏ ﺑﺴﺘﮕﯽ ﺩﺍﺭﺩ ﺍﻣﺎ ﻛﻴﻔﻴﺖ ﺻﺪﺍ ﻛﻢ ﻧﻤﯽFM ﺑﻪ ﺻﺪﺍﻫﺎی ﺍﺿﺎﻓﯽ ﺍﻳﺴﺘﮕﺎﻩ ﻫﺎی ﺟﻬﺖ...
- Page 60 ﺭﺍﺩﻳﻮ ﺷﺮﻭﻉ ﺑﻜﺎﺭ CLOCK : ﺳﺎﻋﺖ ﺑﻪ ﻃﻮﺭ ﺧﻮﺩﻛﺎﺭ ﺑﺎ ﺍﺳﺘﻔﺎﺩﻩ ﺍﺯ ﺩﺍﺩﻩ ﻫﺎی ﺳﺎﻋﺖON TIME SYNC )ﺳﻴﺴﺘﻢ ﺩﺍﺩﻩ ﻫﺎیFM Radio Data System ( ﺩﺭ ﺳﻴﮕﻨﺎﻝCT) .: ﻟﻐﻮ ﻣﻰ ﺷﻮﺩOFF ( ﺗﻨﻈﻴﻢ ﻣﯽ ﺷﻮﺩ. ؛FM ﺭﺍﺩﻳﻮ : ﺣﺘﯽ ﺯﻣﺎﻧﻴﻜﻪ ﺩﺳﺘﮕﺎﻩ ﺧﺎﻣﻮﺵ ﺍﺳﺖ، ﺳﺎﻋﺖ ﻧﻤﺎﻳﺶ ﺩﺍﺩﻩON CLOCK DISPLAY .: ﻟﻐﻮ...
- Page 61 :ﺑﺮﺍی ﺍﻃﻼﻉ ﺍﺯ ﺟﺰﺋﻴﺎﺕ ﺩﺭﺑﺎﺭﻩ ﺑﻪ ﺭﻭﺯ ﺭﺳﺎﻧﯽ ﻣﻴﺎﻥ ﺍﻓﺰﺍﺭ، ﻣﺮﺍﺟﻌﻪ ﻛﻨﻴﺪ ﺑﻪ .ﺭﺍ ﻓﺸﺎﺭ ﺩﻫﻴﺪ ﺑﺮﺍی ﺧﺮﻭﺝ .<http://www.jvc.net/cs/car/> .ﺭﺍ ﻓﺸﺎﺭ ﺩﻫﻴﺪ ،ﺑﺮﺍی ﺑﺎﺯﮔﺸﺖ ﺑﻪ ﻣﻮﺭﺩ ﺗﻨﻈﻴﻢ ﻗﺒﻠﯽ .* ﺩﺭ ﺻﻮﺭﺕ ﺍﻧﺘﺨﺎﺏ ﻣﻨﺒﻊ ﻣﺮﺑﻮﻃﻪ، ﺭﻭی ﺻﻔﺤﻪ ﻧﻤﺎﻳﺶ ﻧﺸﺎﻥ ﺩﺍﺩﻩ ﻧﺨﻮﺍﻫﺪ ﺷﺪ...
- Page 62 ﻧﻜﺎﺕ ﺍﻭﻟﻴﻪ ﺻﻔﺤﻪ ﺟﻠﻮﻳﯽ (RM-RK52) ﻛﻨﺘﺮﻝ ﺍﺯ ﺭﺍﻩ ﺩﻭﺭ ﺩﻛﻤﻪ ﻭﻟﻮﻡ ﭘﻨﺠﺮﻩ ﻧﻤﺎﻳﺶ (.ﺳﻨﺴﻮﺭ ﺍﺯ ﺭﺍﻩ ﺩﻭﺭ )ﺩﺭ ﺑﺮﺍﺑﺮ ﻧﻮﺭ ﺧﻮﺭﺷﻴﺪ ﻗﺮﺍﺭ ﻧﺪﻫﻴﺪ ﺩﺭ ﺻﻮﺭﺕ ﺍﺳﺘﻔﺎﺩﻩ ﺑﺮﺍی ﺍﻭﻟﻴﻦ .ﺑﺎﺭ، ﻭﺭﻕ ﻋﺎﻳﻖ ﺭﺍ ﺑﻴﺮﻭﻥ ﺑﻴﺎﻭﺭﻳﺪ ﺩﻛﻤﻪ ﺟﺪﺍﺳﺎﺯی ﻧﺤﻮﻩ ﺗﻌﻮﻳﺾ ﺑﺎﺗﺮی ﻧﺤﻮﻩ ﺗﻨﻈﻴﻢ ﻣﺠﺪﺩ ﺟﺪﺍﺳﺎﺯی...
- Page 63 ﻓﻬﺮﺳﺖ ﻣﻄﺎﻟﺐ ﻗﺒﻞ ﺍﺯ ﺍﺳﺘﻔﺎﺩﻩ ﻗﺒﻞ ﺍﺯ ﺍﺳﺘﻔﺎﺩﻩ ﻣﻬﻢ • ﺑﺮﺍی ﺍﻃﻤﻴﻨﺎﻥ ﺍﺯ ﺍﺳﺘﻔﺎﺩﻩ ﺻﺤﻴﺢ، ﻟﻄﻔ ﺎ ﹰ ﺍﻳﻦ ﺩﻓﺘﺮﭼﻪ ﺭﺍﻫﻨﻤﺎ ﺭﺍ ﻗﺒﻞ ﺍﺯ ﺍﺳﺘﻔﺎﺩﻩ ﺍﺯ ﺍﻳﻦ ﻣﺤﺼﻮﻝ ﻣﻄﺎﻟﻌﻪ ﻛﻨﻴﺪ. ﻣﻄﺎﻟﻌﻪ ﻭ ﺭﻋﺎﻳﺖ ”ﺍﺧﻄﺎﺭ“ ﻫﺎ ﻭ ”ﺍﺣﺘﻴﺎﻁ“ ﻫﺎی ﻧﻜﺎﺕ ﺍﻭﻟﻴﻪ .ﻣﻨﺪﺭﺝ...
- Page 64 ﺍﻟﻤﻮﺍﺻﻔﺎﺕ 4.41 ﻓﻮﻟﺖ ﻓﻮﻟﻄﻴﺔ ﺍﻟﺘﺸﻐﻴﻞ • Microsoft and Windows Media are either registered trademarks or trademarks of Microsoft ()ﻣﺴﻤﻮﺡ 5.01 ﻓﻮﻟﺖ — 61 ﻓﻮﻟﺖ Corporation in the United States and/or other countries. • “Made for iPod,” and “Made for iPhone” mean that an electronic accessory has been designed to 01 ﺃﻣﺒﻴﺮ...
- Page 65 ﺍﻟﻤﻮﺍﺻﻔﺎﺕ ( )ﺳﺮﻋﺔ ﻗﺼﻮﻯUSB 2.0 ،USB 1.1 USB ﻣﻌﻴﺎﺭ 5.78 ﻣﻴﺠﺎﻫﺮﺗﺰ — 0.801 ﻣﻴﺠﺎﻫﺮﺗﺰ ﻧﻄﺎﻕ ﺍﻟﺘﺮﺩﺩ ()05 ﻛﻴﻠﻮ ﻫﺮﺗﺰ ﻟﻠﺨﻄﻮﺓ ﻣﻦ ﻓﺌﺔ ﺍﻟﺘﺨﺰﻳﻦ ﺍﻹﺟﻤﺎﻟﻲ ﺍﻷﺟﻬﺰﺓ ﺍﻟﻤﺘﻮﺍﻓﻘﺔ ﻧﻈﺎﻡ ﺍﻟﻤﻠﻔﺎﺕ ( 2.8 )17.0 ﻣﻴﻜﺮﻭ ﻓﻮﻟﺖ/ 57 ﺍﻭﻡdBf ﺩﺭﺟﺔ ﺍﻟﺤﺴﺎﺳﻴﺔ ﺍﻟﻤﺴﺘﺨﺪﻣﺔ 32/16/FAT12 ( = 62 ﺩﻳﺴﻴﺒﻞS/N) 1 ﺃﻣﺒﻴﺮ...
- Page 66 ﺍﻟﺘﺮﻛﻴﺐ/ﺍﻟﺘﻮﺻﻴﻞ ﺗﻮﺻﻴﻞ ﺍﻷﺳﻼﻙ ﻫﺎﻡ JVC ﻣﻀﺨﻢ /ﺃﻃﺮﺍﻑ ﺍﻟﺘﻮﺻﻴﻞ ﺍﻟﺨﻠﻔﻴﺔ ﻧﻨﺼﺢ ﺑﺘﺮﻛﻴﺐ ﺍﻟﺠﻬﺎﺯ ﻣﻊ ﺿﻔﻴﺮﺓ ﺍﺳﻼﻙ ﻛﻬﺮﺑﺎﺋﻴﺔ ﺧﺎﺻﺔ ﻣﺘﻮﻓﺮﺓ ﺗﺠﺎﺭﻳﺎ ﺧﺮﺝ ﺍﻟﺼﺒﻮﻭﻓﺮ ﻛﺎﺑﻞ ﺍﻹﺷﺎﺭﺓ ﻣﺨﺼﺼﺔ ﻟﺴﻴﺎﺭﺗﻚ ﻭﺇﻳﻜﺎﻝ ﻫﺬﻩ ﺍﻟﻤﻬﻤﺔ ﻟﻠﻤﺨﺘﺼﻴﻴﻦ ﻭﺫﻟﻚ ﻟﻀﻤﺎﻥ ()ﻏﻴﺮ ﻣﺮﻓﻘﺔ .ﺳﻼﻣﺘﻚ. ﺍﺳﺘﺸﻴﺮ ﺑﺎﺋﻊ ﺃﺟﻬﺰﺓ ﺍﻟﺼﻮﺗﻴﺎﺕ ﺍﻟﺨﺎﺻﺔ ﺑﺎﻟﺴﻴﺎﺭﺍﺕ ﺍﻟﻘﺮﻳﺐ ﻣﻨﻚ...
- Page 67 ﺍﻟﺘﺮﻛﻴﺐ/ﺍﻟﺘﻮﺻﻴﻞ ﻗﺎﺋﻤﺔ ﻗﻄﻊ ﺍﻟﻐﻴﺎﺭ ﺍﻟﻤﺴﺘﺨﺪﻣﺔ ﻓﻲ (ﺗﺮﻛﻴﺐ ﺍﻟﻮﺣﺪﺓ )ﺩﺍﺧﻞ ﺗﺎﺑﻠﻮ ﺍﻟﺴﻴﺎﺭﺓ ﺍﻟﺘﺮﻛﻴﺐ ﻗﻢ ﺑﺘﻮﺻﻴﻞ ﺍﻷﺳﻼﻙ ( ﻭﺍﺟﻬﺔ ﺍﻟﺠﻬﺎﺯA) (19 ) .ﺍﻟﻤﻄﻠﻮﺑﺔ ﺍﻟﺨﻄﺎﻑ ﻓﻲ ﺍﻟﺠﺎﻧﺐ ﺍﻟﻌﻠﻮﻱ ( ﻭﺣﺔ ﺍﻟﺰﻳﻨﺔB) ﺗﺎﺑﻠﻮﻩ ﺍﻟﺴﻴﺎﺭﺓ ﻳﺘﻢ ﺗﻮﺟﻴﻪ ﻟﻮﺣﺔ ﺍﻟﺰﻳﻨﺔ ﺍﻷﻣﺎﻣﻴﺔ .ﻛﻤﺎ ﻫﻮ ﻣﻮﺿﺢ ﻗﺒﻞ ﺍﻟﺘﺮﻛﻴﺐ ﺍﺛﻦ...
- Page 68 Link ﺗﺄﻛﺪ ﻣﻦ ﺃﻧﻚ ﻗﻤﺖ ﺑﺘﺜﺒﻴﺖ ﺃﺣﺪﺙ ﺇﺻﺪﺍﺭ ﻣﻦ “UPDATE APP” .ﻭﻳﺘﻢ ﺗﺸﻐﻴﻠﻪ ﻭﺇﻳﻘﺎﻓﻪ ﺑﻮﺍﺳﻄﺔ ﻣﻔﺘﺎﺡ ﺍﻹﺷﻌﺎﻝ ﻋﻠﻰ ﺟﻬﺎﺯﻙJVC ﻟﺘﻄﺒﻴﻖ .• ﺍﺣﺘﻔﻆ ﺑﺠﻤﻴﻊ ﺍﻟﻜﺒﻼﺕ ﺑﻌﻴﺪﺓ ﻋﻦ ﺍﻻﺟﺰﺍﺀ ﺍﻟﻤﻌﺪﻧﻴﺔ ﺍﻟﺘﻲ ﺗﺒﺪﺩ ﺍﻟﺤﺮﺍﺭﺓ .ﻟﻢ ﺗﻘﻢ ﺑﺎﻟﺘﺴﺠﻴﻞ. ﻗﻢ ﺑﺎﻟﺘﺴﺠﻴﻞ ﻣﺮﺓ ﺍﺧﺮﻯ...
- Page 69 .ﺍﻭﺻﻞ ﺍﻟﻬﻮﺍﺋﻲ ﺑﺼﻮﺭﺓ ﻣﺤﻜﻤﺔ .• ﺍﺳﺘﻘﺒﺎﻝ ﺍﻟﺮﺍﺩﻳﻮ ﺭﺩﻱﺀ (15 ) .ﺍﻟﻰ ﺍﻟﻮﺣﺪﺓ • ﻳﺘﻮﻟﺪ ﺿﺠﻴﺞ ﺍﺳﺘﺎﺗﻴﻜﻲ ﻓﻲ ﺟﻬﺎﺯJVC MUSIC PLAY APP • ﺗﺄﻛﺪ ﻣﻦ ﺗﺜﺒﻴﺖ ﺍﻟﺘﻄﺒﻴﻖ ﻻ ﻳﻤﻜﻦ ﺍﻟﺘﺸﻐﻴﻞ ﻓﻲ .ﺍﺛﻨﺎﺀ ﺍﻻﺳﺘﻤﺎﻉ ﺍﻟﻰ ﺍﻟﺮﺍﺩﻳﻮ (7 ) .Android .[AUTO MODE] ﻭﺿﻊ...
- Page 70 ﻣﺮﺍﺟﻊ ﺗﻐﻴﻴﺮ ﻣﻌﻠﻮﻣﺎﺕ ﺍﻟﺸﺎﺷﺔ • ﻗﺪ ﻳﺨﺘﻠﻒ ﺗﺮﺗﻴﺐ ﺍﻷﻏﺎﻧﻲ ﺍﻟﻤﻌﺮﻭﺿﺔ ﻓﻲ ﻗﺎﺋﻤﺔ ﺍﻻﺧﺘﻴﺎﺭ ﻓﻲ ﻫﺬﻩ ﺍﻟﻮﺣﺪﺓ ﻋﻦ ﺍﻟﺘﺮﺗﻴﺐ ﻓﻲ .، ﺗﺘﻐﻴﺮ ﻣﻌﻠﻮﻣﺎﺕ ﺍﻟﺸﺎﺷﺔ ﻛﻠﻤﺎ ﺿﻐﻄﺖ ﻋﻠﻰ .iPhone/iPod ﺟﻬﺎﺯ “ ﺃﻭNO NAME” “ ﺃﻭNO TEXT” • ﺇﺫﺍ ﻟﻢ ﺗﻜﻦ ﺍﻟﻤﻌﻠﻮﻣﺎﺕ ﻣﺘﻮﻓﺮﺓ ﺃﻭ ﺍﻧﻬﺎ ﻏﻴﺮ ﻣﺴﺠﻠﺔ، ﻳﻈﻬﺮ ،...
- Page 71 .(* ﻟﻦ ﺗﻈﻬﺮ ﺑﻌﺾ ﺍﻟﺤﺮﻭﻑ ﻭﺍﻟﺮﻣﻮﺯ ﺑﺼﻮﺭﺓ ﺻﺤﻴﺤﺔ )ﺃﻭ ﺳﺘﺒﺪﻭ ﻓﺎﺭﻏﺔ – ﺁﺧﺮ ﺗﺤﺪﻳﺜﺎﺕ ﺍﻟﺒﺮﺍﻣﺞ ﺍﻟﺜﺎﺑﺘﺔ ﻭﺍﺣﺪﺙ ﻗﺎﺋﻤﺔ ﺑﻨﻮﺩ ﻣﺘﻮﺍﻓﻘﺔ :ﻟـ – ﺃﻱ ﻣﻦ ﺍﺣﺪﺙ ﺍﻟﻤﻌﻠﻮﻣﺎﺕ ﺍﻻﺧﺮﻯ .<http://www.jvc.net/cs/car/> ﻗﻢ ﺑﺰﻳﺎﺭﺓ ﻣﻠﻔﺎﺕ ﻗﺎﺑﻠﺔ ﻟﻠﺘﺸﻐﻴﻞ • ﻟﻠﺤﺼﻮﻝ ﻋﻠﻰ ﻣﻌﻠﻮﻣﺎﺕ ﻣﻔﺼﻠﺔ ﻭﻣﻼﺣﻈﺎﺕ ﺑﺨﺼﻮﺹ ﻣﻠﻔﺎﺕ ﺍﻟﺼﻮﺕ ﺍﻟﻘﺎﺑﻠﺔ ﻟﻠﺘﺸﻐﻴﻞ، ﻗﻢ .<http://www.jvc.net/cs/car/> ﺑﺰﻳﺎﺭﺓ...
- Page 72 ﺇﻋﺪﺍﺩﺍﺕ ﺍﻟﺸﺎﺷﺔ ﺇﻋﺪﺍﺩﺍﺕ ﺍﻟﺼﻮﺕ : ﻳﺨﻠﻖ ﺻﻮ ﺗ ﹰ ﺎ ﻭﺍﻗﻌﻴ ﹰ ﺎ ﻋﻦ ﻃﺮﻳﻖ ﺗﻌﻮﻳﺾ ﺍﻟﻤﻜﻮﻧﺎﺕ ﻋﺎﻟﻴﺔ ﺍﻟﺘﺮﺩﺩ ﻭﺍﺳﺘﻌﺎﺩﺓ ﺯﻣﻦON D.T.EXPANDER )ﻣﻮﺳﻊ ﺍﻟﻤﺴﺎﺭ .: ﺍﻟﻐﺎﺀOFF ﺍﻟﺼﻌﻮﺩ ﻟﺸﻜﻞ ﺍﻟﻤﻮﺟﺔ ﺍﻟﺘﻲ ﺿﺎﻋﺖ ﻋﻨﺪ ﺿﻐﻂ ﺍﻟﺒﻴﺎﻧﺎﺕ ﺍﻟﺼﻮﺗﻴﺔ. ؛ (ﺍﻟﺮﻗﻤﻲ ﺍﻋﺘﻤﺎﺩﺍ ﻋﻠﻰ ﻃﺮﻳﻘﺔ ﺗﻮﺻﻴﻞ ﺍﻟﺴﻤﺎﻋﺔ، ﺍﺧﺘﺮ ﺍﻹﻋﺪﺍﺩ ﺍﻟﻤﻨﺎﺳﺐ ﻟﻠﺤﺼﻮﻝ ﻋﻠﻰ SPK/PRE OUT (ﺇﻋﺪﺍﺩﺍﺕ...
- Page 73 ﺇﻋﺪﺍﺩﺍﺕ ﺍﻟﺼﻮﺕ XX :ﺍﻓﺘﺮﺍﺿﻲ :(SUB.W +03) SUB.W +06 ﺇﻟﻰSUB.W 00 SPK-OUT * SUB.W LEVEL * ﻳﻀﺒﻂ ﻣﺴﺘﻮﻯ ﺧﺮﺝ ﻣﺠﻬﺎﺭ ﺍﻟﺘﺮﺩﺩﺍﺕ ﺍﻟﺨﻔﻴﻀﺔ EQ SETTING (19 ) .ﺍﻟﻔﺮﻋﻲ ﺍﻟﻤﻮﺻﻮﻝ ﻋﺒﺮ ﺣﻤﻞ ﺍﻟﺴﻤﺎﻋﺔ .ﻳﺤﺪﺩ ﺍﻟﻤ ﹸ ﻌﺎ ﺩ ﹺ ﻝ ﺍﻟﻤﻀﺒﻮﻁ ﻣﺴﺒﻘ ﺎ ﹰ ﻭﺍﻟﻤﻨﺎﺳﺐ ﻟﻨﻮﻉ ﺍﻟﻤﻮﺳﻴﻘﻰ PRESET EQ .[PRO EQ] [ ﺍﻭEASY EQ] [ ﻻﺳﺘﺨﺪﺍﻡ...
- Page 74 ﺇﻋﺪﺍﺩﺍﺕ ﺍﻟﺼﻮﺕ ﺍﺳﺘﺨﺪﻡ ﻣﺸﻐﻞ ﺍﻟﺼﻮﺕ ﺍﻟﻤﺤﻤﻮﻝ .(ﺍﻻﺗﺼﺎﻝ ﺑﺠﻬﺎﺯ ﻣﺸﻐﻞ ﺍﻟﺼﻮﺕ ﺍﻟﻤﺤﻤﻮﻝ )ﻣﺘﺎﺡ ﻟﻠﺸﺮﺍﺀ ﻗﺎﺑﺲ ﺻﻐﻴﺮ ﻟﻠﺼﻮﺕ ﺍﻟﻤﺠﺴﻢ 5.3 ﻣﻢ ﻣﻊ ﻣﻮﺻﻞ ﻋﻠﻰ (“ )ﻣﺘﺎﺡ ﻟﻠﺸﺮﺍﺀL” ﺷﻜﻞ ﺣﺮﻑ ﺣﺪﺩ ﺟﻬﺎﺯ ﻣﻌﺎﺩﻝ ﻣﻌﻴﻦ ﻣﺴﺒ ﻘ ﹰﺎ .ﺑﺘﻜﺮﺍﺭ ﺍﺿﻐﻂ ﻣﺸﻐﻞ ﺻﻮﺕ ﻣﺤﻤﻮﻝ ﻣﻘﺒﺲ ﺗﻮﺻﻴﻞ ﺍﻟﺠﻬﺎﺯ ﺍﻹﺿﺎﻓﻲ ()ﺃﻭ...
- Page 75 (KD-X241 )ﻟﻤﻮﺩﻳﻠﻲ :ﺍﻟﺘﺤﻀﻴﺮ ﺍﻟﺒﺤﺚ ﻋﻦ ﻣﺤﻄﺔ (، ﺛﻢ ﻗﻢiPod touch/iPhone) ﻋﻠﻰ ﺟﻬﺎﺯﻙJVC ﻟﺘﻄﺒﻴﻖiHeart Link ﻗﻢ ﺑﺘﺜﺒﻴﺖ ﺃﺣﺪﺙ ﺇﺻﺪﺍﺭ ﻣﻦ ﺍﺿﻐﻂ .iHeartRadio ﺑﺈﻧﺸﺎﺀ ﺣﺴﺎﺏ ﻭﺗﺴﺠﻴﻞ ﺍﻟﺪﺧﻮﻝ ﺇﻟﻰ ﺃﺩﺭ ﻗﺮﺹ ﻣﺴﺘﻮﻯ ﺍﻟﺼﻮﺕ ﻟﺘﺤﺪﻳﺪ ﺍﻟﻔﺌﺔ، ﺛﻢ ﺍﺿﻐﻂ ﻋﻠﻰ (4 ) .[SOURCE SELECT] [ ﻓﻲIHEART SRC] [ ﻟـON] • ﺣﺪﺩ...
- Page 76 Pandora® (( )ﻳﻨﻄﺒﻖ ﻋﻠﻰ ﻃﺮﺯ ﺃﺳﺘﺮﺍﻟﻴﺎ ﺃﻭ ﻧﻴﻮﺯﻟﻨﺪﺍ ﻓﻘﻂKD-X241 )ﻟﻤﻮﺩﻳﻠﻲ :ﺍﻟﺘﺤﻀﻴﺮ ﺍﻧﺸﺎﺀ ﻭﺗﺨﺰﻳﻦ ﻣﺤﻄﺔ ﺟﺪﻳﺪﺓ (، ﺛﻢ ﻗﻢiPod touch/iPhone) ﻋﻠﻰ ﺟﻬﺎﺯﻙPandora ﻗﻢ ﺑﺘﺜﺒﻴﺖ ﺃﺣﺪﺙ ﺇﺻﺪﺍﺭ ﻣﻦ ﺗﻄﺒﻴﻖ ﺍﺿﻐﻂ .Pandora ﺑﺈﻧﺸﺎﺀ ﺣﺴﺎﺏ ﻭﺗﺴﺠﻴﻞ ﺍﻟﺪﺧﻮﻝ ﺇﻟﻰ .[، ﺛﻢ ﺍﺿﻐﻂ ﻋﻠﻰ ﺍﻟﻘﺮﺹNEW STATION] ﺃﺩﺭ ﻗﺮﺹ ﻣﺴﺘﻮﻯ ﺍﻟﺼﻮﺕ ﻟﺘﺤﺪﻳﺪ (4 ) .[SOURCE SELECT] [ ﻓﻲPANDORA SRC] [ ﻟـON] •...
- Page 77 (ANDROID ﻭUSB )ﻗﺎﺑﻞ ﻟﻠﺘﻄﺒﻴﻖ ﻓﻘﻂ ﻟﻤﺼﺪﺭ ﻣﻦ ﻫﺬﺍ ﺍﻟﺠﻬﺎﺯ ﻋﺒﺮ ﺗﻄﺒﻴﻖAndroid ﻗﻢ ﺑﺎﻟﺘﺤﻜﻢ ﺑﺠﻬﺎﺯ :AUTO MODE .Android ﺍﻟﻤﺜﺒﺖ ﻓﻲ ﺟﻬﺎﺯJVC MUSIC PLAY .ﺇﺫﺍ ﻛﺎﻧﺖ ﻟﺪﻳﻚ ﺍﻟﻜﺜﻴﺮ ﻣﻦ ﺍﻟﻤﻠﻔﺎﺕ، ﻳﻤﻜﻦ ﺍﻟﺒﺤﺚ ﺧﻼﻟﻬﺎ ﺑﺴﺮﻋﺔ ﻧﻔﺴﻪ ﻋﺒﺮAndroid ﺑﺎﺳﺘﺨﺪﺍﻡ ﺟﻬﺎﺯAndroid : ﻗﻢ ﺑﺎﻟﺘﺤﻜﻢ ﺑﺠﻬﺎﺯAUDIO MODE .ﺃﺩﺭ...
- Page 78 .* ﻻ ﺗﺘﺮﻙ ﺍﻟﻜﺎﺑﻞ ﺑﺪﺍﺧﻞ ﺍﻟﺴﻴﺎﺭﺓ ﻋﻨﺪ ﻋﺪﻡ ﺍﺳﺘﺨﺪﺍﻣﻪ “. ﺍﺗﺒﻊ ﺍﻟﺘﻌﻠﻴﻤﺎﺕ ﻟﺘﻨﺼﻴﺐ ﺍﻟﺘﻄﺒﻴﻖ. ﻛﻤﺎPress [VIEW] to install JVC MUSIC PLAY APP” ، ﻳﺘﻢ ﻋﺮﺽAndroid * ﻋﻨﺪ ﺗﻮﺻﻴﻞ ﺟﻬﺎﺯ ﻋﻠﻰ ﺟﻬﺎﺯ ﻗﺒﻞ ﺍﻟﺘﻮﺻﻴﻞ. ﻟﻤﺰﻳﺪ ﻣﻦ ﺍﻟﻤﻌﻠﻮﻣﺎﺕ، ﻗﻢ ﺑﺰﻳﺎﺭﺓJVC MUSIC PLAY ﻳﻤﻜﻦ ﺗﺮﻛﻴﺐ ﺍﺣﺪﺙ ﺍﺻﺪﺍﺭ ﻣﻦ ﺍﻟﺘﻄﺒﻴﻖ...
- Page 79 ﺭﺍﺩﻳﻮ ﺇﻋﺪﺍﺩﺍﺕ ﺃﺧﺮﻯ FM : ﺯﻳﺎﺩﺓ ﺍﻧﺘﻘﺎﺋﻴﺔ ﺍﻟﻤﻮﺍﻟﻒ ﻟﺨﻔﺾ ﺿﻮﺿﺎﺀ ﺍﻟﺘﺪﺍﺧﻞ ﻣﻦ ﻣﺤﻄﺎﺕAUTO IF BAND : ﻳﺘﺒﻊWIDE ﺍﻟﻤﺠﺎﻭﺭﺓ. )ﻳﻤﻜﻦ ﺍﻥ ﻳﺘﻢ ﻓﻘﺪﺍﻥ ﻓﻌﺎﻟﻴﺔ ﺻﻮﺕ ﺍﻟﺴﺘﻴﺮﻳﻮ.( ؛ ﺍﺿﻐﻂ ﻣﻊ ﺍﻻﺳﺘﻤﺮﺍﺭ ﻋﻠﻰ ﺍﻟﻤﺠﺎﻭﺭﺓ، ﻟﻜﻦ ﺟﻮﺩﺓ ﺍﻟﺼﻮﺕ ﻟﻦ ﺗﻨﺨﻔﺾFM ﺿﻮﺿﺎﺀ ﺍﻟﺘﺪﺍﺧﻞ ﻣﻦ ﻣﺤﻄﺎﺕ ﺃﺩﺭ...
- Page 80 ﺭﺍﺩﻳﻮ ﺍﻟﺸﺮﻭﻉ ﻓﻲ ﺍﻟﻌﻤﻞ CLOCK : ﻳ ﹸ ﻀﺒﻂ ﻭﻗﺖ ﺍﻟﺴﺎﻋﺔ ﺗﻠﻘﺎﺋﻴ ﹰ ﺎ ﺑﺎﺳﺘﺨﺪﺍﻡ ﺑﻴﺎﻧﺎﺕON TIME SYNC ﺍﻟﻤﻮﺟﻮﺩ ﻓﻲ ﺇﺷﺎﺭﺓ ﻧﻈﺎﻡ ﺑﻴﺎﻧﺎﺕ ﺭﺍﺩﻳﻮClock Time (CT) .: ﺍﻟﻐﺎﺀOFF . ؛FM Radio Data System : ﻳﺘﻢ ﻋﺮﺽ ﻭﻗﺖ ﺍﻟﺴﺎﻋﺔ ﻋﻠﻰ ﺍﻟﺸﺎﺷﺔ ﺣﺘﻰ ﻋﻨﺪﻣﺎON CLOCK DISPLAY .: ﺍﻟﻐﺎﺀOFF ﺗﻜﻮﻥ...
- Page 81 :ﻟﻠﺤﺼﻮﻝ ﻋﻠﻰ ﺗﻔﺎﺻﻴﻞ ﺣﻮﻝ ﻛﻴﻔﻴﺔ ﺗﺤﺪﻳﺚ ﺍﻟﺒﺮﻧﺎﻣﺞ ﺍﻟﺜﺎﺑﺖ، ﺍﻧﻈﺮ .[، ﺛﻢ ﺍﺿﻐﻂ ﻋﻠﻰ ﺍﻟﻘﺮﺹDATE SET] ﺃﺩﺭ ﻗﺮﺹ ﻣﺴﺘﻮﻯ ﺍﻟﺼﻮﺕ ﻟﺘﺤﺪﻳﺪ .<http://www.jvc.net/cs/car/> .ﺃﺩﺭ ﻗﺮﺹ ﻣﺴﺘﻮﻯ ﺍﻟﺼﻮﺕ ﻟﺘﺤﺪﻳﺪ ﺍﻹﻋﺪﺍﺩﺍﺕ، ﺛﻢ ﺍﺿﻐﻂ ﻋﻠﻰ ﺍﻟﻘﺮﺹ .* ﻻ ﺗ ﹸ ﻌﺮﺽ ﻋﻨﺪﻣﺎ ﻳ ﹸ ﺤﺪﺩ ﺍﻟﻤﺼﺪﺭ ﺍﻟﻤﻨﺎﻇﺮ...
- Page 82 ﺃ ﹶ ﺳﺎﺳ ﹺ ﻴ ﹼ ﺎﺕ (RM-RK52) ﻭﺣﺪﺓ ﺍﻟﺘﺤﻜﻢ ﻋﻦ ﺑﻌﺪ ﻭﺍﺟﻬﺔ ﺍﻟﺠﻬﺎﺯ ﺣﺴﺎﺱ ﺍﻟﺘﺤﻜﻢ ﻋﻦ ﺑﻌﺪ ﻗﺮﺹ ﻣﺴﺘﻮﻯ ﺍﻟﺼﻮﺕ ﻧﺎﻓﺬﺓ ﺍﻟﻌﺮﺽ (.)ﺗﺠﻨﺐ ﺍﻟﺘﻌﺮﻳﺾ ﻟﻀﻮﺀ ﺍﻟﺸﻤﺲ ﺍﻟﺴﺎﻃﻊ ﻗﻢ ﺑﺴﺤﺐ ﻏﻄﺎﺀ ﻋﺎﺯﻝ ﺍﻟﻜﻬﺮﺑﺎﺀ ﻋﻨﺪ ﺍﻻﺳﺘﺨﺪﺍﻡ .ﻷﻭﻝ ﻣﺮﺓ ﺯﺭ ﺍﻟﻔﺼﻞ ﻛﻴﻒ ﻳﻤﻜﻦ ﺍﺳﺘﺒﺪﺍﻝ ﺍﻟﺒﻄﺎﺭﻳﺔ ﻛﻴﻒ...
- Page 83 ﺍﻟﻤﺤﺘﻮﻳﺎﺕ ﻗﺒﻞ ﺍﻻﺳﺘﺨﺪﺍﻡ ﻗﺒﻞ ﺍﻻﺳﺘﺨﺪﺍﻡ ﻫﺎﻡ ﺃ ﹶ ﺳﺎﺳ ﹺ ﻴ ﹼ ﺎﺕ • ﻟﻀﻤﺎﻥ ﺍﻻﺳﺘﺨﺪﻟﻢ ﺍﻟﻤﻨﺎﺳﺐ، ﻳﺮﺟﻰ ﻗﺮﺍﺀﺓ ﻫﺬﺍ ﺍﻟﺪﻟﻴﻞ ﺑﺘﻤﻌﻦ ﻗﺒﻞ ﺍﺳﺘﺨﺪﺍﻡ ﻫﺬﺍ ﺍﻟﻤﻨﺘﺞ. ﻣﻦ ﺍﻟﻤﻬﻢ ﺟﺪﺍ ﺍﻥ ﺗﻘﺮﺃ ﻭﺗﺮﺍﻗﺐ ﺍﻟﺘﺤﺬﻳﺮﺍﺕ .ﻭﺍﻟﺘﻨﺒﻴﻬﺎﺕ ﺍﻻﺣﺘﻴﺎﻃﻴﺔ ﻓﻲ ﻫﺬﺍ ﺍﻟﺪﻟﻴﻞ ﺍﻟﺸﺮﻭﻉ ﻓﻲ ﺍﻟﻌﻤﻞ .•...
- Page 84 ﻋﺮﺑﻲ ﻓﺎﺭﺳﻰ KD-X141 / KD-X241 ﺟﻬﺎﺯ ﺍﺳﺘﻘﺒﺎﻝ ﺍﻟﻮﺳﺎﺋﻂ ﺍﻟﺮﻗﻤﻴﺔ ﺩﻟﻴﻞ ﺍﻟﺘﻌﻠﻴﻤﺎﺕ ﮔﻴﺮﻧﺪﻩ ﺭﺳﺎﻧﻪ ﺩﻳﺠﻴﺘﺎﻝ ﺭﺍﻫﻨﻤﺎی ﺍﺳﺘﻔﺎﺩﻩ © 2016 JVC KENWOOD Corporation 1016DTSMDTJEIN...
Need help?
Do you have a question about the PANDORA KD-X241 and is the answer not in the manual?
Questions and answers
Display says protecting and won’t work