Table of Contents
Advertisement
Available languages
Available languages
Advertisement
Chapters
Table of Contents

Related Manuals for JVC KD-X252


Summary of Contents for JVC KD-X252
-
Page 1: Instruction Manual
ENGLISH ESPAÑOL NEDERLANDS PORTUGUÊS KD-X252 / KD-X152 / KD-X151 DIGITAL MEDIA RECEIVER INSTRUCTION MANUAL RECEPTOR DE MEDIOS DIGITALES MANUAL DE INSTRUCCIONES DIGITALE MEDIAONTVANGER GEBRUIKSAANWIJZING RECEPTOR MÉDIA DIGITAL MANUAL DE INSTRUÇÕES B5A-2129-00 [E]... - Page 2 Informatie over het weggooien van elektrische en elektronische apparatuur en batterijen (particulieren) Dit symbool geeft aan dat gebruikte elektrische, elektronische producten en batterijen niet bij het normale huishoudelijke afval mogen. Lever deze producten in bij de aangewezen inzamelingspunten, waar ze gratis worden geaccepteerd en op de juiste manier worden verwerkt, teruggewonnen en hergebruikt.
- Page 3 For Israel • Microsoft and Windows Media are either registered trademarks or trademarks of Microsoft Corporation in the United States and/or other countries. • “Made for iPod,” and “Made for iPhone” mean that an electronic accessory has been designed to connect specifically to iPod, or iPhone, respectively, and has been certified by the developer to meet Apple performance standards.
- Page 4 3-12, Moriya-cho, Kanagawa-ku, Yokohama-shi, Kanagawa, 221-0022, JAPAN Par la présente, JVCKENWOOD déclare que Português EU Representative: l’équipement radio « KD-X252/KD-X152/KD-X151 » est Deste modo, a JVCKENWOOD declara que o JVCKENWOOD Deutschland GmbH conforme à la directive 2014/53/UE. equipamento de rádio “KD-X252/KD-X152/KD-X151”...
- Page 5 HRVATSKI / SRPSKI JEZIK http://www.jvc.net/cs/car/eudoc/ http://www.jvc.net/cs/car/eudoc/ Eesti JVCKENWOOD ovim izjavljuje da je radio oprema Slovensko Käesolevaga JVCKENWOOD kinnitab, et „KD-X252/ “KD-X252/KD-X152/KD-X151” u skladu s Русский S tem JVCKENWOOD izjavlja, da je radijska oprema KD-X152/KD-X151“ raadiovarustus on vastavuses Direktivom 2014/53/EU. JVCKENWOOD настоящим заявляет, что...
-
Page 6: Table Of Contents
CONNECTION SPECIFICATIONS How to read this manual • Operations are explained mainly using buttons on the faceplate of KD-X252. • English indications are used for the purpose of explanation. You can select the display language from the menu. ( 4) •... -
Page 7: Basics
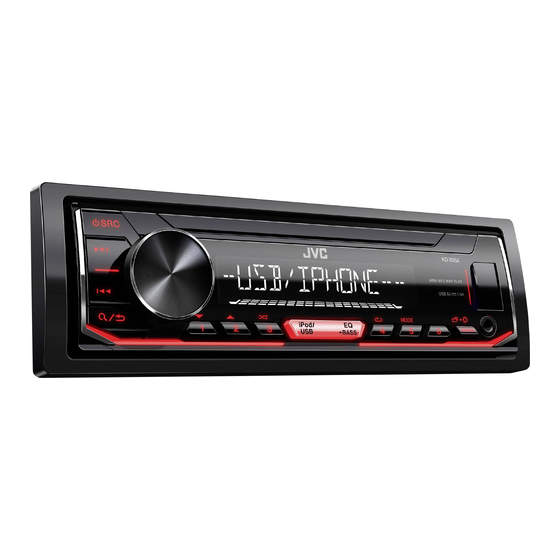
BASICS Faceplate Attach Volume knob Display window Detach How to reset Detach button Your preset adjustments will be erased except stored radio stations. On the faceplate Turn on the power Press • Press and hold to turn off the power. Adjust the volume Turn the volume knob. -
Page 8: Getting Started
To adjust the clock activated). Turn the volume knob to select [CLOCK ADJUST], then press the For details on how to update the firmware, see: <http://www.jvc.net/cs/car/>. knob. CLOCK Turn the volume knob to make the settings, then press the knob. -
Page 9: Usb/Ipod/Android
Do not leave the cable inside the car when not using. When connecting an Android device, “Press [VIEW] to install JVC MUSIC PLAY APP” is shown. Follow the instructions to install the application. You can also install the latest version of JVC MUSIC PLAY application on your Android device before connecting. - Page 10 Quick search (applicable only for USB and ANDROID source) AUTO MODE: Control Android device from this unit via JVC MUSIC PLAY If you have many files, you can search through them quickly. application installed in the Android device. AUDIO MODE: Control Android device using the Android device itself via...
-
Page 11: Radio
RADIO Select a stored station Press one of the number buttons (1 to 6). (or) Press Turn the volume knob to select a preset number, then press the knob. Other settings “STEREO” lights up when receiving an FM stereo broadcast with sufficient signal strength. Press and hold Turn the volume knob to select an item (see the following table), then press the knob. -
Page 12: Aux
RADIO LOCAL SEEK ON: Searches only FM stations with good reception. ; OFF: Cancels. Use a portable audio player • Settings made are applicable only to the selected source/station. Once Connect a portable audio player (commercially available). you change the source/station, you need to make the settings again. 3.5 mm stereo mini plug with “L”... -
Page 13: Audio Settings
AUDIO SETTINGS Default: XX EQ SETTING PRESET EQ Select a preset equalizer suitable to the music genre. • Select [USER] to use the settings made in [EASY EQ] or [PRO EQ]. FLAT/DRVN 3/DRVN 2/DRVN 1/HARD ROCK/HIP HOP/JAZZ/POP/R&B/TALK/ USER/VOCAL BOOST/BASS BOOST/CLASSICAL/DANCE EASY EQ Adjust your own sound settings. - Page 14 AUDIO SETTINGS LOUDNESS LEVEL 01/LEVEL 02: Boosts low or high frequencies to produce a well- D.T.EXPANDER ON: Creates realistic sound by compensating the high-frequency balanced sound at low volume. ; OFF: Cancels. (Digital Track components and restoring the rise-time of the waveform that are lost in Expander) audio data compression. ;...
-
Page 15: Display Settings
DISPLAY SETTINGS Zone identification for brightness setting BRIGHTNESS Set the brightness for day and night separately. 1 DAY/NIGHT: Select day or night. 2 Select a zone. (See the illustration on the left column.) 3 LEVEL 00 to LEVEL 31: Set the brightness level. TEXT SCROLL * SCROLL ONCE: Scrolls the display information once. ;... -
Page 16: References
For: – Latest firmware updates and latest compatible item list – Any other latest information About Android device Visit <http://www.jvc.net/cs/car/>. • This unit supports Android OS 4.1 and above. • Some Android devices (with OS 4.1 and above) may not fully support Android Open Accessory Playable files (AOA) 2.0. -
Page 17: Troubleshooting
TROUBLESHOOTING REFERENCES Change the display information Symptom Remedy Each time you press , the display information changes. Sound cannot be heard. • Adjust the volume to the optimum level. • If the information is unavailable or not recorded, “NO TEXT”, “NO NAME”, or •... -
Page 18: Installation/Connection
( 12) Caution Cannot playback at • Make sure JVC MUSIC PLAY APP is installed on the [AUTO MODE]. Android device. ( 5) • For safety’s sake, leave wiring and mounting to professionals. Consult the car audio dealer. - Page 19 INSTALLATION/CONNECTION Part list for installation Installing the unit (in-dash mounting) (A) Faceplate (B) Trim plate Do the required wiring. ( 16) Hook on the top side Orientate the trim plate as (C) Mounting sleeve (D) Wiring harness Dashboard of your car illustrated before fitting.
-
Page 20: Wiring Connection
INSTALLATION/CONNECTION Wiring connection Rear/subwoofer output When connecting to an external amplifier, connect its ground wire to the car’s chassis to avoid damaging the unit. Fuse (10 A) Antenna terminal Connecting the ISO connectors on some VW/ Yellow (Battery wire) Audi or Opel (Vauxhall) automobiles Light blue/yellow To the steering wheel remote control adapter You may need to modify the wiring of the supplied... -
Page 21: Specifications
SPECIFICATIONS Frequency Range 87.5 MHz — 108.0 MHz (50 kHz step) Frequency Response (±3 dB) 20 Hz — 20 kHz Usable Sensitivity (S/N = 26 dB) 0.71 μV/75 Ω (8.2 dBf) Input Maximum Voltage 1 000 mV Quieting Sensitivity 2.0 μV/75 Ω Input Impedance 30 kΩ (DIN S/N = 46 dB) Maximum Output Power 50 W × 4 or Frequency Response (±3 dB) 30 Hz — 15 kHz 50 W × 2 + 50 W × 1 (Subwoofer = 4 Ω) Signal-to-Noise Ratio (MONO) 64 dB Full Bandwidth Power... -
Page 22: Important
ESPECIFICACIONES Cómo leer este manual • Las operaciones se explican utilizando principalmente los botones de la placa frontal del KD-X252 • Se utilizan indicaciones en inglés para las explicaciones. Puede seleccionar el idioma de visualización desde el menú. ( 4) •... -
Page 23: Puntos Básicos
PUNTOS BÁSICOS Placa frontal Fijar Rueda de volumen Ventanilla de visualización Desmontar Cómo reinicializar Botón de liberación Se borrarán los ajustes preestablecidos, excepto las emisoras de radio memorizadas. Para En la placa frontal Encender la unidad Pulse • Pulse y mantenga pulsado para apagar la unidad. Ajustar el volumen Gire la rueda de volumen. -
Page 24: Procedimientos Iniciales
Para obtener información sobre cómo actualizar el firmware, consulte: Gire la rueda de volumen para seleccionar [CLOCK ADJUST] y, a <http://www.jvc.net/cs/car/>. continuación, pulse la rueda. Gire la rueda de volumen para realizar los ajustes y, a continuación, CLOCK pulse la rueda. -
Page 25: Usb/Ipod/Android
No deje el cable dentro del vehículo cuando no lo esté utilizando. Cuando conecte un dispositivo Android, se mostrará “Press [VIEW] to install JVC MUSIC PLAY APP”. Siga las instrucciones para instalar la aplicación. Antes de la conexión, también puede instalar la versión más reciente de la aplicación JVC MUSIC PLAY en su dispositivo Android. Para obtener más información, visite <http://www.jvc.net/cs/car/>. - Page 26 Controla el dispositivo Android desde esta unidad a través de la Búsqueda rápida (aplicable solo para fuentes USB y ANDROID) aplicación JVC MUSIC PLAY instalada en el dispositivo Android. Si existen numerosos archivos, puede realizar una búsqueda rápida. AUDIO MODE : Controla el dispositivo Android desde el propio Android a través de...
-
Page 27: Radio
RADIO Seleccione una emisora almacenada Pulse uno de los botones numéricos ( a Pulse Gire la rueda de volumen para seleccionar un número de preajuste y, a continuación, pulse la rueda. “STEREO” se enciende cuando se recibe una radiodifusión FM estéreo con una Otros ajustes intensidad de señal suficiente. -
Page 28: Aux
RADIO LOCAL SEEK Uso de un reproductor de audio portátil : Busca solo emisoras FM con buena recepción de señal. ; : Se cancela. • Los ajustes realizados se aplican solo a la fuente/emisora seleccionada. Una vez que se Conecte un reproductor de audio portátil (disponible en el mercado). cambie la fuente/emisora, es necesario volver a realizar los ajustes. -
Page 29: Ajustes De Audio
AJUSTES DE AUDIO Predeterminado: EQ SETTING PRESET EQ Selecciona un ecualizador predefinido adecuado para el género musical. • [USER] [EASY EQ] [PRO EQ] Seleccione para utilizar los ajustes realizados en FLAT DRVN 3 DRVN 2 DRVN 1 HARD ROCK HIP HOP JAZZ R&B TALK USER VOCAL BOOST BASS BOOST CLASSICAL DANCE EASY EQ Ajuste su propia configuración de sonido. - Page 30 AJUSTES DE AUDIO LOUDNESS LEVEL 01 LEVEL 02 D.T.EXPANDER : Refuerza las frecuencias altas o bajas para producir un sonido bien : Crea un sonido real compensando los componentes de alta frecuencia y balanceado a bajos niveles de volumen. ; : Se cancela. (Expansor digital de restableciendo el tiempo de subida de la forma de onda que se pierde en la compresión de pistas) los datos de audio. ;...
-
Page 31: Ajustes De Visualización
AJUSTES DE VISUALIZACIÓN Identificación de zonas para los ajustes de brillo BRIGHTNESS Ajuste separadamente el brillo para uso diurno y nocturno. 1 DAY NIGHT : Selecciona ajuste diurno o nocturno. Selecciona una zona. (Véase la ilustración de la columna izquierda.) 3 LEVEL 00 LEVEL 31 : Ajusta el nivel de brillo. -
Page 32: Referencias
Acerca del dispositivo Android – Cualquier otra información más reciente • Esta unidad es compatible con Android OS 4.1 y superior. Visite <http://www.jvc.net/cs/car/>. • Algunos dispositivos Android (con OS 4.1 y superior) pueden no ser completamente compatibles con Android Open Accessory (AOA) 2.0. -
Page 33: Localización Y Solución De Problemas
LOCALIZACIÓN Y SOLUCIÓN DE PROBLEMAS REFERENCIAS Cambiar la información en pantalla Síntoma Solución Cada vez que pulsa , la información en pantalla cambia. • Si la información no está disponible o no está registrada, aparecerá “NO TEXT”, “NO NAME”, u otra El sonido no se escucha. -
Page 34: Instalación/Conexión
Precaución No se puede reproducir en • Asegúrese de que JVC MUSIC PLAY APP esté instalado en el dispositivo • Para fines de seguridad, deje que un profesional realice el cableado y el montaje. Consulte con un distribuidor de [AUTO MODE] Android. - Page 35 INSTALACIÓN/CONEXIÓN Lista de piezas para la instalación Instalación de la unidad (montaje en el tablero) Placa frontal Placa embellecedora Prepare el cableado ( 16) necesario. Gancho en el lado superior Antes del montaje, oriente la Manguito de montaje Mazo de conductores Salpicadero del automóvil placa embellecedora tal como se muestra en la ilustración.
- Page 36 INSTALACIÓN/CONEXIÓN Conexión del cableado Salida posterior/subwoofer Cuando conecte a un amplificador externo, conecte su cable de tierra al chasis del vehículo para evitar daños en la unidad. Fusible (10 A) Terminal de la antena Conexión de los conectores ISO en algunos Amarillo (Cable de la batería) automóviles VW/Audi u Opel (Vauxhall) Luz azul/amarilla...
-
Page 37: Especificaciones
ESPECIFICACIONES Gama de frecuencias 87,5 MHz — 108,0 MHz (pasos de 50 kHz) Respuesta de frecuencia (±3 dB) 20 Hz — 20 kHz Sensibilidad útil 0,71 μV/75 Ω (8,2 dBf) Voltaje de entrada máximo 1 000 mV (Relación señal/ruido = 26 dB) Impedancia de entrada 30 kΩ Sensibilidad de silenciamiento 2,0 μV/75 Ω... -
Page 38: Kd-X252
TECHNISCHE GEGEVENS Meer over deze gebruiksaanwijzing • KD-X252 De bediening wordt voornamelijk uitgelegd met gebruik van de toetsen op het voorpaneel van de • Voor de uitleg worden de aanduidingen in het Engels gebruikt. U kunt de taal voor het display veranderen met het menu. - Page 39 BASISPUNTEN Voorpaneel Bevestigen Volumeknop Displayvenster Verwijderen Terugstellen Verwijdertoets De door u gemaakte instellingen, uitgezonderd de vastgelegde radiozenders, worden gewist. Voor het Op het voorpaneel Inschakelen van de stroom Druk op • Houd even ingedrukt om de stroom uit te schakelen. Instellen van het volume Verdraai de volumeknop.
- Page 40 : Geannuleerd (upgraden is niet Draai de volumeknop om [CLOCK ADJUST] te kiezen en druk vervolgens geactiveerd). Ga voor details aangaande de update van firmware naar: <http://www.jvc.net/cs/car/>. op de knop. Draai de volumeknop om de instellingen te maken en druk CLOCK vervolgens op de knop.
- Page 41 Indien verbonden met een Android apparaat verschijnt “Press [VIEW] to install JVC MUSIC PLAY APP”. Volg de aanwijzingen voor het installeren van de app. U kunt tevens de laatste versie van de app JVC MUSIC PLAY op uw Android apparaat installeren alvorens de verbinding te maken. Ga voor meer informatie naar <http://www.jvc.net/cs/car/>.
- Page 42 Draai de volumeknop om een bestand te kiezen en druk vervolgens op de knop. AUTO MODE Bedien het Android apparaat met dit toestel via de JVC MUSIC PLAY app die op het Android apparaat is geïnstalleerd. AUDIO MODE : Bedien het Android apparaat met het Android apparaat middels een...
- Page 43 RADIO Kiezen van een opgeslagen zender Druk op een van de cijfertoetsen ( tot (of) Druk op Draai de volumeknop om een voorkeurnummer te kiezen en druk vervolgens op de knop. “STEREO” licht op tijdens ontvangst van een stereo FM-uitzending met Overige instellingen voldoende signaalsterkte.
- Page 44 RADIO LOCAL SEEK Gebruik een draagbare audiospeler : Opzoeken van uitsluitend FM-zenders met een goede ontvangst. ; : Geannuleerd. • De gemaakte instellingen zijn alleen van toepassing op de gekozen bron/zender. Nadat u Verbind een draagbare audiospeler (los verkrijgbaar). van bron/zender verandert, moet u de instellingen opnieuw maken. IF BAND AUTO : Verhogen van de gevoeligheid van de tuner voor minder, door in de buurt...
-
Page 45: Overige Instellingen
AUDIO-INSTELLINGEN Basisinstelling: EQ SETTING PRESET EQ Kiezen van een geschikte, vooringestelde equalizer voor het muziekgenre. • [USER] [EASY EQ] [PRO EQ] Kies voor gebruik van de instellingen die met zijn gemaakt. FLAT DRVN 3 DRVN 2 DRVN 1 HARD ROCK HIP HOP JAZZ R&B TALK USER VOCAL BOOST BASS BOOST CLASSICAL DANCE Selecteer rechtstreeks een vooringestelde equalizer EASY EQ... - Page 46 AUDIO-INSTELLINGEN LOUDNESS LEVEL 01 LEVEL 02 D.T.EXPANDER : Versterkt de lage en hoge frequenties voor een goed-gebalanceerd : Er wordt een compensatie voor de hoge frequentiecomponenten gemaakt en de geluid bij een laag volumeniveau. ; : Geannuleerd. (Digital Track verhogingstijd van de golfvorming die met het comprimeren van audiodata verloren gaat Expander) wordt hersteld voor een realistisch geluid. ;...
- Page 47 DISPLAY-INSTELLINGEN Zone-identificatie voor helderheidsinstellingen BRIGHTNESS Stel de helderheid voor het display en de toetsen voor dag en nacht afzonderlijk in. 1 DAY NIGHT : Kies dag of nacht. Kies een zone. (Zie de afbeelding in de linkerkolom.) 3 LEVEL 00 LEVEL 31 : Stel het helderheidsniveau in. TEXT SCROLL * SCROLL ONCE : Eenmaal rollend tonen van de display-informatie. ;...
- Page 48 – Andere actuele informatie • Bepaalde Android apparaten (met OS 4.1 en hoger) ondersteunen Android Open Accessory (AOA) 2.0 mogelijk niet Ga naar <http://www.jvc.net/cs/car/>. volledig. • Indien het Android apparaat zowel massa-opslagklasseapparatuur als AOA 2.0 ondersteunt, geeft dit toestel altijd Afspeelbare bestanden voorrang aan weergave via AOA 2.0.
- Page 49 OPLOSSEN VAN PROBLEMEN TER REFERENTIE Veranderen van de displayinformatie Symptoom Oplossing Door iedere druk op verandert de display-informatie. • Indien er geen informatie beschikbaar is of niet is opgenomen, verschijnt “NO TEXT”, “NO NAME”, Geen geluid. • Stel het volume op het optimale niveau in. of een andere melding (bijvoorbeeld zendernaam) of het is leeg.
- Page 50 Zet de draden vast met draadklemmen en wikkel isolatietape om de draden die in contact komen met metalen ( 12) het audiosignaal niet naar het toestel leiden. onderdelen, om de draden te beschermen. Weergave is onmogelijk met • Controleer of de app JVC MUSIC PLAY APP op het Android apparaat is Voorzorgen [AUTO MODE] geïnstalleerd. ( 5) •...
- Page 51 INSTALLEREN/VERBINDEN Onderdelenlijst voor het installeren Installeren van het toestel (in-dashboard montage) Voorpaneel Sierplaat Sluit als vereist aan. ( 16) Haak aan de bovenkant Dashboard van uw auto Bevestigingshuls Bedradingsbundel Richt de sierplaat als afgebeeld alvorens te bevestigen. Buig de vereiste lipjes zodat de huls goed op zijn plaats wordt gehouden.
- Page 52 INSTALLEREN/VERBINDEN Verbinden van draden Achter-/subwooferuitgang Bij het verbinden met een externe versterker, moet u het aardedraad verbinden met het chassis van de auto om beschadiging van het toestel te voorkomen. Zekering (10 A) Antenne-aansluiting Verbinden van de ISO-stekkers met bepaalde Geel (Accukabel) VW/Audi en Opel (Vauxhall) auto’s Lichtblauw/geel...
-
Page 53: Technische Gegevens
TECHNISCHE GEGEVENS Frequentiebereik 87,5 MHz — 108,0 MHz (50 kHz stappen) Frequentieweergave (±3 dB) 20 Hz — 20 kHz Bruikbare gevoeligheid (S/R = 26 dB) 0,71 μV/75 Ω (8,2 dBf) Maximale ingangsspanning 1 000 mV Onderdrukkingsgevoeligheid 2,0 μV/75 Ω Ingangsimpedantie 30 kΩ (DIN S/R = 46 dB) Maximaal uitgangsvermogen 50 W × 4 of Frequentieweergave (±3 dB) 30 Hz —... - Page 54 ESPECIFICAÇÕES Como ler este manual • As operações são explicadas utilizando principalmente os botões do painel frontal do KD-X252 • São utilizadas indicações em inglês para a finalidade de explicação. Pode selecionar o idioma de apresentação a partir do menu.
- Page 55 FUNDAMENTOS Painel frontal Colocar Botão de volume Visor Retirar Como reiniciar Botão de remoção Os seus ajustes predefinidos serão apagados, com exceção das estações de rádio armazenada. Para No painel frontal Ligar a corrente Prima • Mantenha premido para desligar a alimentação. Ajustar o volume Rode o botão do volume.
- Page 56 F/W UP xxxx : Inicia a atualização do firmware. ; : Cancela (a atualização não é ativada). Para ajustar o relógio Para mais detalhes sobre como atualizar o firmware, consulte: <http://www.jvc.net/cs/car/>. Rode o botão de volume para selecionar [CLOCK ADJUST] e, em seguida, CLOCK prima-o.
- Page 57 Não deixe o cabo dentro do automóvel quando não estiver a utilizar. Quando ligar um dispositivo Android, aparece a mensagem “Press [VIEW] to install JVC MUSIC PLAY APP”. Siga as instruções para instalar a aplicação. Pode também a última versão da aplicação JVC MUSIC PLAY no seu dispositivo Android antes de ligar. Para mais informações, visite <http://www.jvc.net/cs/car/>.
- Page 58 Rode o botão do volume para selecionar um ficheiro e, em seguida, prima-o. AUTO MODE Controle o dispositivo Android a partir deste aparelho através da aplicação JVC MUSIC PLAY instalada no dispositivo Android. AUDIO MODE : Controle o dispositivo Android a partir do próprio dispositivo Procura rápida (aplicável somente para fonte USB e ANDROID)
- Page 59 RÁDIO Selecione uma estação armazenada Prima um dos botões numéricos ( a (ou) Prima Rode o botão do volume para selecionar um número predefinido e, em seguida, prima-o. “STEREO” acende-se quando se recebe uma transmissão FM estéreo com um Outras definições sinal suficientemente forte.
- Page 60 RÁDIO LOCAL SEEK Utilize um leitor de áudio portátil : Procura somente estações FM com boa recepção. ; : Cancela. • As definições feitas são aplicáveis somente à fonte/estação selecionada. Após mudar a Conecte um leitor de áudio portátil (disponível comercialmente). fonte/estação, é necessário fazer as definições novamente. Mini ficha estéreo de 3,5 mm com conector em forma de “L”...
- Page 61 DEFINIÇÕES DE ÁUDIO Predefinição: EQ SETTING PRESET EQ Seleciona um equalizador predefinido adequado ao género musical. • [USER] [EASY EQ] [PRO EQ] Selecione para utilizar as definições feitas em FLAT DRVN 3 DRVN 2 DRVN 1 HARD ROCK HIP HOP JAZZ R&B TALK...
- Page 62 DEFINIÇÕES DE ÁUDIO LOUDNESS LEVEL 01 LEVEL 02 D.T.EXPANDER : Reforça as frequências baixas ou altas para produzir um som bem : Cria um som realístico compensando os componentes de alta frequência e equilibrado em volumes baixos. ; : Cancela. (Digital Track restaurando o tempo de subida da forma de onda que são perdidos na compressão de Expander) dados de áudio. ;...
- Page 63 DEFINIÇÕES DO VISOR Identificação de zona para definições do brilho BRIGHTNESS Defina o brilho para o dia e noite separadamente. 1 DAY NIGHT : Seleciona dia ou noite. Selecione uma zona. (Veja a ilustração na coluna esquerda.) 3 LEVEL 00 LEVEL 31 : Defina o nível do brilho.
- Page 64 Sobre o dispositivo Android – Quaisquer outras informações recentes • Este aparelho suporte Android SO 4.1 e acima. Visite <http://www.jvc.net/cs/car/>. • Alguns dispositivos Android (com SO 4.1 e acima) podem não suportar totalmente Android Open Accessory (AOA) 2.0. Ficheiros legíveis •...
- Page 65 DETEÇÃO E SOLUÇÃO DE PROBLEMAS REFERÊNCIAS Mudar a informação no visor Sintoma Solução Cada vez que premir , a informação no visor mudará. • Se não houver informação disponível ou gravada, aparecerá “NO TEXT”, “NO NAME” ou outra O som não pode ser ouvido. •...
- Page 66 Cuidado A reprodução não pode ser feita • Certifique-se de que JVC MUSIC PLAY APP está instalado no dispositivo • Para o propósito de segurança, encarregue as ligações e a montagem a profissionais. Consulte o revendedor de áudio [AUTO MODE] Android.
- Page 67 INSTALAÇÃO/CONEXÃO Lista de peças para instalação Instalação do aparelho (montagem no tablier) Painel frontal Placa de guarnição Instale a cablagem ( 16) necessária. Enganche o lado superior Oriente a placa de guarnição Tablier do seu automóvel Manga de montagem Cablagem como mostrado antes de instalar.
- Page 68 INSTALAÇÃO/CONEXÃO Conexão da cablagem Saída traseira/subwoofer Quando ligar a um amplificador externo, ligue o seu fio de terra ao chassis do automóvel para evitar danos ao aparelho. Fusível (10 A) Terminal de antena Conexão dos conectores ISO em alguns Amarelo (Cabo de bateria) automóveis VW/Audi ou Opel (Vauxhall) Azul claro/amarelo Ao adaptador do controlo remoto do volante de direção...
- Page 69 ESPECIFICAÇÕES Gama de frequência 87,5 MHz — 108,0 MHz (passos de 50 kHz) Resposta de frequência (±3 dB) 20 Hz — 20 kHz Sensibilidade útil (S/N = 26 dB) 0,71 μV/75 Ω (8,2 dBf) Voltagem máxima de entrada 1 000 mV Sensibilidade de repouso 2,0 μV/75 Ω Impedância de entrada 30 kΩ (DIN S/N = 46 dB) Potência máxima de saída 50 W × 4 ou Resposta de frequência (±3 dB) 30 Hz — 15 kHz...
- Page 72 © 2017 JVC KENWOOD Corporation 0817DTSMDTJEIN...
Need help?
Do you have a question about the KD-X252 and is the answer not in the manual?
Questions and answers