Table of Contents
Advertisement
Advertisement
Table of Contents
Troubleshooting

Related Manuals for Jenn-Air JBC7624BS


Summary of Contents for Jenn-Air JBC7624BS
- Page 1 JC-01 TECHNICAL EDUCATION Built-in Coffee System JBC7624BS JOB AID W10647095...
- Page 2 FORWARD This Jenn-Air Job Aid, "Built-in Coffee System" (Part No. W10647095), provides the In-Home Service Professional with information on the installation, operation, and service of the “Built-in Coffee System." GOALS AND OBJECTIVES The goal of this Job Aid is to provide information that will enable the In-Home Service Professional to properly diagnose malfunctions and repair the "Jenn-Air Built-in Coffee System.”...
-
Page 3: Table Of Contents
SECTION 4 — COMPONENT ACCESS COFFEE SYSTEM EXPLODED VIEWS ....................4-2 COFFEE SYSTEM PARTS LIST .......................4-6 JENN-AIR BUILT-IN COFFEE SYSTEM DISASSEMBLY SECTION ............4-7 BEFORE DISASSEMBLING THE COFFEE SYSTEM ................4-8 REMOVING THE FAN PANEL .......................4-9 REMOVING THE BACK PANEL & TRAYS ....................4-10 REMOVING THE MAIN BOARD ......................4-11... - Page 4 DIVERTER LIMIT SWITCHES STRIP CIRCUIT ..................5-15 2-WAY VALVE STRIP CIRCUIT ......................5-15 3-WAY VALVE STRIP CIRCUIT ......................5-15 PUMP STRIP CIRCUIT ........................5-16 WATER FLOW/SWITCHES STRIP CIRCUIT ..................5-16 GRINDER MOTOR STRIP CIRCUIT .....................5-16 PRODUCT SPECIFICATIONS & WARRANTY INFORMATION SOURCES (inside back cover) Jenn-Air Built-in Coffee System...
-
Page 5: Jenn-Air Built-In Coffee System
GENERAL INFORMATION Section 1: General Information This section provides general safety, parts, and information for the “Jenn-Air Built-in Coffee System.” Q Coffee System Safety Q Model & Serial Number Label Q Tech Sheet Location Q Parts & Features Q Product Specifications... -
Page 6: Coffee System Safety
Do not use appliance for other than intended household damaged in any manner. Return the appliance to the use. nearest authorized service center for examination, repair or adjustment. SAVE THESE INSTRUCTIONS Jenn-Air Built-in Coffee System... -
Page 7: Model & Serial Number Label
Model & Serial Number Label Model & Serial Number Label Location Figure 1 - Located on left-side of coffee system Tech Sheet Location Tech Sheet Location Figure 2 - Located on back cover of coffee system Jenn-Air Built-in Coffee System... -
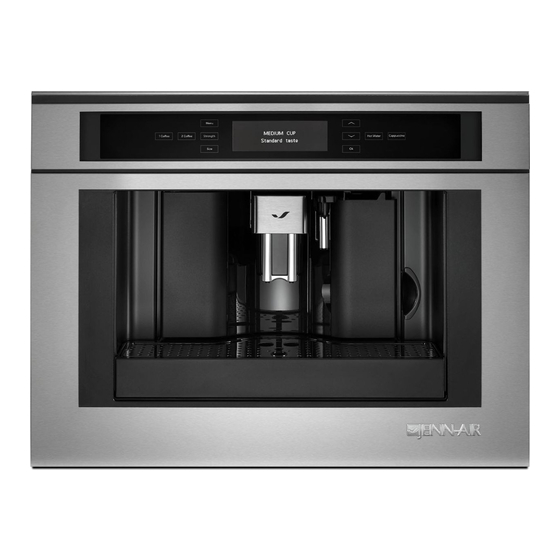
Page 8: Parts & Features
E. Ground coffee funnel cap I. Power supply cable B. Grinding coarseness adjustment knob F. Scoop J. Terminal board C. Coffee bean container G. Scoop compartment K. Storage tray D. Coffee bean container lid H. Ground coffee funnel feed Jenn-Air Built-in Coffee System... -
Page 9: Product Specifications
A. Hot water and steam nozzle B. Hot water spout 2. Turn on the coffee system. 3. The available languages will scroll automatically. Wait until “Press OK to install ENGLISH” is displayed. Press and hold A. Hot water spout Jenn-Air Built-in Coffee System... - Page 10 GENERAL INFORMATION Notes Jenn-Air Built-in Coffee System...
- Page 11 OPERATION Section 2: Operation This section provides operational use and care information for the “Jenn-Air Built-in Coffee System.” Q Before Using the Coffee System Q Coffee System Use Q Settings Q Switching On and Preheating Q Making Coffee or Espresso Using Coffee Beans...
- Page 12 A. Hot water and steam nozzle B. Hot water spout 2. Turn on the coffee system. 3. The available languages will scroll automatically. Wait until “Press OK to install ENGLISH” is displayed. Press and hold A. Hot water spout Jenn-Air Built-in Coffee System...
-
Page 13: Coffee System Use
(30 mL) of hot water will run into the drip tray. displayed. Press OK. Jenn-Air Built-in Coffee System NOTE: If desired, you can place a small cup beneath the coffee spout. The hot water will warm the cup. Empty the hot... - Page 14 (30 mL) of hot water will run into the drip tray. displayed. Press OK. NOTE: If desired, you can place a small cup beneath the coffee spout. The hot water will warm the cup. Empty the hot water before using the cup for coffee. Jenn-Air Built-in Coffee System...
-
Page 15: Coffee Temperature
10. Remove the water tank and empty the contents. Rinse the water tank thoroughly to remove all traces of descaler. Add 3 cups (710 mL) water to the water tank. 11. Replace the water tank. “RINSING Press OK” will be displayed. Press OK. Jenn-Air Built-in Coffee System... -
Page 16: Switching On And Preheating
For a creamier coffee, lower the coffee spout as near as 3. Press the up and down arrow keys until the correct language possible to the cups. is displayed. 4. Press OK. 5. Press MENU to exit the menu. A. Coffee spout Jenn-Air Built-in Coffee System... -
Page 17: Changing The Amount Of Coffee
“PROGRAM QUANTITY” is displayed. 3. Press 1 COFFEE again to stop the runoff and save the desired amount of coffee for the size. The machine is now reprogrammed and ready for use. A. Coffee spout B. Service door Jenn-Air Built-in Coffee System... -
Page 18: Adjusting The Coffee Grinder
3. Fill the container with approximately ½ cup (100 mL) of milk for each cappuccino you want to make. Do not fill above the MAX line on the milk container. For best results, use cold skim or 2% milk. A. Handles Jenn-Air Built-in Coffee System... - Page 19 CAPPUCCINO to prepare more cappuccino. After making cappuccino, always clean the internal tubes of the milk container lid and the hot water and steam nozzle. A. Hot water and steam nozzle B. Hot water spout Jenn-Air Built-in Coffee System...
-
Page 20: Dispensing Hot Water
Use a damp sponge or cloth to clean the hot water and steam of water has been dispensed. nozzle after each use. NOTE: The coffee system is factory-set to automatically deliver approximately 1 cup (250 mL) of hot water. A. Hot water and steam nozzle 2-10 Jenn-Air Built-in Coffee System... -
Page 21: Coffee System Care
If they are, remove coffee deposits with a toothpick as shown. A. Coffee spout B. Service door 2. Remove the drip tray and clean it with a soft damp cloth. NOTE: When removing the drip tray, the coffee grounds container must be emptied. Jenn-Air Built-in Coffee System 2-11... - Page 22 B. Drip tray shown in the following illustration before reinserting it. 7. Replace the drip tray and coffee grounds container. 8. Close the service door. 2-12 Jenn-Air Built-in Coffee System...
-
Page 23: Vacation Or Storage
NOTE: If the coffee system will not be used for an extended period of time, press the main On/Off button on the side of the machine. Auto-Set will not work when the machine is turned off by the main On/Off button. Jenn-Air Built-in Coffee System 2-13... -
Page 24: Consumer Troubleshooting
Move the pointer slightly toward the word “Caffelatte.” See the “Making Cappuccino” section. The milk container lid is dirty. Clean the milk container lid as described in “To Clean Milk Frother” in the “Making Cappuccino” section. 2-14 Jenn-Air Built-in Coffee System... - Page 25 Insert the milk container correctly, pushing it in as CONTAINER! positioned. far as it will go. INSERT GROUNDS After cleaning, the grounds container has not been Open the service door and insert the grounds replaced. container. CONTAINER Jenn-Air Built-in Coffee System 2-15...
-
Page 26: Notes
OPERATION Notes 2-16 Jenn-Air Built-in Coffee System... -
Page 27: Section 3 - Installation
INSTALLATION Section 3: Installation This section provides installation requirements and procedures for the “Jenn-Air Built-in Coffee System.” n Installation Requirements n Tools and Parts n Location Requirements n Electrical Requirements n Installation Instructions n Install Mounting Brackets n Install Coffee System... -
Page 28: Installation Requirements
*From front of coffee system cavity to back of electrical box. Grounded electrical supply is required. See “Electrical **From front corner to rear corner of coffee system cavity. Requirements” section. †®TORX and T20 are registered trademarks of Saturn Fasteners, Inc. Jenn-Air Built-in Coffee System... -
Page 29: Electrical Requirements
(44.8 cm) A. Coffee system B. Non-flush receptacle C. Flush receptacle D. Back of cabinet E. Non-flush receptacle located in upper right or upper left corner F. Wall behind cabinet G. Coffee system with runners fully extended Jenn-Air Built-in Coffee System... -
Page 30: Installation Instructions
Two 2 mm bracket spacers and two 1 mm bracket spacers are included. See Step 3. 3. If bracket spacers are needed: Position the necessary spacer(s) behind the mounting brackets. Continue with Step 4. A. Metal trim piece A. Bracket spacers Jenn-Air Built-in Coffee System... -
Page 31: Install The Coffee System
9. Using one 4.5 x 16 mm screw, attach the power supply cord clip to the top of the cabinet. approx. 14" (35.6 cm) A. Power supply cord clip B. Power supply cord Jenn-Air Built-in Coffee System... -
Page 32: Complete Installation
11. Plug the coffee system into a grounded 3-prong outlet. 12. Push the coffee system back into the housing. 13. Proceed to “Complete Installation” section. Notes Jenn-Air Built-in Coffee System... -
Page 33: Section 4 - Component Access
COMPONENT ACCESS Section 4: Component Access This section provides service parts access, removal, and installation instructions for the “Jenn-Air Built-in Coffee System.” n Coffee System Exploded Views n Coffee System Parts List n Jenn-Air Built-in Coffee System Disassembly Section n Before Disassembling the Coffee System n Removing the Fan Panel n Removing the Back Panel &... -
Page 34: Coffee System Exploded Views
COMPONENT ACCESS Coffee System Exploded Views Reference Parts List on page 6 Jenn-Air Built-in Coffee System... - Page 35 COMPONENT ACCESS Reference Parts List on page 6 Jenn-Air Built-in Coffee System...
- Page 36 COMPONENT ACCESS Reference Parts List on page 6 Jenn-Air Built-in Coffee System...
- Page 37 COMPONENT ACCESS Reference Parts List on page 6 68 96 Jenn-Air Built-in Coffee System...
-
Page 38: Coffee System Parts List
O‐RING SUPPORT O‐RING SPRING COVER MICROSWITCH CLIP CLAMP SLIDER CONNECTION SENSOR NTC HOOK O‐RING TUBE PTFE D12‐DE4, L=170 2 BUSHES SPRING, MICROSWITCH VALVE SUPPORT SPRING SPRING O‐RING COVER ASSEMBLY FILTER CARAFE GENERATOR PIPETTE MICROSWITCH SCREW HALL SENSOR BUTTON ON/OFF BELT FRONT PIECE TRANSMISSION KIT TUBE DISTRIBUTING O‐RING D=3,85 O‐RING D=6 VALVE REGULATOR Jenn-Air Built-in Coffee System... -
Page 39: Jenn-Air Built-In Coffee System Disassembly Section
COMPONENT ACCESS Jenn-Air Built-in Coffee System — Disassembly Section — Jenn-Air Built-in Coffee System... -
Page 40: Before Disassembling The Coffee System
B. 2 Coffee E. Display H. Hot water K. Size centered from left to right. With a pencil, mark the hole Jenn-Air Built-in Coffee System C. Menu F. Down arrow key I. Cappuccino through the clip on the top of the cabinet. -
Page 41: Removing The Fan Panel
4. Disconnect the fan harness from connector “J1” on the LED/ Fan PCB (see Figure 5). Figure 1 2. Remove one (1) screw from the corner on the left side (see Figure 2). Figure 5 5. Remove fan panel from coffee system. Figure 2 Jenn-Air Built-in Coffee System... -
Page 42: Removing The Back Panel & Trays
(see Figure 4). Remove back panel. Figure 1 4. Remove two (2) screws from the back panel and one screw from underneath the tray (see Figure 2 in next column). Remove both trays from the coffee system. Figure 4 4-10 Jenn-Air Built-in Coffee System... -
Page 43: Removing The Main Board
2. Disconnect all harnesses. If necessary, label terminals and connectors for ease of reinstallation. 3. To remove main board, remove the five (5) screws securing PCB to chassis (see Figure 2). Figure 2 Figure 1 Jenn-Air Built-in Coffee System 4-11... -
Page 44: Removing The Flow Meter
3. Lift off the rubber cap to access the flow meter connector. Remove harness from flow meter (see Figure 3). 4. Remove the two (2) water tubes from the flow meter (see Figure 3). Figure 1 Rubber Cap Figure 3 4-12 Jenn-Air Built-in Coffee System... -
Page 45: Removing The Water Pump
1. Remove back panel (page 4-10) to access water pump assembly (see Figure 1). Figure 2 4. Using a wrench to keep the white shaft stationary, unscrew the valve-dumper assembly (see Figure 3). Figure 1 Figure 3 5. Remove water pump from coffee system. Jenn-Air Built-in Coffee System 4-13... -
Page 46: Removing The Steam Heater & 3-Way Valve
5. Disconnect the wiring from the Steam Heater and 3-Way solenoid valve. 6. Unscrew the two (2) screws securing the 3-Way solenoid valve to the bracket (see Figure 4). Figure 1 Figure 4 Figure 2 4-14 Jenn-Air Built-in Coffee System... -
Page 47: Steam Heater & 3-Way Valve Assembly
COMPONENT ACCESS Steam Heater & 3-Way Valve Assembly 3-Way Valve Steam Water Inlet Outlet Power Connection Connection Steam Heater Element Figure 5 Jenn-Air Built-in Coffee System 4-15... -
Page 48: Removing The Diverter/Transmission Assembly
Figure 1 3. Press in on the red clips on each side of the Infuser assembly and then pull the infuser out of the coffee Figure 4 system (see Figure 2). continued... Figure 2 4-16 Jenn-Air Built-in Coffee System... -
Page 49: Diverter/Transmission Assembly
7. Unscrew four (4) screws from the motor bracket (see Figure 6 in next column). Remove Diverter Motor from transmission assembly. Figure 6 Diverter/Transmission Assembly Diverter Guide Infuser Holder Infuser Diverter Motor Drive Pulley Figure 7 Jenn-Air Built-in Coffee System 4-17... -
Page 50: Removing The Coffee Heater
2. Remove two (2) screws at the rear of the coffee system as shown in Figure 1. Figure 3 4. Remove upper panel (see Figure 4). Figure 1 3. Remove two (2) screws, one on each side as shown in Figures 2 and 3. Figure 4 4-18 Jenn-Air Built-in Coffee System... - Page 51 1. Disconnect the Power harness, NTC harness, and water hoses from the coffee heater. Figure 2 3. Gently remove Heater Assembly from coffee system. Coffee Heater Assembly Connection Power Connection Water Inlet Hot Water Dispenser Microswitch Jenn-Air Built-in Coffee System 4-19...
-
Page 52: Removing The Display Board & 2-Way Valve
Disassembling the Coffee System” prior to performing the following steps. Figure 2 2. Next, perform the procedures to “Removing the Fan Panel” on page 4-9. 3. Then, perform the procedures to “Removing the Back Panel” on page 4-10. Figure 3 Figure 1 4-20 Jenn-Air Built-in Coffee System... - Page 53 Figure 6 8. From the front of the coffee system, remove the three (3) screws located above the service door, underneath the control/display panel. Refer to Figure 7 for screw locations. Figure 5 Figure 7 Jenn-Air Built-in Coffee System 4-21...
- Page 54 Then, lift up and remove front panel from coffee system. Refer to Figures 10, 11 & 12. Figure 8 10. Remove one (1) screw from inside the upper-left compartment (see Figure 9). Figure 10 Figure 11 Figure 9 Figure 12 - Front Panel 4-22 Jenn-Air Built-in Coffee System...
- Page 55 4. Disconnect the two (2) hoses from the solenoid valve. Figure 13 5. Unscrew the two (2) screws to remove the solenoid valve. Remove 2-Way Valve 1. Locate and remove the two (2) screws illustrated in Figure 1. Figure 3 Figure 1 Jenn-Air Built-in Coffee System 4-23...
-
Page 56: Removing The Grinder Assembly
2. Remove the finger guard. Then remove the coffee bean storage area from the grinder by removing the screws illustrated in Figure 2. Grinder Motor F4 F3 F2 F1 Figure 4 - Grinder Motor Connections on Main Board Figure 2 4-24 Jenn-Air Built-in Coffee System... - Page 57 4. Turn the white shaft counterclockwise till it stops; then, white ring a maximum of one or two steps (one or two pull up on shaft to remove it (see Figure 3). holes) either way as required. Jenn-Air Built-in Coffee System 4-25...
-
Page 58: Notes
8. Turn the shaft clockwise till it stops to insert the 9. Insert the locking ring in the right position (see Figure 7). upper gear. Then, enter the mill by turning back counterclockwise until it stops (see Figure 6). Figure 7 Figure 6 Notes 4-26 Jenn-Air Built-in Coffee System... -
Page 59: Section 5 - Diagnostics & Troubleshooting
DIAGNOSTICS & TROUBLESHOOTING Section 5: Diagnostics & Troubleshooting This section provides diagnostic, fault codes, and troubleshooting information for the “Jenn-Air Built-in Coffee System.” n Safety First n Control Panel n Load Test Mode n Display Test Mode n Customer Instruct / Technical Faults... - Page 60 Any attempt to repair a major appliance may result in personal injury and property damage. The manufacturer or seller cannot be responsible, nor assume any liability for injury or damage of any kind arising from the use of this data sheet. Jenn-Air Built-in Coffee System...
-
Page 61: Control Panel
“SELECT TEST” is shown. Close the door and NOTE: When the coffee system is reset, the language must be press OK. set again. NOTE: When the coffee system is reset, the language must be set again. Jenn-Air Built-in Coffee System... -
Page 62: Customer Instruct And Technical Faults
Check that the float is present in the tank; the float has to displayed even be free to move inside the water tank. though there Reed Sensor Check that the reed is correctly connected. Replace if is water in the needed. tank. Jenn-Air Built-in Coffee System... - Page 63 Diverter motor fault Unplug coffee system or disconnect power. Check connections, resistance across motor, and power to the motor. Replace the diverter motor if required. Main board Check connections and if necessary, replace Main board. Jenn-Air Built-in Coffee System...
-
Page 64: Wiring Diagram
Motor Handling Bracket Route 3 Route 2 External Terminal Block Knurled and/or W Motor Filter L L L L G/Y (GND) Pump Pump Motor Protector Machine Bracket Steam Heater Motor Cooling Fan Figure 2 PCB LED+Fan Jenn-Air Built-in Coffee System... -
Page 65: Ladder Diagram
M3 - Coffee Grounds Container Switch M4 - Service Door Switch LED + Fan M5 - Carafe Presence Switch M6 - Hot Water Dispenser Switch M7 - Water Tank Switch M8 - Standby Switch Figure 3 Jenn-Air Built-in Coffee System... - Page 66 +5 VDC F4 F3 F2 F1 CONNECTOR J8 (Hall Sensor) F4-AC In (L1) F1-Pump L1 J8-1 +5 VDC J8-2 Signal (Max 5 VDC) F3-Coffee Grounds F2-Grinder L1 Container Switch L1 J8-3 Figure 4 - Main Board Jenn-Air Built-in Coffee System...
- Page 67 (Coffee Heater) LED-FAN PCB CONNECTOR PIN-OUTS F1-AC In (L1) J6-Display F2-AC In (Neutral) CONNECTOR J1 (FAN) J1-1 +12 VDC J1-2 TERMINAL F1 AC In, L1 TERMINAL F2 AC In, Neutral J1-Fan LEDs Figure 5 - LED-Fan PCB Jenn-Air Built-in Coffee System...
-
Page 68: Plumbing Diagram
1200 W Cold Water Flow Hot Water Flow “T” Connector 3-Way Valve Infusion Unit Pump Flowmeter Water Filter 2-Way Valve Hot Water Dispenser Water Tank Drip Tray Steam Heater 1000 W Figure 6 - Plumbing Diagram 5-10 Jenn-Air Built-in Coffee System... -
Page 69: Measuring Coffee Temperature
5. The temperature should read: 172 °F ± 6.5 °F (78 °C ± 3 °C). 10 mm NOTE: The temperature should read: 172 °F ± 6.5 °F (78 °C ± 3 °C) Figure 7 - Coffee Temperature Jenn-Air Built-in Coffee System 5-11... -
Page 70: Component Testing Chart
Power In (LED LED Fan - F1 (L1) LED Fan - F2 (N) 120 VAC LED Fan PCB AC IN Fan PCB) NOTE: When each switch is activated, the control will beep (sound a tone). 5-12 Jenn-Air Built-in Coffee System... - Page 71 Standby switch is depressed. (Momentary) Switch, Power Switch-pin 1 Switch-pin 0 Continuity Switch Open = Infinity, Switch Closed = < 3 ohms. NOTE: When each switch is activated, the control will beep (sound a tone). Jenn-Air Built-in Coffee System 5-13...
- Page 72 ELEMENT SWITCH SWITCH NOTE: Check TCO if open circuit is detected. STEAM HEATER NTC Steam Heater NTC MAIN BOARD MAIN BOARD STEAM NTC J12-1 J12-2 NTC INPUT 112k * Approximate value measured at room temperature 5-14 Jenn-Air Built-in Coffee System...
- Page 73 CHASSIS GND control cover, and upper reinforcement. 3-WAY VALVE 3-Way Valve MAIN BOARD TERMINAL 3-WAY VALVE BLOCK J1-2 458k ON/OFF ON/OFF EV1 SWITCH SWITCH SWITCH NOTE: 2-way valve is grounded to heat exchanger support. CHASSIS GND Jenn-Air Built-in Coffee System 5-15...
- Page 74 TANK PRESENCE J7-1 FLOW SIGNAL FLOW J7-2 METER J7-3 +5 VDC MAIN BOARD MAIN BOARD COFFEE GRINDER GRINDER Grinder Motor GRINDER MAIN BOARD MAIN MOTOR TERMINAL BOARD BLOCK ON/OFF FUSE ON/OFF TRIAC SWITCH SWITCH 13.1 5-16 Jenn-Air Built-in Coffee System...
- Page 75 PRODUCT SPECIFICATIONS & WARRANTY INFORMATION SOURCES IN THE UNITED STATES: FOR PRODUCT SPECIFICATIONS AND WARRANTY INFORMATION CALL: 1-800-JENNAIR Website: (1-800-536-6247) www.jennair.com FOR TECHNICAL ASSISTANCE WHILE AT THE CUSTOMER’S HOME CALL: THE TECHNICAL ASSISTANCE LINE: 1-800-832-7174 HAVE YOUR STORE NUMBER READY TO IDENTIFY YOU AS AN AUTHORIZED IN-HOME SERVICE PROFESSIONAL FOR LITERATURE ORDERS (CUSTOMER EXPERIENCE CENTER): PHONE: 1-800-851-4605...
- Page 76 Jenn-Air Built-in Coffee System W10647095...
Need help?
Do you have a question about the JBC7624BS and is the answer not in the manual?
Questions and answers