Table of Contents
Advertisement
Quick Links
Advertisement
Table of Contents
Troubleshooting

Related Manuals for Jenn-Air W11356996


Summary of Contents for Jenn-Air W11356996
- Page 1 SERVICE MANUAL Built-in Coffee System W11356996...
- Page 2 FORWARD This JennAir Service Manual, "Built-in Coffee System" (Part No. W11356996), provides the In-Home Service Professional with service information of the “Built-in Coffee System." For specific operating and installation information on the model being serviced, refer to the “Use and Care Guide”...
-
Page 3: Table Of Contents
TABLE OF CONTENTS JennAir Built-in Coffee System SECTION 1: GENERAL INFORMATION ................. 1-1 COFFEE SYSTEM SAFETY ........................1-2 PRODUCT FEATURES ........................... 1-3 MODEL/SERIAL LABEL LOCATION ...................... 1-5 WIRING DIAGRAM LOCATION ......................1-5 MODEL & SERIAL NUMBER NOMENCLATURE ..................1-6 PRODUCT SPECIFICATIONS ......................... 1-7 SECTION 2: DIAGNOSTICS &... - Page 4 Notes JennAir Built-in Coffee System...
-
Page 5: Section 1: General Information
GENERAL INFORMATION Section 1: General Information This section provides general safety, parts, and information for the “JennAir Built-in Coffee System.” ■ Coffee System Safety ■ Product Features ■ Model/Serial label location ■ Tech Sheet Location ■ Model & Serial Number Nomenclature ■... -
Page 6: Coffee System Safety
GENERAL INFORMATION Coffee System Safety Your safety and the safety of others are very important. We have provided many important safety messages in this manual and on your appliance. Always read and obey all safety messages. This is the safety alert symbol. This symbol alerts you to potential hazards that can kill or hurt you and others. -
Page 7: Product Features
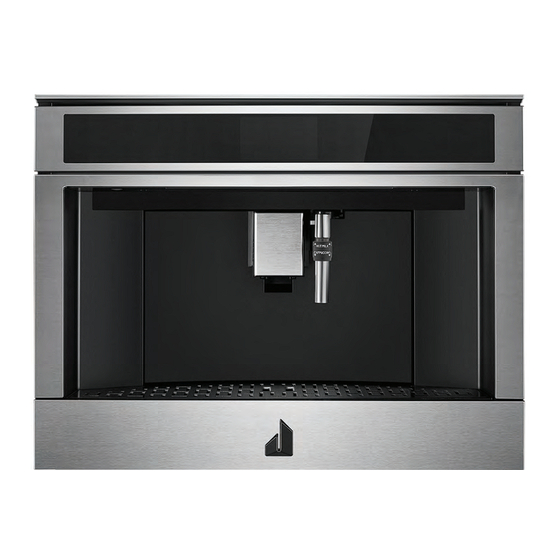
GENERAL INFORMATION Product Features This manual covers several models. The coffee system you have purchased may have some or all of the items listed. The locations and appearances of the features shown here may not match those of your model. Coffee System: L M N A. - Page 8 GENERAL INFORMATION Product Features (continued) Accessories: A. "Total Hardness Test" indicator paper D. Hot water/steam spout B. Ground coffee measure E. Connection nozzle cover C. Cleaning brush Milk and Accessories Container: A. Froth adjustment and CLEAN D. Milk container function dial E. Milk intake tube B. Lid release buttons F. Adjustable frothed milk spout C.
-
Page 9: Model/Serial Label Location
GENERAL INFORMATION Model/Serial Label Location A. Model/Serial label Wiring Diagram Location A. Wiring diagram (attached with tape) JennAir Built-in Coffee System... -
Page 10: Model & Serial Number Nomenclature
GENERAL INFORMATION Model & Serial Number Nomenclature MODEL NUMBER INTERNATIONAL SALES OR MARKETING CHANNEL Brand J = JennAir Categories J = Electric M = Microwave Configuration W = Wall Oven C = Microwave D = Warming E = Three Door / Double Cutout B = Coffee Maker Product Detail 60 = Steam Oven... -
Page 11: Product Specifications
GENERAL INFORMATION Product Specifications Dimensions Cutout Depth (IN, inches) Cutout Height (IN, inches) Cutout Width (IN, inches) Depth (IN, inches) Height (IN, inches) Width (IN, inches) Options Selection Options Cappuccino Option Coffee-Espresso Brewing Option Frothing System with Integrated Milk Container Hot Water Dispenser Controls Control Type... - Page 12 GENERAL INFORMATION Product Specifications (Continued) COFFEE SYSTEM SPECIFICATIONS Voltage: 120 VAC, 60 Hz Power: 1350 W Pressure: 218 psi (15 bar) Water Tank Capacity: 2.54 quarts (2.4 liters) Coffee Section Temperature Probe: 208°F (98°C) Coffee/Hot Water Thermal Fuse (TCO): 377°F (192°C) Heating Element: 600 + 600 W Pump:...
-
Page 13: Section 2: Diagnostics & Troubleshooting
DIAGNOSTICS & TROUBLESHOOTING Section 2: Diagnostics & Troubleshooting This section provides diagnostic, fault codes, and troubleshooting information for the “JennAir Built-in Coffee System.” ■ Control Panel ■ To Enter Service Mode ■ To Enter Load Test Mode ■ Measuring Coffee Temperature ■... -
Page 14: Control Panel
DIAGNOSTICS & TROUBLESHOOTING For Service Technician Use Only Control Panel 00:00 Strength User 2 Size Espresso Co ee Cappuccino Latte macchiato A. Menu to customize beverages settings G. Size selection B. Appliance settings menu H. Right scroll arrow C. Selected strength I. Selectable drinks (press on the scrolling arrows to see all the drinks) D. Clock J. Left scroll arrow E. Selected size K. Customizable profiles F. Strength selection... - Page 15 DIAGNOSTICS & TROUBLESHOOTING For Service Technician Use Only To Enter Load Test Mode: 4. Measure the flow temperature 5-10 mm away from the spout. Once LOAD TEST MODE is selected, it is possible to test the 5. The indicative temperature must be 187°F (± 3°F). following functional parts by pressing on the related display area.
-
Page 16: Customer Instruct And Technical Faults
DIAGNOSTICS & TROUBLESHOOTING For Service Technician Use Only Customer Instruct and Technical Faults DISPLAYED MESSAGE POSSIBLE CAUSE SOLUTION ADD PRE-GROUND COFFEE, The “Pre-ground coffee” function has been Place pre-ground coffee in the funnel and PRE-GROUND MAXIMUM ONE selected, but without placing any repeat delivery. - Page 17 DIAGNOSTICS & TROUBLESHOOTING For Service Technician Use Only Customer Instruct and Technical Faults (Continued) DISPLAYED MESSAGE POSSIBLE CAUSE SOLUTION INSERT WATER SPOUT The hot water spout is not inserted or is Insert the water spout as far as it will go. inserted incorrectly.
-
Page 18: Troubleshooting
DIAGNOSTICS & TROUBLESHOOTING For Service Technician Use Only Troubleshooting Try the solutions suggested here first in order to avoid the cost of an unnecessary service call. PROBLEMS POSSIBLE CAUSE SOLUTION The coffee is not hot The cups have not been preheated. Enable the cup warmer from the user SETTINGS menu. - Page 19 DIAGNOSTICS & TROUBLESHOOTING For Service Technician Use Only Troubleshooting (Continued) PROBLEMS POSSIBLE CAUSE SOLUTION The appliance requires a third rinse cycle The water tank was not filled to the MAX Empty the drip tray. at the end of descaling level. Follow the instructions displayed by the appliance and perform a third rinse cycle.
- Page 20 DIAGNOSTICS & TROUBLESHOOTING For Service Technician Use Only Notes JennAir Built-in Coffee System...
-
Page 21: Section 3: Component Testing
COMPONENT TESTING Section 3: Component Testing This section provides the wiring diagram and component location for the “JennAir Built-in Coffee System.” ■ Safety ■ Wiring Diagram ■ Ladder Diagram ■ Main Board ■ LED-fan PCB ■ Water Flow Diagram • Coffee/Hot Water Circuit •... -
Page 22: Safety
COMPONENT TESTING For Service Technician Use Only Safety WARNING DANGER Electrical Shock Hazard Electrical Shock Hazard Disconnect power before servicing. Only authorized technicians should perform diagnostic voltage measurements. Replace all parts and panels before operating. After performing voltage measurements, Failure to do so can result in death or disconnect power before servicing. -
Page 23: Wiring Diagram
COMPONENT TESTING For Service Technician Use Only Wiring Diagram SHUTTLE (OPTIONAL) HALL SENSOR FLOWMETER (ENCODER) WHITE CABLE 3 STEAMER REED SENSOR WHITE CABLE 1 SUPPORT BRACKET M7 TANK NTC H.E. TEMPERATURE WHITE CABLE 2 GENERATOR COFFEE SUPPORT BRACKET BROWN CABLE 3/3 NTC H.E. -
Page 24: Ladder Diagram
COMPONENT TESTING For Service Technician Use Only Ladder Diagram SHUTTLE (OPTIONAL) HALL SENSOR FLOWMETER (ENCODER) WATER LEVEL SENSOR (REED) NTC H.E. TEMPERATURE COFFEE NTC H.E. PCB DISPLAY BRIDGE TEMPERATURE STEAMER HALL H.E. COFFEE (HIGH 2) H.E. WATER STEAMER GRINDER PUMP FILTER GROUP INFUSION... -
Page 25: Main Board
COMPONENT TESTING For Service Technician Use Only Main Board CONNECTOR PIN-OUTS J8-Hall Sensor J12-NTC, Steam Heater J7-Flow Meter CONNECTOR J1 (Valves, M4 Switch, Pump, Motor) J2-Water Level/ J1-1 120 VAC, EV2 (2-Way Valve) Tank Presence J1-2 120 VAC, EV1 (3-Way Valve) J1-3 GND, Diverter Motor J1-4... -
Page 26: Led-Fan Pcb
COMPONENT TESTING For Service Technician Use Only Main Board CONNECTOR PIN-OUTS TERMINAL PINS TERMINAL F1 CONNECTOR J12 (Grinder Motor, L1) (NTC, Steam Heater) J12-1 TERMINAL F2 J12-2 NTC Input (Switch M3, Drawer Microswitch) TERMINAL F3 CONNECTOR J13 (AC In, L1) (Display PCB) J13-1 +5 VDC... -
Page 27: Water Flow Diagram
COMPONENT TESTING For Service Technician Use Only Water Flow Diagram Coffee/Hot Water Circuit Legend Cold Water Flow Hot Water Flow A. Coffee heater G. Drip tray B. EV1, 3-Way valve H. Water tank C. Steam heater I. Flowmeter D. EV2, 2-Way valve J. - Page 28 COMPONENT TESTING For Service Technician Use Only Water Flow Diagram (Continued) Steam Water Circuit Legend Cold Water Flow Hot Water Flow A. Coffee heater G. Drip tray B. EV1, 3-Way valve H. Water tank C. Steam heater I. Flowmeter D. EV2, 2-Way valve J.
-
Page 29: Component Testing Chart
COMPONENT TESTING For Service Technician Use Only Component Testing Chart Unplug coffee system or disconnect power before performing the following checks: ■ A potential cause of a control not functioning is corrosion Do not continue with the diagnosis of the appliance if a fuse is on connections. - Page 30 COMPONENT TESTING For Service Technician Use Only Component Testing Chart (Continued) COMPONENT FROM VOLTAGE RESISTANCE NOTES Power In (Main Main Board - F3 Main Board - F5 120 VAC Main Board AC in Board) (L1) Power In (LED LED Fan - F1 (L1) LED Fan - F2 (N) 120 VAC LED Fan PCB AC in...
-
Page 31: Strip Circuits
COMPONENT TESTING For Service Technician Use Only Strip Circuits Coffee Heater System Coffee Heater * NOTE: Both heaters measured in parallel. (To measure, upplug terminal F9 from Main Board. 11.5 Ω ∗ MAIN BOARD TERMINAL BLOCK ON/OFF HEATER ON/OFF TRIAC SWITCH ELEMENTS SWITCH... - Page 32 COMPONENT TESTING For Service Technician Use Only Strip Circuits Diverter Assembly Group Infusion Motor Relay 2 J1-3 140 VDC * GROUP INFUSER GND * MOTOR Relay 1 J1-5 * DC Voltage polarity reverses FILTER to drive motor up & down. MAIN BOARD Group Infusion Motor Microswitches SWITCH, M1...
- Page 33 COMPONENT TESTING For Service Technician Use Only Strip Circuits 3-Way Valve MAIN BOARD TERMINAL 3-WAY VALVE BLOCK J1-2 458k ON/OFF ON/OFF EV1 SWITCH SWITCH SWITCH NOTE: 3-way v alve is grounded to the generator support bracket CHASSIS GND or controls cover. Plumbing Circuit Pump * PUMP POLARITY: Positive side is...
- Page 34 COMPONENT TESTING For Service Technician Use Only Notes 3-14 JennAir Built-in Coffee System...
-
Page 35: Section 4: Component Access
COMPONENT ACCESS Section 4: Component Access This section provides service parts access, removal, and installation instructions for the “JennAir Built-in Coffee System.” n Coffee System Exploded Views n Coffee System Parts List n Before Disassembling the Coffee System n Removing the Top Panel and Fan Panel n Removing the Back Panel and Side Panel n Removing the Main Power Board n Removing the Grinder Assembly... -
Page 36: Coffee System Exploded Views
COMPONENT ACCESS Coffee System Exploded Views JennAir Built-in Coffee System... - Page 37 COMPONENT ACCESS Coffee System Exploded Views JennAir Built-in Coffee System...
- Page 38 COMPONENT ACCESS Coffee System Exploded Views JennAir Built-in Coffee System...
- Page 39 COMPONENT ACCESS Coffee System Exploded Views JennAir Built-in Coffee System...
-
Page 40: Coffee System Part List
COMPONENT ACCESS Coffee System Part List CALLOUT PART DESCRIPTION CALLOUT PART DESCRIPTION FAN, BLOWER BELT, TRANSMISSION SWITCH HOUSING, INFUSION SLIDE POWER CORD SUPPORT, REED BOARD, CONTROL TERMINAL BOARD MICROSWITCH MICROSWITCH GRID SPRING RAIL, MOUNTING SPRING BOARDS, LED CAM, TANK COVER INFUSOR ASSEMBLY BOARD, LED FRAME... - Page 41 COMPONENT ACCESS Coffee System Part List (Continued) CALLOUT PART DESCRIPTION CALLOUT PART DESCRIPTION MICROSWITCH BRACKET, TCO TUBING BRACKET SOLENOID VALVE TUBING FORM, TUBING TUBING THERMOSTAT TUBING SENSOR, TEMPERATURE TUBE GUIDE, FLOW METER REGULATOR, PUMP O-RING CLAMP, SPRING PROTECTOR, PUMP VALVE, PUMP SUPPORT, PUMP PUMP SUPPORT...
-
Page 42: Before Disassembling The Coffee System
COMPONENT ACCESS Before Disassembling the Coffee System 6. If installed, remove hot water spout or milk container. WARNING 7. Remove water tank (B). 8. Open service door (D) and remove drip tray (C) with coffee grounds container (A). Electrical Shock Hazard Disconnect power before servicing. -
Page 43: Removing The Top Panel And Fan Panel
COMPONENT ACCESS Removing the Top Panel and Fan Panel 4. Remove the two screws securing the fan assembly to the WARNING front panel. Pull out fan assembly and see the step 5. Electrical Shock Hazard Disconnect power before servicing. Replace all parts and panels before operating. Failure to do so can result in death or electrical shock. -
Page 44: Removing The Back Panel And Side Panel
COMPONENT ACCESS Removing the Back Panel and Side Panel 4. Remove the four screws on each side of coffee system which WARNING are securing the left and right side panels. Electrical Shock Hazard Disconnect power before servicing. Replace all parts and panels before operating. Failure to do so can result in death or electrical shock. -
Page 45: Removing The Main Power Board
COMPONENT ACCESS Removing the Main Power Board 3. To remove main board, remove the five screws securing PCB WARNING to chassis. Electrical Shock Hazard Disconnect power before servicing. Replace all parts and panels before operating. Failure to do so can result in death or electrical shock. -
Page 46: Removing The Grinder Assembly
COMPONENT ACCESS Removing the Grinder Assembly 4. Disconnect the motor terminals from the control board WARNING terminals “F1” and “F7.” Main Board Electrical Shock Hazard Disconnect power before servicing. Replace all parts and panels before operating. Failure to do so can result in death or electrical shock. -
Page 47: Grinder Setup
COMPONENT ACCESS Grinder Setup 3. Verify the position of the white gasket with below figure. WARNING Electrical Shock Hazard Disconnect power before servicing. Replace all parts and panels before operating. Failure to do so can result in death or electrical shock. 4. - Page 48 COMPONENT ACCESS Grinder Setup (Continued) 6. Insert the white shaft, making sure its larger notch is aligned 8. Insert the locking ring in the right position. with the one on the grinder. 7. Turn the shaft clockwise till it stops to insert the upper gear. Then, enter the mill by turning back counterclockwise until it stops.
-
Page 49: Removing The Flow Meter
COMPONENT ACCESS Removing the Flow Meter 3. Remove the two water tubes from the flow meter. WARNING Electrical Shock Hazard Disconnect power before servicing. Replace all parts and panels before operating. Failure to do so can result in death or electrical shock. -
Page 50: Removing The Water Pump
COMPONENT ACCESS Removing the Water Pump 4. Disconnect the two hoses (fixed by clips) from the upper WARNING dumper of the pump. Electrical Shock Hazard Disconnect power before servicing. Replace all parts and panels before operating. Failure to do so can result in death or electrical shock. -
Page 51: Removing The Steam Heater And 3-Way Valve
COMPONENT ACCESS Removing the Steam Heater and 3-Way Valve 4. Remove the two screws which are securing the steamer WARNING bracket. Electrical Shock Hazard Disconnect power before servicing. Replace all parts and panels before operating. Failure to do so can result in death or electrical shock. - Page 52 COMPONENT ACCESS Removing the Steam Heater and 3-Way Valve (Continued) Steam Heater and 3-Way Valve Assembly A. Steam Heater Element B. Power Connection C. Steam Outlet D. Water Inlet E. 3-Way Valve F. NTC Connection 4-18 JennAir Built-in Coffee System...
-
Page 53: Removing The Transmission Assembly
COMPONENT ACCESS Removing the Transmission Assembly 4. Remove the two screws securing the infuser sled. Remove WARNING the screw holding the transmission kit fulcrum. Electrical Shock Hazard Disconnect power before servicing. Replace all parts and panels before operating. Failure to do so can result in death or electrical shock. - Page 54 COMPONENT ACCESS Removing the Transmission Assembly (Continued) 7. Remove the drive belt from the transmission & motor Infuser Assembly pulleys. NOTE: The infuser can be easily removed from the sled and can cleaned under running water. 8. Unscrew four screws from the motor bracket. Remove Diverter Motor from transmission assembly.
-
Page 55: Removing The Coffee Heater And Mechanical Valve
COMPONENT ACCESS Removing the Coffee Heater and Mechanical Valve 4. Remove four bolts (one at each corner). Take care as nuts are WARNING on the underside of the assembly and may fall inside the unit. Electrical Shock Hazard Disconnect power before servicing. Replace all parts and panels before operating. -
Page 56: Removing The Led And Fan Board
COMPONENT ACCESS Removing the LED and Fan Board 4. Disconnect the harnesses from the LED and Fan board. WARNING 5. Remove the two screws from the PCB in order to disconnect the board from coffee system. Electrical Shock Hazard Disconnect power before servicing. Replace all parts and panels before operating. -
Page 57: Removing The Front Panel And Front Door
COMPONENT ACCESS Removing the Front Panel and Front Door Front Door Removal WARNING 6. With the help of a clamp, remove the metallic rod which is holding the front door. Electrical Shock Hazard Disconnect power before servicing. Replace all parts and panels before operating. Failure to do so can result in death or electrical shock. -
Page 58: Removing The 2-Way Solenoid Valves
COMPONENT ACCESS Removing the 2-Way Solenoid Valves 2-Way Solenoid Valves (Steam) WARNING 1. Complete the steps from “Removing the Top Panel and Fan Panel”. 2. Complete the steps from “Removing the Back Panel and Side Panel”, prior to performing the following steps. 3. -
Page 59: Removing Ifd (Instant Froth Dispenser)
COMPONENT ACCESS Removing IFD (Instant Froth Dispenser) 2. Unlock the IFD plastic cover from its clips and remove it from WARNING the chassis of the appliance. Electrical Shock Hazard Disconnect power before servicing. Replace all parts and panels before operating. Failure to do so can result in death or electrical shock. - Page 60 COMPONENT ACCESS Removing IFD (Instant Froth Dispenser) 4. Pull the spout from the IFD assembly. NOTE: Remove the upper 2-way solenoid valve before performing this operation. 5. Remove the two screws which are securing the IFD assembly. Remove the IFD assembly. NOTE: The screw is also holding the micro-switch for the milk jug and steam spout detection.
- Page 61 PRODUCT SPECIFICATIONS &WARRANTY INFORMATION SOURCES IN THE UNITED STATES: FOR PRODUCT SPECIFICATIONS AND WARRANTY INFORMATION CALL: 1-800-JENNAIR Website: (1-800-536-6247) www.jennair.com FOR TECHNICAL ASSISTANCE WHILE AT THE CUSTOMER’S HOME CALL: THE TECHNICAL ASSISTANCE LINE: 1-800-832-7174 HAVE YOUR STORE NUMBER READY TO IDENTIFY YOU AS AN AUTHORIZED IN-HOME SERVICE PROFESSIONAL FOR LITERATURE ORDERS (CUSTOMER EXPERIENCE CENTER): PHONE: 1-800-851-4605...
- Page 62 JennAir Built-in Coffee System W11356996...
Need help?
Do you have a question about the W11356996 and is the answer not in the manual?
Questions and answers