Sportplus SP-MR-008 Operating Instructions Manual
Hide thumbs
Also See for SP-MR-008:
- Operating instructions manual (110 pages) ,
- Operating instructions manual (116 pages)

Related Manuals for Sportplus SP-MR-008


Summary of Contents for Sportplus SP-MR-008
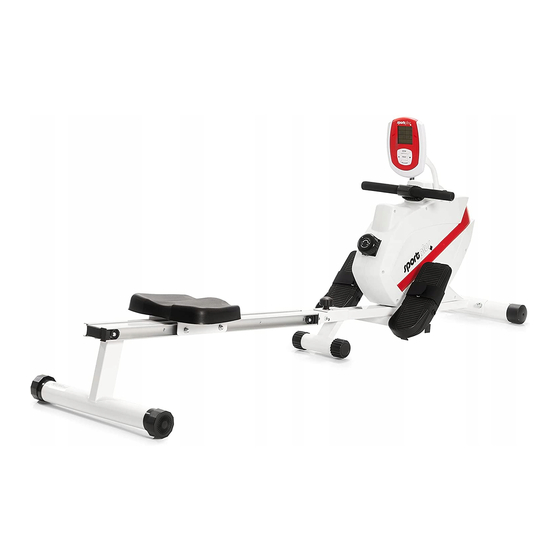
- Page 1 OPERATING INSTRUCTIONS ROWING MACHINE SP-MR-008 SP-MR-008-GB-V08.indb 1 2/15/17 10:54 AM...
-
Page 2: Table Of Contents
Dear Customer, Congratulations for choosing a SportPlus product. We have every expectation that you will be fully satisfied with your new purchase. To guarantee optimal function of this product, please adhere to the following instructions: • Before using this product for the first time, please read the manual carefully! •... -
Page 3: Safety Instructions
- improper repairs can lead to serious risks for the user. Use the product exclusively for the intended purpose as described in this user manual. • Shield the product from spraying water, moisture, high temperatures and direct sunlight. SP-MR-008-GB-V08.indb 3 2/15/17 10:54 AM... - Page 4 • If necessary, lay out protective padding (not included) beneath the product to protect your floor as there is no guarantee that, for instance, the rubber feet will not leave marks behind. SP-MR-008-GB-V08.indb 4 2/15/17 10:54 AM...
-
Page 5: Exploded Diagram
3. EXPLODED DIAGRAM SP-MR-008-GB-V08.indb 5 2/15/17 10:54 AM... -
Page 6: Components List
End cap for roller rail 30*60 End cap for lower roller rail End cap for right roller rail End cap for middle foot Screw M8*80 Safety pin Screw knob V-belt Pull cable with reel Reel mount SP-MR-008-GB-V08.indb 6 2/15/17 10:54 AM... - Page 7 Rowing handle rest Screw M10*75 Washer Ф10*Ф22 Nut M10 Washer Screw M5*10 Left side lid Right side lid Screw ST5*15 Screw ST5*15 Screw M8*16 Bearing 6000z Sensor cable 1 Screw ST4*15 Foam Axle Screw Sensor cable 2 SP-MR-008-GB-V08.indb 7 2/15/17 10:54 AM...
-
Page 8: Rear Foot
4. COMPONENTS LIST This page lists all the components that require assembly in the following steps. Description Main frame Front foot Rear foot Aluminum roller rail Pedal support tube Left pedal Right pedal Seat Computer SP-MR-008-GB-V08.indb 8 2/15/17 10:54 AM... - Page 9 4. COMPONENTS LIST This page depicts all the small parts (screws, washers, nuts and tools) that you will require for assembly. All these parts are included in the packaging, shrink-wrapped on a blister card. SP-MR-008-GB-V08.indb 9 2/15/17 10:54 AM...
-
Page 10: Assembly Instructions
Pick up the front foot (2) with the built-in transport rollers and fasten it to the main frame (1) using two screws (55), two washers (56) and two nuts (57). Fasten the tread surface mount (12) to the main frame (1) using two screws (16), two washers (14) and two nuts (15). SP-MR-008-GB-V08.indb 10 2/15/17 10:54 AM... -
Page 11: Spacer
(22) onto the roller rail (6). Mount the spacer (10) to the roller rail (6) using two hex screws (9). Also fit the end caps (28/29) to the end of the roller rail (6). SP-MR-008-GB-V08.indb 11 2/15/17 10:54 AM... -
Page 12: Pedal Mount
Slide the pedal axle (18) through the left pedal (17L) and fasten it to the pedal mount (12) using two screws (20) and two washers (19). Slide the pedal axle (18) through the right pedal (17R) and fasten it to the pedal mount (12) using two screws (20) and two washers (19). SP-MR-008-GB-V08.indb 12 2/15/17 10:54 AM... - Page 13 Mount the computer (37) to the computer mount (47) using the two pre-assembled screws (59). Note: Make sure that no cables on the back of the computer are crushed. Before beginning training, verify that all screws and nuts are fastened tightly. SP-MR-008-GB-V08.indb 13 2/15/17 10:54 AM...
-
Page 14: Using The Computer
, button to change the training objective of the function selected using the Mode button. RESET: Press the Reset button to reset all values to 0. RECOVERY: Press the RECOVERY button to calculate your heart rate recovery. SP-MR-008-GB-V08.indb 14 2/15/17 10:54 AM... -
Page 15: Computer
The computer activates automatically when you begin training or press a button. The computer turns off automatically after 4 minutes if no signal is received. If the computer displays no or only a partial image, replace the batteries. The computer operates on 2 AA batteries. SP-MR-008-GB-V08.indb 15 2/15/17 10:54 AM... -
Page 16: Training Tips
Check all components regularly for wear and damage to guarantee the safety of the product. Replace worn parts immediately. • Do not use any aggressive cleaning agents to clean the unit. Use a soft, slightly damp cloth to remove and filth and dust. SP-MR-008-GB-V08.indb 16 2/15/17 10:54 AM... -
Page 17: Notes On Disposal
Use an uncoded 5 kH/ chest strap strap Inaccurate or Insufficient range Replace the chest strap battery interrupted Insufficient body contact Following the manufacturer's instructions, display with strap moisten the chest strap's contact surfaces or use a contact gel. SP-MR-008-GB-V08.indb 17 2/15/17 10:54 AM... -
Page 18: Complaints & Warranty
The costs and risk of loss for unsolicited shipments will be borne by the sender. We reserve the right to refuse to accept unsolicited shipments or to return the corresponding merchandise to the sender carriage forward, that is, at the sender's expense. SP-MR-008-GB-V08.indb 18 2/15/17 10:54 AM... -
Page 19: Warranty Terms
12. WARRANTY TERMS SportPlus guarantees that the product this warranty applies to was manufactured using high- quality materials and has been inspected with the utmost attention. The operation and assembly of the product according to the user manual is a precondition of this warranty. - Page 20 Servicehotline: +44 - 203 318 4415 (Call charges depend on your phone company / your phone contract.) E-Mail: service@sportplus.org URL: http://www.sportplus.org Latupo GmbH Waterloohain 9 22769 Hamburg Germany SP-MR-008-GB-V08.indb 20 2/15/17 10:54 AM...
Need help?
Do you have a question about the SP-MR-008 and is the answer not in the manual?
Questions and answers