
Related Manuals for Sportplus SP-HG-010


Summary of Contents for Sportplus SP-HG-010
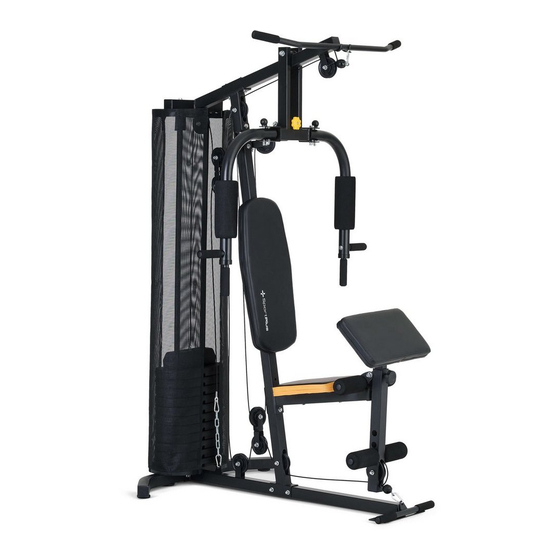
- Page 1 BEDIENUNGSANLEITUNG HOME-GYM USER MANUAL HOME-GYM MODE D'EMPLOI GYM À DOMICILE SP-HG-010 SP-HG-010-IM-DE+GB+FR-02.indb 1 10/6/2016 3:11 PM...
-
Page 2: Table Of Contents
Sehr geehrte Kundin 1. TECHNISCHE DATEN Sehr geehrter Kunde, Produktinformationen Wir gratulieren Ihnen zu Ihrem neuen SportPlus Produkt und sind überzeugt, dass Sie mit diesem Produkt zufrieden sein werden. Abmessungen (L x B x H): 170 x 120 x 195 cm... -
Page 3: Teileliste
Lieferumfang enthalten) unter das Produkt, da nicht ausgeschlossen werden kann, Sitzpolster dass z.B. Gummifüße Spuren hinterlassen. Seilrolle Muffe (14 x 11 x 13 mm) Griffschraube für Arretierstift Bizeps-Polster Gepolsterter Knöchelriemen Gewichtsaufnahmestift Gewichtsaufnahmemuffe PVC-Schoner Zylindrische Gummimuffe Unterlegscheibe der oberen Gewichtsplatte SP-HG-010-IM-DE+GB+FR-02.indb 4-5 10/6/2016 3:11 PM... -
Page 4: Montagesatz
WICHTIGER HINWEIS: Die Aushöhlungen in den Gewichtsplatten für den Schraube (M10 x 85 mm) Haltestift (41) müssen nach unten zeigen. Anderenfalls lässt sich der Haltestift nicht hineinstecken. Schraube (M12 x 75 mm) Schraube (M10 x 65 mm) SP-HG-010-IM-DE+GB+FR-02.indb 6-7 10/6/2016 3:11 PM... -
Page 5: Schutzblech
Befestigen Sie das Rückenpolster (28) am vertikalen Standrohr (2) und das angeschweißten Griffe. Befeuchten Sie die Innenseiten der Polster mit etwas Sitzpolster (29) am Sitzrohr (20). Verwenden Sie dafür die Schrauben (1a) und Seifenwasser, damit sich die Polster leichter anbringen lassen. Unterlegscheiben (2d). SP-HG-010-IM-DE+GB+FR-02.indb 8-9 10/6/2016 3:11 PM... -
Page 6: Sp-Hg-010-Im-De+Gb+Fr-02.Indb
Seilrolle am Lastarmträger (1). • Nach der Installation der Seilzüge können Sie unter Verwendung des Haltestifts (41) das gewünschte Gewicht für Ihre Trainingseinheiten auswählen. 3d 2d 31 2d 3d 2d 2d 1e 2d 1j 51 50 SP-HG-010-IM-DE+GB+FR-02.indb 10-11 10/6/2016 3:11 PM... -
Page 7: Trainings- Und Bedienungsanleitung
Sollten Sie Schmerzen verspüren, lösen Sie sofort die Dehnung, und führen Sie diese in Wenn Sie mehr erfahren möchten oder den Eindruck haben, dass Ihnen dieses Training Zukunft weniger extensiv aus. ungenügend schnelle Erfolge ermöglicht, kontaktieren Sie bitte einen professionellen Trainer. SP-HG-010-IM-DE+GB+FR-02.indb 12-13 10/6/2016 3:11 PM... -
Page 8: Wartung, Reinigung Und Pflege
Alle ein bis zwei Jahre müssen die Achsen der beweglichen Teile gefettet werden. Benutzen Sie dazu ein handelsübliches Schmierfett. SportPlus versichert, dass das Produkt, auf das sich die Gewährleistung bezieht, aus qualitativ hochwertigen Materialien hergestellt und mit äußerster Sorgfalt überprüft 8. - Page 9 Dear Customer, 1. TECHNICAL DATA Congratulations for choosing a SportPlus product. We have every expectation Product information that you will be fully satisfied with your new purchase. Dimensions (L x W x H): 170 x 120 x 195 cm To guarantee optimal function of this product, please adhere to the following...
-
Page 10: Components List
Back cushion Seat cushion Pulley Sleeve (14 x 11 x 13 mm) Knurled screw for locking pin Biceps padding Padded ankle strap Quick pin Weight-mounting sleeve PVC pad Cylindrical rubber sleeve Upper weight plate washer SP-HG-010-IM-DE+GB+FR-02.indb 18-19 10/6/2016 3:11 PM... -
Page 11: Assembly Kit
Bolt (M8 x 50 mm) • Guide the select rod (15) through the holes in the center of the weight plates (16). Bolt (M8 x 85 mm) Bolt (M12 x 75 mm) Bolt (M8 x 65 mm) SP-HG-010-IM-DE+GB+FR-02.indb 20-21 10/6/2016 3:11 PM... - Page 12 Moisten the insides of the paddings with some soapy water in order to facilitate installation of the paddings. • Attach the handles (12) to the inside or outside of both braces (8 & 9). To do so, use the bolts (1b), washers (2b) and nuts (3b). SP-HG-010-IM-DE+GB+FR-02.indb 22-23 10/6/2016 3:11 PM...
- Page 13 (1). • After having installed the cable pulls, you may select the desired weight for your exercise using the locking pin (41). 3d 2d 31 2d 3d 2d 2d 1e 2d 1j 51 50 SP-HG-010-IM-DE+GB+FR-02.indb 24-25 10/6/2016 3:11 PM...
-
Page 14: Training And Operating Instructions
Note: The following notes are general basic recommendations for your workout. Should you want to learn more or have the impression that this form of training does not deliver the results you seek quickly enough, please contact a professional personal trainer. SP-HG-010-IM-DE+GB+FR-02.indb 26-27 10/6/2016 3:11 PM... -
Page 15: Maintenance, Cleaning And Care
10. WARRANTY 8. NOTES ON DISPOSAL SportPlus guarantees that the product this warranty applies to was manufactured using Packaging materials are raw materials and can be recycled. high-quality materials and has been inspected with the utmost attention. - Page 16 1. DONNÉES TECHNIQUES Cher client, Informations sur le produit Nous vous félicitons pour l’achat de votre nouveau produit SportPlus et sommes Dimensions (Lo x La x H) : 170 x 120 x 195 cm convaincus que vous en serez satisfait.
- Page 17 Vis moletée pour goupille de verrouillage Rembourrage pour biceps Bride rembourrée Goupille pour les trous des poids Manchon de passage des poids Protection en PVC Manchon en caoutchouc cylindrique Rondelle plate de la plaque supérieure des poids SP-HG-010-IM-DE+GB+FR-02.indb 32-33 10/6/2016 3:11 PM...
- Page 18 Vis (M10 x 85 mm) pour la goupille (41) doivent être orientés vers le bas. Dans un autre sens, il n'est pas possible d'insérer la goupille de blocage. Vis (M12 x 75 mm) Vis (M10 x 65 mm) SP-HG-010-IM-DE+GB+FR-02.indb 34-35 10/6/2016 3:11 PM...
- Page 19 (29) sur le tube du siège (20). Utilisez pour cet assemblage les vis (1a) et Humidifiez les intérieurs des rouleaux avec de l'eau savonneuse, afin que les les rondelles plates (2d). rembourrages puissent plus facilement être positionnés. SP-HG-010-IM-DE+GB+FR-02.indb 36-37 10/6/2016 3:11 PM...
- Page 20 (1). 3d 2d • Après l'installation des câbles de commande, vous pouvez choisir en utilisant la 31 2d goupille (41) le poids souhaité pour votre séance d'entraînement. 3d 2d 2d 1e 2d 1j 51 50 SP-HG-010-IM-DE+GB+FR-02.indb 38-39 10/6/2016 3:11 PM...
- Page 21 Si vous souhaitez avoir plus de connaissances ou que vous avez l'impression que cet entraînement ne vous permet pas d'obtenir des succès rapides, veuillez prendre contact avec un entraîneur professionnel. SP-HG-010-IM-DE+GB+FR-02.indb 40-41 10/6/2016 3:11 PM...
- Page 22 N'utilisez pas de produits solvants pour le nettoyage. SportPlus assure, que le produit, qui se réfère à la garantie, a été fabriqué avec des • C'est particulièrement important pour les poignées car ces pièces sont en contact matériaux d’excellente qualité...
- Page 23 Bei technischen Fragen, Informationen zu unseren Produkten und für Ersatzteilbestellungen steht Ihnen unser Service-Team wie folgt zur Verfügung: Servicezeit: Montag bis Freitag von 9.00 bis 18.00 Uhr Servicehotline: 040-780896-35 (Nationales Festnetz, Gebühren providerabhängig) E-Mail: service@sportplus.org URL: http://www.sportplus.de Latupo GmbH Waterloohain 9 22769 Hamburg Germany SP-HG-010-IM-DE+GB+FR-02.indb 44 10/6/2016 3:11 PM...
Need help?
Do you have a question about the SP-HG-010 and is the answer not in the manual?
Questions and answers