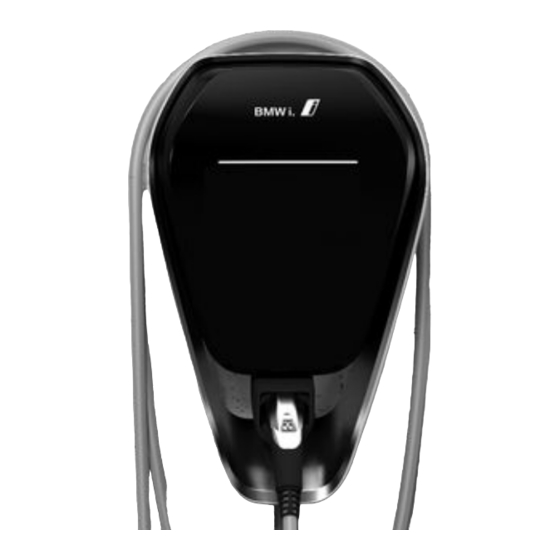
BMW i Wallbox Installation Manual
Charging cable
Hide thumbs
Also See for i Wallbox:
- Installation instructions manual (48 pages) ,
- Instructions for use manual (24 pages) ,
- Usb update instructions (15 pages)
Table of Contents
Advertisement
Advertisement
Table of Contents

Related Manuals for BMW i Wallbox


Summary of Contents for BMW i Wallbox
- Page 1 BMW i Freude am Fahren BMW i Wallbox Charging cable installation manual...
- Page 3 BMW i Wallbox Charging cable installation manual...
-
Page 5: Table Of Contents
BMW i Wallbox Charging cable installation manual Contents INFORMATION Safety instructions About this manual Assignment of the manual to the spare parts Package Warranty conditions and legal information PREPARATIONS Installation requirements List of tools Switch off the voltage supply Remove the connector holder... - Page 6 Install the connector holder ADDITIONAL INFORMATION DISPOSAL INDEX...
-
Page 7: Legal Information
Munich, Germany www.bmw.com Translation of the original installation instructions Copyright ©2016 BMW AG Munich This documentation contains information protected by copyright. All rights reserved, especially the right of reproduction and distribution. No part of this documentation may be reproduced (photocopying, scanning or any other procedures) or processed, copied or distributed in any form using electronic systems without the written consent of Bayerische Motorenwerke Aktiengesellschaft. - Page 8 Means that property damage may occur if the appropriate precautions are not taken. This warning points out the possible consequences of touching electrostatically sensitive components. Note Indicates procedures which do not involve any danger of injury. Note Your BMW dealer will be delighted to help find a qualified installation contractor.
-
Page 9: Safety Instructions
INFORMATION Safety instructions Read the safety instructions carefully and study the device to familiarise yourself with it before you attempt to install, operate or service it. WARNING Electrical danger. The Wallbox must be installed, commissioned, maintained and retrofitted by suitably trained, qualified and authorised electricians who bear full responsibility for compliance with current standards and installation regulations. -
Page 10: About This Manual
The illustrations and explanations contained in this manual refer to a typical version of the device. Your device version may differ from this. Assignment of the manual to the spare parts This installation manual applies to the following BMW i Wallbox spare parts: BMW part number Connector type... -
Page 11: Warranty Conditions And Legal Information
If the installation work is carried out correctly as described in this manual, by suitably qualified personnel and using BMW i Wallbox original spare parts, it may be assumed that the warranty and the specific certifications will remain in force. -
Page 12: Preparations
PREPARATIONS Installation requirements Comply with local installation guidelines. The product must be repaired in a suitable environment. The Wallbox must be protected from rain, snow and dirt during the procedure. If it is installed outdoors, the termination panel cover and the front part must not be opened in rain, wind, snow, etc. -
Page 13: Remove The Connector Holder
CAUTION 5 safety rules: Switch off on all poles and from all sources. Secure it to prevent it being switched on again. Verify isolation from the supply. Earth and short-circuit. Cover neighbouring live parts and cordon off danger areas. 1. End any charging session currently taking place and disconnect the vehicle from the Wallbox. 2. -
Page 14: Remove The Housing Cover
Remove the housing cover 1. Press the two interlocks 1 for the housing cover on the underside of the Wallbox upwards. The housing cover should then jump out slightly at the bottom. 2. Swing the housing cover forwards a little on the underside 2. -
Page 15: Remove The Termination Panel Cover
Remove the termination panel cover 1. Undo the four screws used to secure the termination panel cover 1. Danger of damage. Electronic components may be destroyed if touched. Before handling modules, perform an electrical discharge process by touching a metallic earthed object. -
Page 16: Remove The Front Part
Remove the front part IMPORTANT Danger of damage. The front part and the bottom of the housing are connected by a ribbon cable. Ensure that you do not damage the ribbon table or its plug connectors by handling the front part with care. 1. -
Page 17: Installation
INSTALLATION Overview Switch feedback connector Switch feedback cable tie Earth terminal Contactor terminals Cable gland lock nut Pilot cable connector Electronics cover... -
Page 18: Disconnect The Old Charging Cable
Disconnect the old charging cable Note Make a note of or photograph the assignment of all connected cables so that you can reconnect them correctly after replacing the charging cable. Disconnect the switch feedback (connector at top right) 1. Remove the cable tie 2 using a side cutter. 2. - Page 19 Disconnect the cable from the earth terminal: Remove the charging cable's earth conductor 4. Push a flat screwdriver (blade width 5.5 mm) into the terminal as shown in the figure. 5. Press the flat screwdriver with moderate force straight into the terminal until the contact opens fully.
-
Page 20: Prepare The New Charging Cable
Remove the lock nut on the cable gland 10. Remove the lock nut 1 on the cable gland using an open-ended spanner. 11. Pull the old charging cable downwards out of the Wallbox. Prepare the new charging cable CAUTION The design current for the charging cable must not be less than the design current for the Wallbox. -
Page 21: Connect The New Charging Cable
Connect the new charging cable 1. Connect the charging cable (phases and neutral conductor) to the contactor using a PZ2 cross head screwdriver (torque: 2.5-3 Nm). 2. Connect the switch feedback connector and secure the cables as before using the cable ties provided. - Page 22 1. Take the front part in your hand. 2. Connect the connector on the ribbon cable 1 to the circuit board inside the front part. 3. Return the front part to its original position. 4. Tighten the four screws in the front part using a T25 Torx screwdriver.
-
Page 23: Commissioning & Safety Tests
COMMISSIONING & SAFETY TESTS General commissioning procedure Switch on the supply voltage. After the self-test, which is conducted automatically at the start, the blue status LED (LED bar) must be lit after 15-20 seconds. Conduct the specified initial tests to comply with local regulations and laws. Commissioning mode/Self-test The Wallbox can be set to a commissioning mode to help with the initial system tests. -
Page 24: Safety Tests
Safety tests Before commissioning the device, check the effectiveness of the system's protective measure(s) in accordance with national regulations such as ÖVE/ÖNORM E8001-6-61, DIN VDE 0100-600. Electrical systems or devices must be tested by the installer of the system or device before being used for the first time. -
Page 25: Concluding Work
CONCLUDING WORK Install the terminal cover Note If you did not remove the terminal cover during the installation work, continue with section Install the termination panel cover. 1. Fit the terminal cover 1 again using the two fastening screws (torque: 1.5 Nm). Install the termination panel cover Note The Wallbox must not be switched on permanently if this cover is missing or damaged. -
Page 26: Test The Function
Housing marking 1. Tighten the four screws until the housing markings on the right and left on the termination panel cover are flush with the housing. 2. The termination panel cover must correctly seal the housing. Increased force is required for the self-tapping screws: 3.5 Nm. -
Page 27: Affix Warranty Seals
Affix warranty seals 1. Clean the surfaces on the left and right on the Wallbox to which the warranty seals are to be affixed, see illustration to the left. The area must be clean and free from dust or grease. 2. - Page 28 Interlocks 3. Press the bottom section of the housing cover on to the Wallbox until the interlocks 1 fully engage. Install the connector holder 1. Insert the connector holder. 2. Position the connector holder as shown in the figure.
- Page 29 3. Screw the connector holder into position using the screw.
-
Page 30: Additional Information
ADDITIONAL INFORMATION Other functions and settings Information about of the functions and settings is provided in the Wallbox installation manual or operating manual. Manuals, software, downloads http://www.bmwgroup.com/360electric/index.html. -
Page 31: Disposal
DISPOSAL After correctly decommissioning the device, please have it disposed of by the service department in compliance with current waste disposal regulations. Disposal information The symbol of the waste bin with a line through it indicates that electrical and electronic devices including accessories must be disposed of separately from general household waste. -
Page 32: Index
INDEX Commissioning................................23 Commissioning mode / Self-test..........................23 Connect the new charging cable..........................21 Disconnect the old charging cable.......................... 18 Disposal.................................... 31 Installation..................................17 Install the connector holder............................28 Install the front part..............................21 Install the housing cover............................. 27 Install the terminal cover............................. 25 Install the termination panel cover........................... - Page 36 Mehr über BMW www.bmw.de www.bmw.com Freude am Fahren 102790 IA Ladekabel für BMW i Wallbox EUR...
Need help?
Do you have a question about the i Wallbox and is the answer not in the manual?
Questions and answers