Table of Contents
Advertisement
Advertisement
Table of Contents

Related Manuals for Hotpoint HR 612 CH


Summary of Contents for Hotpoint HR 612 CH
- Page 1 HR 612 CH ENGLISH Instructions for use Seite 4...
- Page 2 INSTRUCTION FOR USE IMPORTANT SAFETY INSTRUCTIONS BEFORE USING THE GLASS CERAMIC HOB INSTALLATION ELECTRICAL CONNECTIONS ENERGY SAVING TIPS SAFEGUARDING THE ENVIRONMENT CARE AND MAINTENANCE OF THE GLASSCERAMIC HOB TROUBLESHOOTING GUIDE AFTER SALES SERVICE PRODUCT DESCRIPTION SHEET...
-
Page 3: Important Safety Instructions
IMPORTANT SAFETY INSTRUCTIONS YOUR SAFETY AND THAT OF OTHERS IS • Do not place flammable materials on or near the appliance. VERY IMPORTANT • Overheated oils and fats catch fire easily. Pay attention when cooking food products rich in fat This manual and the appliance itself provide important and oil. - Page 4 BEFORE USING THE GLASS CERAMIC HOB • To make the most of your new appliance, please read the user instructions carefully and keep them handy for future consultation. INSTALLATION Cooktop • The cooktop must be set into a worktop between 20 mm and 50 mm Rear wall deep •...
-
Page 5: Electrical Connections
ELECTRICAL CONNECTIONS Electrical connection must be made before connecting the appliance to the electricity supply. The appliance must be installed by a qualified electrician who is fully aware of current safety and installation regulations. Specifically, installation must be carried out in compliance with the regulations of the local electricity supply company. -
Page 6: Safeguarding The Environment
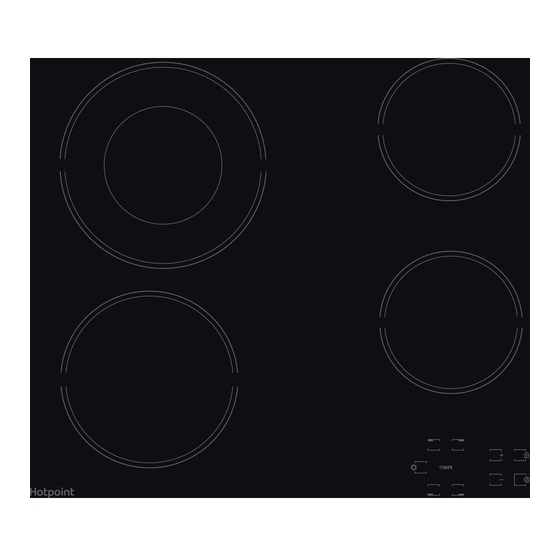
SAFEGUARDING THE ENVIRONMENT 1. Packing Declaration of conformity CE • The packaging material can be 100% recycled, as confirmed by the • This cooktop is suitable for contact with foodstuffs and complies with EEC (CE) Regulation n. 1935/ 2004. recycling symbol •... - Page 7 PRODUCT DESCRIPTION SHEET 1. Radiating cooking zone Ø 145 2. Radiating cooking zone Ø 180 3. Radiating cooking zone Ø 145 4. Radiating cooking zone Ø 210 5. Display DIMENSIONS OF THE HOB (mm) R = Min. 6,5 mm Max. 8 mm min 20 mm Min.
- Page 8 On/O Key lock Cooking zone and timer selection Multiple zone Activation / Deactivation Heat setting increase and decrease Upon rst installation, the control panel performs a functional test for about 1 second, after which it automatically switches to the “Key lock” function. To deactivate the function, press and hold button “D”;...
Need help?
Do you have a question about the HR 612 CH and is the answer not in the manual?
Questions and answers