Table of Contents
Advertisement
Advertisement
Table of Contents

Related Manuals for Grundig GNF41823X


Summary of Contents for Grundig GNF41823X
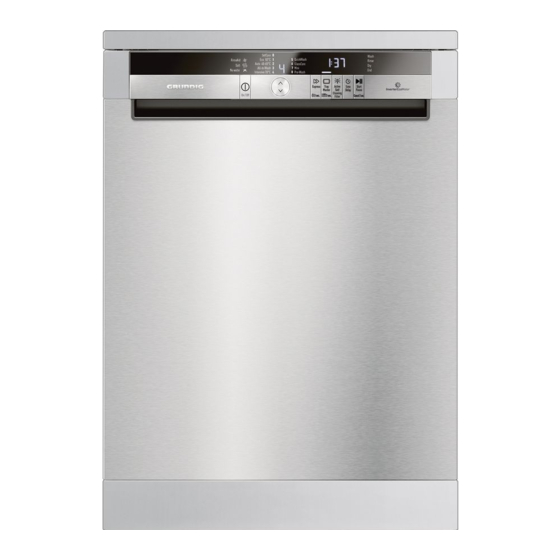
- Page 1 DISHWASHER USER INSTRUCTIONS GNF41823X www.grundig.com...
- Page 2 DISHWASHER USER INSTRUCTIONS GNF41823X...
- Page 3 Please read this user manual first! Dear Customer, Thank you for preferring a Grundig product. We hope that you get the best results from your product which has been manufactured with high quality and state-of-the-art technology. Therefore, please read this entire user manual and all other accompanying documents carefully before using the product and keep it as a reference for future use.
-
Page 4: Table Of Contents
CONTENTS 1 INSTRUCTIONS FOR SAFETY Tray Wash Supports ........21 Ceiling cutlery basket ........22 AND ENVIRONMENT Collapsible lower basket tines ....23 General safety ..........4 Cutlery basket ..........23 Intended use ........... 4 Children’s safety ..........5 5 OPERATING THE Disposing of packaging material ....5 PRODUCT Transportation of the product ....... -
Page 5: Instructions For Safety And Environment
INSTRUCTIONS FOR SAFETY AND ENVIRONMENT This section contains safety • Never touch the plug with wet hands! Never unplug by instructions that will help to give pulling on the cable, always protection from risk of personal pull out by grabbing the plug. injury or property damage. -
Page 6: Children's Safety
Instructions for safety and envIronment - Staff kitchen areas in shops, Disposing of packaging offices and other working material environments. Packaging materials are • Only dishwasher safe dangerous to children. Keep detergents, rinse aids and packaging materials in a safe additives must be used. -
Page 7: Compliance With Weee Directive And Disposing Of The Waste Product
Instructions for safety and envIronment Compliance with WEEE Directive and Disposing of the Waste Product This product complies with EU WEEE Directive (2012/19/EU). This product bears a classification symbol for waste electrical and electronic equipment (WEEE).This product has been manufactured with high quality parts and materials which can be reused and are suitable for recycling. -
Page 8: Dishwasher
DISHWASHER Overview 1. Upper basket 2. Upper impeller 3. Lower impeller 4. Silverware basket 5. Door 6. Rating Label 7. Control panel 8. Detergent dispenser 9. Lower basket 10. Filters 11. Salt reservoir lid 12. Upper basket rail 13. Upper cutlery basket (depends on model) 14. -
Page 9: Fan Drying System
Dishwasher Technical specifications Compliance to standards and test data / EC declaration of conformity This product complies with the following EU directives; Development, production and sales stages of this product comply with the safety rules included in all pertaining European Community regulations. 2014/35/EU, 2014/30/EU, 93/68/EC, IEC 60436/DIN 44990, EN 50242 Power input 220-240 V, 50 Hz (see rating label) -
Page 10: Installation
INSTALLATION • To make the product ready for use, make Place the product on a rigid floor. Do not place it on a long pile rug or similar sure that the electricity, tap water supply and surfaces. water drainage systems are appropriate before calling the Authorised Service Agent. -
Page 11: Waterprotect
Installation to the drainpipe without bending it. Tightly WaterProtect+ fix the water discharge hose to the drainpipe The WaterProtect+ system protects against in order to prevent any dislocation of the water leaks that may occur at the hose inlet. water discharge hose during operation of Water contact with the valve box of the the product. -
Page 12: This Appliance Must Be Earthed
Installation Connect the brown (live) wire to the This appliance must be terminal in the plug marked ‘L’ or earthed coloured red. If the fitted moulded plug is not Green and yellow suitable for your socket, then the or green plug should be cut off and an appropriate plug fitted. -
Page 13: Preparation
PREPARATION Tips for energy saving Adjusting the water softening system Following information will help you use the product in an ecological and energy-efficient Cleaning, rinsing and drying performance manner. of your dishwasher will increase when water Wipe away any coarse food remnants on softening system is adjusted properly. -
Page 14: Water Hardness Level Adjustment Table
Preparation 1 min. 1 Second 1 Minute Remove the test Turn on the tap and Hold the test strip in Remove the test Wait for 1 minute. The test strip shows strip from the let the water run for the water for about strip from the water you the hardness packet. -
Page 15: Adding Salt
Preparation If the hardness level of the supply water It is recommended to use is above 90 °dF or if you are using well granule- or powder-formed water, then it is recommended to use water softening salts in the water purification devices and special filters. -
Page 16: Detergent
Preparation 3. Add 1 litre of water to salt reservoir of Since different salt brands in the your machine only in initial use (C). market have different particle sizes and since the water hardness may vary, dissolution of the salt in water may take a couple of hours. -
Page 17: Tablet Detergents
Preparation 1. Push the latch to right to open the detergent dispenser lid (A). 2. Put suggested amount of powder, liquid/ gel or tablet detergent in the reservoir. Inside the detergent dispenser there are level markings that help you use appropriate amount of powder detergent. -
Page 18: Rinse Aid
Preparation Rinse aid The best washing performance in dishwashers is obtained by using The rinse aid used in dishwashers detergent, rinse aid and water is a special combination softening salt individually. that aims to increase drying efficiency and prevent water or lime stains on the washed items. -
Page 19: Items Not Suitable For Washing In The Dishwasher
Preparation 4. If there are stains on tableware items Placing the dishes into the after washing, level must be increased dishwasher and if there is a blue trace after wiping You can use your dishwasher in the optimum them by hand, it must be decreased. This way with respect to energy consumption and is set to position 3 as factory default. - Page 20 Preparation Suggestions for loading the dishwasher Improper Loading Of Dishware Lower basket Upper basket Improper Loading Of Dishware DISHWASHER / USER INSTRUCTIONS 19 / 44 EN...
-
Page 21: Adjusting The Height Of The Upper Basket
Preparation Adjusting the height of the 2. Lower the basket from its current position to the lower one. upper basket 3. Release the basket after it has reached The upper basket height adjustment one level down. mechanism has been designed for you to Repeat the process if the height is not create large spaces in the lower or upper sufficient. -
Page 22: Collapsible Upper Basket Wires
Preparation Collapsible upper basket wires GlassGuard Accessory You can use collapsible wires when you The GlassGuard Accessory found in the need a larger space for your dishes in the lower basket of your machine enables a safe upper basket of your machine. washing for your fragile glasses. -
Page 23: Ceiling Cutlery Basket
Preparation Ceiling cutlery basket Ceiling cutlery basket is designed to wash your cutlery items such as forks, spoons and etc. by placing them between the bars on the basket. When the central tray is in the lower position, you can load long/high items such as coffee cups, ladles, etc. -
Page 24: Collapsible Lower Basket Tines
Preparation Collapsible lower basket tines Bringing the tines to the horizontal position by holding There are foldable tines (A) located at the them from the tips may cause lower basket of the machine are designed them to bend. Therefore, it will for an easier placement of large pieces such be appropriate to bring the tines as pans, bowls, etc. -
Page 25: Operating The Product
OPERATING THE PRODUCT 1. On/Off key 2. Programme Selection keys 3. Function keys a) Child Lock key / Express Function b) Settings key / TrayMasterFunction Active Self Cleaning Filter 4. Time Delay key 5. Start/Pause/Cancel key 6. Display 7. Programme indicator 8. -
Page 26: Keys
OperatIng the product Keys 6. Close the door of the dishwasher. On/Off key Programme selection It is used to switch on or off the machine. 1. Press On/Off key to switch on your Press the On/Off key to switch on the machine. - Page 27 OperatIng the product /44 EN DISHWASHER / USER INSTRUCTIONS...
-
Page 28: Auxiliary Functions
OperatIng the product Auxiliary functions Active Self Cleaning Filter With this function, your micro filter will be Washing programmes of your dishwasher cleaned by a special system at the end are designed to obtain the best cleaning of washing cycle and it is made ready for effect, considering the type of the soiling, use for the next usage of the machine. -
Page 29: Programming The Washing Time
OperatIng the product Line. Selected programme will start as Changing Warning Sound Volume Your machine is equipped with an audio soon as the countdown is over. signal to inform warnings audibly. While the time delay function 1. After switching your machine on, press is activated, you cannot the settings key until the countdown 3, 2, make changes in the washing... -
Page 30: Programme Step Follow-Up
OperatIng the product Programme Follow-up indicator. Your machine performs water softening depending on the hardness level of the mains water. Remaining time displayed towards the end of the programme can be different from the time indicated at the beginning due to this process. a) Washing indicator The total duration can also b) Rinsing indicator... -
Page 31: Cancelling The Programme
OperatIng the product Salt ( ) indicator Child lock prevents the selected programme or functions from Please check the salt indicator on the panel being changed and disables the of your dishwasher to see whether there is Start / Pause / Cancel key. adequate amount of softening salt in the dishwasher or not. -
Page 32: Water Cut-Off Indicator
OperatIng the product SelfCare Water Cut-off indicator ( This programme is recommended to be Water Cut-off warning indicator will light operated on each 1-2 months for machine when the machine cannot take in water. cleaning and necessary hygiene. The When the water is supplied again, the programme should be operated while the warning light will turn off automatically. -
Page 33: Maintenance And Cleaning
MAINTENANCE AND CLEANING Service life of the product extends and Cleaning the filters frequently faced problems decrease if it is Clean the filters at least once every three cleaned at regular intervals. months in order for the machine operates Unplug the product and turn off efficiently. -
Page 34: Cleaning The Hose Filter
Maintenance and cleaning Cleaning the hose filter Damages on the machine that may be caused by impurities coming from the urban supply water or your own water installation (such as sand, dirt, rust, etc.) can be prevented by means of the filter attached to the water inlet hose. -
Page 35: Cleaning The Impellers
Maintenance and cleaning Cleaning the impellers Upper impeller Clean the impellers at least once a week in Check if the holes on the upper impeller (1) order for the machine operates efficiently. are clogged. If they are clogged, remove and clean the impeller. Turn its nut to left to Lower impeller remove the upper impeller. -
Page 36: Troubleshooting
TROUBLESHOOTING Machine does not start. • Power cable is unplugged. >>> Check if the power cable is plugged in. • Fuse is blown. >>> Check the fuses in your house. • Water is cut. >>> Make sure that the water inlet tap is open. •... - Page 37 Troubleshooting Dishes are not dry at the end of cycle • Dishes are not placed orderly in the machine. >>> Place your dishes in a way that no water will accumulate in them. • Rinse aid is not sufficient. >>> Check the rinse aid indicator and add rinse aid if necessary.
- Page 38 Troubleshooting • Salt leakage exists. >>> Pay attention not to spill salt around the salt filling hole while adding salt. Make sure that the salt reservoir lid is tightly closed after finishing the filling process. Run the prewash programme to remove the salt that spilled inside the machine. Since the salt granules that will remain under the lid will dissolve during prewash, causing the lid loosen, check the lid once again at the end of the programme.
- Page 39 Troubleshooting • Kitchen utensils that are already corroded are washed in dishwasher. >>> Rust on a corroded item can migrate to other stainless steel surfaces and cause corrosion on those surfaces as well. Such items should not be washed in dishwashers. Detergent remains in detergent dispenser.
- Page 40 Troubleshooting A smear remains on glasses that resembles milk stain which can not be removed when wiped by hand. A bluish / rainbow appearance occurs when the glass is pointed to light. • Excessive rinse aid is used. >>>Lower rinse aid setting. Clean the spilled rinse aid when adding rinse aid.
-
Page 41: Guarantee
• Time taken off work. • Functional replacement parts to repair a product. • Damaged food, clothing or other items. • The costs of a Grundig Approved • Meals taken at restaurants or from Engineer to carry out the repair. takeaways. -
Page 42: Important Notes
User Instructions Booklet provided with Does Grundig offer replacements? your product. This is a repair-only guarantee. On occasion, the Manufacturer may at its • Professional installation by a qualified... - Page 43 Guarantee appointments, this cannot be guaranteed. We will not be liable for delays or if it is unable to carry out a repair because a convenient appointment cannot be arranged. Will there be any charge for the repairs? It is your responsibility to provide evidence to the Engineer that your product is covered by this guarantee with a proof of purchase.
- Page 44 Should you experience any difficulty in obtaining service contact the Grundig Customer Helpline on Tel: 0333 207 9920 or e-mail: customerservice@support.grundig.co.uk …………………………………………………………..................
- Page 45 www.grundig.com...
Need help?
Do you have a question about the GNF41823X and is the answer not in the manual?
Questions and answers