Table of Contents

Related Manuals for Airmar DX900+


Summary of Contents for Airmar DX900+
- Page 1 Owner’s Guide & Installation Instructions Electromagnetic Multilog Sensor Smart Sensor ™ DX900+ Model Record the information found on the cable tag for future reference. Part No.__________Date__________Frequency______________ 17-626-01-rev.02 09/12/17...
- Page 2 Information in this manual is subject to change without notice. Airmar reserves the right to change or improve its products and to make changes in the content without obligation to notify any person or organization of such changes.
-
Page 3: Table Of Contents
Table of Contents Introduction..................4 Functions & Outputs................4 Features & Options................4 About the CAST App..............5 ™ Applications..................6 Tools & Materials................6 Warnings..................7 Choosing the Mounting Location............9 Anti-fouling Paint................11 Installation..................12 Installation in a Cored Fiberglass Hull..........17 Cable Routing & Connecting............18 Speed & Temperature Only: NMEA 0183........18 Depth, Speed &... -
Page 4: Introduction
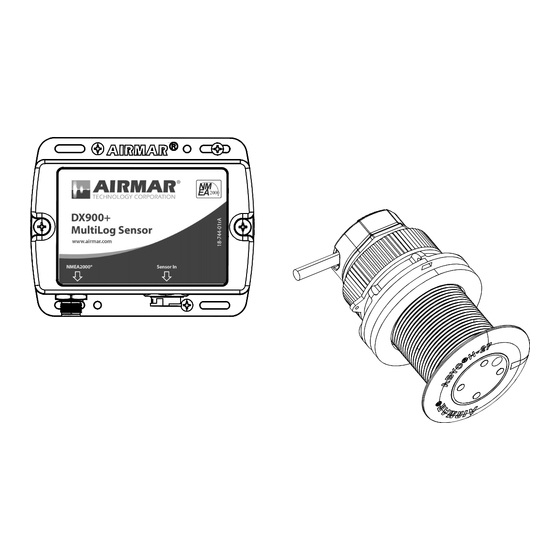
Introduction Thank you for purchasing Airmar’s Electromagnetic MultiLog Sensor. The DX900+ is the industry’s first Bluetooth -enabled, multi-functional unit. It is ® actually several sensors in a single housing. And it is the only sensor that truly measures leeway instantaneously—not derived from a calculation. Data is output in NMEA 0183 or NMEA 2000 format. -
Page 5: About The Cast™ App
About the CAST™ App Download the CAST app by Airmar to view, analyze, and share sensor data and evaluate your sailing performance. Simply install the CAST app on your iOS or Android device to view available NMEA data over a Bluetooth or network ®... -
Page 6: Applications
Applications • High-speed racing sailboats • Not recommended for boats designed to pull air under the hull. • Plastic housing recommended for fiberglass or metal hull only. Never install a plastic housing in a wood hull, since swelling of the wood can possibly fracture the plastic. -
Page 7: Warnings
CAUTION: Interference From Electronic Devices Install the DX900+ sensor and the Processor a minimum of 1m (3') from other electronic equipment and cables. The sensor may be susceptible to interference from strong electromagnetic fields caused by devices such as AC inverters, power supplies, or other on-board equipment. - Page 8 WARNING: A safe installation requires a 0.5 amp fast-blow fuse or circuit breaker. WARNING: The power supply voltage must be 9 - 16 VDC. CAUTION: The sensor is NOT compatible with a bronze housing, because bronze may cause interference resulting in incorrect readings. CAUTION: Never pull, carry, or hold the sensor by its cable;...
-
Page 9: Choosing The Mounting Location
Choosing the Mounting Location CAUTION: Do not mount in line with or near water intake or discharge openings, or behind strakes, fittings, or hull irregularities that will disturb the water flow. CAUTION: Never mount the sensor directly ahead of a depth transducer, since turbulence generated by the housing will adversely affect the depth transducer’s performance, especially at high speeds. - Page 10 Boat capable of speeds above 25kn (29MPH)—Review the installation location and operating results of similar boats before proceeding. fin keel sailboats full keel sailboats large displacement hulls small displacement hulls stepped hull outboard and I/O Figure 2. Best location for sensor Copyright © 2017 Airmar Technology Corp...
-
Page 11: Anti-Fouling Paint
O-ring housing & valve assembly blanking plug exterior flange of housing bore of housing exposed up 30mm (1-1/4") Figure 3. Anti-fouling paint Copyright © 2017 Airmar Technology Corp... -
Page 12: Installation
(plastic) housing safety wire hull nut washer hull electrode (4) marine sealant on flange marine sealant on flange and sidewall of housing and sidewall of housing Figure 4. Bedding and installing Copyright © 2017 Airmar Technology Corp... - Page 13 (metal) isolation bushing electrode (4) marine sealant on flange and sidewall of housing and isolation bushing where it contacts hull Figure 5. Bedding and installing an SS617V in a metal hull Copyright © 2017 Airmar Technology Corp...
- Page 14 Figure 6. Arrow on the flange of the housing faces forward and parallel to keel Copyright © 2017 Airmar Technology Corp 2. From outside the hull, push the housing into the mounting hole using a twisting motion to squeeze out excess sealant. Align the arrow on the flange of the housing pointing forward toward the bow area.
- Page 15 Figure 7. Align arrow on insert cap, key on insert, notch in housing, and arrow on flange to face forward toward bow area Copyright © 2017 Airmar Technology Corp Stainless steel housing in a metal hull—Be sure the washer contacts the hull (Figure 5).
- Page 16 Figure 8. Insert: top view with arrow facing forward toward the bow area Copyright © 2017 Airmar Technology Corp Screw the cap nut several turns until the threads are engaged. Being sure the cable exit is still pointing backward toward the stern, continue to tighten the cap nut completely.
-
Page 17: Installation In A Cored Fiberglass Hull
9-12 mm (3/8-1/2") pour in larger than the casting hole through the epoxy hull’s outer skin inner skin core hull thickness outer skin solid or hollow cylinder Figure 9. Preparing a cored fiberglass hull Copyright © 2017 Airmar Technology Corp... -
Page 18: Cable Routing & Connecting
Cable Routing & Connecting CAUTION: Do not remove the waterproof connector(s) to ease cable routing. CAUTION: Be careful not to tear the cable jacket(s) when passing it through bulkheads and other parts of the boat. Use grommets to prevent chafing. CAUTION: Coil any excess cable(s) and secure it with cable ties to prevent damage. -
Page 19: Installing The Processor
Installing the Processor 1. Select a convenient, dry, mounting location for the water-resistant processor, a minimum of 1m (3') from other cables and electronic equipment (Figure 10 or 11). 2. Route the DeviceNet/instrument cable from the processor location to the network backbone/instrument. - Page 20 DeviceNet® cable sensor cable network backbone cable insert Figure 10. NMEA 2000 cable layout (not to scale) Copyright © 2017 Airmar Technology Corp. screws (4) processor instrument cable sensor cable insert instrument Figure 11. NMEA 0183 cable layout (not to scale)
-
Page 21: Checking For Leaks
Checking for Leaks When the boat is placed in the water, immediately check around the sensor for leaks. Note that very small leaks may not be readily observed. Do not to leave the boat in the water for more than 3 hours before checking it again. If there is a small leak, there may be considerable bilge water accumulation after 24 hours. - Page 22 O-ring near the bottom. 2. Place the remaining two small O-rings near the bottom of the blanking plug. BOW ► arrow yellow O-ring blanking insert plug small O-ring(s) electrode (4) Figure 12. Replacing the O-rings Copyright © 2017 Airmar Technology Corp...
- Page 23 Replacement Sensor & Parts The information needed to order a replacement Airmar sensor is printed on the cable tag. Do not remove this tag. When ordering, specify the part number and date. For convenient reference, record this information on the bottom of page one.
-
Page 24: Troubleshooting
• The insert is covered with aquatic growth. See “Servicing the Insert” on page 22. • Aerated water is flowing under the sensor because the boat is designed to pull air under the hull. The sensor will not work on this type of boat. 35 Meadowbrook Drive, Milford, New Hampshire 03055-4613, USA www.airmar.com...
Need help?
Do you have a question about the DX900+ and is the answer not in the manual?
Questions and answers