MTD Series 400 Operator's Manual
18-inch duracut mower
Hide thumbs
Also See for Series 400:
- Operator's manual (56 pages) ,
- Owner's manual (20 pages) ,
- Manual (6 pages)
Table of Contents
Advertisement
Quick Links
Safe Operation Practice
Set-U
Operatio
Maintenanc
Servic
Troubleshootin
Warranty
O
'
M
PERATOR
S
ANUAL
18-inch Duracut Mower — Model Series 400,800
WARNING
READ AND FOLLOW ALL SAFETY RULES AND INSTRUCTIONS IN THIS MANUAL
BEFORE ATTEMPTING TO OPERATE THIS MACHINE.
FAILURE TO COMPLY WITH THESE INSTRUCTIONS MAY RESULT IN PERSONAL INJURY.
MTD PRODUCTS AUSTRALIA PTY LTD,P.O. BOX 4314 DANDENONG SOUTH VICTORIA 3164
Printed In China
Form No. 769-11802
(
,201 )
Advertisement
Table of Contents

Subscribe to Our Youtube Channel
Related Manuals for MTD Series 400


Summary of Contents for MTD Series 400
- Page 1 READ AND FOLLOW ALL SAFETY RULES AND INSTRUCTIONS IN THIS MANUAL BEFORE ATTEMPTING TO OPERATE THIS MACHINE. FAILURE TO COMPLY WITH THESE INSTRUCTIONS MAY RESULT IN PERSONAL INJURY. MTD PRODUCTS AUSTRALIA PTY LTD,P.O. BOX 4314 DANDENONG SOUTH VICTORIA 3164 Printed In China Form No. 769-11802...
-
Page 2: Table Of Contents
To The Owner Thank You Thank you for purchasing a Lawn Mower manufactured by MTD the right to change product speci cations, designs and products. It was carefully engineered to provide excellent equipment without notice and without incurring obligation. performance when properly operated and maintained. -
Page 3: Safe Operation Practices
Important Safe Operation Practices WARNING: This symbol points out important safety instructions which, if not followed, could endanger the personal safety and/or property of yourself and others. Read and follow all instructions in this manual before attempting to operate this machine. Failure to comply with these instructions may result in personal injury. - Page 4 The blade control is a safety device. Never attempt to Slope Operation bypass its operation. Doing so makes the safety device Slopes are a major factor related to slip and fall accidents, which inoperative and may result in personal injury through can result in severe injury.
- Page 5 Check the blade and engine mounting bolts at frequent Service intervals for proper tightness. Also, visually inspect blade for damage (e.g., bent, cracked, worn) Replace blade with Safe Handling Of Gasoline: the original equipment manufacture’s (O.E.M.) blade only, To avoid personal injury or property damage use extreme listed in this manual.
-
Page 6: Safety Symbols
Safety Symbols This page depicts and describes safety symbols that may appear on this product. Read, understand, and follow all instructions on the machine before attempting to assemble and operate. Symbol Description READ THE OPERATOR’S MANUAL(S) Read, understand, and follow all instructions in the manual(s) before attempting to assemble and operate DANGER —... - Page 7 Sight and hold this level with a vertical tree... or a corner of a building... or a fence post 15° Use this page as a guide to determine slopes where you may not operate safely. WARNING: Do not operate your lawn mower on such slopes. Do not mow on inclines with a slope in excess of 15 degrees (a rise of approximately 2-1/2 feet every 10 feet).
-
Page 8: Assembly & Set-Up
Assembly & Set-Up Contents of Carton One Lawn Mower One Grass Catcher One Rear Discharge Plugs One Lawn Mower Operator’s Manual One Engine Operator’s Manual Handle with cam lock Assembly Turn the cam lever to release the handle from the folding NOTE: This unit is shipped without gasoline or oil in the engine. -
Page 9: Starter Rope
ollow steps below to attach the grass catcher. Starter Rope Lift rear discharge door. Disconnect the spark plug boot from the spark plug (refer Place grass catcher hooks onto the rear door pivot to the Engine Operator’s Manual). and press them to ensure they sit in place as Pivot the control handle against the upper handle and pull shown in Fig 3-7. - Page 10 Set-Up Adjustments Gas and Oil Fill-Up Cutting Height Refer to the separate engine owner’s manual for additional There is a cutting height adjustment lever located above the engine information. rear right wheel. Add oil provided before starting unit for the rst time out Push the height adjustment lever towards wheel.
-
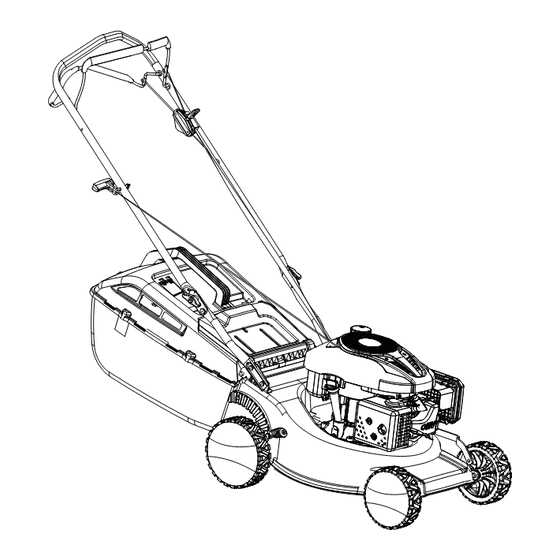
Page 11: Controls & Features
Controls and Features Bail Blade Control Bail Drive Control † Throttle Control Recoil Starter Grass Catcher Cutting Height † If Equipped Adjustment Lever Figure 4-1 Bail Blade Control Grass Catcher The bail blade control is attached to the upper handle of the The grass catcher, located at the rear of the mower, is used to bag mower. -
Page 12: Operation
Operation Starting & Stopping Engine Using Grass Catcher Refer to the Engine Operator’s manual packed with your lawn You can use the grass catcher to collect clippings while you are mower for instructions on starting and stopping the engine. operating the mower. Attach grass catcher following instructions in the Using Your Lawn Mower “Assembly &... -
Page 13: Maintenance
Maintenance Maintenance General Recommendations Always observe safety rules when performing any maintenance. The warranty on this lawn mower does not cover items that have been subjected to operator abuse or negligence. To receive full value from warranty, operator must maintain the lawn mower as instructed here. -
Page 14: Service
Service Blade Care WARNING: When removing the Flat Washer cutting blade for sharpening or replacement, protect your hands with a pair of heavy gloves or use Blade Disc a heavy rag to hold the blade. Periodically inspect the blade adapter for cracks, especially if you strike a foreign object. -
Page 15: Troubleshooting
Troubleshooting Problem Cause Remedy Engine Fails to start Blade control disengaged. Engage blade control. Spark plug boot disconnected. Connect wire to spark boot. Fuel tank empty or stale fuel. Fill tank with clean, fresh gasoline. Engine not primed (if equipped with primer). Prime engine as instructed in the Operation section. -
Page 16: Warranty
MTD Products Australia Pty Ltd. Postal Address: P.O. Box 4314 Dandenong South, Victoria 3164 Business Address: 6 Zenith Road, Dandenong. Vic. 3175 and Unit 3B, 301 Orchard Road, Richlands, Qld 4077. Email Address: customerserviceaus@mtdproducts.com Customer Service Phone: 1300 951 594...
Need help?
Do you have a question about the Series 400 and is the answer not in the manual?
Questions and answers