Advertisement

FAQ Guide
/
Please read "Important Safety Instructions"
before operating this product.
After you finish reading this guide, store it in a safe
place for future reference.
The information in this document is subject to
change without notice.
You can access canon.com/oip-manual
to read the User's Guide that describes all
functions of this machine.
/
P.36
What is
Your Question?

Advertisement

Table of Contents
loading

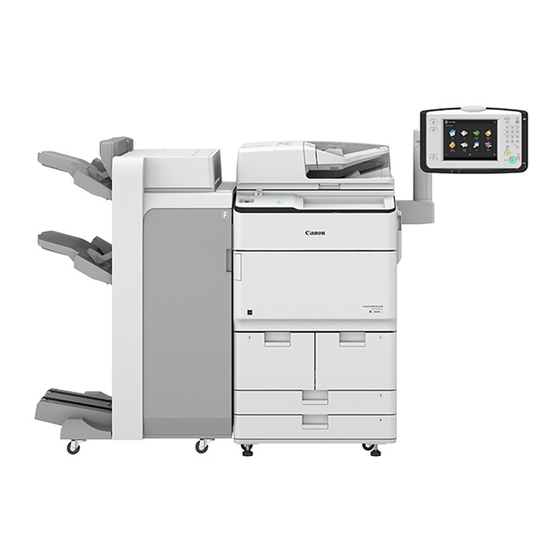
Summary of Contents for Canon imageRUNNER ADVANCE 8595i

  • Page 1 After you finish reading this guide, store it in a safe place for future reference. The information in this document is subject to change without notice. You can access canon.com/oip-manual to read the User's Guide that describes all functions of this machine. What is...
  • Page 2: Table Of Contents

    Contents What's Your Problem? The Machine Does Not If Paper Jams Occur P.14 Operate Check the following first ....4 The Machine Does Not Respond to the Paper Jams Occur .
  • Page 3 Canceling Copy/ Printing Results Are P.24 P.12 Print Jobs Not Satisfactory Installing the P.25 Printer Driver P.26 Replacement Parts Images Are Shifted/Slanted/Skewed ... . . 12 Irregularities Appear in Images/Images Are Faint .
  • Page 4: Check The Following First

    The Machine Does Not Operate Check the following first Check Check Is a message displayed on the touch Is the main power indicator Off? panel display? If the main power indicator does not light when you turn the main power ON, check the power plug and the breaker.
  • Page 5: The Machine Does Not Respond To The Computer

    The Machine Does Not Respond to the Computer Solution Solution Restart the machine. Download the printer driver again. Press the main power switch to turn off the machine. CAUTION! Note that turning OFF the machine deletes the data that is waiting to be printed. N O T E P.25 For more information...
  • Page 6: How To Load Paper

    How to Load Paper Loading Paper in the Paper Loading Paper in the Paper Deck Drawer CAUTION! Of the LTR size, you can load the preset size of paper in the paper deck. N O T E When loading paper in the optional paper deck. User's Guide Adjust the position of the slide guides.
  • Page 7 0WR6-0SH Search Available paper types P.47 How to use the search number Check the paper size. If you have loaded paper in this paper drawer P O I N T for the first time, attach the appropriate paper If the displayed paper size is different from the size label to the paper drawer.
  • Page 8: Loading Paper In The Multi-Purpose Tray

    How to Load Paper Loading Paper in the Multi- Purpose Tray Check the paper size/ type. Press Extend the slide guides. Auxiliary Tray If the paper size/type setting does not match the paper you have loaded In the screen for this step 5, change the setting manually.
  • Page 9: When Loading Paper In The Optional

    0WR6-0SH Search Available paper types P.47 How to use the search number When loading paper in the optional Document insertion For the loading procedures, see the User's Guide. When you have loaded custom size paper Document Insertion Unit-N1 Set the paper size manually. User's Guide When loading free size paper 0WR6-0UH...
  • Page 10: Loading Paper With Printed Logos

    How to Load Paper Loading Paper with Printed Logos Refer to the table below to load paper with printed logos. Example: Paper size: LTR Orientation Printing result Paper Deck*/Paper Drawer Multi-Purpose Tray Paper Co. Ltd. A B C Logo C o . L t d . Multi- Purpose Tray Paper Drawer...
  • Page 11: Loading Tab Paper

    0WR6-0SH Search Available paper types P.47 How to use the search number Loading Tab Paper Load the tab paper. CAUTION! You can load index paper in a paper drawer, the Make sure that this line is not exceeded. optional POD Deck Lite, or the optional Document Insertion.
  • Page 12: Images Are Shifted/Slanted/Skewed

    Printing Results Are Not Satisfactory Images Are Shifted/Slanted/ Irregularities Appear in Skewed Images/Images Are Faint Solution Solution Adjust the slide guides. The paper may have absorbed moisture. Replace it with paper that has not absorbed moisture. Solution Perform gradation adjustment. Press Adjust the guide exactly.
  • Page 13: Black Streaks Appear In Images

    Black Streaks Appear in Bleed-through Occurs Images Solution Solution Clean the document feed scanning Set a lower background density. areas. Turn OFF the machine, and unplug the power plug from the AC power outlet. Press Open the feeder, and clean the lower side document feed scanning area using the supplied glass-cleaning sheet.
  • Page 14: Paper Jams Occur

    If Paper Jams Occur Paper Jams Occur If paper jams occur, a screen like the following appears on the touch panel display. Follow the instructions in the screen to remove the jammed paper. Remedy Paper jam locations When the remedy consists of a number of steps, you can view the steps by pressing these buttons.
  • Page 15: Paper Jams Occur Frequently

    Paper Jams Occur Frequently Solution Solution Adjust the slide guides. Check the paper type setting. Press Press Adjust the guide exactly. Multi-purpose tray If the paper type setting does not match the loaded paper, change the setting. • For paper deck/paper drawer •...
  • Page 16: Loading Paper Or Paper Settings Cannot Be Done Successfully

    Loading Paper or Paper Settings Cannot Be Done Successfully Paper Is Not Fed • Solution Remove the excess amount of paper. Open the paper source to check whether Capacity of Paper Sources paper has been loaded properly. User's Guide • Adjust the slide guides 0WR6-0SH Search...
  • Page 17: If The "Load Paper." Message Is Displayed

    If the "Load paper." Message Is Displayed Solution Solution Replenish paper. Check the paper type setting. Press Press If the paper source is vacant, replenish paper. Solution Adjust the slide guides. If the paper type setting does not match the loaded paper, change the setting.
  • Page 18: Printing Cannot Be Performed On The Expected

    Loading Paper or Paper Settings Cannot Be Done Successfully Printing Cannot Be Performed Printing Cannot Be Performed on the Expected Side of Paper with the Expected Size Solution Solution Load paper in the correct orientation Make sure that the paper size setting and with the correct side face up/ matches the size of the loaded paper.
  • Page 19: In Two-Sided Printing, The Print Direction Differs Between The Front And Back Sides Of The Paper

    In Two-Sided Printing, the Print Direction Differs between the Front and Back Sides of the Paper Solution Make settings for two-sided printing. In the application's print setting screen, select the print direction. In the [Printing Preferences] screen of the driver, set [Orientation] for the direction selected in step 1.
  • Page 20: Scan/Fax Cannot Be Performed Successfully

    Scan/Fax Cannot Be Performed Successfully If You Cannot Send Documents Stopping Scanning/Faxing to a Server Using [Scan and Send] Check the server information. To stop the paper feed If you have updated something including the login password for the server (computer), change the information registered to the address book/one- touch buttons.
  • Page 21: Scanned Documents Cannot Be E-Mailed

    Scanned Documents Cannot Be E-Mailed Solution Solution Check the information of the If e-mailing of documents is destination. not possible at all, make correct communication settings for the SMTP/ If any update has been done, change the DNS server. For the setting procedures, information registered to the address book/one- see the User's Guide.
  • Page 22: If You Cannot Send/Forward Faxes

    Scan/Fax Cannot Be Performed Successfully If You Cannot Send/Forward Faxes If you cannot forward faxes Solution Check the information of the forwarding Check the information of the destination registered to the address book/one- destination. touch buttons. If anything is wrong with the information, correct it.
  • Page 23: If You Cannot Receive Faxes

    If You Cannot Receive Faxes If you are using an optical line or IP Solution telephone line Delete unnecessary documents in the Communication errors may occur memory to increase the free space. depending on the line quality. For more information, contact your telephone carrier.
  • Page 24: Canceling A Copy Job

    Canceling Copy/Print Jobs Canceling a Copy Job Canceling a Print Job To stop the paper feed For Windows OS In the computer screen, double-click the printer icon. Press P O I N T You can also stop the paper feed by pressing on the control panel.
  • Page 25: Installing The P

    For details of printer driver installation, see the Driver Installation Guide. The Guide can be downloaded from, or viewed on, the same page of the Canon website as for the printer driver. Latest OS support information See the Canon website (http://www.canon.com/).
  • Page 26: Replacement Parts

    Prepare the consumable. Check the item number.* * This is an item number identifying a Canon genuine supplies. For high quality printouts, we recommend that you use Canon genuine supplies. N O T E P.27 List of Consumables...
  • Page 27 30°C and humidity is not higher than 80%. Genuine Supplies Canon has developed and manufactured Toner, Cartridge, and Parts specifically for use in this machine. For optimal print quality and for optimal machine performance and productivity, we recommend that you use Genuine Canon Toner, Cartridge, and Parts.
  • Page 28: An Error Screen Is Displayed

    Make a note of the code number displayed on the User's Guide screen. 0WR6-0RS Search P.47 Error code How to use the search number Turn the machine OFF, and disconnect the power plug from the power outlet. Contact your local authorized Canon dealer.
  • Page 29 When the [Limited Functions Mode] P O I N T When you select a restricted function in the button is displayed limited functions mode, the following screen You can use the machine with part of functions appears. restricted even before the problem is resolved. Press Press on the control panel to return to the...
  • Page 30: Illustrated Index

    Illustrated Index You can easily identify the name of a part and find the page where that part is described. * The illustrations assume that the machine is equipped with a Booklet Finisher-W1 PRO and Upright Control Panel-E1 Main Unit Booklet Finisher-W1 PRO Control Panel (Upright Control Panel E1) P.32...
  • Page 31 Main Power Switch Multi-purpose Tray Auxiliary Tray Slide Guides Paper Decks Paper Drawers Slide Guides Tab Feeding Attachment Kit P.11...
  • Page 32 Illustrated Index Control Panel (Upright Control Panel E1) Main Menu key P.13 Volume Settings key Press to display the Main Menu screen. Press to adjust the sound volume. Quick Menu key Brightness Adjustment dial Press to display the registered functions in the Adjusts the brightness of the screen.
  • Page 33 Flashes or lights if there is an error in the machine. When the Error indicator maintains a steady red light, ID (Log In/Out) key contact your local authorized Canon dealer. Press this to log in/out (when a login service has been set). Processing/Data indicator •...
  • Page 34: Installation Precautions

    Provide Adequate Installation Space to shade the machine. Be sure that the to perform data communication. In this curtains do not block the machine's case, contact your local authorized Canon Provide enough space on each side • ventilation slots or louvers, or interfere dealer.
  • Page 35: Installation Space Requirements

    Installation Space Requirements When the Staple Finisher-X1 is attached: When the Booklet Trimmer-D1, Booklet Finisher-W1 PRO, Multi Function Professional Puncher-A1, Paper Folding Unit-J1, Document Insertion Unit-N1, POD Deck Lite-C1, and Upright Control Panel-E1 are attached: 4" (100 mm) or more 31 1/2"...
  • Page 36: Handling Precautions

    Do not damage or modify the power your local authorized Canon dealer. • Using the machine in this state may cord. Also, do not place heavy objects cause a fire or electrical shock.
  • Page 37 OFF the main power Canon dealer, as the condition may and external covers, the laser beam switch, and disconnect the power cord cause a fire: cannot escape from the machine –...
  • Page 38: Legal Notices

    Doing so may instead. equipment in the U.S.A., please refer to cause damage to the vacuum cleaner imageRUNNER ADVANCE • the "SUPPORT" page on Canon U.S.A.'s or result in a dust explosion due to 8505i/8595i/8585i (F155600) Web site (http://www.usa.canon.com). static discharge. •...
  • Page 39 ENERGY STAR Program for energy by Canon Inc. or its licensors from third Français [ French ] Le présent appareil parties. Use and distribution of this efficiency. est conforme aux CNR d'Industrie Canada...
  • Page 40 OR USE, OR NON-INFRINGEMENT. or rotary) should be used. If the Super format US:AAAEQ##TXXXX. The digits CANON INC. SHALL NOT BE LIABLE G3 2nd Line Fax Board is installed, a represented by ## are the REN without a FOR ANY DIRECT, INCIDENTAL, OR multi telephone line (touch-tone or decimal point (e.g., 10 is a REN of 1.0).
  • Page 41 If the Super G3 the RENs of all the devices does not 2nd Line Fax Board is installed, a multi Canon vous conseille d'utiliser une exceed five. telephone line (touch-tone or rotary) ligne individuelle conforme aux normes The REN of this product is 1.0.
  • Page 42: About This Manual

    Third Party Software ITU-T V.34 standard 33.6 Kbps* modems. Super G3 High Speed Fax machines allow transmission times This Canon product (the "PRODUCT") of approximately 3 seconds* per page includes third-party software modules.
  • Page 43: Remote Service

    Canon published materials available from By so instructing Canon USA, Canon not be enabled and you may apply for your dealer or on the web sites of Canon Canada or your dealer, you shall also be refund of any license fees paid.
  • Page 44 Canon, including any implied warranty regarding merchantability or fitness for a particular purpose, and all such warranties are disclaimed. The sole warranty, if any, with respect to such non-Canon brand items is given by the supplier or producer thereof.
  • Page 47: Do You Want To Know More

    You Can Consult the User's Guide! The User's Guide describes all functions of the machine. Opening the User's Guide Search by "Contents" 1. Display the online manual website canon.com/oip-manual 2. Select the appropriate user's guide [imageRUNNER ADVANCE] [Black & White] Select this machine Search by "Search"...
  • Page 48 Building A, The Park Estate, 5 Talavera Road, 8501, Japan Macquarie Park, NSW 2113, Australia CANON U.S.A., INC. CANON CHINA CO., LTD One Canon Park, Melville, NY 11747, U.S.A. 2F Jinbao Building No.89 Jinbao Street, Dongcheng District, Beijing 100005, China CANON CANADA INC. CANON SINGAPORE PTE. LTD.

This manual is also suitable for:

Imagerunner advance 8585iImagerunner advance 8505i

Table of Contents