Table of Contents
Advertisement
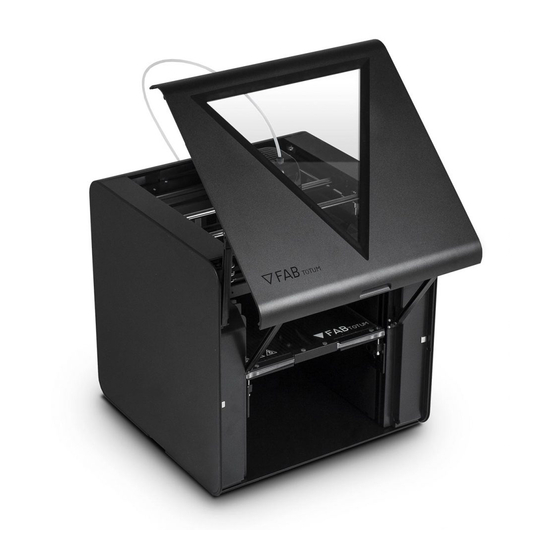
FABtotum Complete Manual
FABTOTUM MANUAL
INDEX OF CONTENTS
0. Safety
1. Getting started
1.1 Unboxing the FABtotum Personal Fabricator
1.2 First setup
2. Software
2.1 FABUI Overview
2.2 Network Configuration
3. 3D Printing
3.1 Your first 3D Print
3.2 Slicing with cura 2.X
3.3 3D Printing filaments guide
3.4 Improving adhesion
3.5 Advanced: Printing Head PRO
3.6 General 3D printing troubleshooting
4. Milling
4.1 CNC Milling: Making a "Make More" Sign
4.2 Milling & Engraving Bits
5. Laser Engraving
www.fabtotum.com
| 1
Advertisement
Table of Contents

Summary of Contents for FABtotum Personal Fabricator
- Page 1 FABtotum Complete Manual FABTOTUM MANUAL INDEX OF CONTENTS 0. Safety 1. Getting started 1.1 Unboxing the FABtotum Personal Fabricator 1.2 First setup 2. Software 2.1 FABUI Overview 2.2 Network Configuration 3. 3D Printing 3.1 Your first 3D Print 3.2 Slicing with cura 2.X 3.3 3D Printing filaments guide...
-
Page 2: Safety
FABtotum Complete Manual 5.1 Laser Head: Safety & health guidelines 5.2 Calibrating the Laser Head 5.3 Laser Head: engraving and cutting 6. 3D Scanning 6.1 Getting started 7. Maintenance 7.1 Head Installation 7.2 Bed calibration 7.3 Nozzle Height calibration 7.4 Filament loading / unloading 7.5 Feeder Maintenance... - Page 3 These parts have warning stickers and status LEDs on them to inform of the dangers related to the use of the FABtotum. Do not touch the nozzle, the heated bed or any moving part of the unit.
-
Page 4: Technical Support
FABtotum Complete Manual DO NOT touch, move the product or leave it unattended when it’s operating or turned on. DO NOT modify, disassemble or alter the unit and/or its components in any way. DO NOT touch or bend the flexible connection cable, the connectors and all cables. -
Page 5: Warranty
FABtotum Complete Manual purchased is sold on the assumption the purchaser will make his own tests to determine the quality and suitability of the product. Manufacturer expressly disclaims any and all liability for incidental and/or consequential property damage arising out of the use of this product. No information provided shall be deemed to be a recommendation to use any product in conflict with any existing applicable law. -
Page 6: Unboxing The Package
UNBOXING THE FABTOTUM PERSONAL FABRICATOR The unboxing procedure is important to prepare the FABtotum before the first setup without damaging the unit. Particular attention must be paid when removing the unit from its box. During unboxing you should also make sure there are no damages that might have occurred during transportation. -
Page 7: What's In The Box
FABtotum Complete Manual What’s in the box www.fabtotum.com... - Page 8 FABtotum Complete Manual Connecting to the FABtotum www.fabtotum.com...
- Page 9 FABtotum Complete Manual Installing heads and modules www.fabtotum.com...
-
Page 10: First Setup
Now it’s time to do the first setup and unit calibration! The unit Calibration of the FABtotum is a critical step in all future operations. A non-calibrated unit is unable to perform most basic task like printing and milling. Using a non-calibrated hardware could even damage the unit in the long run! After unboxing, setting up the machine and connecting to it with your favourite browser, you’ll be prompted with a... - Page 11 FABtotum Complete Manual Now it’s time to enter your settings and read carefully all the safety notices, also available on fabtotum.com/knowledgebase. Enter the username (email) Name, Surname and password. these will be used to access and operate the device. www.fabtotum.com...
- Page 12 FABtotum Complete Manual This passage is not mandatory, but you can set up a short name for your unit (a-z 0-9) that will be always accessible in your local Wlan/Lan (in this example http://fab01.local/ ) www.fabtotum.com | 12...
- Page 13 FABtotum Complete Manual Choose the Wlan you wish your unit will be connected to. www.fabtotum.com | 13...
- Page 14 FABtotum Complete Manual The procedure is finished, the installation will be finalized and you will be redirected to the onboard FABtotum User Interface (FABUI) www.fabtotum.com | 14...
- Page 15 FABtotum Complete Manual www.fabtotum.com | 15...
- Page 16 FABtotum Complete Manual The calibration wizard After the first setup you’ll be able to use the “calibration wizard” (either by clicking on the pop-up alert or going to Maintenance→ first setup). You can do all the wizard operations later by using the Maintenance menu.
-
Page 17: Software
2. SOFTWARE FABTOTUM FABUI SOFTWARE OVERVIEW The FABUI is the onboard user interface of the FABtotum Personal Fabricator. It’s used to store and launch all the “jobs” like 3D printing, milling, etc. After having setup the machine, unless otherwise specified, the FABUI will be accessible at http://169.254.1.2 once the FABtotum is switched on and connected directly to your computer via LAN cable. - Page 18 FABtotum Complete Manual The FABUI controls and menu are locate around the main page, that is dynamically loaded with different contents The FABUI allows to monitor , start, pause and stop any manufacturing job and have it run without the need of a connected computer.
- Page 19 FABtotum Complete Manual The project Manager is where you can upload and manage files for manufacturing: 3D printing, Milling, Laser engraving etc. The JOG menu is used to manually move the gantry and enter direct comands (suggested for expert users only) www.fabtotum.com...
- Page 20 FABtotum Complete Manual The Updates Menu allows you to quickly install available updates directly from the internet once they become available. www.fabtotum.com | 20...
-
Page 21: Network Configuration Guidelines
Older units have a separate USB Wlan Adapter. To set up the Wi-Fi connection you need to turn off your FABtotum, plug the USB Wi-Fi dongle in the USB port on the back of the unit and turn it back on. Once connected to the FAB UI, click on “Settings”, then “Network” and then “Wi-Fi”. You will see the list of available Wi-Fi networks, ranked by signal strength. -
Page 22: First Time Connection
FABtotum Complete Manual First time connection www.fabtotum.com | 22... - Page 23 The wireless tab allows to connect to single networks. Different modes are available: Access Point (AP mode) Available on FABtotum CORE and above.Static and Disabled. DNS-SD allows to give your unit a Domain name in the format http://NAME.local/ (note the ending “/” ).
- Page 24 FABtotum Complete Manual These settings are used on the FABtotum to resolve external domains. Do not change unless it’s required by special networking needs. www.fabtotum.com | 24...
-
Page 25: Your First 3D Print
First you’ll need a file to print. We have already uploaded some printing samples for you in your printer, you can find them in Object Manager – Samples. You can also upload and print other files, following this procedure, but if you are new to the FABtotum just stick to the sample. - Page 26 FABtotum Complete Manual Don’t let any leftover filament get dragged in the print area, cut it if necessary. When your FABtotum is printing, you can check all the printing parameters in the Live feed section (nozzle temperature, bed temperature, Z height, etc.) While printing you can edit all those parameters in the Controls section.
-
Page 27: Installation
FABtotum Complete Manual SLICING WITH CURA 2.X Cura is an open source software created and developed by Ultimaker. The FABtotum can work with .gcodes generated with Cura. To upload one on the FABUI, refer to the FABUI overview. Note: for legacy Cura 1.5 support, please refer to “Cura 1.5”... - Page 28 FABtotum Complete Manual The Wizard will also ask you if you want to install additional drivers to manage your printers. As the FABtotum does not require Arduino drivers for serial connectivity, you can avoid installing those. Finally, you can click on “Run Cura” and finalize the setup.
-
Page 29: Slicing An Stl Model
FABtotum Complete Manual Slicing an STL model Once Cura is configured, the correct FABtotum profile is loaded, and you have a model on your computer that you need to prepare for printing, you can proceed with slicing itself. The task is pretty easy: just drag and drop an .stl or an .obj file to the interface (or select the folder icon “Open file” in the 3D view (1)), and the 3D model will load. - Page 30 FABtotum Complete Manual Sequential Batch Printing Both Cura 1 and Cura 2 allow to choose the mode of the batch printing: you can print many objects at the same time or one at the time. This is very useful to reduce printing times and user intervention between multiple prints. It also allows to prepare gcodes of complete projects composed by multiple parts that can be printed in one task.
- Page 31 FABtotum Complete Manual www.fabtotum.com | 31...
- Page 32 FABtotum Complete Manual www.fabtotum.com | 32...
- Page 33 FABtotum Complete Manual Common Slicing Parameters Once you have tried our profiles you will want to make changes and create your own. Here are some basic information on slicing. NOZZLE SIZE: This is the tiny hole from which the material flows, the Hybrid Head V1 has a 0.35mm nozzle, the Printing Head V2 a 0.4 mm one.
- Page 34 1.75 mm filaments which is the value you should put in Cura. Please always make sure to use our tested and approved high quality filaments when using our FABtotum, you can purchase spools on our store. FILAMENT FLOW: This is the quantity of material extruded in percentage.
- Page 35 FABtotum Complete Manual bottom as it sinks the object into the platform. This feature should be used to avoid for the object to detach from the plane. TRAVEL SPEED: This parameter sets the speed at which the head moves when not printing. Suggested values for this are between 100mm/s, to 200mm/s.
-
Page 36: Pre-Flight Check
Pre-flight check If you are using a FABtotum filament you should not worry about the material too much, as extensive testing has been done to ensure good performances. However you may also use third party filaments. In both cases always make sure to keep in mind the following: If you are using a Slicing Software profile be aware that it’s not meant as a fool-proof solution, and might be... - Page 37 FABtotum Complete Manual Suggested Temperatures PLA (Polylactic Acid) It’s one of the most used material in 3D printing: it’s a biodegradable polymer that comes from corn. 3D Printing suggested temperature: 200 – 220 °C Bed temperature: 25 – 65 °C (bed can be at room temperature) ABS (Acrylonitrile butadiene styrene) It’s a common plastic polymer, it’s used to print strong parts.
-
Page 38: Flexible Filaments
Charging the polymers with materials like Carbon fibers, wood dust, metallic powder can make stronger materials or with a nice finishing. Printing settings depends on the polymer used. Refer to the spool manufacturer or , in case of FABtotum Filaments , the Spool label to get the suggested printing settings. -
Page 39: Improving Adhesion
Calibrating the bed A well calibration will create a constant thickness first layer, the material cools homogeneusly and the printing nozzle will not hit the printed part. With the FABtotum is very easy to calibrate the bed, using the bed calibration guided procedure. - Page 40 FABtotum Complete Manual ADVANCED PRINTING HEAD PRO Introduction The Printing Head PRO is a Direct Drive head with 1:10 reduction and hi-speed capabilities. It is important to understand that the main advantage of operating the Printing head pro is in it’s ability to produce more reliable results regardless of the shape of the 3D file being printed, the material and the way the files are arranged on the print bed.
- Page 41 FABtotum Complete Manual Filament Management and spool loading/unloading FILAMENT INSERTION FILAMENT REMOVAL www.fabtotum.com | 41...
- Page 42 FABtotum Complete Manual Depending on the model of the FABtotum (Core, Pro editions) the filament is loaded and unloaded in a different manner. It’s important to notice that since the Printing Head PRO does not require the feeder mechanism to work, the filament will not be inserted in the feeding mechanism but in a different loading hole.With the printing head PRO you can automatically...
- Page 43 Here a filament sensor will sense if the filament is present.Use this hole to insert the filament up to the head. Install the PTFE tube on the Print Head PRO (1,2) and the back of the FABtotum CORE. Do not use the feeder mechanism to feed the print head PRO.
- Page 44 FABtotum Complete Manual It does that with extreme speed and power. Take full advantage of this feature by packing more objects on the print bed and have them be as close as reasonably possibile and by not using the batch printing feature of your slicing software.
- Page 45 This way the standard profiles can be tuned for speed or for quality. All slicing profiles and onboard samples have been tested with FABtotum Official Filaments but may be as well adapted with ease for the respective third party materials.
-
Page 46: General 3D Printing Troubleshooting
E+ button and the FABtotum will extrude 10mm, if the filament is not moving, pull it while the motor is running: the filament has been grinded and requires some help to restart extruding;... - Page 47 FABtotum Complete Manual Nozzle is too close to the printing surface. In this case the filament won’t be able to get out if too close (you can tell it’s too close by the fact that the layer is very thin and has a faint tint, almost translucent).
-
Page 48: Milling
4. MILLING CNC Milling: Making a “Make More” Sign In this guide we are going to take a step-by step approach on how to use the FABtotum for CNC milling, by engraving a sample sign. We will engrave the “Make More” signon a foam stock block. We’ll use foam because we can avoid damages to the milling bit if something fails. - Page 49 FABtotum Complete Manual When you are done, press start and follow the on-screen instructions. Once the Job has started, the milling motor will power up and the milling process will begin in seconds. Take your time to go around in the Control tabs and see the current speed and RPMs.
- Page 50 FABtotum Complete Manual CAD/CAM guidelines for the FABtotum Personal Fabricator. You’ll be able to generate a gcode file (*.nc, *.gc, *.gcode) with the set of instructions needed to CNC Mill or Engrave your very own CAD design . In the meantime, check some of the community guides and tutorials on the topic.
- Page 51 FABtotum Complete Manual INTRODUCTION TO MILLING BITS The FABtotum Milling Head V2 and Hybrid Head both natively support milling bits with a shank diameter in the range of 3.0 to 3.5mm (0.12 inches or 1/8“) The above ER8 Collet can be swapped with another compatible one in the ER8 family.
- Page 52 FABtotum Complete Manual The ability to change the routers’ RPM is essential to good bit life and a good finish. Vibrations should also be kept at bay. The fewer the flutes, the larger the vibration on the tool, as the load is always localized instead of being distributed among more flutes.
- Page 53 You wouldn’t use a single fluted one for metals. The number of flutes increase with the hardness of the material. The FABtotum is able to work on any surface but it might be better to add another pass on the same route rather than going too strong.
- Page 54 FABtotum Complete Manual V Carve Milling Bit V carve flutes are used to engrave v-shaped paths and are usually associated with PCB engraving.They are differentiated by the angle of the tip. The bigger the angle the less probable is to break but it will be able to realize only bigger details, www.fabtotum.com...
- Page 55 FABtotum Complete Manual while smaller angles are used for fine details. www.fabtotum.com | 55...
-
Page 56: Laser Engraving
ONLY ALLOW USE BY A RESPONSIBLE PERSON This is not a toy. Children should not be permitted to use the FABtotum Personal Fabricator when equipped with a Laser Head. Any teenager using the Laser Head should be continuously supervised by a responsible adult. - Page 57 FABtotum Complete Manual POTENTIAL EYE INJURY HAZARD – DIFFUSE REFLECTION Avoid staring at the laser dot at close range, for more than a few seconds even with protective gear. Looking at the laser dot for more than 10 seconds can cause persisting damage.
- Page 58 FABtotum Complete Manual leave the room if not properly equipped. DO NOT USE SUNGLASSES FOR LASER PROTECTION Sunglasses are NOT laser protective eyewear. They are not rated to ensure light-attenuating protection. Most sunglasses will not block enough laser light to significantly reduce hazardous exposures.
-
Page 59: Getting Started
The focusing distance must therefore be determined and saved during this calibration procedure. First of all, let’s download the calibration sample Gcode at http://download.fabtotum.com/gcodes/material_test_pattern.gcode and upload it on your FABUI using the Object Manager. This is an iterative process. The head will try to engrave different patterns at increasing power that will tell you if you overestimated or underestimated the focusing distance. - Page 60 FABtotum Complete Manual Load the material_test_pattern.GCODE gcode file from the Make>Laser menu. Proceed to put on your safety goggles and take note of the safety warnings and hazards that are listed before starting. Calibrate the Z using either manual positioning or assisted positioning.
- Page 61 FABtotum Complete Manual During the job execution, judge your result and change the Z height accordingly. You can do so by operating on the Z height override button in the command tab. At the end of each print you will be asked to save the Z height changes.
- Page 62 FABtotum Complete Manual LASER HEAD: LASER ENGRAVING AND CUTTING The scope of this tutorial is to illustrate an engraving procedure with a sample raster image. The procedure is still valid for DXF files, but CAM params will be different when selecting the profiles.
- Page 63 FABtotum Complete Manual Depending on the file size the upload will take from a few seconds to a full minute. Once the file is loaded, you will be presented with the CAM interface. Notice that at this time you can’t see any preview unless the Gcode is Generated.
- Page 64 FABtotum Complete Manual As you can see, the shades are not shown correctly as in the original image, that’s because we choose a Black and White profile, that only uses two colors. let’s change the profile to Engraving -Greyscale (wood) and regenerate the Gcode by pressing the Regenerate Gcode button on the top right side of the page to see how it changes.
- Page 65 If you made changes to the profile you can download it locally and keep it on your computer. As usual, go to the FABtotum address on your browser and upload the Gcode to the FABUI object manager page. Then , from the main Menu run Make>Laser to list all available laser-related files.
- Page 66 FABtotum Complete Manual Select the Gcode you previously uploaded and press “Laser” Safety check: please read carefully what prompted and wear safety goggles as instructed. The Laser Head will be turned on at 5% intensity to allow positioning in the next step.
- Page 67 FABtotum Complete Manual Press the Home button and ok to proceed.The job will start in a few seconds. www.fabtotum.com | 67...
- Page 68 (Valid on all FABtotum purchased between 2013 to 2016) Rotative laser-scanning Rotative laser scanning is a scanning method that use the red laser line embedded on the FABtotum head and the camera, plus the 4th axis . It takes two pictures of a rotating object: one with the line projected on the object to scan and one without. Then the post processor installed on the Raspberry makes a subtraction between the two images, obtaining just the line modified on the object’s profile.
- Page 69 It uses the probe embedded in the FABtotum carriage to measure the geometry of the object. Special care should be applied as a scan that has not been correctly plannet may result in damages of the touch probe.
- Page 70 Using screws, duct tape or wires attch the object you want to scan and close the FABtotum’s door. When ready click “Click here when ready”. The scanning is started! Wait until the FABtotum took the last picture and sent it to your computer using the FABtotum Desktop Server Post processing a photogrammetry scan.
-
Page 71: Maintenance And Calibration
FABtotum Complete Manual 7. MAINTENANCE & CALIBRATION HEAD INSTALLATION At any given time, you can swap one head for another, provided the unit is not performing any operation. Swapping heads enable certain options in the FABUI interface itself, so for example you won’t be able to launch a subtractive job (e.g. - Page 72 FABtotum Complete Manual itself. Once saved the profile can be also exported and downloaded. www.fabtotum.com | 72...
-
Page 73: Bed Calibration
It’s very important to have a planar printing bed to make the first printing layer stick perfectly. With your FABtotum you can easily calibrate it using the guided procedure. The procedure works only on the 3D printing side of the hybrid bed, unless the fixtures holes are covered on the subtractive side, to avoid any damage to the probe. - Page 74 FABtotum Complete Manual By working with the supplied allen key, rotate the screws that sustain the bed as the program tells you. www.fabtotum.com | 74...
- Page 75 FABtotum Complete Manual Once all points are done, repeat the measurement. You’ll receive new instructions. Repeat until you see that all the points are green: www.fabtotum.com | 75...
- Page 76 FABtotum Complete Manual The Hybrid Bed of your FABtotum 3D printer is now calibrated. www.fabtotum.com | 76...
-
Page 77: Nozzle Height Calibration
FABtotum Complete Manual NOZZLE HEIGHT CALIBRATION The probe calibration sets the length of the FABtotum Personal Fabricator in order to be correctly be able to measure the distance from the bed. Follow these instructions to correctly execute the probe calibration procedure. - Page 78 FABtotum Complete Manual www.fabtotum.com | 78...
-
Page 79: Loading The Filament
Loading the filament Loading or changing the filament is an assisted procedure on the FABtotum. The user just need to follow the on-screen instructions and perform a series of tasks to allow the unit to safely insert or remove the filament from the system. - Page 80 FABtotum Complete Manual Open the compartment on the right of your FABtotum; place the spool as shown; cut the excess filament and sharpen the tip with scissors in order to facilitate entry; insert the filament in the Filament Hole or Filament Tube (according to device version): this is located near the “insert Filament”...
- Page 81 Printing Head Lite / V2, Hybrid Head Go to “Maintenance” -> “Spool” -> “Load spool” to start the guided procedure. Open the compartment on the right of your FABtotum; cut the excess filament and sharpen the tip (a slanting cut will do);...
-
Page 82: Unloading The Filament
FABtotum Complete Manual Unloading the filament Printing Head PRO Go to “Maintenance”-> “Spool” -> “Unload spool” to start the guided procedure. www.fabtotum.com | 82... - Page 83 FABtotum Complete Manual Wait for the nozzle to reach melting temperature; when the temperature is reached remove the feeding tube by pushing down the black cap AND pulling the feeding tube up. press “Start” to unload the filament; the filament will be extracted from the bowden tube, assist gently to retrieve the leftover filament.
- Page 84 FABtotum Complete Manual Cut the exceeding molten filament (if you don’t, it can get stuck in the bowden); open the compartment on the right; press “Start” to unload the filament; the filament will be extracted from the bowden tube, assist gently to retrieve the leftover filament.
- Page 85 FABtotum Complete Manual FEEDER CLEANING ON THE FABTOTUM CORE On the FABtotum CORE and CORE PRO the feeder compartment is removeable and can be inspected. As a result the feeder can be replaced, upgraded and -most importantly- accessed for maintenace cleaning.
- Page 86 FABtotum Complete Manual make also sure to uninstall and remove the filament from the head… BUT keep a little bit of excess filament sticking out, just like in the picture, in order to help yourself when reintroducing the feeder in the back panel once you are finished with the cleaning process.
- Page 87 FABtotum Complete Manual With a T8 screwdriver, unscrew all the external screws. leave the 3 internal untouched for now. www.fabtotum.com | 87...
- Page 88 FABtotum Complete Manual Extract just a few centimeters and take a peek inside, you should see the motor assembly and the motor connector. With a screwdriver gently disconnect the motor. www.fabtotum.com | 88...
- Page 89 FABtotum Complete Manual Now pull just a bit the cable in order to avoid to loose it inside the back panel. Do not pull the cable too much. www.fabtotum.com | 89...
- Page 90 FABtotum Complete Manual The feeder can now be pulled out. www.fabtotum.com | 90...
- Page 91 FABtotum Complete Manual cut the filament inside the feeding tube (leave 10-15cm for later convenience). The filament coming from the spool compartment must not be respooled at this point. You should end up with a back panel with the motor cable and the excess filament sticking out. Leave it this way for now and make sure those are not moved until further instructions are provided.
- Page 92 FABtotum Complete Manual Lets move back to the feeder. Pushing down the feeder release lever (just like in the photo) now we can extract the filament. www.fabtotum.com | 92...
- Page 93 FABtotum Complete Manual for better access you must remove the feeder plate by unscrewing the 3 screws. Make sure to keep them safe. www.fabtotum.com | 93...
- Page 94 FABtotum Complete Manual Remove the screw with a HEX driver Now you can extract the screw. Look inside and extract the bearing wich was held by this screw. www.fabtotum.com | 94...
- Page 95 FABtotum Complete Manual Inside you can see the feeding gear with some green filament residue. www.fabtotum.com | 95...
- Page 96 FABtotum Complete Manual With canned air , a brush or a compressor you can clean the feeding gear. When you are done, put back the bearing in the feeder and screw it securely but not too tightly. Before putting everything back clean the filament sticking from the unit as it could have become greasy by touching the librificated leadscrew inside the back of the unit.
- Page 97 FABtotum Complete Manual by pushing the release lever on the feeder, you can now insert the filament again up until the feeding gear. www.fabtotum.com | 97...
- Page 98 FABtotum Complete Manual By gently pulling the filament from the filament compartment you can retrieve the feeding tube and have it sticking in the filament compartment as it was originally. www.fabtotum.com | 98...
- Page 99 FABtotum Complete Manual Now screw everything back on the feeder. www.fabtotum.com | 99...
- Page 100 FABtotum Complete Manual the screw indicated by the tweezers is the shortest one of the bunch, in case you wonder. www.fabtotum.com | 100...
- Page 101 FABtotum Complete Manual just like it was before, insert the feeder in the feeder hole in the back of the unit, insert the motor cable connector on the motor and secure the connector on the clip. Put it back together by screwing the external T8 screws Gently.
- Page 102 FABtotum Complete Manual www.fabtotum.com | 102...
- Page 103 FABtotum Complete Manual REPLACING A NOZZLE : BEFORE STARTING Nozzles can be swapped in order to change nozzle diameter or material for special filaments or to change an old nozzle with a new one. Regardless of the reason and the modle of the head the procedure requires the following conditions: Remove the filament from the nozzle by unloading the filament Remove the head while the unit is idle and the nozzle is cold.
- Page 104 FABtotum Complete Manual Printing Head PRO Gather all the parts: the provided monkey wrenches, a T8 screwdriver and the desired nozzle. Optional: metal sponge for cleaning. Remove the two screws on the side with a T8 screwdriver. www.fabtotum.com | 104...
- Page 105 FABtotum Complete Manual Gently remove the shield. Note that the fan cable must not be pulled at any time. www.fabtotum.com | 105...
- Page 106 FABtotum Complete Manual This is a good time to gently clean the hotend from any plastic residue. Use the two wrenches to unscrew the nozzle. keep the hotend firm with one wrench and unscrew the nozzle with the other wrench just like you would normally (counterclockwise).
- Page 107 FABtotum Complete Manual Now screw the new nozzle back in manually and use the wrenches only to fasten it at the end. As a rule of thumb once you hit resistance the nozzle can still be screwed in for 10-20 angular degrees.
- Page 108 FABtotum Complete Manual The heat shield must be reinstalled. Make sure the wires are not in the way by gently pushing them back in to the respective hole. www.fabtotum.com | 108...
- Page 109 FABtotum Complete Manual Done! Renstall the head with the FABUI head installation procedure, load the filament and extrude some plastic or run a small print to prime the nozzle. www.fabtotum.com | 109...
- Page 110 FABtotum Complete Manual www.fabtotum.com | 110...
- Page 111 FABtotum Complete Manual Printing Head Lite / V2, Hybrid Head To change the nozzle on a Print Head V2 you’ll only need the two Wrenches usually provided with the unit. Make sure the nozzle is clean and has no dust or residues in the orifice.
- Page 112 FABtotum Complete Manual With one wrench keep the hotend still (right wrench in this image), with the other wrench turn the nozzle counterclockwise to unscrew. The nozzle should unscrew fine after a little extra force is applied to fight the initial friction.
- Page 113 FABtotum Complete Manual You can unscrew the whole nozzle by hand once the initial friction has been overcome. Make sure the final nozzle is clean and void of any dust, epsecially the screw. www.fabtotum.com | 113...
- Page 114 FABtotum Complete Manual Now you can manually and gently screw the nozzle down to around 1 mm distance from the metal base.Use the wrenches to force it screwed in. Once you feel some resistance you can still screw around 10-20 angular degrees more than that.
- Page 115 FABtotum Complete Manual www.fabtotum.com | 115...
- Page 116 FABtotum Complete Manual 8. RESOURCES & DEVELOPERS THE TOTUMDUINO BOARD Totumduino is the name of the FABtotum controller board based on Arduino. Its architecture is based on that of RAMPS 1.4 boards. Features 4th axis connector 5th axis on a pole JST connector PH series 2mm connector...
-
Page 117: Firmware Development
The Totumduino firmware is based on the Marlin by Erik Zalm. Its source code (called FABlin) can be found on GitHub at https://github.com/FABtotum/FABlin. Communications from the Raspberry Pi to the Totumduino use a custom set of G-codes. Please refer to the Raspberry Pi section for details on how it is done. - Page 118 Wait until the web interface completes the operation successfully (it beeps a couple of times in between). Flashing Firmware from the Raspberry Pi Upload your firmware to /var/www/build/ and connect to your FABtotum with a ssh terminal (search Putty for Windows or just open the Terminal on Linux/MacOS)
- Page 119 Mechanical Drawings FABtotum @ Grabcad (mechanical) https://grabcad.com/library/fabtotum-2 Electronics Electronics of the FABtotum personal Fabricator have been released on Github as well, along with the software needed for each microcontroller. Totumduino v10.4 schematics, draft http://download.fabtotum.com/TOTUMduino schematics.PDF Gerbers & BOM of all parts https://github.com/FABtotum/FAB_Electronics...
- Page 120 Arduino Nano or similar development boards mounted on the FABtotum Personal Fabricator through a HDB. This enables to create complex interactions, use actuators and sensors on top of the FABtotum Personal Fabricator. All sketches require the latest development version of the FABlin. You can compile it yourself from https://github.com/FABtotum/FABlin/tree/development or flash the precompiled hex file given in this repository.
- Page 121 FABtotum Complete Manual www.fabtotum.com | 121...
- Page 122 The FABtotum Personal Fabricator carriage is the platform on which each and every head has to sit. The carriage provides power, communication and other things through its connector plate. It moves on the X & Y axis.
- Page 123 They don’t harm or put users in direct danger and aren’t used for illegal or questionable activities; They comply with the mechanical, electronic, software, safety and licensing standards outlined in this document. Head Development Kit Resources You can find the Head Development Kit toolchain on the FABtotum GitHub repo: https://github.com/FABtotum/. www.fabtotum.com | 123...
Need help?
Do you have a question about the Personal Fabricator and is the answer not in the manual?
Questions and answers