Table of Contents
Advertisement
Advertisement
Table of Contents

Summary of Contents for Projoy Prosol-M600
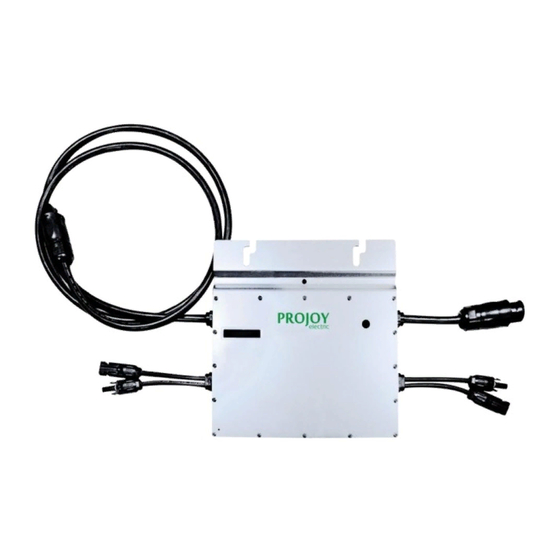
- Page 1 用户手册 V1.1 User Manual MICRO-INVERTER Prosol-M600 PROJOY ELECTRIC SRL...
-
Page 2: Table Of Contents
Catalogue INTRODUCTION ....................... 3 SAFETY ..........................4 SYMBOL ILLUSTRATION ......................4 INSTALLATION WARNINGS ......................6 PREPARE FOR INSTALLING ................... 7 TRANSPORT AND INSPECT ......................7 CHECK INSTALLATION ENVIRONMENT ..................7 INSTALLATION POSITION ......................8 MOUNTING AND WIRING ....................9 INSTALLING DIAGRAM ....................... 9 ASSEMBLY INSTRUCTION...................... -
Page 3: Introduction
1. INTRODUCTION Thank you for using M600 Micro-Inverter! This Micro-Inverter system is the world’s most technologically advanced inverter system with benefits of efficient, flexible, safe and reliable for use in utility-interactive applications. This system is composed of a group of Micro-inverters that convert direct current (DC) into alternating current (AC) and feeds it into the electric grid. -
Page 4: Safety
2. SAFETY IMPORTANT SAFETY INSTRUCTIONS! PLEASE KEEP THIS INTRODUCTION IN A SAFE PLACE! 2.1 SYMBOL ILLUSTRATION The safety symbols used in this manual are list below and illustrated in detail. Symbol Usage Indicates a hazardous situation that can result in deadly electric shock hazards, other serious physical injury, or fire hazards. - Page 5 The symbols on the micro inverter are list below and illustrated in detail. Symbol Usage Treatment To comply with European Directive 2002/96/EC on waste Electrical and Electronic Equipment and its implementation as national law, electrical equipment that has reached the end of its life must be collected separately and returned to an approved recycling facility.
-
Page 6: Installation Warnings
Prior to touching any part of the inverter use care to ensure surfaces and equipment are at touch safe temperatures and voltage potentials before proceeding. Projoy accepts No liability for damage from incorrect or careless operation Electrical Installation & Maintenance shall be conducted by licensed... -
Page 7: Prepare For Installing
3. PREPARE FOR INSTALLING 3.1 TRANSPORT AND INSPECT Projoy packages and protects individual components using suitable means to make the transport and subsequent handling easier. Transportation of the equipment, especially by road, must be carried out by suitable ways for protecting the components (in particular, the electronic components) from violent, shocks, humidity, vibration, etc. -
Page 8: Installation Position
3.3 INSTALLATION POSITION When choosing the position of installation, comply with the following conditions: Install only on structures specifically conceived for photovoltaic modules (supplied by installation technicians). Install Micro-inverter underneath the photovoltaic modules so that they work in the shade. If this condition cannot be met, the inverter could undergo derating. Fig.1. -
Page 9: Mounting And Wiring
4. MOUNTING AND WIRING 4.1 INSTALLING DIAGRAM System Schematic Diagram Red:Live PV Module Black:Neutral Green:Ground … Micro inverter AC Cable Distribution Panel Junction Fig.2. 230Vac single phase Assembly Diagram Fig.3. Assembly Illustration... -
Page 10: Assembly Instruction
4.2 ASSEMBLY INSTRUCTION Step 1. Install Micro-inverter Mark the approximate center of each photovoltaic module on the frame and install the Micro- inverter with the logo side facing downwards. Observe the certification documents concerning the maximum number of Micro- inverters permitted for installation at each cable section! The Micro-inverter must be under the module, out of long-term exposure to direct sunlight or rain. -
Page 11: Step 4. Connecting Ac-Trunk Cables To Junction Box
All the external connections to the insulated junction box (caps, adapters, etc.)must be made with securely-sealed Projoy components. Projoy AC cables from the Micro-inverters have three conductors with different colors to identify the function of each conductor: Red: Live... -
Page 12: Step 5. Drawing System Map
Step 5. Drawing System Map Draw a map of the system, affixing the extra label that comes attached to each inverter, on the appropriate position on the diagram (found in the Appendix of this manual). Fig.7. System Map Step 6. Install Photovoltaic Modules Install the photovoltaic modules, and connect the DC cables of the modules to the corresponding DC input side of the Micro-inverter. -
Page 13: Step 7. Install Cdd
The recommended installation need keeping the Micro-inverters underneath the photovoltaic modules, so that the Micro-inverters can operate in the shade. Direct sunlight may cause damage to the Micro-inverters. Each module must be connected to the Micro-inverters with a DC cable having a length of less than 3m. -
Page 14: Maintenance Guide
5. MAINTENANCE GUIDE 5.1 ROUTINE MAINTENANCE Only authorized personnel are allowed to carry out the maintenance operations and are responsible to report any anomalies. Always use the personal protective equipment provided by the employer when carry out the maintenance operation. -
Page 15: Appendix
6. APPENDIX 6.1 TECHNICAL DATA Model Prosol-M600 Input data(DC) Recommended input power (W) 200~310/200~310 MPPT voltage range (V) 27~48 Operating voltage range (V) 16~60 Maximum input voltage (V) Maximum input current (A) 10/10 Inverter back feed current (A) Output Data (AC) -
Page 16: Contact Information
Tel: +39 02 8088 7095 Fax: +39 02 9573 9603 Website: www.projoy-electric.it Email: Sales@projoy-electric.com APAC Branch ProJoy Electric Co., Ltd. XinTang Industrial Zone, PingJiang District, Suzhou, China Tel: +86 512 6878 6489 Fax: +86 512 6878 6489 Website: www.projoy-electric.com Email: Sales@projoy-electric.com 6.3 TEMPLATE FOR MAP OF MICRO-INVERTER INSTALLATION...