Table of Contents
Advertisement
Quick Links
Advertisement
Table of Contents

Subscribe to Our Youtube Channel
Related Manuals for Monoprice 16220


Summary of Contents for Monoprice 16220
-
Page 2: Table Of Contents
TABLE OF CONTENTS SAFETY WARNINGS AND GUIDELINES ............................3 INTRODUCTION ........................................ 4 FEATURES ..........................................4 PACKAGE CONTENTS ....................................5 SPEAKER BREAK-IN ...................................... 5 SPEAKER PLACEMENT ....................................6 CONSTANT VOLTAGE VS 8-OHM SPEAKER SYSTEMS ....................6 SPEAKER WIRING ......................................7 SPEAKER CONNECTIONS ..................................8 SUBWOOFER MOUNTING .................................. -
Page 3: Safety Warnings And Guidelines
SAFETY WARNINGS AND GUIDELINES Turn off and unplug all equipment prior to making electrical connections, including speaker wire connections. Reduce the volume level prior to making any change to the audio input source, e.g., changing radio stations or changing CDs. ... -
Page 4: Introduction
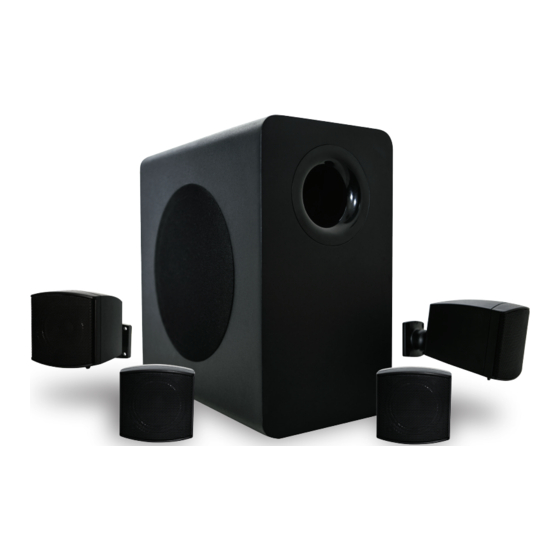
INTRODUCTION Thank you for purchasing this BGM 4.1 Indoor/Outdoor Speaker System! This passive speaker system features a 6.5" subwoofer and two pairs of 2.5" stereo satellite speakers. It can be used as a standard 8-ohm speaker system or as part of a 70-volt speaker system with 30-watt and 60-watt taps. -
Page 5: Package Contents
PACKAGE CONTENTS Please take an inventory of the package contents to ensure you have all the items listed below. If anything is missing or damaged, please contact Monoprice Customer Service for a replacement. 1x 6.5" passive subwoofer speaker 4x 2.5" full range satellite speakers... -
Page 6: Speaker Placement
SPEAKER PLACEMENT Before making any connections, you should examine the room and determine where you will place each speaker. This system is intended for open spaces as large as 30 feet by 50 feet. If installing to a larger room, multiple systems should be used in a 70-volt speaker array. -
Page 7: Speaker Wiring
lower overall volume levels. In the latter case, the 4-ohms impedance means that your amplifier will have to work harder and must be rated as stable at 4 ohms. Adding a third speaker to the mix would complicate it further, producing either a 24-ohm or 2.67-ohm overall impedance. -
Page 8: Speaker Connections
SPEAKER CONNECTIONS Warning! To prevent possible personal injury and/or damage to your equipment, turn off and unplug all equipment before making connections! Before attempting to make any connections it is best to look at the situation, get all the necessary materials together, and then make all the connections at once. First, look at the back of your amplifier or receiver to determine what options it offers for making connections. - Page 9 Wire Gauge Distance (feet) 18 AWG 16 AWG 14 AWG 12 AWG 10 AWG In general you should use the heaviest gauge speaker wire that will fit in the connectors (remember, the smaller the AWG number, the heavier/thicker the wire). Using pin plugs, spade terminals, and cable lugs can allow use of heavier gauge wire.
-
Page 10: Subwoofer Mounting
In many cases, the mark is a single stripe on the jacket of one of the connectors. In this case the side with the stripe is generally considered the positive side, but it really does not matter as long as you are consistent in always using the stripe as positive or always using it as negative. -
Page 11: Vertical Mounting
Vertical Mounting 1. Use the included wall template to mark the screw locations on your vertical surface. Ensure that it is not located in a position where it could fall on people or animals in the event that it becomes dislodged. Additionally, it should be positioned so there is no obstruction close to the port on the front. -
Page 12: Wiring The Speakers
2. You will need to obtain four screws (not included) to mount each bracket to your vertical surface. The screws should have a shaft diameter no larger than 4mm and a head diameter of 5-6mm. 3. If necessary, drill pilot holes for the mounting screws using a drill bit of the appropriate size. - Page 13 speaker wire to the speaker's input terminals, then connect the other end to the appropriate terminals on the rear of the subwoofer. Take care to match the polarity at each end. 5. For each satellite that will be connected to a satellite wall mount bracket, remove the rubber plug from the bracket slot on the bottom rear of the speaker, along with the plastic insert.
-
Page 14: Online Support
ONLINE SUPPORT Monoprice is pleased to provide free online support. For order related issues, contact the Customer Service department through the Live Chat link on our website www.monoprice.com during normal business hours (Mon-Fri: 5am-7pm PT, Sat-Sun: 9am- 6pm PT) or via email at support@monoprice.com For technical issues, contact the Technical Support department through the online chat button on our website www.monoprice.com during regular business hours, 7 days a week.
Need help?
Do you have a question about the 16220 and is the answer not in the manual?
Questions and answers