
Related Manuals for Gen2wave RP1600


Summary of Contents for Gen2wave RP1600
- Page 1 V1.0 RP1600 User's Guide Gen2Wave Co.,Ltd This document is proprietary and confidential. No part of this document may be disclosed in any manner to a third party without the prior written consent of GEN2WAVE.
-
Page 2: Copyrights
Please refer to your contact for further information. Trademarks Gen2Wave and the Gen2Wave logo are registered trademarks of Gen2Wave. -
Page 3: Table Of Contents
Table of Contents Copyrights ..............................2 1. Overview ..............................4 2. Getting Started ............................6 3. Basic Function .............................12 4. Calls ..............................17 5. Applications ............................21 6. Using the Scanner ..........................26 7. Using the Camera ..........................28 8. Using the IC Card, NFC ........................30 9. Wireless ...............................32 10. -
Page 4: Overview
1. Overview 1) Specifications 2) Package... - Page 5 3) Device Features...
-
Page 6: Getting Started
2. Getting Started 1) Installing Cards There are three slots to insert SAM, micro SD, and SIM cards in the back of your device. A. SAM card is required for security transactions that are made through your device. It validates the device and the credit cards. It also includes the company information. B. - Page 7 2) Installing Battery RP Series uses a Lithium-ion rechargeable battery (Standard 1860mAh, Middle 2860mAh, Extended 4000mAh). Install the provided battery before starting to charge the device. A. Installing the Battery (1) Insert the battery, top first, into the battery compartment in the back of the device. (2) Press the battery down into the battery compartment .
- Page 8 (2) Battery full charging time - 1,860mAh : 4hr / 2,860mAh : 5hr / 4,000mAh : 6hr CAUTION Do not use any other charger except one (5.0V / 3.5A) provide. Make sure to handle it gentle; damage with excessive force may cause no warranty. Risk of explosion if battery is replaced by an incorrect type.
- Page 9 5) Manage Battery A. Battery Usage ** Prior to checking the battery charge level, remove the RP Series from any AC power source. (cradle or multigender) The Battery screen lists which applications consume the most battery power. Also use it to turn off applications that were downloaded if they are consuming too much power.
- Page 10 B. Manual Settings (1) Date&Time - Menu > Settings > Date & time > Automatic date & time to disable automatic date and time synchronization. - Set date > Move the sliders up and down to select the month, date and year. - Set Time >...
- Page 11 B. Volumes - Use to change the volume of Media, Ringtone & notifications, Alarms. C. Call Ringtone & Vibrate (1) Phone ringtone - Touch to select a ringtone to sound when an incoming call is received. (2) Vibrate when ringing - Check to make the device vibrate when a call is received D.
-
Page 12: Basic Function
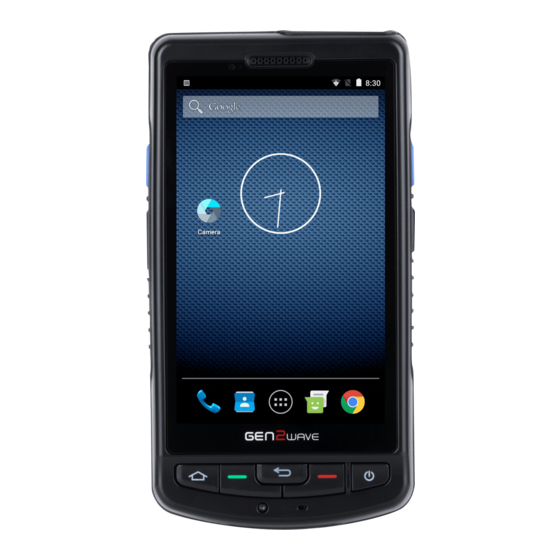
3. Basic Function 1) Home Screen You can personalize the panels with your choice of shortcuts, apps, folders and widgets. The Favorites tray, located at the bottom of the screen, is visible from any of the five home screen panels. You can modify the apps in the Favorites tray to include the apps you use most. - Page 13 2) Accessing the Status Bar To view additional details about a notification, touch and hold the status bard at the top of the screen and then drag down. The notification panel provides quick access to all your notifications. - Touch any notification to open the related app and access additional settings or information. - Select to access the quick settings screen.
- Page 14 The Device has function buttons. 5) Turning Airplane Mode ON/OFF Turn Airplane Mode on to disable all the terminal radios that transmit voice or data. A. Press and hold the Power button until the options menu displays. B. Touch Airplane Mode to toggle the mode on or off. When Airplane Mode is turned on, shows on the status bar.
- Page 15 (2) Drag the item to the top of the screen where the word Remove is displayed. C. To move an item (1) Tap and hold the item. (2) When the unit vibrates, drag and drop the item in the new location ** The next panel automatically opens if you drag the item to the edge of the touchscreen.
- Page 16 10) Using the On-screen Keyboard Use the on-screen keyboard to enter text in a text field. To configure the keyboard settings, Menu > Settings > Language & input and then select keyboard settings. A. Editing Text (1) Edit entered text and use menu commands to cut, copy, and paste text within or acress applications. Some applications do not support editing some or all of the text they display;...
-
Page 17: Calls
4. Calls Make a phone call from the Phone application, the People application or other applications or widgets that display 1) Emergency Calling The service provider programs one or more emergency phone numbers, such as 911 or 999, that the user can call under any circumstances, even when the phone is locked, a SIM card is not inserted or the phone is not activated. - Page 18 5) Making a call using the contacts and call history A. Using the contacts (1) On the Home screen touch phone icon. (2) Touch the people icon tab. (3) Touch the contact to initiate the call. (4) Touch end icon to end the call. B.
- Page 19 Then touch the caller. To include all parties again, touch icon. 7) Making a call using a bluetooth headset A. Bluetooth headset (1) Pair the bluetooth headset with the device. (2) Press the call button on the bluetooth headset (3) Press the call button on the bluetooth headset to end the call. 8) Answering Calls When you receive a phone call, the Incoming call screen opens, displaying the call ID and any additional information about the caller that is in the people application.
- Page 20 10) Call Settings Use the call settings to modify options related to the phone call feature. A. Ringtone & Vibrate (1) Phone ringtone : touch to select a ringtone to sound when an incoming call is received. (2) Vibrate when ringing : Check to make the device vibrate when a call is received. B.
-
Page 21: Applications
5. Applications This section describes the applications installed on the device. 1) Messaging Use Messaging to send and receive SMS and MMS message. From a Home screen or Menu, touch A. Sending a Text Message (1) In the main Messaging screen, touch (2) In the to field, enter a name or a mobile phone number. - Page 22 - Slideshow : Opens a screen opens to assemble txt, photos, videos, and recordings into a slideshow of up to 10 slides to attach to the message. - Contacts : Send a contact's information. (4) Touch to send the message. 2) People Use the People application to manage contacts.
- Page 23 3) Sound Recorder Use Sound Recorder to record audio messages. Recording are saved on the microSD card(if installed) or the Internal Storage and available in the Music application playlist titled "My Recordings" 4) Gallery The device support the following image formats : jpeg, gif. pnd, bmp. The device support the following video formats : H.263, H.264, MPEG4 simple profile.
- Page 24 6) G2W TEST It is available for users to test main functions of the device. A. Path : Menu > G2W TEST B. Test Select each test item to check each function is working properly or not. ...
- Page 25 C. Information View basic information about the device. ...
-
Page 26: Using The Scanner
6. Using the Scanner 1) Overview The RP Series device houses a compact lager or image engine that instantly read popular 1D and 2D(image engine) barcodes and supports decoding for greater flexibility in real-world settings. 2) Scanner Engine Specifications. 3) How to use scanner A. - Page 27 4) How to Scan direct input Scan direct input is a utility that adds advanced bar code scanning capability to any application without writing code. It runs in the background and handles the interface to built-in barcode scanners. The captured bar code data is converted to keystrokes and sent to the target application as if it was typed on the keypad.
-
Page 28: Using The Camera
7. Using the Camera 1) Overview Device are equipped with 13.0 Megapixel auto focus cameras to provide easy integration of color picture and video capture into business application. The camera lens and camera flash are located on the back panel of the terminal. Pictures and videos captured using the Camera app are stored on the internal memory in the DCIM folder under Camera(Internal storage/DCIM/Camera). - Page 29 - Access options to share the photo. - Touch More to access editing options, delete, view details, or set a photo as a contact photo or the Home screen wallpaper. - Swipe left or right to scroll through your other photos or videos. (6) Press the Back button to return to the Camera app.
-
Page 30: Using The Ic Card, Nfc
8. Using the IC Card, NFC 1) Overview To read cards, use IC Card or Near field communication (NFC.) ** A SAM card is required to use this feature. For information about a SAM card, refer "2. Getting Started > Installing Cards". ** IC Card/NFC is only available for the models with IC Card/NFC installed. - Page 31 (2) Peer-to-Peer commnunication (3) Card Emulation mode C. Reading NFC cards (1) Launch an NFC enabled application. (2) Move RP Series close the NFC card until the RP Series detects the card. (3) Hold the card steadily until the transaction is complete (usually indicated by the application). ** Make sure the NFC options is marked checked in the Settings menu.
-
Page 32: Wireless
9. Wireless This section provides information on the wireless features - Wireless Wire Area Network (WWAN) - Wireless Local Area Network (WLAN) - Bluetooth 1) Wireless Wide Area Networks Use Wireless wide area networks(WWANs) to access data over a cellular network. A. - Page 33 > In the Network SSID text field, edit the network name. > Touch the Security option and select a security method from the drop-down list. None, WPA PSK, WPA2 PSK > In the Password text field, enter a password ** If None is selected in the Security option, a password is not required. >...
- Page 34 - Open - Wireless Equivalent Privacy (WEB) - Wi-Fi Protected Access (WPA) / WPA2 Personal (PSK) - Extensible Authentication Protocol (EAP) The status bar displays icons that indicate Wi-Fi network availability and Wi-Fi status. ** Turn off Wi-Fi when not using it, to extend the life of the battery. A.
- Page 35 - If required, touch CA certificate and select a Certification Authority (CA) certificate. Certificates are installed using the Security settings. - If required, touch User certificate and select a user certificate. User certificates are installed using the Location & security settings. - If required, in the Identity text box, enter the username credentials.
- Page 36 ** By default, the network Proxy is set to None and the IP settings is set to DHCP. D. Configuring for a proxy server A proxy server is a server that acts as an intermediary for requests from clients seeking resources from other servers.
- Page 37 - Use to select the frequency band. - Options : Auto(Default), 5 GHz only or 2.4 GHz only. (5) Wi-Fi region code - Displays the current region code. (6) Install Certificates - Touch to install certificates. (7) Wi-Fi optimization - Touch to minimize battery usage when Wi-Fi is on G.
- Page 38 B. Bluetooth radio power Turn off the Bluetooth radio to save power or if entering an area with radio restrictions. When the radio is off, other Bluetooth devices cannot see or connect to the device. Turn on the Bluetooth radio to exchange information with other Bluetooth devices (within range). Communicate only with Bluetooth radios in close proximity.
- Page 39 F. Configuring or unpairing bluetooth devices (1) Menu > Settings > Verify the Bluetooth radio is activated ON. (2) Touch Bluetooth (3) On the Paired Devices list touch the settings net to name of the device you want to disconnect. (4) Touch Rename, Unpair or Select a different profile from the Profiles list available for the paired device.
-
Page 40: Settings
10. Settings 1) Ethernet By default, the RP Series is configured to obtain IP addresses automatically via DHCP server. This means that in most cases you would simply plug-and-play the unit. A. Connecting the device to the ethernet accessories (1) Plug the ethernet accessories(ethernet cradle, 4 slot ethernet cradle, ethernet multigender) into the RJ45 connector on the back of the ethernet accessories. - Page 41 B. Encryption Encrypt phone : Tap to encrypt your accounts, settings, downloaded apps and their data, and other files. Set a numeric PIN or passwords for encryption. You must enter the password each time you turn on the device. ** You can only decrypt the device by performing factory reset. ** Encrypting your device may take more an hour.
-
Page 42: Accessories
11. Accessories 1) Vehicle cradle A. Scope This vehicle cradle is compatible with all RP1000 series. Gen2Wave manufactures and supplies. B. Mechanical Characteristics (1) Size : 88.2 x 108.2 x 44.2mm VC-RP1000-CS(serial type) VC-RP1000-CX(none serial) - Page 43 C. Block Diagram D. Specification (1) Characteristics of the product - Charging for RP1000 series - support USB Host communication - support Ear-mic Jack for voice call headset - support serial communication - Power on indicator red color LED (2) Electrical Characteristics - Power supply voltage In : DC.
- Page 44 A. CAT-RP1000-CEM (Ear-mic jack Adaptor Cable for Stereo Headset Specification) (1) Scope This direct Ear-mic jack adaptor cable is compatible with all RP1000 series. Gen2Wave manufactures and supplies. (2) Mechanical Characteristics - Cable length : 350mm (MAX 800mm) - Weight : less than 40g...
- Page 45 B. CAT-RP1000-CQD (Quick Disconnect Adaptor Cable for Headset Specification) (1) Scope This direct QD adaptor cable is compatible with all RP1000 series. Gen2Wave manufactures and supplies. (2) Mechanical Characteristics - Cable length : 350mm (Max. 800mm) - Weight : less than 40g...
- Page 46 C. CAT-RP1000-CSM (Adaptor Cable for Serial Connection) (1) Scope This Adaptor cable for serial connection is compatible with all RP1000 series. Gen2Wave manufactures and supplies. (2) Mechanical Characteristics - Cable length : 330mm (MAX 800mm) - Weight : less than 50g...
- Page 47 - Power Out (D-sub Connector Pin No. 9) : DC 5V / 500mA (Max.) - Serial communication D. CAT-RP1000-CUH (Adaptor Cable for USB Host) (1) Scope This Adaptor cable for USB host is compatible with all RP1000 series. Gen2Wave manufactures and supplies. (2) Mechanical Characteristics...
- Page 48 - Cable length : 240mm - Weight : less than 30g (3) Block Diagram...
-
Page 49: G2W_Kisok
12. G2W Kiosk 1) Installing the G2W_Kiosk Program Path : Menu > Execute "ES File Explorer" > Root > mastering > demo_apk > G2W_KIOSK.apk APK Download Path : A. Installing the G2W_KIOSK.apk ... - Page 50 A. Execute G2W_KIOSK > Select "OK, Got it." > Select G2W_KOISK Lancher > Always 3) Settings A. To set Gen2Wave Kiosk tap anywhere in the empty area 5 times within 3 seconds. > Input Password(Defaut 0000) ...
- Page 51 B. Manage Applications Select the applications to be allowed in Lock mode. - Add folder - Add application ...
- Page 52 - Add files(Image, Text) C. Import/Export Settings Backup and share settings with other devices - Export Settings as a file : Copy settings to external storage. (filename : gen2lock.settings) - Import from file : Copy Settings from external storage. - Reset settings : This will reset all settings.
- Page 53 - Set allowed websites : To add allowed websites, type address ** These settings are applied only in KIOSK mode. ** You can access websites only which is set as allowed websites. G. About Gen2Wave Kiosk Show the information of Gen2Wave Kiosk...
- Page 54 This product is CE marked according to the provisions of the R&TTE Directive(1999/5/EC). Hereby, Gen2wave Co., Ltd. declares that this product is in compliance with the essential requirements and other relevant provisions of Directive 1999/5/EC. This device is Class 2 radio equipment under the European Radio and Telecommunications Terminal Equipment (R&TTE) Direective (1999/5/EC).
Need help?
Do you have a question about the RP1600 and is the answer not in the manual?
Questions and answers