Table of Contents
Advertisement
Quick Links
Viking Use & Care Manual
Viking Range Corporation
111 Front Street
Greenwood, Mississippi 38930 USA
(662) 455-1200
For product information,
call 1-888-VIKING1 (845-4641)
or visit the Viking Web site at
Designer Series Built-In Electric
vikingrange.com
Touch Control Single and Double Ovens
F20686 EN
(102909J)
Advertisement
Table of Contents

Subscribe to Our Youtube Channel
Related Manuals for Viking F20686


Summary of Contents for Viking F20686
- Page 1 Viking Use & Care Manual Viking Range Corporation 111 Front Street Greenwood, Mississippi 38930 USA (662) 455-1200 For product information, call 1-888-VIKING1 (845-4641) or visit the Viking Web site at Designer Series Built-In Electric vikingrange.com Touch Control Single and Double Ovens F20686 EN (102909J)
-
Page 2: Table Of Contents
HI BROIL _________________________________________________51 MED BROIL ______________________________________________51 appliance needs. For more information about the complete and LOW BROIL ______________________________________________51 growing selection of Viking products, contact your dealer or visit us Broiling Instructions________________________________________53 online at vikingrange.com Warming Modes_____________________________________________56 Convection Dehydrate _____________________________________56... - Page 3 IMPORTANT– IMPORTANT– Please Read and Follow Please Read and Follow Warning and Important Safety Instructions appearing in this manual WARNING are not meant to cover all possible conditions and situations that may occur. Common sense, caution, and care must be exercised when DO NOT use commercial oven cleaners inside the oven.
- Page 4 IMPORTANT– IMPORTANT– Please Read and Follow Please Read and Follow To Prevent Fire or Smoke Damage Cooking Safety • Be sure all packing materials are removed from the appliance before • Use dry, sturdy pot-holders. Damp pot-holders may cause burns from steam. operating it.
- Page 5 IMPORTANT– IMPORTANT– Please Read and Follow Please Read and Follow Important Safety Notice and Warning • Other potentially hot surfaces include oven vent, surfaces near the vent The California Safe Drinking Water and Toxic Enforcement Act of 1986 opening, oven door, areas around the oven door, and oven window. (Proposition 65) requires the Governor of California to publish a list of •...
- Page 6 The cooling fan should be operating when the unit is in operation. If you notice the cooling fan is not operating or you observe unusual or excessive noise coming from the cooling fan, contact a Viking CAUTION Authorized Service Center before continuing operation. Failure to do DO NOT touch the exterior portions of the oven after so can result in damage to the oven or surrounding cabinets.
-
Page 7: Before Using Oven
Before Using Oven Setting the Clock Oven Setting the Clock Important! Before first use, wipe interior with soapy water and dry The time-of-day must be set thoroughly. Then set the oven selector to “BAKE”, the thermostat before any other program can to 350°F, and operate for an hour. -
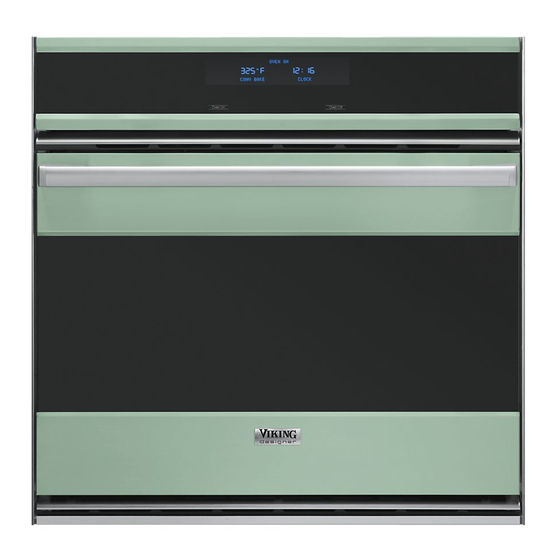
Page 8: Oven Control Panel
Oven Control Panel Oven Control Panel Oven Function and Electronic Timing Center Oven Selector Controls Electronic Keypad Entry Temperature Controls The electronic timing center is used to The oven selector controls are The electronic keypad entry is Each oven function has a separate setting. program and control all timing used to turn the upper or used to program and control... -
Page 9: Oven Features
Clocks and Timers Electronic Timing Center The Electronic Timing Center is used to program and control all timing functions on your Viking appliance. It has four display and programming modes that are activated by the four push buttons. Both the timer and the Cook Time/Stop Time modes can be used to time cooking periods. - Page 10 Cook Time and Stop Time The timer is designed for accurate timing and is ideal for baking With the Viking oven, you can choose what times you need to start delicate items such as biscuits, cookies, and popovers, and for precise and stop cooking your food.
-
Page 11: Oven Settings
Clocks and Timers Oven Settings Cook Time and Stop Time Settings (cont.) To set Stop Time: Use this function to access, program, 1. Set Cook Time, following the steps provided in the previous section. and customize special features of your 2. - Page 12 Oven Settings Oven Settings Tones Tones (cont.) This function allows you to define the duration of tones and the To change the frequency and/or duration of any of the above tone number of tones for different events. Your oven is programmed with signals: different audible tones as demonstrated by the following chart: 1.
- Page 13 Oven Settings Oven Settings Tone Volume Timeouts (cont.) To change the Tone Volume setting: To change the duration of a Timeout: 1. Press "SETTINGS." Settings menu will appear on display. 1. Press “SETTINGS.” Settings menu will appear in display. 2. Press the up or down arrows until "TONES ..." appears on 2.
- Page 14 Oven Settings Oven Settings Sabbath Mode Lock and Unlock This mode offers users belonging to religions with “no work” This child protection function prevents restrictions to program their ovens to comply with the Sabbath the oven controls from being activated requirement.
- Page 15 Oven Settings Oven Settings Editing a Recipe: This Recipe Function accesses, programs, and saves cooking 1. In the recipe list mode, press “RECIPES.” cycles from favorite recipes. 2. Recipe name should be flashing. 3. Use the following instructions to make changes: Entering Recipe Name: •...
-
Page 16: Using The Oven
Therefore, placing food items in the oven during preheat mode is not Roast, TruConvec™, and recommended. The Viking Rapid Ready™ Preheat System is Convection Broil are the cooking engineered so that the oven is brought to the desired set temperature... -
Page 17: Rack Positions
Using the Oven Using the Oven Rack Positions Conventional and Convection Cooking Each oven is equipped with two standard tilt-proof racks and one Because of variations in food density, surface texture and consistency, TruGlide™ rack. With the TruGlide™ rack, the bottom section remains some foods may be prepared more successfully using the conventional in the oven and the top section smoothly glides outward when pulled. -
Page 18: Condensation
Using the Oven Using the Oven Condensation Pan Placement Tips The oven is supplied with a system which provides a natural circulation • When using large (15" x 13") flat pans or trays that cover most of of air. In most cases, this natural circulation will eliminate any observed the rack, rack positions 2 or 3 produce the best results. -
Page 19: Baking
Baking Baking BAKE (Two-Element Bake) TRU CONV (TruConvec™) Full power heat is radiated from the bake The rear element only operates at full element in the bottom of the oven cavity power. There is no direct heat from the and supplemental heat is radiated from bottom or top elements. -
Page 20: Bake Instructions
Baking Baking Bake Instructions Convection Bake Instructions This function is recommended for single-rack baking. Use this setting This function is recommended for multi-rack baking. Foods can be for baking, roasting, and casseroles. baked and roasted at the same time with minimal taste transfer, even when different dishes are involved, such as cakes, fish, or meat. - Page 21 Baking Baking TruConvec™ Instructions Baking Chart This function is ideal for foods that require gentle cooking, single-rack Single Rack Time baking, multiple-rack baking, roasting, and preparation of complete Food Pan Size Position Temp (min) meals. This setting is also recommended when preparing large BREADS quantities of baked goods at one time.
-
Page 22: Solving Baking Problems
Baking Solving Baking Problems Convection Baking Chart Baking problems can occur for many reasons. Check the chart below for the causes and remedies for the most common problems. It is Single Rack Time important to remember that the temperature setting and cooking Food Pan Size Position... -
Page 23: Roasting
Roasting Roasting CONV ROAST Roasting Tips (cont.) (Convection Roast) • When using a meat thermometer, insert the probe halfway into the The convection element runs in center of the thickest portion of the meat. (For poultry, insert the conjunction with the inner and outer thermometer probe between the body and leg into the thickest part broil elements. -
Page 24: Roast Instructions
Roasting Roasting Roasting Tips Convection Roast Instructions (cont.) After preparing the meat and placing on broiler pan, follow these Use this function when roasting tender cuts of meat or poultry of steps for proper probe placement. any size. • Lay the probe on the outside of the meat along the top or side and To use Convection Roast: mark with your finger where the edge of the meat comes to on the 1. - Page 25 Roasting Roasting Auto Roast Instructions Conventional Roasting Chart (when using the Bake or Convection Bake setting) Use this function further simplifies roasting by automatically searing the outside of Internal Time meats, raising the pre-set temperature by Food Weight Temp (min/lb) Temp 100°F for a short time to sear the outside BEEF...
-
Page 26: Broiling
Roasting Broiling Convection Roasting Chart CONV BROIL (Convection Broil) Internal Time The top element operates at full power. Food Weight Temp (min/lb) Temp This function is exactly the same as BEEF regular broiling with the additional Rib roast benefit of air circulation by the Rare 4 - 6 lbs 325˚... -
Page 27: Broiling Instructions
Broiling Broiling Broiling Tips Broiling Instructions • ALWAYS use a broiler pan and grid for broiling. They are designed Broiling is a dry-heat cooking method using direct or radiant heat. to provide drainage of excess liquid and fat away from the cooking It is used for small, individualized cuts such as steaks, chops, and surface to help prevent splatter, smoke, and fire. - Page 28 Broiling Broiling Convection Broil Instructions Broiling Chart Convection broiling has the advantage of broiling food slightly more Type and Time quickly than conventional. Convection broiling of meats also produces Cut of Meat Weight Setting Rack (min) better results, especially for thick cuts. This is because meat sears on BEEF the outside and retains more juices and natural flavor inside with less Sirloin, 1"...
-
Page 29: Warming Modes
Warming Modes Warming Modes Convection Dehydrate Convection Defrost This oven is designed not only to cook, This oven can defrost frozen food. With but also to dehydrate fruits and the temperature control off, a motorized vegetables. With this function, a fan in the rear of the oven circulates air. -
Page 30: Cleaning And Maintenance
Cleaning and Maintenance Cleaning and Maintenance Broiler Pan and Grid Any piece of equipment works better and lasts longer when maintained properly and kept clean. Cooking equipment is no Clean with detergent and hot water. For stubborn spots, use a soap-filled exception. -
Page 31: Self-Clean Cycle
Self-Clean Cycle Self-Clean Cycle To start the Self-Clean cycle: This oven features an automatic pyrolytic self-cleaning cycle. During this cycle, the oven reaches elevated temperatures in order to burn off 1. Close the door completely. soil and deposits. An integral smoke eliminator helps reduce odors 2. -
Page 32: Replacing Oven Lights
Replacing Oven Lights Troubleshooting Problem Possible Cause and/or Remedy WARNING Oven is not connected to electrical power. Oven will not function. ELECTRICAL SHOCK HAZARD Disconnect the electric power at the main fuse or circuit Have electrician check power circuit breaker, breaker before replacing bulb. -
Page 33: Error Handling
Error Handling Service Information In the event that you make an error while programming your Viking If service is required, call your dealer or authorized service agency. oven, you will hear a long beep followed by the appearance of an The name of the authorized service agency can be obtained from the error message on the display. - Page 34 (12) months from the date of original retail purchase. Viking Range Corporation, warrantor, agrees to repair or replace, at its option, any part which fails or is found to be defective during the warranty period.
Need help?
Do you have a question about the F20686 and is the answer not in the manual?
Questions and answers