
Related Manuals for LG AC Ez Touch


Summary of Contents for LG AC Ez Touch
- Page 1 INSTALLATION / USER MANUAL CONDITIONER Please read this manual carefully before operating your set and retain it for future reference. AC Ez Touch PACEZA000, CACEZA000 www.lg.com P/NO : MFL69517401...
-
Page 2: Table Of Contents
TABLE OF CONTENTS TABLE OF CONTENTS Delete schedule TIPS FOR SAVING EN- View report ERGY Emergency stop IMPORTANT SAFETY IN- Setting STRUCTIONS Operation setting COMPONENTS Group setting System setting PRODUCT SPECIFICA- System setting (General setting) TION System setting (Advanced setting) NAME OF EACH PART Screen setting Name... -
Page 3: Tips For Saving Energy
TIPS FOR SAVING ENERGY TIPS FOR SAVING ENERGY Here are some tips that will help you minimize the power consumption when you use the air conditioner. You can use your air conditioner more efficiently by referring to the instructions below. •... -
Page 4: Important Safety Instructions
• If the installation work is done without an installation license, the installer will be responsible for all problems related to the installation, and in such case, LG will not provide the free of charge A/S. • The following safety related cautions are to prevent the unexpected risk or damage in advance. - Page 5 IMPORTANT SAFETY INSTRUCTIONS • Install the product fixed firmly. If the product is not securely fixed, it may fall and become damaged. • Correctly install the product after fully studying the provided manual. It may cause fire or elec- tric shock. •...
- Page 6 IMPORTANT SAFETY INSTRUCTIONS may cause fire or electric shock. • Do not place a heavy object on the product. It may cause product failure. • Do not directly spray water on the product or wipe the product with wet towel, etc. It may cause fire or electric shock.
-
Page 7: Components
COMPONENTS COMPONENTS AC Ez Touch Wall installation plate Wall installation screw Controller INSTALLATION MANUAL CONDITIONER Please read this installation manual completely before installing the product. Installation work must be performed in accordance with the national wiring standards by authorized personnel only. -
Page 8: Product Specification
PRODUCT SPECIFICATION PRODUCT SPECIFICATION AC Ez Touch product specification is as follows. 47.4 mm 137 mm 23.7 mm Item Specification Power DC 12 V (Adapter) Input : 100-240 V~, 50 / 60 Hz , 1.2 A Adapter Output : DC 12 V, 3.33 A... -
Page 9: Name Of Each Part
NAME OF EACH PART NAME OF EACH PART Name ① LCD display window ⑤ LAN commu- nication part ② Back button ③ Home screen ④ Power input part button ⑥ RS-485 commu- nication ⑧ Reset ⑦ AI(Reserved) / part Button DI input part Item Specification... -
Page 10: How To Use
HOW TO USE HOW TO USE Menu composition Start Home (status) Home (menu) Heating Aircon control Vent control Schedule Report Setting control Operation Monthly Error setting Weekly Change alarm Group setting List Energy System setting Screen setting Installer setting General user Manager and installer Access rights for each menu... -
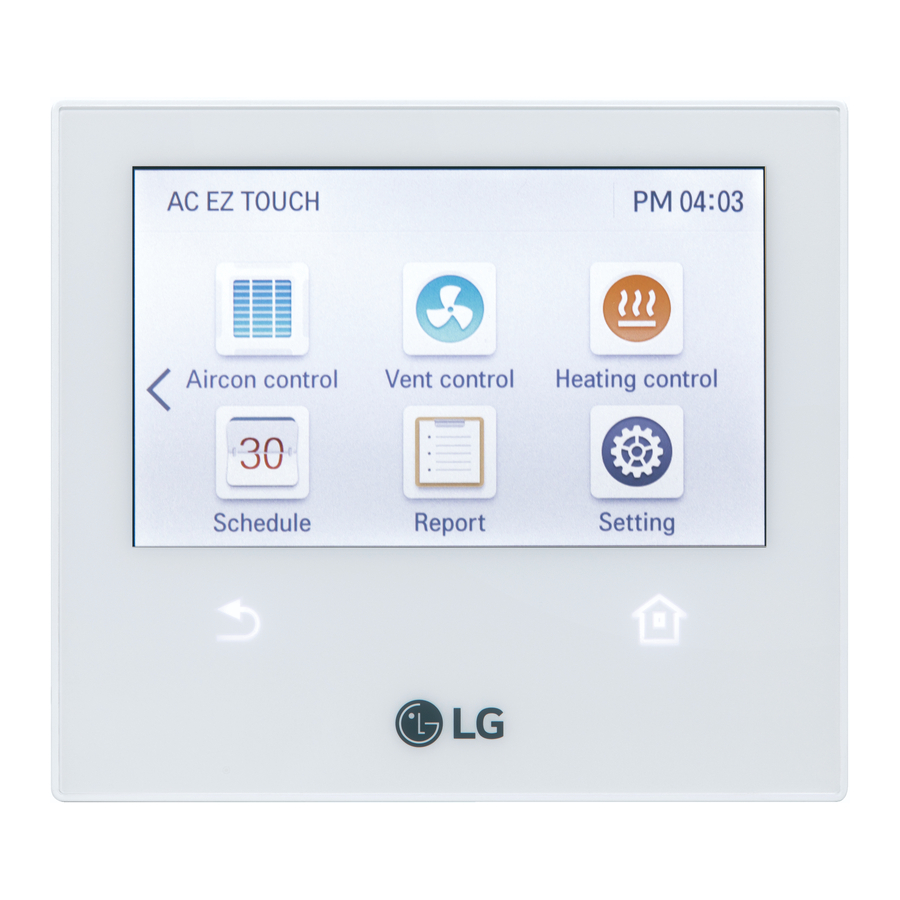
Page 11: Home Screen Composition And Function
HOW TO USE Home screen composition and function It describes the home screen composition and function. The home screen is divided to status screen and menu screen. ③ ④ ⑤ ① Easy information ② Detail screen ⑥ ⑦ Item Specification ①... -
Page 12: Top Bar Detail Screen
HOW TO USE Top bar detail screen tab on Top bar area ④ ⑤ ⑥ ① ⑦ ② ③ Item Specification ① Setting status Set function list area Displays the number of each notice ② Notice list (error, oil change, filter change) ③... -
Page 13: Status Screen
HOW TO USE Status screen ② ④ ① ③ ⑤ Item Specification ① Status screen Provides today's schedule / operation status as fixed display Displays the number of entire indoor unit ② Operation status (Air conditioner + Ventilation + Heating) operation/stop/error Entire indoor unit (Air conditioner + Ventilation + Heating) ③... -
Page 14: Menu Screen
HOW TO USE Menu screen ① Item Specification The component of menu is different depending on the type of the connected equipment. ① When the menu is selected, it moves to the control screen. Menu screen h In case of the menu screen, the location of the menu changes ac- cording to the connected product. -
Page 15: Control Screen
HOW TO USE Control screen 1. Equipment display area - It displays group and individual equipment in 3*4 matrix. - It is positioned at the top when a group is created. Group Individual equipment <Group/individual <It is positioned at the top equipment position>... - Page 16 HOW TO USE 3. Page move button - It is activated when the control screen's number of equipment or groups is 13 or more. - Current page number / entire number of pages and buttons 4. Group / equipment display - Group If the corresponding group's equipment is on, it displays the number of turned on equip- ments (ON N equipments).
- Page 17 HOW TO USE 5. When an error occurs - Error icon is displayed. - In case of a group, if there is at least 1 indoor unit with error in the group, it is applied. Item Specification When an error occurs In case of oil/filter change alarm h If error, oil change alarm, and filter change alarm occur at the same time, the error is displayed with the priority.
-
Page 18: Information Input Method
HOW TO USE Information input method A touch keyboard appears at the bottom of the screen by touching the information input column. Enter information using the touch keyboard. < Keyboard display screen> NOTE When you press number input field, you can directly input the number for the setting. -
Page 19: Air Conditioner Control
HOW TO USE Air conditioner control In this screen, you can control the air conditioner indoor unit group/individual equipment or check the status. 1. When you press button, selection box to control group/individual equipment appears. Control <Status view screen> <Control screen> 2. - Page 20 HOW TO USE <General control category> Classification Detail control Operation ON/OFF Set temp 18 °C ~ 30 °C / 64 °F ~ 86 °F Mode COOL/HEAT/DRY/FAN/AUTO Lock Hard Lock/Temp Lock/Mode Lock/Fan Lock/Clear Fan speed Low/Med/High/Auto Swing ON/OFF Lower: 16 °C ~ 30 °C / 60 °F ~ 86 °F Upper: 18 °C ~ 30 °C / 64 °F ~ 86 °F Set temp range (Even if the temperature display setting is in Celsius /...
- Page 21 HOW TO USE <Lock setting screen> <Control mode setting screen> <Temperature limit setting screen> NOTE According to the product type, some additional functions may not be displayed or not opera- tional. In slave state, you cannot use each equipment’s lock setting, set temp range, 2set point, IDU 2set, auto search device function, energy report and energy save mode.
- Page 22 HOW TO USE <Auto control setting category> <AutoChangeover/Setback setting screen> Classification Detail control Whether used ON/OFF Low/Med/High/Auto Auto Changeover Lower: 18 °C ~ 30 °C / 64 °F ~ 86 °F Temp range Upper: 18 °C ~ 30 °C / 64 °F ~ 86 °F Whether used ON/OFF Setback...
- Page 23 HOW TO USE <Advanced setting category> <2set Auto mode setting screen> Classification Detail control Occupancy setting ON(Occupied)/OFF(Unoccupied) Cool set temperature 10 °C ~ 37.5 °C / 50 °F ~ 99 °F Cool upper temperature 10 °C ~ 37.5 °C / 50 °F ~ 99 °F Cool lower temperature 10 °C ~ 37.5 °C / 50 °F ~ 99 °F Heat set temperature...
-
Page 24: Ventilation(Erv And Erv Dx) Control
HOW TO USE Ventilation(ERV and ERV DX) control In this screen, you can control Ventilation(ERV and ERV DX)’s group/individual equipment or check the status. 1. When you press button, selection box to control group/individual equipment appears. Control <Status view screen> <Control screen>... - Page 25 HOW TO USE <General control category> Classification ERV DX Operation ON/OFF ON/OFF Mode HEX/NORMAL/AUTO HEX/NORMAL/AUTO Lock Lock/Clear Lock/Clear Low/High/Super/Auto Low/High/Super/Auto 18 °C ~ 30 °C / 64 °F ~ 86 °F Set temp (Even if the temperature display setting is in Celsius / 0.5 °C unit, setting is possible only in 1 °C unit.) Additional function Drift/Quick/Clear...
-
Page 26: Heating Control
HOW TO USE Heating control In this screen, you can control the heating’s group / individual equipment or check the status. 1. When you press button, selection box to control group/individual equipment appears. Control <Status view screen> <Control screen> 2. After selecting the equipment to control, when you press button, it enters the detail Done control screen. - Page 27 HOW TO USE <General control category> Classification Detail control Operation ON/OFF Hot water ON/OFF Lock Lock/Clear Mode COOL/HEAT/AUTO Product type 1) WHU[Hydrokit] 3) CASCADE Air temp (Cool) : 18 °C ~ 30 °C / 64 °F ~ 86 °F Air temp (Heat) : 16 °C ~ 30 °C / 60 °F ~ 86 °F Air temp (Heat) : 16 °C ~ 30 °C / 60 °F ~ 86 °F Water temp(Heat) : 30 °C ~ 80 °C / 86 °F ~ 176 °F Water temp(Cool) : 6 °C ~ 25 °C / 42 °F ~ 77 °F...
-
Page 28: Schedule View
HOW TO USE Schedule view This screen views the monthly/weekly/list of the schedule. The default schedule screen display is monthly. - Monthly view: You can see monthly set schedules at a glance. - Weekly view: You can see weekly set schedules at a glance. You can check the start time of the schedule and the set operation mode. -
Page 29: Add Schedule
HOW TO USE Add schedule 1. Press the button. 2. Input the basic schedule information. <Name setting> <Date setting> After the input, press button. Next <Time setting> <Repeat setting>... - Page 30 HOW TO USE 3. Input additional equipment and detail setting values. <Select Air conditioner> <Setting value input screen> <Select Ventilation> <Setting value input screen> <Select Heating> <Setting value input screen> 4. When you press button, the schedule is saved. Complete NOTE If repeat pattern is set not to use, the set period is fixed to today's date.
-
Page 31: Edit Schedule
HOW TO USE Edit schedule 1. Select the schedule to edit. 2. Press button at the bottom. Edit 3. Change the basic schedule information. <Name setting> <Date setting> After the input, press button. Next <Time setting> <Repeat setting>... - Page 32 HOW TO USE 4. Add equipment and change detail setting values. <Select Air conditioner> <Setting value input screen> <Select Ventilation> <Setting value input screen> <Select Heating> <Setting value input screen> 5. When you press button, the schedule is saved. Complete...
-
Page 33: Delete Schedule
HOW TO USE Delete schedule 1. Select the schedule to edit. 2. Press button at the bottom. Delete 3. In the whether to delete check screen, press button. Apply 4. The schedule is deleted. -
Page 34: View Report
HOW TO USE View report This screen views the occurred error information, filter / oil change alarm information and energy information. - Error: Displays the error report. (You can view each error report of Air conditioner/Ventilation/Heating.) It displays [date / time / device name / error code / message] of the occurred error. When you select the error contents, you can check the detail error information. - Page 35 HOW TO USE - Energy: It displays the energy report. You can check the power consumption and accumulated power consumption of group / individual equipment. When you select the energy contents, you can check the detail energy information. <View entire energy report> <View detail energy information of group>...
-
Page 36: Emergency Stop
HOW TO USE Emergency stop <Occurrence of emergency stop situation> The emergency stop function is to stop all connected cooling and heating equipment when an emergency stop situation occurs. When there is an input to DI port, it stops all connected equipment and shows the emergency stop state as follows. -
Page 37: Setting
HOW TO USE Setting Classification Detail control Auto mode option, energy save mode cycle, temperature difference, Operation setting holiday setting, schedule initialization Group setting Equipment group setting (for each Air conditioner/Ventilation/Heating) Date, time, daylight saving time, controller name, speaker, General temperature display, language System setting... -
Page 38: Operation Setting
HOW TO USE Operation setting <Auto mode option setting> Auto mode option is set to auto mode and 2set auto mode. Auto mode supports the setting function for the auto conversion operation and temperature limit operation. 2set auto mode supports the setting function for advanced setting. (When it is in the auto mode, in the detail control screen, you can select whether to use the auto change over / setback. - Page 39 HOW TO USE When you press in the Aircon control screen, the air conditioner energy save mode is turned on, and it repeats the operation state change control in sequence according to the set energy save mode cycle. h Energy save mode operates the air conditioner only. ↔...
- Page 40 HOW TO USE <Holiday setting> You can set the exception date not to apply the schedule. Setting up the exceptional date is applicable only to the corresponding year. 1) Add exception date - Press button to enter the addition screen. - After the input of the name and date of the excep- tion date to add, press button.
-
Page 41: Group Setting
HOW TO USE Group setting You can add a new group to manage, or edit or delete existing indoor unit group. <Add group> 1. In the group setting screen, select the 3. Select button. equipment group to add (Air conditioner/Ventilation/Heating). 2. - Page 42 HOW TO USE <Edit group> 2. Select button. 1. In the group setting screen, select the Edit equipment group (Air conditioner/Ventila- tion/Heating) to edit and select the group to change in the group list. 3. Change the group name, and press 4.
- Page 43 HOW TO USE <Delete group> 3. Select the group to delete and press 1. In the group setting screen, select the equipment group (Air conditioner/Ventila- button. tion/Heating) to delete from the group. 2. Press button at the top to enter Edit the edit mode.
-
Page 44: System Setting
HOW TO USE System setting The system setting is divided to general setting / advanced setting. <General setting> <Advanced setting> - In the general setting, you can set the time, date, daylight saving time, controller name, speaker, temperature display, and language. - In the advanced setting, you can set the network and password, and it displays the version in- formation, open source license. -
Page 45: System Setting (General Setting)
HOW TO USE System setting (General setting) <Date setting> In this screen, you can set the current date. After the input of the year / month / day input to set, press button. Apply h When you change the current date value, the standard date is changed, and the displayed date and schedule interface date, etc. - Page 46 HOW TO USE <Controller name setting> In this screen, you can set the name of the currently used controller. After the controller name input, press button. Apply The set name is displayed at the top left side of the home screen. <Speaker setting>...
- Page 47 HOW TO USE <Temperature display setting> In this screen, it sets whether to display the temperature in Celsius or Fahrenheit. Select Celsius / Fahrenheit. <Celsius> <Fahrenheit> When Celsius is selected, °C minimum temperature display is activated, and please select whether to set the temperature unit to 0.5° or 1.0°. <Language setting>...
-
Page 48: System Setting (Advanced Setting)
HOW TO USE System setting (Advanced setting) <Network setting> In this screen, you can save or change the network setting information to use when you wish to connect to ethernet. 1) IP address setting IP address setting methods are using DHCP to get IP address and designating IP address. - Get the IP address using DHCP You can use DHCP to automatically set dynamic IP in the currently connected internet network. - Page 49 HOW TO USE 2) DNS server designation You can set main DNS / sub DNS address. 3) HTTP port designation You can change HTTP port setting information for the ethernet connection (for service). User can freely set HTTP port according to the network environment. (Input boundary is 1~65535.)
- Page 50 HOW TO USE <Password setting> In this screen, you can initialize or change the password, and when you enter the setting screen, you can set whether to use password. 1. If password is used 1) Select to use the password. 2) Input the previously set password, and press button.
- Page 51 HOW TO USE 3) It displays that the password is set, and 4) It displays that the password set-up is the password is displayed as used. completed. You need to press button to Apply apply the changed password. 3. If you do not use the password 1) Select password usage.
- Page 52 <Version information & SW update> In this screen, it displays the current version information of the controller. h Update function is an installer and service function. <Open source license> This screen displays a open source license notice of AC Ez Touch.
-
Page 53: Screen Setting
HOW TO USE Screen setting <Theme setting> In this screen, you can select white / black theme according to the usage environment. Select the desired theme, and press button. Apply <Screen saver setting> In this screen, it sets the screen saver to display on the screen. Select whether to use screen saver / guide word button / screen saver preview button, and press button. - Page 54 HOW TO USE NOTE If the monitor power standby time is the same as the screen saver standby time or shorter, the monitor power is turned off. <Screen saver waiting time setting> It sets the standby time before displaying the screen saver when there is no input. →...
- Page 55 HOW TO USE <Screen brightness setting> In this screen, you can set the brightness of the screen according to the ambient illumination. → Screen brightness selection [25%, 50%, 75%, 100%] Select the screen brightness, and press button. Apply NOTE The screen brightness set-up function is not supported on the PC.
-
Page 56: Installer Setting
In this screen, you can set Master / Slave according to the interface status to the central con- troller. If the one AC Ez Touch is installed without other central controller, set to Master. NOTE In slave state, you cannot use each equipment’s lock setting, set temp range, 2set point, IDU 2set, auto search device function, energy report and energy save mode. - Page 57 HOW TO USE <Device management> In this screen, you can search registered device and register the searched device to the device management list. At this time, device that can be searched is Air conditioner/Ventilation/Heating. 1. Auto registration function 1) To automatically search the connected device, press button.
- Page 58 HOW TO USE 5) It checks whether to lock the address of the indoor unit so that general user may not change the set indoor unit address without authorization. To set the indoor unit address lock, press button, and if you do not set, press button.
- Page 59 HOW TO USE 2. Manual registration function 1) Press button at the top. 2) Press button at the top. Edit 3) Input the detail information of the de- 5) It enters the device management screen. vice to add. 6) To reflect the device addition, press (device type, device name, address, button.
- Page 60 HOW TO USE 3. Manual edit function 1) Select the device to edit in the device 2) Press button in the detail device in- Edit management list. formation screen. 3) Input the detail information of the de- 5) It enters the device management screen. vice to edit.
- Page 61 HOW TO USE 4. Device delete function 1) Press button at the top. 2) Select the device to delete. Edit 3) Press button at the top. 4) To proceed with the delete, press 5) It enters the device management screen. Apply button.
-
Page 62: Pc Access
HOW TO USE PC access It supports the function that you can control and monitor connected devices via the web application. 1. Set the IP in the network setting screen. 2. Connect by entering the IP set in the web browser. -
Page 63: Installation And Setting
In this chapter, it describes the installation and setting method to set AC Ez Touch. To use AC Ez Touch, you need to establish the environment for the controller and the equip- ment (Air conditioner/Ventilation/Heating) to communicate with each other, and you need to reg- ister the corresponding equipment through AC Ez Touch. -
Page 64: Installation Environment Check And Setting Up The Equipment Address
• The maximum communication distance guaranteed by LG Electronics is 1 000 m. That is, the equipment installed at the farthest location from AC Ez Touch shall be within 1 000 m. • It is recommended to use the communication cable of 0.75 mm or more. - Page 65 HOW TO USE <RS485 communication cable connection> Maximum of 64 indoor units can be connected to one AC Ez Touch. If multiple number of the outdoor units need to be connected, the connection should be in BUS type. Otherwise, AC Ez Touch may malfunction.
-
Page 66: Central Control Address Of The Indoor Unit Set-Up
First, you need to assign address that does not overlap with other equipment (Air-condi- tioner/Ventilation/Heating equipment) considering the entire installation composition con- nected to one AC Ez Touch. The equipment address can be set in hexadecimal from 00 to FF. - Page 67 HOW TO USE <Installing the product> The installation and cable connection methods of AC Ez Touch are as follows. 1. Decide the space to install the controller. - Before fixing the controller to the wall, check if it is a suitable location to connect the con- troller, RS485 cable, power cable, and ethernet cable.
- Page 68 HOW TO USE 2. Fix the controller's wall installation plate to the wall above RS485 cable. 3. Connect RS485 cable located at the backside of the controller main unit to RS485 connector. When connecting T/B, after removing the sheath referring to the guide as shown on the picture, make sure to connect by inserting a short-protecting sleeve into the O-ring or U-ter- minal.
- Page 69 HOW TO USE 4. If network connection is required from the controller, connect the ethernet cable to LAN port at the backside of the controller main unit. 5. Connect power adaptor to the power connector located at the backside of the controller main unit.
- Page 70 HOW TO USE 6. After matching the hook of the wall mounting plate installed on the wall and the groove of the product, push the product to match the groove. <Groove of the product> <Wall-mounting plate hook> 7. Push down the product to lock the top hook. NOTE Seperation sequence is in reverse of installation sequence.
- Page 71 AC Ez Touch has an emergency stop function to stop all connected equipment (Air- conditioner/Ventilation/Heating equipment) when there is an emergency in the building. When DI port detects a short circuit signal, AC Ez Touch stops the operations of all connected equipment.
-
Page 72: Check List Before Calling For Service
HOW TO USE Check list before calling for service When any malfunction occurs to the product, check the following list before contacting the serv- ice center. Symptoms Check Action Change DI port state to open state. All products keep Is the DI port in 'short' sta- (If DI port is in short circuit state, operations turning off. - Page 73 ver. 1.0.3...
Need help?
Do you have a question about the AC Ez Touch and is the answer not in the manual?
Questions and answers