Advertisement
Quick Links
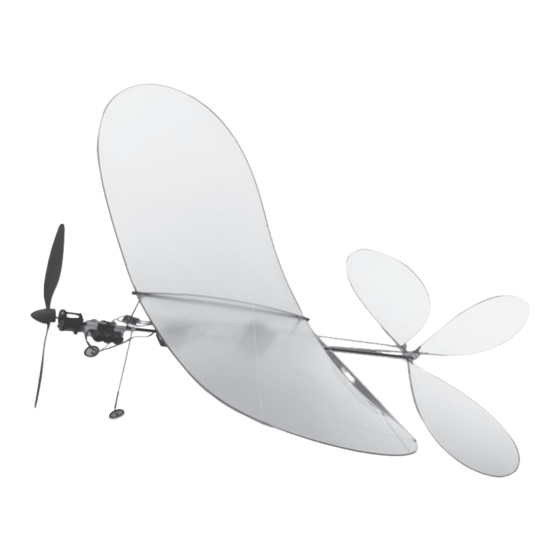
T0381
INSTRUCTION MANUAL • GEBRUIKSAANWIJZING • ANLEITUNG • INSTRUCTIONS DE MONTAGE
WARNING !
This R/C kit and the model
you will build is not a toy.
2
27,9 dm
LET OP !
Deze bouwdoos van een
radiobestuurd vliegtuig
is geen speelgoed.
160 g.
ACHTUNG !
Ein dieser Bausatz
ferngesteuertes Modell
ist kein Spielzeug
ATTENTION !
Ce planeur R/C à assembler
n'est pas un jouet.
Advertisement

Subscribe to Our Youtube Channel
Related Manuals for protech BUTTERFLY


Summary of Contents for protech BUTTERFLY
- Page 1 T0381 INSTRUCTION MANUAL • GEBRUIKSAANWIJZING • ANLEITUNG • INSTRUCTIONS DE MONTAGE WARNING ! This R/C kit and the model you will build is not a toy. 27,9 dm LET OP ! Deze bouwdoos van een radiobestuurd vliegtuig is geen speelgoed. 160 g.
- Page 2 Specifi cations / Specifi caties / Technische Daten / Spécifi cations Length: 790 mm Lengte: 790 mm Länge: 790 mm Longueur: 790 mm Wing span: 815 mm Spanwijdte: 815 mm Spannweite: 815 mm Envergure: 815 mm Wing area: 27,9 dm Vleugelopp.: 27,9 dm Tragfl...
- Page 3 Tools & items / Gereedschap & benodigdheden / Werkzeuge und erforderliches / Outils et équipements MICRO SERVOS Micro Receiver #PRO5.40 or #PRO5.35 Powerpack 7,2V-110mAh #S1605 PROTECH Micro servo #B109 Weight: Bec connectors #PL030 Torque: 15Ncm Speed: 0,16s / 60° Dimensions:...
-
Page 4: Important Safety Notes
Important Safety Notes. Be sure to read right through the instructions covering assembly and operation of your model before you at tempt to operate it for the fi rst time. You alone are respon- sible for the safe operation of your radio-con trol led model. Young people should only be permitted to build and fl y these mod els under the instruction and su per vi sion of an adult who is aware of the hazards involved in this activity. -
Page 5: Wichtige Sicherheitshinweise
Wichtige Sicherheitshinweise Vor dem Versuch der ersten Inbetriebnahme muß die gesamte Betriebs- und Montageanleitung sorgfältig gelesen werden. Sie alleine sind verantwortlich für den sicheren Betrieb Ihres RC-Flugmodells. Bei Jugendlichen muß der Bau und Betrieb von einem Erwachsenen, der mit den Gegebenheiten und möglichen Gefahren eines RC-Flugmodells vertraut ist, verantwortlich überwacht werden. - Page 6 Steps to assemble / Volgorde voor het monteren Etappen für die Montierung / Ordre d'assemblage...
- Page 7 Installing the landing gear and wing supports / Monteren van het landingsgestel en de vleugelbevestiging / Montieren von Hauptfahrwerk und Flügelunterstützung / Montage du train et des supports d'aile Fig. 1 Take the carbon fuselage and slide the Neem de carbonnen romp en schuif Nehmen Sie den Rumpf und schie- Glissez les 2 supports d'accu sur 2 battery holders on.
- Page 8 Installing the stabilizer / Monteren van de stabilo / Montieren des Stabilisators / Installation du stabilisateur Fig. 2 Glue the stabilizer on the back of the Verlijm de stabilo op de achterzijde Verkleben Sie den Stabilisator am hin- Collez le stabilisateur sur l'arrière du fuselage.
- Page 9 Installing the motor, propeller & spinner / Monteren van de motor, propeller en spinner / Fixieren von den Motor, Luftschraube und Spinner / Installation du moteur et de l'hélice Fig. 4 Glue the motor with reduction, propel- Verlijm de motor met vertraging, pro- Verkleben Sie den Motor mit Über- Insérez et collez le réducteur avec le ler and spinner to the front of the fuse-...
- Page 10 Installing the wing / Monteren van de vleugel / Fixieren vom Flügel /Installation de l'aile Fig. 6 Glue the wing on the wingsupports. Verlijm de vleugel op de vleugel- Verkleben Sie den Flügel auf die Flü- Installez et collez l'aile sur les sup- steunen.
- Page 11 Installing electronics / Installeren van de elektronica Installieren von Elektronika / Installation de l'électronique Fig. 8 Fig. 9 A. antenna A. antenne A. Antenne A. antenne B. servos B. servo's B. Servos B. servos C. receiver C. ontvanger C. Empfänger C.
- Page 12 Mounting the servos / Monteren van de servo’s / Montierung des Servos / Installation des servos Fig.11 Fig.10 Make a small hook with the metallic Maak een klein haakje aan de metalen Biegen Sie einen kleinen Winkel in Effectuez un coude à l'aide d'une pince rod and assemble the control rod stang en bevestig de stuurstang das Gestänge und befestigen Sie das...
- Page 13 Installing the speedcontroller / Montage van de snelheidsregelaar / Montieren von den Fahrtregler / Installation du variateur électronique de vitesse • We reccomand to glue the pignon with cyano on the drive shaft. • Wij raden aan om het tandwiel op de aandrijfas te verlijmen met cyano.
- Page 14 Installing the powerpack / Plaatsen van de batterij / Anbringen von die Akku / Installation de l'accu Fig.14 Install the poxerpack between the Bevestig de batterij tussen de twee Befestigen Sie die Akku zwischen Installez l'accu entre les 2 supports. 2 supports.
- Page 15 Motor current / Verbruik Verbrauch / Consommation du moteur Batterypack Motor using 7,2V - 110 mAh 0,7 A 8,4V 0,9 A 9,6V 0,9 A 7,2V Li-ion (2 cells) 0,7 A Parts list / Onderdelenlijst Benötigtes / Pièces détachées T0381.1 Motor + gear Butterfl y T0381.15 Landing gear Butterfl...
- Page 16 PROTECH ® is a registered trademark Lammerdries 23B • B-2250 Olen Tel.: +32 (0)14 25 92 83 Fax: +32 (0)14 25 92 89 E-mail: info@protech.be http://www.protech.be...
Need help?
Do you have a question about the BUTTERFLY and is the answer not in the manual?
Questions and answers