Table of Contents
Advertisement
Quick Links
SERVICE MANUAL
Picture tube
0.24-0.25 mm aperture grill pitch
17 inches measured diagonally
90-degree deflection
Video image area
(16" maximum viewing image)
Approx. 327 X 243 mm (w/h)
(12
7/8
x 9
Resolution
Horizontal: Max. 1600 dots
Vertical: Max. 1200 lines
Standard image area
Approx. 312 x 234 mm (w/h)
(12
1/4
x 9
Input signal
Video
Analog RGB (75 ohms typical)
0.7 Vp-p,
Sync
Separate HD/VD,
TTL Polarity Free
External Composite,
TTL Polarity Free (2K ohms impedance)
Sync on Green
SPECIFICATIONS
5/8
inches)
1/4
inches)
5%, Positive
±
TRINITRON COLOR MONITOR
N. Hemisphere Model
S. Hemisphere Model
Chassis No. SCC-L29P-A
D99
Power Consumption
Maximum
Nominal
Deflection frequency
AC input voltage / current
Dimensions
Mass
Design and specifications are subject to change without notice.
P700
P700
AEP Model
AUS Model
Japan Model
CHASSIS
130 W
95 W
Horizontal: 30 to 92 KHz
Vertical: 48 to 120 Hz
100 to 120 V, 50/60 Hz, 1.7A
220 to 240V, 50/60Hz, 0.9A
404 x 428 x 424 mm (w/h/d)
(15
9/10
x 16
7/8
x 16
7/10
inches)
Approx. 19.2 kg (42 lb 11 oz.)
Advertisement
Table of Contents

Related Manuals for Compaq P700


Summary of Contents for Compaq P700
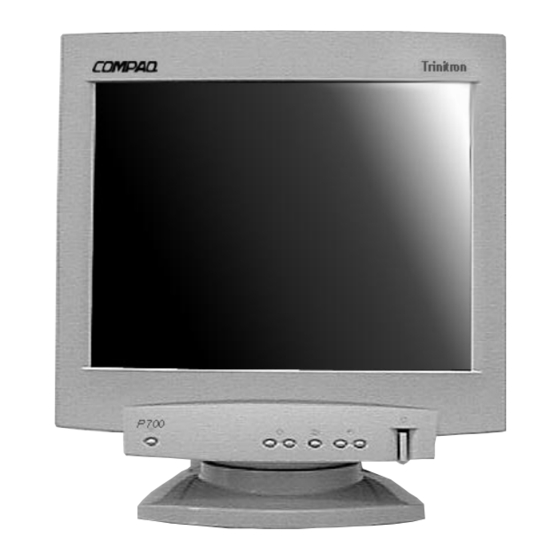
- Page 1 P700 SERVICE MANUAL P700 AEP Model AUS Model Japan Model N. Hemisphere Model S. Hemisphere Model Chassis No. SCC-L29P-A CHASSIS SPECIFICATIONS Picture tube 0.24-0.25 mm aperture grill pitch Power Consumption 17 inches measured diagonally Maximum 130 W 90-degree deflection Nominal...
-
Page 2: Power Management
P700 POWER MANAGEMENT The power saving mode complies with the VESA Display Power Management Signaling standard. Each state of power management shall be activated by the host computer terminating the appropriate sync signals. Blanking the video must precede termination of the sync signals. The elapsed time counter shall also be controlled by the host computer. -
Page 3: Table Of Contents
P700 TABLE OF CONTENTS Section Title Page Safety Check Out Instructions ............... 4 1. GENERAL .................. 5 2. DISASSEMBLY 2-1. Cabinet Removal ............10 2-2. Service Position ............10 2-3. A and D Board Removal ..........10 2-4. Picture Tube Removal ..........11 3. -
Page 4: Safety Check Out Instructions
P700 SAFETY CHECK-OUT After correcting the original service problem, perform the Leakage Test following safety checks before releasing the set to the The AC leakage from any exposed metal part to earth ground customer: and from all exposed metal parts to any exposed metal part having a return to chassis, must not exceed 0.5 mA (500... - Page 5 P700 — 5 —...
- Page 6 P700 — 6 —...
- Page 7 P700 — 7 —...
- Page 8 P700 — 8 —...
- Page 9 P700 — 9 —...
-
Page 10: Disassembly
P700 SECTION 2 DISASSEMBLY 2-1. CABINET REMOVAL 2-2. SERVICE POSITION Two claws PUSH Cabinet A board PUSH D board 1 When the D-board is Two screws placed in service (BVTP 4 x 16) position, the Safety Earth Wire (green and yellow wire) is disconnected. -
Page 11: Picture Tube Removal
P700 2-4. PICTURE TUBE REMOVAL Demagnetization coil Two screws (BVTP 4 x 16) Tension spring A board Neck ass'y Deflection yoke Four screws (Tapping screw 5) Picture tube shield Stand ass'y (D board) Anode cap Cushion ANODE CAP REMOVAL WARNING: High voltage remains in the CRT even after the power is disconnected. To avoid electric shock, discharge CRT before attempting to remove the anode cap. -
Page 12: Safety Related Adjustments
P700 SECTION 3 SAFETY RELATED ADJUSTMENTS 8) After adjusting the High Voltage within specification, When replacing parts shown in the table below, the following operational checks must be performed as a put the RV cover on RV501 as shown below and apply safety precaution against X-ray emissions from the unit. -
Page 13: Adjustments
P700 SECTION 4 ADJUSTMENTS Connect the communication cable of the connector located on the D board on the monitor. Run the service software and then follow the instructions. 1-690-391-21 A-1500-819-A 3-702-691-01 Interface Unit Connector Attachment IBM AT Computer To BUS CONNECTOR... - Page 14 P700 4. Display crosshatch pattern with red and blue lines and 14. Adjust V.TILT with TLV VR. black field. TLV Movement 5. Adjust H.STAT and V.STAT with 4 pole magnet. Use 4 pole magnet, not "HSTAT" and "VSTAT". 4 Pole Magnet 15.
- Page 15 P700 Vertical Convergence 4-7. Digital Convergence Adjustment Convergence (Low) Mode 1. Adjust the H.STAT and V.STAT with "HSTAT" and "VSTAT". A. Horizontal Convergence YBH-T-LO CBH-T-L-LO CBH-T-R-LO MBH-T-R-LO MBH-T-L-LO APH-L-LO APH-R-LO Adjust each misconvergence point in sequence. HSTAT MBH-B-R-LO MBH-B-L-LO 2. Repeat the procedure of A and B so that the convergence of the entire screen is within the specification.
- Page 16 P700 NOTES: — 16 —...
- Page 17 P700 NOTES: — 17 —...
- Page 18 P700 NOTES: — 18 —...
-
Page 19: Diagrams
P700 SECTION 5 DIAGRAMS 5-1. BLOCK DIAGRAM 5-2. CIRCUIT BOARDS LOCATION 5-3. SCHEMATIC DIAGRAMS AND PRINTED WIRING BOARDS Note: • All capacitors are in µF unless otherwise noted. pF: µµF 50 • When replacing parts shown in the table below, be sure to WV or less are not indicated except for electrolytic. - Page 20 P700 [POWER] [CONVERGENCE] D BOARD SEMICONDUCTOR LOCATION DIODES D619 IC503 D BOARD TRANSISTOR D401 H-10 D620 IC601 A-10 VOLTAGE LIST D402 G-12 D621 F-12 IC602 D403 I-12 D622 IC603 Q503 179.8 175.8 D404 H-12 D704 IC604 Q504 145.2 D501 D901...
- Page 21 P700 D BOARD SCHEMATIC DIAGRAM D BOARD IC VOLTAGE LIST IC 401 IC 503 IC 605 -0.1 VOLT VOLT VOLT 140.3 15.1 132.5 15.1 11.9 15.1 -14.6 -15.1 132.4 142.6 IC 607 14.8 IC 601 VOLT IC 703 VOLT VOLT 11.5...
- Page 22 P700 A BOARD SCHEMATIC DIAGRAM A BOARD IC VOLTAGE LIST IC 001 11.9 IC 003 179.2 VOLT VOLT IC 005 11.9 IC 002 VOLT VOLT IC 004 57.4 VOLT 54.9 11.9 11.9 54.3 78.7 10.4 11.6 99.1 IC 006 95.6 VOLT All voltages are in V.
-
Page 23: Semiconductors
P700 5-4. SEMICONDUCTORS 2SC2610 2SC1623-L5L6 DTC143ESA 2SC4634LS-CB11 2SA1037AK-T146-R 2SC3941A-Q(TA) DTA114EKA-T146 HZU5.6B2TRF MTZJ-T-77-12B D1NS6 2SK2605LBSONY 2SA1175-HFE ERC81-004 D1NL40-TA2 2SK3155-01 2SC2785-HFE EGP10D UF4007G23 2SK2098-01MR-F119 DTC114TSA RGP10JPKG23 RGP02-20EL-6394 2SK2843LBS2SONY 2SC3311A-QRSTA RGP10DG23 ERB91-02 IRFU110A RL3Z-LF014-302 LETTER SIDE CATHODE CATHODE ANODE ANODE 1SS119-25 D4SB60L HSS83TD RD5.1ESB2... -
Page 24: Exploded Views
P700 SECTION 6 EXPLODED VIEWS Note: • • Items with no part number and no descrip- Items marked " " are not stocked since tion are not stocked because they are sel- they are seldom required for routine ser- The components identified by shading and dom required for routine service. -
Page 25: Packing Materials
Ne les remplacer que par une piece portant le numero specifie. with part number specified. 6-2. PACKING MATERIALS REF.NO. PART NO. DESCRIPTION REMARK 4-071-899-01 KIT, COMPAQ ACCESSORY 1-782-784-31 CORD SET, POWER (AEP) 1-782-785-21 CORD SET, POWER (AUS) 1-782-786-31... -
Page 26: Electrical Parts List
P700 SECTION 7 ELECTRICAL PARTS LIST • The components identified by in this manual have been carefully factory-selected Note: for each set in order to satisfy regulations regarding X-ray radiation. Should The components identified by shading replacement be required, replace only with and mark are critical for safety. - Page 27 P700 Note: Note: The components identified by shading and mark Les composants identifies per un trame et une marque are critical for safety. Replace only with part number sont critiques pour la securite. Ne les remplacer specified. que par une piece portant le numero specifie.
- Page 28 P700 Note: Note: The components identified by shading and mark Les composants identifies per un trame et une marque are critical for safety. Replace only with part number sont critiques pour la securite. Ne les remplacer specified. que par une piece portant le numero specifie.
- Page 29 P700 Note: Note: The components identified by shading and mark Les composants identifies per un trame et une marque are critical for safety. Replace only with part number sont critiques pour la securite. Ne les remplacer specified. que par une piece portant le numero specifie.
- Page 30 P700 Note: Note: The components identified by shading and mark Les composants identifies per un trame et une marque are critical for safety. Replace only with part number sont critiques pour la securite. Ne les remplacer specified. que par une piece portant le numero specifie.
- Page 31 P700 Note: Note: The components identified by shading and mark Les composants identifies per un trame et une marque are critical for safety. Replace only with part number sont critiques pour la securite. Ne les remplacer specified. que par une piece portant le numero specifie.
- Page 32 P700 Note: Note: The components identified by shading and mark Les composants identifies per un trame et une marque are critical for safety. Replace only with part number sont critiques pour la securite. Ne les remplacer specified. que par une piece portant le numero specifie.
- Page 33 P700 Note: Note: The components identified by shading and mark Les composants identifies per un trame et une marque are critical for safety. Replace only with part number sont critiques pour la securite. Ne les remplacer specified. que par une piece portant le numero specifie.
- Page 34 P700 Note: Note: The components identified by shading and mark Les composants identifies per un trame et une marque are critical for safety. Replace only with part number sont critiques pour la securite. Ne les remplacer specified. que par une piece portant le numero specifie.
- Page 35 P700 Note: Note: The components identified by in this manual have been The components identified by shading carefully factory-selected for each set in order to satisfy and mark are critical for safety. regulations regarding x-ray radiation. Should replacement Replace only with part number specified.
- Page 36 P700 English 99HS74019-1 Printed in U.S.A. 9-978-856-01 © 1999.8 — 48 —...
- Page 37 P700 SERVICE MANUAL P700 AEP Model AUS Model Japan Model N. Hemisphere Model S. Hemisphere Model Chassis No. SCC-L29P-A CHASSIS SUPPLEMENT-1 Subject: Exploded View, Parts List and Schematic Supplement (for AEP Model made in UK only) File this supplement with the service manual.
- Page 38 P700 SECTION 6 EXPLODED VIEWS Note: • • Items with no part number and no descrip- Items marked " " are not stocked since tion are not stocked because they are sel- they are seldom required for routine ser- The components identified by shading and dom required for routine service.
- Page 39 P700 SECTION 7: ELECTRICAL PARTS LIST - Board (AEP Model made in UK only) REF. NO. PART NO. DESCRIPTION REMARK REF. NO. PART NO. DESCRIPTION REMARK CAPACITOR RESISTOR C526 1-164-646-11 CERAMIC 2200PF 10% 500V R629 1-216-107-00 RES,CHIP 270K 1/10W C610 1-117-752-11 ELECT(BLOCK) 330µF...
- Page 40 P700 English 99JS74019-1 Printed in U.S.A. © 1999.9 9-978-856-81 — 4 —...