JVC TH-S5 Service Manual
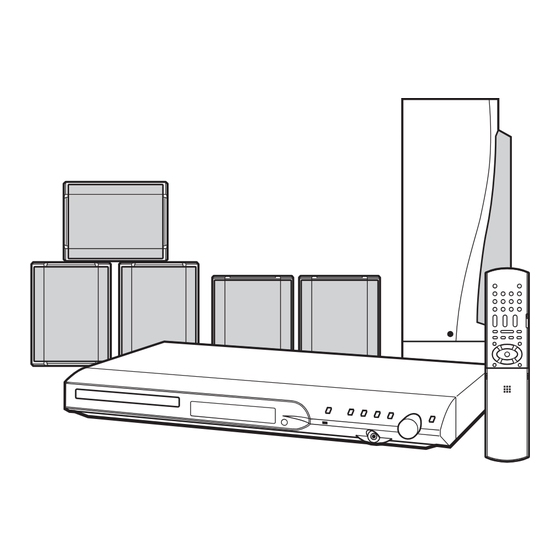
Dvd digital cinema system
Hide thumbs
Also See for TH-S5:
- Instructions manual (50 pages) ,
- Instructions manual (48 pages) ,
- Instructions manual (50 pages)
Advertisement
Quick Links
SERVICE MANUAL
DVD DIGITAL CINEMA SYSTEM
4
2004
MB180
TH-S5
1
PRECAUTIONS . . . . . . . . . . . . . . . . . . . . . . . . . . . . . . . . . . . . . . . . . . . . . . . . . . . . . . . . . . . . . . . . . . . . . . . 1-3
2
SPECIFIC SERVICE INSTRUCTIONS . . . . . . . . . . . . . . . . . . . . . . . . . . . . . . . . . . . . . . . . . . . . . . . . . . . . . . 1-7
3
DISASSEMBLY . . . . . . . . . . . . . . . . . . . . . . . . . . . . . . . . . . . . . . . . . . . . . . . . . . . . . . . . . . . . . . . . . . . . . . . 1-8
4
ADJUSTMENT . . . . . . . . . . . . . . . . . . . . . . . . . . . . . . . . . . . . . . . . . . . . . . . . . . . . . . . . . . . . . . . . . . . . . . . 1-25
5
TROUBLESHOOTING . . . . . . . . . . . . . . . . . . . . . . . . . . . . . . . . . . . . . . . . . . . . . . . . . . . . . . . . . . . . . . . . . 1-29
TH-S5, TH-S51
TABLE OF CONTENTS
COPYRIGHT © 2004 VICTOR COMPANY OF JAPAN, LIMITED
TH-S51
TH-S5
Area suffix
B ------------------------------- U.K.
E ----------- Continental Europe
EN ------------ Northern Europe
EV -------------- Eastern Europe
TH-S51
Area suffix
B ------------------------------- U.K.
No.MB180
2004/4
Advertisement

Related Manuals for JVC TH-S5


Summary of Contents for JVC TH-S5
-
Page 1: Table Of Contents
SERVICE MANUAL DVD DIGITAL CINEMA SYSTEM MB180 2004 TH-S5, TH-S51 TH-S5 Area suffix B ------------------------------- U.K. E ----------- Continental Europe EN ------------ Northern Europe EV -------------- Eastern Europe TH-S51 Area suffix B ------------------------------- U.K. TH-S5 TH-S51 TABLE OF CONTENTS PRECAUTIONS ............... 1-3 SPECIFIC SERVICE INSTRUCTIONS . - Page 2 SPECIFICATION Center unit (XV-THS5/XV-THS51) Audio section Total Harmonic Distortion 0.02%*1 Digital input*2 DIGITAL IN (OPTICAL):-21 dBm to -15 dBm(660 nm E30 nm) Video section Video System Horizontal Resolution 500 lines Signal-to-Noise Ratio 64 dB (Composite signal when “RGB” is selected) Composite:1.0 V(p-p)/75 Ω...
-
Page 3: Precautions
SECTION 1 PRECAUTIONS Safety Precautions (1) This design of this product contains special hardware and voltmeter. many circuits and components specially for safety purpos- Move the resistor connection to each exposed metal es. For continued protection, no changes should be made part, particularly any exposed metal part having a return to the original design unless authorized in writing by the path to the chassis, and measure the AC voltage across... - Page 4 1.5 Safety Precautions (U.K only) (1) This design of this product contains special hardware and many circuits and components specially for safety purposes. For con- tinued protection, no changes should be made to the original design unless authorized in writing by the manufacturer. Replace- ment parts must be identical to those used in the original circuits.
- Page 5 Preventing static electricity Electrostatic discharge (ESD), which occurs when static electricity stored in the body, fabric, etc. is discharged, can destroy the laser diode in the traverse unit (optical pickup). Take care to prevent this when performing repairs. 1.6.1 Grounding to prevent damage by static electricity Static electricity in the work area can destroy the optical pickup (laser diode) in devices such as laser products.
- Page 6 Important for laser products 5.CAUTION : If safety switches malfunction, the laser is able 1.CLASS 1 LASER PRODUCT to function. 2.DANGER : Invisible laser radiation when open and inter 6.CAUTION : Use of controls, adjustments or performance of lock failed or defeated. Avoid direct exposure to beam. procedures other than those specified here in may result in 3.CAUTION : There are no serviceable parts inside the hazardous radiation exposure.
-
Page 7: Specific Service Instructions
SECTION 2 SPECIFIC SERVICE INSTRUCTIONS This service manual does not describe SPECIFIC SERVICE INSTRUCTIONS. (No.MB180)1-7... -
Page 8: Disassembly
SECTION 3 DISASSEMBLY Main body section 3.1.1 Removing the top cover (See Figs.1 to 3) (1) From the both sides of the main body, remove the four screws A attaching the top cover. (See Figs.1 and 2) (2) From the back side of the main body, remove the three screws B attaching the top cover. - Page 9 3.1.2 Removing the front panel assembly (See Figs.4 and 5) • Prior to performing the following procedures, remove the top Front panel assembly Main board cover. (1) From the top side of the main body, disconnect the parallel Earth wire wires from the connectors CN451 CN452...
- Page 10 3.1.4 Removing the DSP board (See Figs.7 and 8) • Prior to performing the following procedures, remove the top cover. (1) From the back side of the main body, remove the screw F and three screws H attaching the DSP board to the rear panel.
- Page 11 3.1.7 Removing the power board DVD mechanism assembly (See Figs.10 and 11) • Prior to performing the following procedures, remove the top CN408 cover. (1) From the back side of the main body, remove the screw M attaching the power board to the rear panel. (See Fig.10) (2) From the top side of the main body, disconnect the parallel wires from the connectors CN404...
- Page 12 Front panel assembly section • Prior to performing the following procedures, remove the top cover and front panel assembly. 3.2.1 Removing the FL board (See Fig.1) (1) From the inside of the front panel assembly, remove the screw A attaching the FL board. (2) Take out the FL board from the front panel assembly.
-
Page 13: See Figs.1 To
DVD mechanism section • Remove the DVD mechanism assembly from the main body. (See "3.1.6 Removing the DVD mechanism assembly".) 3.3.1 Removing the tray assembly (See Figs.1 to 3) (1) From the right side of the DVD mechanism assembly, push Tray assembly DVD mechanism assembly the slide cam and pull the tray assembly out of the DVD... - Page 14 3.3.2 Removing the traverse mechanism assembly (See Figs.4) (1) From the bottom side of the DVD mechanism assembly, re- DVD mechanism assembly move the four screws B attaching the traverse mechanism assembly and take out the DVD traverse mechanism as- DVD servo board sembly with the DVD servo board.
- Page 15 3.3.4 Removing the pickup (See Figs.5,7 to 9) • Remove the traverse mechanism assembly. Thrust spring Plate (1) From the side of the traverse mechanism assembly, solder the short land sections c on the pickup. (See Fig.5.) (2) Release the lock of the connector on the pickup in the di- rection of the arrow and disconnect the card wire.
- Page 16 3.3.5 Attaching the pickup (See Figs.5,7 to 10) • See "3.3.4 Removing the pickup". Feed gear M (1) Attach the shaft, SW actuator and LEAD spring to the pick- up. (See Fig.9.) (2) Align the pickup to the section j of the traverse mechanism assembly first, and set the both ends of the shaft of the pickup in the sections g and i of the traverse mechanism assembly.
- Page 17 3.3.7 Removing the spindle motor board (See Figs.11 and 13) • Remove the traverse mechanism assembly. Traverse mechanism assembly • Remove the DVD servo board. (1) From the top side of the traverse mechanism assembly, re- move the wires from the soldered section k on the spindle motor board.
- Page 18 Speaker section 3.4.1 Removing the amplifier assembly (See Figs.1 to 3) (1) From the back side of the speaker main body, remove two screws A attaching the amplifier assembly. (See Fig.1) (2) From the bottom side of the speaker main body, remove the eight screws B attaching amplifier assembly.
- Page 19 3.4.2 Removing the rear panel (See Figs.4 and 5) • Prior to performing the following procedures, remove the am- plifier assembly. (1) From the back side of the amplifier assembly, remove the four screws C, two screws D and screw E attaching the rear panel.
- Page 20 3.4.4 Removing the heat sink BKT (See Figs.6 and 7) Amplifer assembly • Prior to performing the following procedures, remove the am- plifier assembly and rear panel. Wire clamp (1) From the left side of the amplifier assembly, remove the wires from the wire clamp on the heat sink BKT.
- Page 21 3.4.6 Removing the amp. board (See Fig.10) • Prior to performing the following procedures, remove the am- Amp. board Heat sink plifier assembly, rear panel, heat sink BKT and mother board. (1) From the left side of the amplifier assembly, remove the nine screws J attaching the amp.
- Page 22 3.4.9 Removing the LED board (See Fig.13) • Prior to performing the following procedures, remove the am- Tie bands plifier assembly and rear panel. (1) From the front side of the amplifier assembly, cut off the tie bands. (2) Remove the screw N attaching the LED board. (3) From the reverse side of the LED board, remove the solder from the solder point b on the LED board.
- Page 23 3.4.11 Removing the speaker net (See Figs.16 and 17) (1) From side of the speaker main body, insert the tip of the Flat-bladed flat-bladed screwdriver or similar tool into the space be- screwdriver,etc. tween the speaker main body and speaker net, and lift the speaker net little by little to remove.
- Page 24 3.4.12 Removing the speaker (See Figs.18 and 19) • Prior to performing the following procedures, remove the speaker net. (1) From right side of the speaker main body, remove the four screws Q attaching the speaker. (See Fig.18) (2) Take out the speaker from the speaker main body. (See Fig.19) (3) Disconnect the wires from the terminal of the speaker.
-
Page 25: Adjustment
SECTION 4 ADJUSTMENT Test mode setting method (1) Unplug the power plug. (2) Insert power plug into outlet while pressing both "PLAY" key and "STANDBY/ON" key of the main body. "Area code" is indicated at the upper left of display. (3) To release test mode, press "STANDBY/ON"... - Page 26 Method of displaying region code (1) Set the main body at test mode. (2) Press "MENU" key of the remote controller three times. Then, region code are displayed in the FL display. Initialization method Please initialize according to the following procedures in the following case: •...
- Page 27 Upgrading of firmware (DVD UPGRADE) The latest firmware for upgrading is updated in "Optical disc CSG" page in JS-net. At the time of service, compare the version of the product and the latest version, and upgrade the old version into the latest version. (1) Press "STANDBY/ON"...
- Page 28 Compulsive NTSC mode (1) Unplug the power plug. (2) Insert power plug into outlet while pressing both "PAUSE" key and "STANDBY/ON" key of the main body. (3) The compulsive NTSC mode is set up. NOTE: In E version, Y/C mode is set up. (4) Unless the mode is canceled, regardless of input of "NTSEL"...
-
Page 29: Troubleshooting
SECTION 5 TROUBLESHOOTING This service manual does not describe TROUBLESHOOTING. (No.MB180)1-29... - Page 30 VICTOR COMPANY OF JAPAN, LIMITED AV & MULTIMEDIA COMPANY AUDIO/VIDEO SYSTEMS CATEGORY 10-1,1chome,Ohwatari-machi,Maebashi-city,371-8543,Japan (No.MB180) Printed in Japan...
Need help?
Do you have a question about the TH-S5 and is the answer not in the manual?
Questions and answers