Table of Contents
Advertisement
Quick Links
Advertisement
Table of Contents

Related Manuals for Star SM-L300


Summary of Contents for Star SM-L300
-
Page 1: Hardware Manual
Mobile Printer SM-L300 SERIES Hardware Manual... - Page 2 Federal Communications Commission Radio Frequency Interference Statement This device complies with Part 15 of the FCC Rules and Industry Canada licence-exempt RSS standard(s). Operation is subject to the following two conditions: (1) This device may not cause harmful interference, and (2) this device must accept any interference received, including interference that may cause undesired operation.
- Page 3 övriga relevanta bestämmelser som framgår av direktiv 1999/5/EG. [Swedish] Por medio de la presente STAR MICRONICS CO.,LTD. declara que el Wireless Device cumple con los requisitos Español: esenciales y cualesquiera otras disposiciones aplicables o exigibles de la Directiva 1999/5/CE.
-
Page 5: Trademark Acknowledgments
Trademark acknowledgments SM-L300: Star Micronics Co., Ltd. Notice All rights reserved. Reproduction of any part of this manual in any form whatsoever, without STAR’s express permission is forbidden. The contents of this manual are subject to change without notice. - Page 6 Caution Symbol This symbol is placed near the thermal head to indicate that it may be hot. Never touch the thermal head immediately after the printer has been used. Let the thermal head cool for a few minutes before touching it. This symbol is placed near the thermal head to indicate that it is easily damaged.
-
Page 7: Using The Printer
Using the Printer Some semiconductors can be damaged by static electricity. Be sure to turn off the printer when inserting or removing the battery pack. Do not drop the printer or hit it against a hard object. ... -
Page 8: Printer Maintenance
Operating Environment for the Printer Before actually unpacking the printer, you should take a few minutes to think about where you plan to use it. Remember the following points when doing this. Do not use the printer in an environment in which it will be subject to strong shaking while it is printing. - Page 9 Maintenance for using Linerless Label Paper Perform cleaning regularly so that the printer can be used safely and comfortably. (Every time when a paper roll is ended.) Cleaning points are as above except Card reader. (Thermal head, Platen, Paper storage unit, roller, paper path and the surrounding area) Remove any dirt, dust, pieces of paper and glue etc.
-
Page 10: Table Of Contents
Table of Contents 1. Product Overview ..................1 1.1 Printer & Accessories ......................2 1.2 Appearance and Components ....................3 2. Setup ...................... 5 2.1 Battery Pack .......................... 5 2.1.1 Inserting into the Printer ......................5 2.1.2 Charging the Battery ........................6 2.2 Connecting a tablet or PC to the printer (pairing) ............... - Page 11 5. Paper ....................43 5.1 Paper Specification ......................43 5.1.1 Receipt (thermal) Paper ......................43 5.1.2 Label Paper ..........................44 5.1.3 Linerless Label Paper ......................45 5.2 Printable Area ........................47 5.2.1 Receipt (thermal) Paper ......................47 5.2.2 Label Paper ..........................49 5.2.3 Linerless Label Paper ......................
-
Page 12: Product Overview
1. Product Overview This printer is perfect for mobile banking systems, retail, POS (point of sale) terminals and other forms of mobile computing. The characteristics of this printer are listed below: • Support Label Paper and Linerless Label Paper • Support to switch the de-curl function when receipt is used. •... -
Page 13: Printer & Accessories
1.1 Printer & Accessories The printer is packaged with the following accessories. If any of these accessories is broken or missing, please contact the dealer that you bought the product. Printer Battery Pack Sample Roll Paper Belt Clip USB Cable Easy Setup Guide Ferrite Core Ferrite Core Instruction Sheet... -
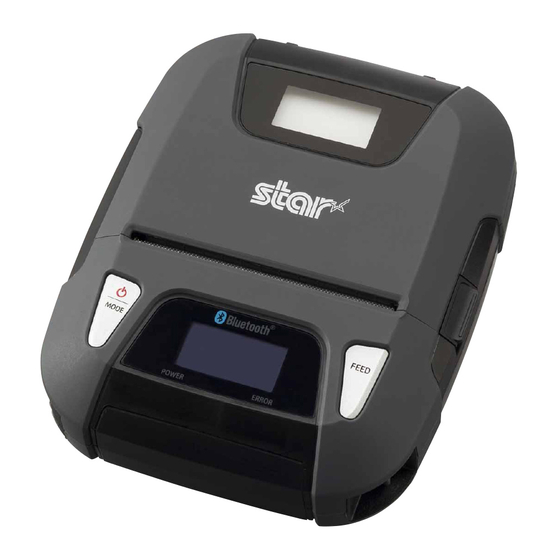
Page 14: Appearance And Components
1.2 Appearance and Components NOTE: Only SM-L304 MSR model has the Magnetic Stripe Reader. Protection Film Remove the films if you do not need them. -
Page 16: Setup
2. Setup 2.1 Battery Pack 2.1.1 Inserting into the Printer 1. Make sure that the printer has been turned off before you insert or remove the battery pack. 2. Insert the battery pack into the back of the printer as in the figure shown below, following the direction of the arrow. -
Page 17: Charging The Battery
2.1.2 Charging the Battery Insert the battery pack into the printer to charge it. Plug in socket with USB charging. When battery pack runs out of power, the battery icon will flash. It powers off automatically when continues printing. If you want to go on, please recharge it. Battery charging status descriptions are as follows. - Page 18 Notes about the Battery Pack General Battery Characteristics The battery is a consumable and its performance over time gradually decreases. While not in use of printer, the battery will slowly discharge itself. Prepare a battery pack that has been charged relatively recently (1 to 2 days earlier). ...
- Page 19 Do not disassemble or modify the battery pack. Do not short the terminals of the battery pack or get it wet. Do not place the battery pack in a bag with a small metal object (such as a key). ...
-
Page 20: Connecting A Tablet Or Pc To The Printer (Pairing)
SM-L300 has two Bluetooth modes: One is Bluetooth 4.0(BLE) without PIN for iOS system. Another is Bluetooth Ver3.0 with PIN for Android or Windows system. SM-L300 changes the Bluetooth mode automatically by host system. Pairing sets one by one in order, otherwise it can‘t figure out which one succeeds in pairing. -
Page 21: Windows10
Select the displayed device name (STAR L300-XXXXX), and enter the PIN code. 4. When "Connected" is displayed, pairing is completed. You can test the connectivity with a host device by using Star IO SDK Application which is available on Apple Store and Google play. -
Page 22: Loading Paper
2.3 Loading Paper 2.3.1 De-curl Setting This function makes it possible to correct the curl in the thermal paper roll. It can set ON or OFF by De-curl Switching Lever. (*Default: OFF) NOTE: Be careful not to forcibly pull or push the de-curl mechanism part. The de-curl mechanism part may become damaged if strong force is applied. - Page 23 2. The de-curl switching lever is set to OFF by default, and you need to be set to ON if you would like to use this function. OFF (default) ON (Receipt paper/Label paper/Linerless label paper) (Receipt paper only) 3.
-
Page 24: Paper Guide Adjustment
2.3.2 Paper Guide Adjustment Press and hold the paper guide button, push the paper guide so that it can be moved to adjusted to fix the roll paper. Paper Guide Button Default : 80mm *Example: When using the 58mm width roll paper, press and hold the paper guide button, push the paper guide to the position of 58 so that it can be fix the 58mm width roll paper. - Page 25 NOTE : 1. Please be sure to adjust the paper guide position while pressing the paper guide button. Moving the paper guide without pressing the paper guide button may damage it. 2. The paper guide position can be adjusted at 2 mm pitch. Move the paper guide until it touches the roll paper.
-
Page 26: Loading Paper To The Printer
2.3.3 Loading Paper to the Printer Refer to Section 5 “Paper”, to select roll paper that conforms to the specifications. 1. Press the cover open button to open the printer cover. 2. Load the roll paper in the orientation shown in the figure below. 3. -
Page 27: Automatic Adjustment Of Label Gap Sensor
2.3.4 Automatic Adjustment of Label Gap Sensor This function is to automatically calibrate the printer setting according to label paper used. Procedure: 1. Check the paper type if "Label (Gap)" is selected. *Refer to "3.4 Memory Switch Settings" 2. Turn off the printer. 3. - Page 28 CAUTION When ERROR lamp is flashing, please make sure the cover is closed correctly. If it’s not, open the cover and close it correctly. When the paper is jammed, be sure to open the printer cover before removing the jammed paper. Do not under any circumstances try to pull out the jammed paper forcefully while the printer cover is closed, doing so may damage parts of the printer.
-
Page 29: Belt Clip
2.4 Belt Clip 2.4.1 Attaching to the Printer Follow the procedure below to attach the belt clip to the printer. 1. Make sure that you are attaching the belt clip in the right orientation, then turn the screw that comes with the belt clip into the designated screw hole to attach the belt clip to the printer. -
Page 30: Control Panel & Buzzer
3. Control Panel & Buzzer 3.1 Button 1) MODE Button: • Holding the MODE button for 2 seconds or more will turn the power on or off. • In the memory switch settings mode, the MODE button is to move a cursor(“_”) on the list. If holding MODE button during setting mode it moves to previous screen. -
Page 31: Led & Lcd Display / Error
3.2 LED & LCD Display / Error 3.2.1 LED & LCD Display Table1-1 Lamp Status Action Buzzer Power Error LCD Backlight, [Description] (Green) (Red) Backlight ON Printer Initialization(Power On) Beep [Printer Status:Online] (A->B->C) Backlight OFF Power USB Cable is not connected Backlight OFF USB Cable is Battery Full... - Page 32 Table1-2 Lamp Status Action Buzzer Power Error LCD Backlight, [Description] (Green) (Red) Backlight ON On-Line Taking off Battery is not Full 600ms Beep maintain the original state (Idle) cable Flashing (G->G->G) Battery Icon =>ON Charge Icon Backlight OFF Stand-by 1sec Nothing Flashing Backlight ON...
- Page 33 Table1-3 Lamp Status Action Buzzer Power Error LCD Backlight, [Description] (Green) (Red) Self Test Printing While printing Backlight ON Nothing at the button operation maintain the original state After printing Backlight ON Nothing maintain the original state Writing Firmware Enter Writing Mode Backlight OFF Nothing While Writing...
- Page 34 Remaining Battery Power Icon: No charging While charging Icon Battery Status and Voltage Icon Battery Status and Voltage Empty 7.2~7.4V Charging ~8.3V The remaining battery power is extremely low. *Less than 7.2V Please turn off the printer 1 bar 7.4~7.5V The remaining battery power is low.
-
Page 35: Led & Lcd Display For Error
3.2.2 LED & LCD Display for Error Lamp Status Action Power Error Buzzer LCD Backlight, [Description] (Red) (Green) Backlight ON Error Recoverable No paper error Happened Flashing [Printer Status:Out of Paper] Error Beep Roll paper Icon (G->G) without paper Backlight ON Recovered [Printer Status:Online] Beep... - Page 36 NOTE: a) Bluetooth Status icon, Battery status icon and Roll paper Status Icon are always displayed on LCD when backlight is ON. b) Buzzer sound frequency or pattern A : 530Hz/192msec E : 667Hz/96msec B : 670Hz/192msec F : 537Hz/96msec C : 800Hz/192msec G : 800Hz/96msec D : 800Hz/96msec...
-
Page 37: Self Test
3.3 Self Test You can use self test to check the printer’s settings. Before you start the self test, make sure that roll paper has been properly loaded into the printer. 3.3.1 Self Test Procedure 1) Turn on the power while holding down FEED button. 2) The printer will print the current printer status, including the firmware version, communication mode, print settings and QR code that links to the users Manual Download site. -
Page 38: Memory Switch Settings (Using Buttons On The Printer)
3.4 Memory Switch Settings (Using Buttons On the Printer) Change the memory switch by following operations. 1. Press and hold MODE button for approx. 2 seconds, and printer is turned on. 2. To put the printer into Memory Switch Setting mode, press and hold both the MODE & FEED buttons for 5 seconds. - Page 39 < Memory Switch Setting Table > First-level menu Second-level menu Third-level menu Fourth-level menu Default 1 Print Press Feed To Print 2 MSR MSR SELF TEST Please Swipe Card 1 Self Test 3 Hex Dump Mode*1 Hex Dump Mode 4 Previous Menu 0-Medium 1-Low 1 Density...
-
Page 40: System Setting
1) Self Test When in the second-level menu, press the MODE button 9 times to switch the menu item--Previous Menu. → Press the FEED button once to return to the previous menu. Display: 1 Self Test 2 System Setting 3 Exit Menu ... - Page 41 2) System Setting Example When you want to change the settings of the printer mode as shown below. Item Factory Setting Configuration Example 1 Density 0(Medium) 1(Low) 2 Standby Time 0060(Sec) 0080(Sec) 3 Auto Off Time 0(Invalid) 1000(Min) 4 Smart Power 0(Disable) 1(Enable) 5 Paper Type...
- Page 42 → Press and hold the FEED button for 2 seconds to get into the menu. Display: 1 Density Standby Time Auto Off Time Smart Power Paper Type BM Sensor Printable Area Factory Reset Password 10 Previous Menu 1. Density setting ...
- Page 43 → Press the FEED button twice to move cursor(“-”), then press the MODE button twice to input the number: 8, finally press and hold FEED button to confirm the new setting and return to the previous menu. (The standby time has set to 80 seconds) 0060(Sec) →0080(Sec) When set the parameter to 0000, the standby time becomes invalid.
- Page 44 4. Smart Power setting Press the MODE button 3 times to switch the menu item--Smart Power. → Press the FEED button once to get into the menu. Display: Smart Power 0-Disable 1-Enable → Press the MODE button once to input the number on : 1, then press and hold FEED button to confirm the new setting and return to previous menu.
- Page 45 6. Black Mark Sensor Press the MODE button 5 times to switch the menu item--Black Mark Sensor. → Press the FEED button once to get into the menu. Display: 0-No Use 1-Use(3inch) 2-Use(2inch) 3-Use(Center) 4-Label(Gap) → Press the MODE button twice to input the number: 4, then press and hold FEED button to confirm the new setting and return to the previous menu.
- Page 46 8. Factory Reset Press the MODE button 7 times to switch the menu item--Factory Reset. → Press the FEED button once to get into the menu. Display: → When the setting does not need to be reset, press and hold FEED button to return to the previous menu.
-
Page 47: Hex Dump Mode
3.5 Hex Dump Mode All data sent from a host device is printed by hexadecimal codes. This mode can be used to check if a program to be sent to the printer is coded correctly. Example Press and hold the MODE & FEED buttons for 5 seconds. →You will see present “Enter Menu Mode”... -
Page 48: Instruction For Power Management
3.6 Instruction for Power Management The printer in the Standby(Sleep) Mode will recover to the Print Ready Mode when receiving print data or button operations. Press the FEED button or the MODE button and confirm that the Power lamp (Green LED) is turned on. When the Power lamp is not turned on, it is possible that the printer is turned off by the Power OFF mode. - Page 49 Event1 Event2 Event3 Event4 Event Powered Auto Power OFF Charging Status Powered Interrupted Time out completed Turned OFF Turn ON (Auto) Condition 1 No charging Start charging Turned OFF Turn OFF Turn OFF Condition 2 Charging No charging Charging Turned ON Turn ON (Auto) Turn OFF Condition 3...
-
Page 50: Paper Type
3.7 Paper Type Please choose proper paper type option in your uses. 0-Receipt 1-Label / Sticky If ‘Label / Sticky’ is selected, move to another screen to input data for Top Margin. * If ‘Receipt Paper’ is selected, Top Margin function is invalid. Top Margin: This sets the top margin from the cutting position (the head of the label in case of label printing) to the print start position. -
Page 51: Printable Area
3.9 Printable Area Please choose proper printable area in your uses. 0-72mm (3inch) - For 3 inch paper width 1-50.8mm (2inch) - For 2 inch paper width 2-Other 0 - For other paper width or need to customize for special setting If "2-Other"... -
Page 52: Magnetic Card Reader (For Msr Model)
4. Magnetic Card Reader (For MSR model) Please keep the following points in mind when reading a card. Swipe the card with its magnetic stripe side towards the printer. Hold the card in the center and swipe it straight at a steady speed in the directions of arrows. ... - Page 53 Correct example: Make sure the magnetic stripe is towards to the magnetic head. Hold the card in the center as left figure and swipe it straight at a steady speed in the direction of arrows. Incorrect example: To grasp a magnetic card If you grasp the front/rear part of a card and move it through the MSR slot, the front /rear part is loose and a read error occurs.
-
Page 54: Paper
5. Paper 5.1 Paper Specification 5.1.1 Receipt (thermal) Paper Paper Width (W1) 39.5±0.5mm to 79.5±0.5mm (2mm pitch) Paper Thickness 53μm to 85μm Recording side Outside of roll Maximum Roll Diameter (D) Ø57 mm Curling dimension (W2) 40+0.5-1 to 80+0.5-1 mm Axial Inner diameter Ø12±1 mm... -
Page 55: Label Paper
5.1.2 Label Paper Paper Width (W1) 39.5±0.5mm to 79.5±0.5mm (2mm pitch) Paper Thickness Max. 150μm Recording side Outside of roll Maximum Roll Diameter (D) Ø57 mm Curling dimension (W2) 40+0.5-1 to 80+0.5-1 mm Axial Inner diameter Min Ø25.4±1 Outer diameter Min Ø30±1 NOTE: Do not use roll paper whose end is glued to its core, because the printer will be unable to properly detect the end of the paper. -
Page 56: Linerless Label Paper
5.1.3 Linerless Label Paper Paper Width (W1) 39.5±0.5mm to 79.5±0.5mm (2mm pitch) Paper Thickness 86μm Recording side Outside of roll Maximum Roll Diameter (D) Ø57 mm 40+0.5-1 to 80+0.5-1 mm Curling dimension (W2) Axial Inner diameter Min Ø12.7±1 Outer diameter Min Ø18±1 (1)Operating a) Temperature : 0 to 45 degrees... - Page 57 4) The roll paper may change color if you scratch it with your fingernail, a hard piece of metal, etc. 5) Please use Star recommended label paper. A label paper or receipt (thermal) paper whose end has been glued by tape or adhesive to the core may result in the printer being unable to properly detect the end of the paper or may cause damage to the mechanism, voiding the warranty.
-
Page 58: Printable Area
5.2 Printable Area NOTE: To avoid paper jams and other problems, feed the paper at least 1 mm (8 dot lines) before printing. 5.2.1 Receipt (thermal) Paper Paper Width Left Margin Printable Area Right Margin 39.5mm to 79.5mm 3.75mm 32mm or 72mm 3.75mm Minimum Printable Region (39.5mm) 4.75mm... - Page 59 ● Printable area of BM specification Paper Width Left Margin Printable Area Right Margin 39.5mm to 79.5mm 3.75mm 32mm or 72mm 3.75mm Minimum Printable Region (39.5mm) 4.75mm 30mm 4.75mm Printable area and Margin set by panel operation. Paper Width Left Margin Printable Area Right Margin 72mm (3 inch)
-
Page 60: Label Paper
5.2.2 Label Paper Label paper can be used in BM mode and Label mode. ● When the BM mode ● When the Label mode NOTE: 1. When using label paper, adequately check operations on the actual layout and print media. 2. -
Page 61: Linerless Label Paper
5.2.3 Linerless Label Paper Paper Width Left Margin Printable Area Right Margin 39.5mm to 79.5mm 3.75mm 32mm or 72mm 3.75mm Minimum Printable Region (39.5mm) 4.75mm 30mm 4.75mm Printable area and Margin set by panel operation. Paper Width Left Margin Printable Area Right Margin 72mm (3 inch) 79.5mm... -
Page 62: Specification Of Black Mark
5.3 Specification of Black Mark SM-L300 supports black mark on back sides of the paper and the specification of black mark is illustrated by the following image. NOTE: 1. There is a possibility of Black Mark malfunction. Please contact the dealer when you would like to preprint paper. -
Page 63: Label Paper
5.3.2 Label Paper ● 58 or 80 mm width only... -
Page 64: Specifications Of Label Paper
5.4 Specifications of Label Paper... -
Page 65: General Specification
6. General Specification Table 6-1 Item Specifications Printing Method Direct line thermal printing Resolution 203dpi (8dots/mm) Printing Printing Speed Max.65mm/s Valid Printing Width Max.72mm Bluetooth Ver 3.0/4.0 [BLE] Communication Dual Mode Frequency Range 2.4GHz ISM-band Data Transmission Rate 115200bps adjustable Bluetooth Specification Data Bit 8 data bit fixed... - Page 66 -20°C to 60°C, 5% to 90%RH (No condensation) The combination of 40°C and 90% RH (No condensation) is Storage Condition considered the worst value regarding high temperatures and humidity. SM-L300:119.1(W) x 146.4(H) x 69.0(D) mm Dimension Physical SM-L304:119.1(W) x 150.8(H) x 69.0(D) mm SM-L300:540g (including battery pack)
- Page 67 Dimensions SM-L300 ・External Dimension: 119.1mm (W) x 146.4mm(H) x 69.0mm (D) : 540g (including battery pack) ・Weight ・Body Color : Black...
- Page 68 SM-L304 ・External Dimension: 119.1mm(W) x 150.8mm(H) x 69.0mm(D) : 552g (including battery pack) ・Weight ・Body Color : Black...
-
Page 69: Revision History
7. Revision History Date of Revision Changes Rev. No. Rev.1.0 May 2017 First Edition... - Page 70 http://www.starmicronics.com/support/ Rev.1.0...
Need help?
Do you have a question about the SM-L300 and is the answer not in the manual?
Questions and answers