Table of Contents
Advertisement
Quick Links
Advertisement
Table of Contents

Subscribe to Our Youtube Channel
Related Manuals for Star SM-T400I Series


Summary of Contents for Star SM-T400I Series
- Page 1 Mobile Printer SM-T400I SERIES Hardware Manual...
- Page 2 Federal Communications Commission Radio Frequency Interference Statement This device complies with part 15 of the FCC Rules and Industry Canada licence-exempt RSS standard(s). Operation is subject to the following two conditions: (1) This device may not cause harmful interference, and (2) this device must accept any interference received, including interference that may cause undesired operation.
- Page 3 Smernice 1999/5/ES. Deutsch: Slovensko: Hiermit erklärt STAR MICRONICS CO.,LTD., dass sich das Gerät STAR MICRONICS CO.,LTD. izjavlja, da je ta Wireless Device v [German] [Slovenian] Wireless Device in Übereinstimmung mit den grundlegenden skladu z bistvenimi zahtevami in ostalimi relevantnimi določili Anforderungen und den übrigen einschlägigen...
-
Page 4: Declaration Of Conformity
Star Micronics Co.,Ltd. Manufacturer’s Address 20-10 Nakayoshida, Suruga-ku, Shizuoka-shi, Shizuoka 422-8654 Japan Importer’s Name Star Micronics Europe Ltd. Importer’s Address Star House, Peregrine Business Park, Gomm Road, High Wycombe, Bucks. HP13 7DL, U.K. Type of Equipment Thermal Printer Model Name WSP-i450 Ref. -
Page 5: Trademark Acknowledgments
I : Star Micronics Co., Ltd. Notice • All rights reserved. Reproduction of any part of this manual in any form whatsoever, without STAR’s express permission is forbidden. • The contents of this manual are subject to change without notice. - Page 6 P If you notice smoke, a strange smell, or a strange sound, turn off the power immediately, and remove the battery pack and battery charger. Then contact a Star Micronics dealer. P If any foreign material (metal scraps, water, or other fluid) enters the printer, immediately turn off the printer and remove the battery charger and/or battery pack.
-
Page 7: Using The Printer
Using the Printer P Some semiconductors can be damaged by static electricity. Be sure to turn off the printer when inserting or removing the battery pack. P Do not drop the printer or hit it against a hard object. P Do not open the printer cover while the printer is printing. P Before you open the printer cover, make sure that printing data is not being sent to the printer. -
Page 8: Printer Maintenance
Operating Environment for the Printer Before actually unpacking the printer, you should take a few minutes to think about where you plan to use it. Remember the following points when doing this. P Do not use the printer in an environment in which it will be subject to strong shaking while it is printing. P Be careful to ensure that the printer is not exposed to direct sunlight. -
Page 9: Table Of Contents
Table of Contents 1. Product Overview......................1 1.1 Printer & Accessories ..........................2 1.2 External Appearance and Part Names ....................3 2. Setup ..........................4 2.1 Battery Pack ..............................4 2.1.1 Inserting into the Printer or the Battery Holder ..................4 2.1.2 Charging the Battery ............................5 2.2 Bluetooth .............................. - Page 10 4.2.4 Memory Switch Settings ..........................26 4.3 Black Mark Specification ........................27 5. General Specifications ....................28 6. Release History ......................30 This manual supports the following firmware version. Firmware Version: Ver 4.0 or later Refer to the appropriate hardware manual which supports the firmware version of your printer. The firmware version can be confirmed by the self-test.
-
Page 11: Product Overview
1. Product Overview This printer is perfect for mobile banking systems, retail, POS (point of sale) terminals and other forms of mobile computing. u The characteristics of this printer are listed below: • Compact size (150.9 ×136.6 × 63.3 mm) <Model without Card Reader> •... -
Page 12: Printer & Accessories
1.1 Printer & Accessories The printer is packaged with the following accessories. If any of these accessories is broken or missing, please contact the dealer that you bought the product. Printer Battery Pack Printer paper sample Belt Clip Serial Communication Cable Safety Instruction Sheet Battery Charger u The optional items for this printer are listed below. -
Page 13: External Appearance And Part Names
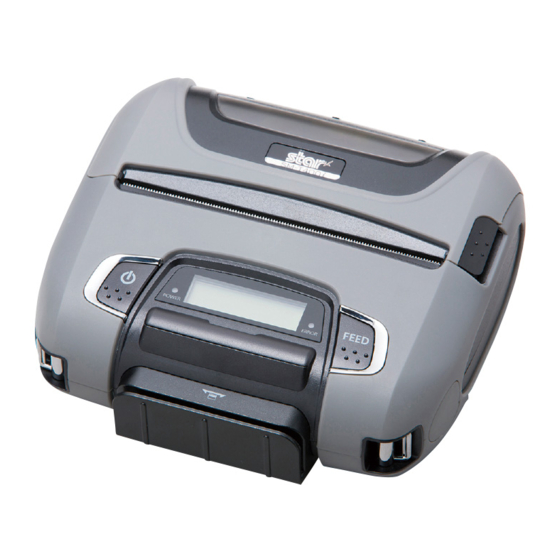
1.2 External Appearance and Part Names Black Mark Sensor Platen Gear Charge Connector Printer Cover Platen Serial Connector Don’t connect USB mini B Mechanism cable here. Paper End Sensor Protection Film *Remove the films if you do not need them. Power Button Cover Open Switch Power Lamp... -
Page 14: Setup
2. Setup 2.1 Battery Pack 2.1.1 Inserting into the Printer or the Battery Holder 1. Make sure that the printer has been turned off before you insert or remove the battery pack. 2. Insert the battery pack into the back of the printer as in the figure shown below, following the di- rection of the arrow. -
Page 15: Charging The Battery
2.1.2 Charging the Battery Insert the battery pack into the printer to charge it. Insert the battery charger cable into the printer’s power inlet for charging. Lamp(Red) Lamp(Green) Charging Fully charged Note: When the battery charger is connected to the printer without the battery pack, the printer turns on but cannot print. - Page 16 u Battery Pack Life • The battery can be charged approximately 500 times in the normal temperature range without losing performance. If an extreme decline in the running time of the battery is noticed, the bat- tery is reaching the end of its usable life. It is recommended to replace the old battery with a new one.
- Page 17 u Battery Disposal and Recycling A lithium-ion battery is used to power this device. Since the disposal process of batteries varies from country to country, refer to the appropriate measures mandating the disposal method of the country in which this device is used. <...
-
Page 18: Bluetooth
Star Setting Utility ( for iOS, Android ) To obtain this utility, please contact with our dealer. Or it can be downloaded from Star’s website. http://www.starmicronics.com/support/ For instructions on how to use this utility, please refer to the Bluetooth Setting Utility Software Manual. -
Page 19: Auto Connection Function (Only For Ios )
The ON/OFF switching of the auto connection can be performed by operating the printer panel or using the Star Bluetooth utility in "StarPRNT Intelligence". For more details on the switching method, refer to "3-3. Memory Switch Setting". (*1: This function is only valid with iOS devices or when the printer is set to [Bluetooth(Auto)]. -
Page 20: Loading Paper
2.3 Loading Paper Refer to chapter 4, “Paper” (p. 23), to select roll paper that conforms to the specifications. 1. Put your finger on the switch for opening the cover, and then open and raise the printer cover. 2. Load the roll paper in the orientation shown in the figure below, and then pull the end of the roll Printer Cover Cover Open Switch straight toward you. - Page 21 Caution Symbol This symbol is placed near the thermal head to indicate that it may be hot. Never touch the thermal head immediately after the printer has been used. Also, even when the thermal head is not hot, do not touch it, because static electricity can damage the devices inside the thermal head.
-
Page 22: Belt Clip
2.4 Belt Clip 2.4.1 Attaching to the Printer Follow the procedure below to attach the belt clip to the printer. 1. Make sure that you are attaching the belt clip in the right orientation, then screw the screw that comes with the belt clip into the designated screw hole to attach the belt clip to the printer. 2. -
Page 23: Printer Features
3. Printer Features 3.1 Control Panel 7Remaining battery power 1 Mode Status 3 POWER Lamp 4 ERROR Lamp Bluetooth-Auto 1 POWER Button 2 FEED Button 8 Bluetooth Connection Status 6 Data Communication Status 3.1.1 Button 1 POWER Button : Pressing and holding the POWER button for 5 seconds or more will turn the power on or off. 2 FEED Button : When the printer is on, pressing and holding the FEED button for 1 second or more feeds a paper. -
Page 24: Self Test
Differs depending on Emulation : ESC/POS Emulation : StarPRNT the version. Communication Port : Bluetooth(Auto) Communication Port : Bluetooth(Auto) 3.0 : Star Line 3.1 or later: StarPRNT Self test information Bluetooth device name and MAC address Memory switch setting information... -
Page 25: Memory Switch Setting (By The Buttons On The Printer.)
3.3 Memory Switch Setting (By the buttons on the printer.) For details on the printer settings, refer to [ Setting Table] on page 17. The setting change by memory switch is enable before shipment. The setting change by memory switch is the following steps. 1. - Page 26 Change the Memory switch by following operations. Indicates the printer mode or currently setting . Bluetooth-Auto POWER button: Changes the setting. FEED button: Changes the printer mode. 1. Press and hold POWER for approx. 3 seconds, and printer is turned on. 2.
- Page 27 3. To swith the printer mode , press FEED button. 4. If the current printer mode does not need to be changed, press FEED button again and swith the printer mode. To change the setting, press POWER button. * Example: When you want to change the settings of the printer mode as shown below, <Before>...
-
Page 28: Printer Mode
[Setting Table] Note : To change the memory switch setting of the table below, use the buttons on the printer or the StarPRNT Intelligence application that can be downloaded from our web site. Printer Mode Setting Display RS-232C UART Mode Communication Port Bluetooth(Mac) Bluetooth-Mac... - Page 29 1) Communication mode It is possible to change the communication mode setting between Bluetooth and serial. Please see below for details to select the proper communication mode for your application. RS-232C: The display shows [UART Mode]. At the RS-232C mode, the printer can communicate with a device using the serial communication cable supplied with the printer.
- Page 30 Simple method of switching over between ESC/POS and StarPRNT emulation modes 1. Turn the printer power and open the printer cover. 2. Press and hold the MODE button and the FEED button simultaneously. As soon as the ERROR lamp flashes five times, release the buttons.
- Page 31 Initialization of memory switch setting (factory setting) To initialize the memory switch setting that has been changed, follow the steps below. 1. Turn the printer power and open the printer cover. 2. Press and hold the POWER button and the FEED button simultaneously and allow the ERROR lamp to flash five times.
- Page 32 Hold down the FEED button After three black marks have been ejected, POWER lamp and ERROR lamp (Release your finger from release the FEED button. flash alternately the power button) Complete! is displayed Complete ! 3. Perform self-printing, and check that the value for SENSOR = LOW(***) has changed. For more procedure on the self test, refer to "3-2.
-
Page 33: Hex Dump Mode
3.4 HEX Dump Mode All data sent from a host device is printed by hexadecimal codes. This mode can be used to check if a program to be sent to the printer is coded correctly. Follow the steps below. 1. While the printer cover is open, turn on the printer power by pressing and holding the FEED button and the MODE button simultaneously for three seconds or more. -
Page 34: Instruction For Auto Power Down(Sleep) Mode
3.5 Instruction for Auto Power Down(Sleep) Mode The printer in the Power Down(Sleep) Mode will recover to the Print Ready Mode when receiving commands or button operations. However, print data received while shifting from the Sleep Mode to the print Ready Mode (for ap- prox. -
Page 35: Paper
4. Paper 4.1 Thermal Paper 4.1.1 Paper Specifications Paper width : 111.5±0.5mm Paper thickness : 65±5 µm Outer diameter : Ø50 mm or less Inner diameter : Ø12 mm or more Recording side : Outside of roll 4.1.2 Recommended Paper Manufacturer Product Name Mitsubishi Paper Mills Limited... -
Page 36: Thermal Label
Density High CAUTION Please use Star recommended Label Paper Roll. A Label or paper roll whose end has been glued by tape or adhesive to the core may result in the printer being unable to properly detect the end of the paper or may cause damage to the mechanism, voiding the warranty. -
Page 37: Black Mark Specification
CAUTION Please adjust print density, print quality and barcode resolution according to your use environ- ment and check the printed barcode for scanability before use. When using thermal labels with a dark colored liner, the printer sometimes fails to detect black marks. -
Page 38: General Specifications
Incompatible RS-232C Emulation ESC/POS, Firmware version 3.0 : Star Line / 3.1 or later : StarPRNT Roll paper Thermal roll paper (112 mm wide with a diameter of Ф50 mm) 1D: JAN, EAN, UPC, ITF, Code39, Code93, Code128, CODABAR(NW-7), GS1 Barcode(Star-... - Page 39 n Dimensions External Dimensions : 150.9 mm (W) × 136.6 mm (D) × 63.3 mm (H) <Model without Card Reader> 150.9 mm (W) × 143.2 mm (D) × 63.3 mm (H) <Model with Card Reader> Weight : 735 g (Including Battery Pack) Body Color : Gray and Black <Model without Card Reader>...
-
Page 40: Release History
6. Release History Rev. No. Date Contents F/W Ver. Rev. 1.0 2014. 04. 15 New issues Ver. 2.5 Rev. 1.1 2014. 01. 07 Thermal Label added Ver. 2.5 Rev. 1.2 2014. 09. 11 Revise Ver. 2.5 Rev. 1.3 2015. 09. 30 Recommended Paper added Ver. - Page 41 URL: http://www.starmicronics.com/support/ Rev. 1.5...
Need help?
Do you have a question about the SM-T400I Series and is the answer not in the manual?
Questions and answers