Table of Contents
Advertisement
Advertisement
Table of Contents

Related Manuals for BUSHWACKER BIG EYE D3


Summary of Contents for BUSHWACKER BIG EYE D3
- Page 1 VER.201703...
-
Page 2: Table Of Contents
CONTENTS Quick Start Guide ..............1 Introduction ..............1 Main Features ..........1 1.1.1 Application ..........2 1.1.2 Camera Overview ............3 Power/Mode Switch ............ 4 Enter IntoTest Mode ........4 1.3.1 Enter Into ON Mode ........4 1.3.2 Start Shooting .............. 4 Load Battery .......... - Page 3 Appendix I: Video Length and Interval Length Correspondence Table ..................... 19 AppendixⅡ:PACKAGE CONTENTS ........20 Statements ..................21...
-
Page 4: Quick Start Guide
Quick Start Guide Introduction Big Eye D3 wildlife game camera (also called hunting camera/trail camera) is a scouting device. It can be triggered by sudden change of ambient temperature caused by moving game in a region of interest, which is detected by a highly sensitive Passive Infra-Red (PIR) sensor, and then take pictures or video clips automatically. -
Page 5: Application
months with 8*AA batteries). Alarm light flashing when battery power level goes low. Playbacks zoom in 1-8 times. Nine-rectangle-grid mode to view images. Auto play in “Slide Show”. Device Number will be showed on image file name, this helps users identify which camera captured the image when review it. Lockable and password protected. -
Page 6: Camera Overview
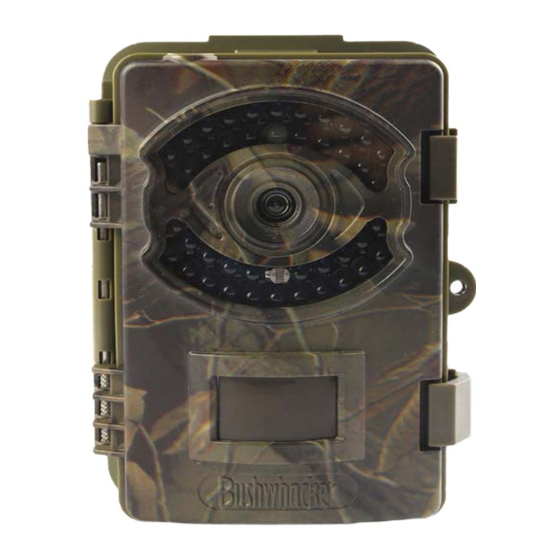
Camera Overview ① IR LED ⑧ TFT Screen ⑮ Speaker ② ⑨ ⑯ Indicator Light SD Card Slot Tripod Nut ③ ⑩ ⑰ Lock Buckle Keypad DC In Power/Mode ④ ⑪ ⑱ Lens Battery Slot Switch Battery Slot ⑤ ⑫ ⑲... -
Page 7: Power/Mode Switch
Power/Mode Switch Power/Mode switch has 3 operation modes: OFF/TEST/ON. OFF: to turn off the camera. TEST: to set operational parameters. ON: to work under surveillance status. 1.3.1 Enter Into Test Mode Move power switch to “TEST” to enter into Test mode, TFT screen displays normally. -
Page 8: Set Clock
Note:User has to purchase battery extra. 1.4.3 Set Clock Find “Set Clock” in the menu of “System” to set local time. Time and Date setting will restore factory defaults when power outage. 1.4.4 Return Factory Default Setting Find “Default Set “in the menu of “System” to confirm the camera takes photos/videos according to default setting. -
Page 9: Sd Card
On “TEST” mode when battery power level gets low, the message “Battery Low” will show on TFT screen(the battery icon in bottom right corner is empty and marked with red “X”); In “ON” mode, red indicator light flashes 60 seconds. 1.5.2 SD Card Please insert SD card correctly. - Page 10 Settings Parameter Description (Bold=Default) Image In “Camera + Video” mode, first take Camera/Video/ Mode photos per shooting numbers, then Camera + Video record video per video length. Higher resolution produces better quality photos, but creates larger files 3MP/5MP/8MP/ Image Size that take more of SD card capacity 12MP/16MP and longer time to write to the SD...
- Page 11 Off/3s/5s/10s/15s /30s/1 minute/ Select the PIR sleep time, the PIR will 2 minutes/ be disabled after each triggering. After 5 minutes/ PIR Sleep this period of time the PIR of the 10 minutes/ device will wait to be triggered by the 20 minutes/ motion of human (or animals).
- Page 12 Default Set Factory Return menu setting to defaults. Support many languages, See 4.5 Language English Language. Choose OFF to turn off the sounds Beep Sound Off/On made by pressing the buttons. When SD card full, it will Loop automatically deletes the earliest Off/On Recording photos or videos and makes room for...
-
Page 13: Product Technical Parameters
Product Technical Parameters Item Parameters 3MP: 1536× 2048, 395KB; 5MP: 1944× 2592, 675KB; Picture Size 8MP: 2488× 3264, 915KB; 12MP: 3024× 4032, 1.25MB; 16MP: 3480x4640, 1.55MB 640x480, 6.8MB(10s); WVGA 800x480, 7.9MB(10s); Video Size 720P 1280x720@30fps, 10MB(10s); 1080P 1920x1080@30fps, 21MB(10s) Work Mode Day/Night FOV=90°... - Page 14 PIR Sleep 3 Seconds~60 Minutes, Programmable 5 Seconds~24 Hour, Programmable *In video mode, interval's optional min duration Interval depends on the video length. *Refer to Appendix Ⅰ 1~6 Photos(1~3 Photos available when Shooting Numbers choosing 16MP) Lock Current, Unlock Current; Lock All, Unlock Protect Image Video Length 5 Seconds~10 Minutes, Programmable...
- Page 15 Auto Power Off in 1-10 minutes while no Auto Power Off keypad controlling; Programmable Power 200mA (+700mA when IR LED lights up) Consumption Low Battery 4.8V Alarm Interface TV-out, USB, SD card slot, 6V DC External Mounting Strap; Tripod Nail Waterproof IP66 Work...
-
Page 16: Keypad Learning
Keypad Learning Keypad : MENU button, press it to set parameters; Switch among “IMAGE/SET/SYSTEM”; Press “EXIT” button to exit. : Up, Quick switch to camera mode. : Left, Check the previous one (only available on Replay mode). : Down, Quick switch to Video mode. : Right, Replay mode, Check the next one (only available on Replay mode). -
Page 17: Replay" Button
“REPLAY” Button With “REPLAY” button and other buttons can review/play/delete photos and videos in SD card; Photos can zoom in/zoom out/move; Nine-rectangle-grid mode to view images; Lock/unlock photos; Slide show, etc. Image Review: After press “REPLAY” button through ◄/► can review photos/videos in SD card. -
Page 18: Details Of Partial Function
through ◄/► can set “Lock Current”, “Unlock Current”, “Lock All”, “Unlock All”. Note: On “Replay” mode, above functions can return to previous menu by pressing “EXIT”. Quickly exit “Replay” mode by pressing “CAMERA”/ “VIDEO" to take photos or videos. Details of Partial Function Timer Set camera to work within specified time period every day. -
Page 19: Connecting To Tv
Connecting to TV Use the camera’s TV cable connects to TV RCA directly, Switch camera to “TEST” mode, choose “REPLAY” to review photos/videos in TV. Note: After connect to TV, TFT screen will shutdown automatically to save power! Language System language, Users can choose different language version to purchase. -
Page 20: Faq
Please do the following checks if camera can’t start or work normally: No battery; Battery loaded reversely; Run out of battery; Battery is not in conformity with the specifications; Not switch camera to “ON” mode; ... -
Page 21: Warranty Policy
Warranty Policy We value our customers very highly and would like to ensure that our products and service are always of a top standard. However, if you are experiencing issues with your Bushwhacker products, please take a moment to read through the information below to establish whether your products are covered under the warranty. - Page 22 Appendix I: Video Length and Interval Length Correspondence Table In video mode, interval's optional min duration depends on the video length D3 camera’s interval time is to start video recording time as a starting point Interval Length Video Length (min duration)
- Page 23 AppendixⅡ:PACKAGE CONTENTS Carefully unpack camera and check that all of the following components are contained in the box: Part Name Quantity Digital Camera USB Cable TV Cable Strap Manual Warranty Card...
- Page 24 Statements The manufacturer reserves the right to amend the content due to editing or typographical errors, product upgrades and other factors which may causes discrepancies. Amendments will be applied to latest user’s manual. These are subject to change without prior notice.
Need help?
Do you have a question about the BIG EYE D3 and is the answer not in the manual?
Questions and answers